Archive for 2013


Troubleshooting A Slow Toshiba Laptop

Wednesday, May 1st, 2013

Troubleshooting A Slow Toshiba Laptop - Computer Repair

Few computer issues are more crippling than when your laptop gets bogged down and its speed diminishes. There are a variety of factors that could be causing this troublesome trend. The following is information for a specific demographic of laptop users. This article provides information on troubleshooting a slow Toshiba laptop.

Toshiba laptops are not prone to slowdowns more so than other laptops, thus, these tips will most likely translate to users of most laptops.

End Unnecessary Processes

Toshiba laptops can slow down significantly if the machine is forced to run too many processes at one time. To view which processes are running at a given time, you will want to access the Task Manager.

1. To do so, press Ctrl+Atl+Delete and click “Start Task Manager”.

2. While in the task manager, click on the tab that reads “Processes”.

3. In this tab, it will show you all the processes that are currently running — some of them important to your computer, and others not. For processes that you do not need active, right click on them and select “End Process”. It is likely that the more processes you cancel out of, the faster your computer will run.

Run A Disk Cleanup

If the data on your Toshiba laptop is fragmented, the machine is not able to access the information as quickly as it should. To remedy this issue, you will want to run a disk cleanup. To access this feature, take the following path:

Start > All Programs > Accessories > System Tools > Disk Cleanup

Here, you will be able to compress the files on your Toshiba laptop and make the information easier to access for the machine. Furthermore, if you select the “More Options” tab, you are able to clean up information in the following areas:

– Windows components

– Installed programs

– System restore

– Files to delete

A cleanup like this will more than likely speed up your laptop.

Need Help Troubleshooting A Slow Toshiba Laptop?

These are general solutions that often work in speeding up a Toshiba laptop, but they might not work for everyone. For those who are left to continue troubleshooting a slow Toshiba laptop, consult a computer repair technician. Finding one in your area is easy through TalkLocal. Our service can get you talking with the right professional on the phone in a matter of minutes.

Together, We Can Do More #4Boston!

Wednesday, May 1st, 2013

Together, We Can Do More #4Boston! - Seva Call

Use the Promo Code #4Boston  When Submitting A Free Service Request This Week and We’ll Donate $1 to One Fund Boston.

The smoke has long cleared from the streets of Boston, but the warmth from concerned citizens continues to fill coffers, blood banks, and hearts across the country. Yet, more help is needed. For many victims injured during the tragic incident, the long, trying, and expensive journey toward recovery has just begun. They are losing wages, accumulating medical bills, and may eventually need to make their home wheelchair accessible or purchase prosthetic limbs, typically costing $20k-$50k.

Now, even in the midst of a personal crisis, you can do a little more to help the Boston bombing victims heal and rebuild their lives. Just visit www.talklocal.com and enter promo code “#4Boston” next to your name when completing a service request for one of Seva Call’s over 50 service categories. Not only will you save time and energy, getting connected to up to 3 vetted, local professionals who match your service and scheduling needs in seconds, but Seva Call will also donate $1 to One Fund Boston, a charity helping  the victims attain the medical care  they’ll need to take their lives back.

“I have loved ones there, so of course I feared for their safety when I heard news of the bombing. The worst for me is over now that I know they’re okay, but what about those for whom the struggle towards normalcy has only just begun?” explained Steve D’Adamo, Seva Call intern.

Now, anyone can do a little more for Boston — even in the midst of their busy schedules.  With Seva Call, every day heroes who need help from a local pro can raise money for One Fund Boston simply by using the promo code #4Boston when entering their free service request at www.talklocal.com this week. They can also spread the word and donate to make an even bigger impact in the lives of Boston’s victims. Seva Call is making it easier to take care of everything you care about- your home, pets, health, and now the victims of the Boston Marathon bombing.

How To Care For Braces

Wednesday, May 1st, 2013

How To Care For Braces - Dentists

Young or old, braces are never fun. In fact, they can be a hassle for the months or years you have them. The orthodontist wants to see you monthly and the dentist, bi-yearly. Meanwhile, you can only eat certain foods while dealing with mouth sores and worrying about embarrassing food stuck in your teeth.

While braces may seem like the enemy, the end result is worth the suffering. Here are a few tips on how to care for braces to make sure you achieve the best end result possible.

How To Care For Braces

– Avoid sticky, gooey or hard foods. Hard foods are permissible if they are cut into small pieces. If consumed as is, any one of these foods could knock loose a piece of the equipment and cause damage to your treatment.

– Contact your orthodontist immediately if something is poking you or comes loose. If pieces are left unattached, teeth may shift, which will result in prolonged treatment.

– Brush your teeth after each meal to remove any stuck food particles. Braces can easily harbor food for long periods of time if not properly brushed. This food can rot and cause gum infections or diseases.

– Make sure to keep all orthodontist appointments. The doctor can determine if issues may arise with your equipment in the future and correct any problems already present.

– Most people should avoid whitening toothpaste when wearing braces. If you did not use whitening toothpaste for a significant amount of time before getting your braces, you should not start until after they are removed. If you do use whitening toothpaste, the square areas under your braces will remain yellowed and will show up when your braces are removed.

The important thing to remember when determining how to care for braces is that they are only temporary. You can do anything for a temporary period of time. The results last a lifetime and are well worth it.

Let A Dentist Take A Look

If you are unsure about some things regarding your braces, it’s best to ask a professional orthodontist or dentist. Seva Call can help you find a qualified one in your area. The best part is our service is completely free and effective.

Chair Reupholstery Steps

Tuesday, April 30th, 2013

Chair Reupholstery Steps - Furniture Reupholstery

Everyone is on a budget these days. Few people have hundreds of dollars to blow on brand new home décor, but that doesn’t mean you can’t renovate and get the look you want. You have to start thinking about turning trash into treasure. When you take the chairs you have and follow a few simple chair reupholstery steps, you can end up with a gorgeous new look that makes your creative sense — and your checkbook — happy.

What you’ll need:

– Fabric you love. Use a measuring tape on your chair to figure out how much you’ll need, and make sure you get at least a yard extra – just in case.

– Flathead screwdriver

– Hammer

Chair Reupholstery Steps To Follow:

1. Remove the fabric that covers the bottom of the chair.

2. Remove the exterior frame. Use the hammer to tap the flathead screwdriver under the frame and remove it gently.

3. Remove all of the current fabric on the chair by starting at the bottom. Since chairs are originally made top-to-bottom, it’s much easier to undo that work bottom-to-top style. You’ll have to do this one panel at a time, and it can be time consuming. Use whatever method is easiest for you. Oftentimes, this fabric is stapled on with an industrial stapler. You could use your flathead screwdriver, pliers, or any other method you prefer to pull out the staples.

4. Label the fabric as you go so you know which part of the chair it was from.

5. When you get to the ply-grip, be careful: it’s sharp. Use a butter knife to open the ply-grip to help you remove the fabric here.

6. Lay the old fabric aside, making sure it’s flat and unfolded.

7. Cut the new pattern. Use the old fabric as a guide so you are sure you don’t have a huge size difference here.

8. Sew where necessary.

9. Attach the new pattern to the chair top-to-bottom — the opposite of the way you removed it.

10. Attach the wood frame. You can stain this if you’d like.

Too Much Hassle?

Now you have a new chair and a new look for your home. For more help in recycling items and renovating for less, TalkLocal can connect you with the local professionals you need, in just minutes.

Sound Card Not Recognized

Tuesday, April 30th, 2013

Sound Card Not Recognized - Computer Repair

Is your sound card not recognized by your computer? When the sound card is not recognized by the system, no sound comes from your computer. A few factors can cause the sound card to be unrecognized. Here are some solutions for an unrecognized sound card.

Causes of Unrecognized Sound Card

1. First, make sure the issue is the sound card and not the speakers. Turn the speakers on to test them. If they work on devices other than your malfunctioning computer, then the problem is the sound card. If the speakers do not work on any device, then simply replace your speakers.

2. The sound card might be incompatible with the operating system, causing it to not be recognized. Make sure your sound card matches with the system.

3. A virus could destroy the device driver, which causes your computer to not detect the sound card. Regular virus scans can prevent this issue from occurring.

4. Dust accumulation is one of the worst enemies of your computer, next to viruses. Dust entering the inside of your computer prevents the sound card from being recognized. Clean your computer regularly with a compressed air can to blow dust away.

5. Dislodgement can also cause the computer to not detect the sound card. If you move your computer around a lot or it gets bumped, the internal devices might shift. Keep your computer on a hard level surface at all times to avoid possible sound card dislodgement.

Solutions for Unrecognized Sound Card

1. USB sound cards are available if you do not wish to replace the internal sound card. Purchase a USB sound card and plug it into your computer. You can also get a PCI sound card instead of a USB one. Install any necessary devices or software if needed.

2. When the computer does not recognize the sound card, make sure all of the appropriate drivers that come with the sound card are installed. If the sound card drivers are not installed, the sound card will appear as an unidentified device. You can look for this under Device Manager. If you know the model of the sound card, download the drivers for it from its website.

Take a look at this article and this article for further assistance.

For Professional Help

If you are still having difficulties with your sound card, please contact TalkLocal to help connect you with knowledgeable IT technicians in your local area. We will find and connect you with up to three computer technicians who will be able to help you, when you need them most.

How To Safely Kill A Tree

Tuesday, April 30th, 2013

How To Safely Kill A Tree - Tree Removal

There are many ways to kill or remove a a tree — but the important part is to do it safely, and if possible, quickly. Read this guide to learn how to safely kill a tree. We’ll give you the tips, as well as precautions to keep in mind when trying to kill a tree.

How To Safely Kill A Tree

Salting the Ground

In ancient times, salting the ground was used as a means of spite after a war, so that the enemy territories would not grow any crops or fruit. Although salting the ground around a tree is an efficient way to kill a tree, it is generally not recommended. Salting the ground around a tree will also prevent any other vegetation from growing in that area. So don’t salt the ground — salt only the tree.

1. You can do this by drilling holes into the tree’s trunk, in a slanted direction.

2. Then just pour salt inside the hole.

3. Pour some hot water inside of the hole in order to dissolve the salt and accelerate the tree’s absorption of it.

4. The more holes you drill, the faster the tree will die, but too many holes may compromise the stability of the tree as it dies, causing it to fall in a particular direction. The tree should die off in about one month, but this could vary depending on the extent of the treatment and the size of the tree.

5. Frequently check the state of the tree throughout the month to estimate how weak the tree is getting. If you find that it is weak enough, you should organize a clearing for the fall and cut the tree in that direction. This will ensure that the falling tree does not damage any of your property.

Suffocate the Tree

Alternatively, you could cover up the ground around the tree to kill the tree at the roots. Use a large vinyl sheet, or sheets, and lay them on the ground around the tree. The vinyl sheets will prevent the tree’s roots from receiving oxygen and sunlight, effectively suffocating the tree from the ground up. This will also kill the grass and any plants around the tree. This process takes longer than salting the ground, but it will kill the tree safely.

Additional Help

If you feel like you need professional help with killing or removing a tree, TalkLocal can help you by connecting you with up to three professional tree removal services in your area. We will have you on the phone with up to three professionals in just minutes, and it’s free!

Dog Kennel Installation

Tuesday, April 30th, 2013

Dog Kennel Installation - Handyman

Dog owners that allow their four-legged friends to run free all the time are just asking for trouble. For their own safety, and to ensure they do not get into mischief, dogs must be trained to spend time in a kennel. If you do not already have a kennel, do not worry; the dog kennel installation process is relatively easy. With a little bit of time and money, you could construct a caged-in area for your dog both inside and outside.

Pre-Manufactured Kennels

Dog kennel installation is a cinch if you go to a local pet store and purchase one that is already made. These are generally kennels for the inside of your home, which you can use to put your dog inside while you are away.

Smaller kennels are usually already assembled on the store shelves, too. All you have to do is purchase it and bring it home. For larger kennels, significant assembly may be required. Don’t worry, though, these kennels come with a thorough set of instructions that will guide you through the dog kennel installation process from start to finish.

Outdoor Dog Kennel Installation

To give your dog a safe place to relax and enjoy the outdoors, a kennel is ideal. You can build a very simple kennel by purchasing some chain-link fencing from a local hardware store and constructing a fenced-in area. Just follow these steps:

1. Measure out what will be the perimeter of the dog kennel. Make sure the measurements are precise.

2. If you want the kennel to have a concrete floor, dig out the area, but not too deep. Level out the ground so you can pour and smooth out the concrete. It helps to line the area with boards to contain the concrete as it dries.

3. Next, you must dig appropriate holes for your poles at all four corners of the area. A posthole digger is the most appropriate tool to use for this task.

4. Drop the posts into each respective hole and fill the holes with concrete to secure them.

5. Finally, wrap the chain-link fencing around the posts. You should have ordered the right amount of fencing from the store based on your measurements before the project. It is best to attach a tension rod to one of the posts and start from there. Wrap the fencing around all posts and secure it.

6. Make sure you include gate hardware in your purchase. This will allow you to install a door in the kennel to allow for easy access in and out.

Too Much?

If you are not especially skilled at this, or similar tasks, simply log on to TalkLocal for help. We will put you in touch with professionals in your local area that can help you out with such projects.

Install Carpet For Stairs

Monday, April 29th, 2013

Install Carpet For Stairs - Carpet Cleaners

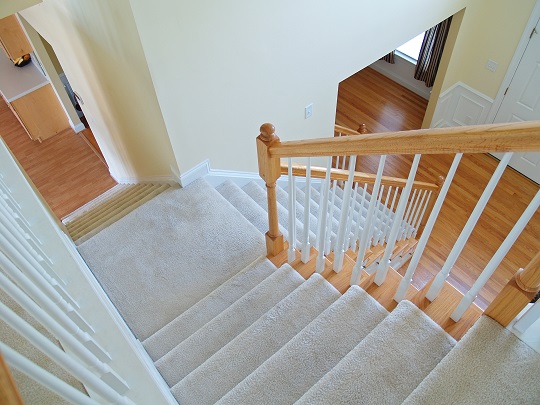
While hardwood looks great, it can sometimes be a pain in the butt.  Once instance in which this is true is with stairs.  You should consider carpeting your stairs because it will make going up and down a lot easier.  You will be able to take things up and down by sliding them if they are two heavy.  It is also more comforting than wood if you happen to fall.  You do not always have to hire someone to help you install carpets because you can install carpet for stairs yourself.

Install Carpet For Stairs

You need six things if you want to install carpet on your stairs: a staple gun, a box of half-inch staples, carpet tacks, tackless strips, and a hammer.  All of these items will help to install the soft plush carpets on your hardwood stairs.

1. The first thing you need to do is mark the center of each stair.  You can put a tackless strip on the center of each stair.  It should be placed one inch from the vertical back of the next stair.  Put another tackless strip on the front of each step as well.

2. Next, cut carpet padding for the top of each step.  Attach them with staples, placed approximately six inches apart.  Once the carpet pads are completely installed you should start installing the carpet.

3. Tack the end of the carpet to the bottom of the first step.  Every four inches you should place another tack.  Make sure that the carpet is pulled tight and tacked securely so that your carpet is securely attached to the stairs.

4. While you install the carpet with the tacks, press the carpet into the tackless strips.  Do not press the carpet back into the corner of the stair treads because then the carpet will be to short.  You should continue this process until all of the stairs are covered.

5. When you get to the last step, secure the carpet with staples four inches apart again.

Have A Professional Install Carpet For Stairs

While installing carpeting for you stairs is not a complicated process, it is time-consuming. If you would prefer to have a professional do this, just use TalkLocal. We will find the right carpet professionals in your area in just minutes, for free!

Should I Rent A Regular Or Stretch Limo?

Monday, April 29th, 2013

Should I Rent A Regular Or Stretch Limo? - Limo Rental

You are planning a formal occasion. You have plenty of questions to ask yourself. Did I get the right flowers? What kind of music should I play? Oh, and do not forget transportation — that’s key. But even there, you might ask: Should I rent a regular or stretch limo?

Limousines are a staple for formal occasions, most notably, weddings, proms, and banquets. Still, limos are used for more practical purposes, especially regular limousines. If you are wondering — Should I rent a regular or stretch limo? — here is a little information to help you out.

What Is The Difference Between A Stretch And Regular Limo

When most people hear the word “limo,” they automatically picture a stretch limousine. While these are very common, they are not the only kind of limo. In fact, limos can come in the form of a more traditional car, like a Lincoln Town Car. As long as the vehicle is piloted by a chauffeur and features a few more luxurious amenities than an ordinary vehicle, then it is considered a limo.

What’s The Occasion?

As you may have guessed, regular limos are used for more practical purposes, while the stretch variety, in all of their extravagance, are used for special occasions. Here are some examples of when you might use each.

Regular limo

– To get to the airport to board a flight

– As transportation in another city while on a business trip

– On a date with no other couples

Stretch limo

– Weddings

– Proms/high school dances

– Large gatherings

– To social events (clubs, concerts, sports games, etc.)

How Many People Are Riding?

This is an important question, as space in a regular limo is limited. If you are transporting a whole party of people, a stretch limo can sometimes seat dozens of passengers safely.

What Amenities Do You Want?

Much of the draw to stretch limos comes from the fact that they come equipped with a lot of fun features, including a wet bar, snacks, televisions, lights, stereos, and more. If you require some, or all, of these amenities, the stretch limo is the way to go. A regular limo’s amenities are very limited due to space constraints.

Rent A Limo Now!

You can always call a local limo rental company and ask: Should I rent a regular or stretch limo? They can make an accurate assessment for you. To contact one quickly, just use TalkLocal. We do all of the legwork for you. All you have to do is pick up the phone and talk to professionals who want to compete for your business.

Pros And Cons Of Turf Fields

Monday, April 29th, 2013

Pros And Cons Of Turf Fields - Gyms and Fitness

When playing sports games or just trying to get some outdoor exercise, you might find that different fields offer different benefits. Grass fields and turf fields are very different. Check out the pros and cons of turf fields to help you decide what kind of field investment you may want to make.

Pros Of Turf Fields:

– Over time, turf is cheaper than grass, which could help with your personal budget. There is a large, one-time installation fee when you first get your turf field, but it’s much cheaper to maintain. Turf doesn’t die over the winter and it is typically safe from abuse by wild animals and birds, unlike grass. Grass also requires trimming, chalking, pesticides, etc. Although turf does require watering and aerating, the maintenance here is much cheaper than with grass.

– Turf is safer than grass. Grass fields develop knots and puddles in inclement weather, which makes tripping a big risk. Turf fields don’t have this problem, which makes running outside, or on a turf track, much safer.

– Turf can be used indoors or outdoors, whereas grass cannot thrive indoors.

Cons Of Turf Fields:

– Turf fields do soak up heat like a sponge soaks up water. In some cases, turf fields have grown to be more than 30 degrees above the actual temperature. This can cause risk of heat stroke and dehydration, which is important to consider.

– Choosing turf instead of grass does remove a naturally occurring plant from the environment. Although this is not drastically harmful to the environment, it should be noted.

– The light, airy structure of turf might affect the way an athlete plays differently than grass, which is what he or she is probably used to. When playing on turf, an athlete would also want to train on turf to insure he or she knows what to expect during the game.

No matter what you choose after analyzing the pros and cons of turf fields, you’ll need to budget if you plan to build a new field at all.

Find Someone To Install Turf For You

TalkLocal can help you with budgeting, deciding on, and constructing your field. We can also help you decide which gyms or fitness facilities may be best for you. We take the work out of the search for qualified professionals by connecting you with the right local help.