Archive for 2013


My Desktop is Slow and Unresponsive

Sunday, April 14th, 2013

My Desktop is Slow and Unresponsive - Computer Repair

“My desktop is slow and unresponsive!” In this age of instant information, a slow computer can have you banging your head against your desk, repeatedly.  A slow and unresponsive desktop typically results from a buildup of junk files and/or malware. Regularly clearing your desktop of malicious files will help maintain your computer’s speed and performance. Free tools are available to help clean up your desktop.

Free Tools to Clean Up Your Desktop

CCleaner will clean out junk and temp files from your PC. Once it is installed on your desktop, click on “Run Cleaner” to eliminate harmful junk files.

Antivirus software such as Malwarebytes and Windows Defender will protect your desktop against viruses and spyware that slows down your PC.

You can also increase your PC’s speed by installing more RAM. You can purchase RAM memory modules from online sites like Amazon and Newegg or from your local computer electronics store.

Need Help Cleaning Up Your Desktop?

A computer technician will be able to help you clean out your computer of unwanted files, and could even give you some tips to keep your computer clean in the future. TalkLocal will connect you with up to three, high-quality computer technicians in your area. Just tell us what you need, where you are, and your availability, and we’ll find the right professional for you in just minutes, for free!

Common Exotic Flowers For A Garden

Sunday, April 14th, 2013

Common Exotic Flowers For A Garden - Florists

Gardens are an effective way to beautify your home, but when your garden looks the same as everyone else’s, you might get bored with it. An easy way to prevent that boredom or disappointment is to get some common exotic flowers for a garden to achieve a unique look. You don’t have to always settle for traditional flowers, like roses.

There are certain exotic flowers that do flourish in most American climates:

These are just a few of the common exotic flowers for a garden that can flourish in America. Don’t forget that other plants can also brighten up your garden if you use them strategically. For example, roses come in many different colors and might provide the extra pizzazz you’re looking for.

When You Need To Consult A Florist…

If you need help finding more information about these, or other flowers, TalkLocal can help connect you to professionals in your area. Our process is quick and hassle-free, and we’ll have you speaking with quality florists in your area in just minutes.

Macbook Case Melted

Sunday, April 14th, 2013

Macbook Case Melted - Computer Repair

The case prevents your Macbook’s hardware from getting damaged. However, a dysfunctional Macbook case can prevent air from circulation, which leads to overheating. In the worst case, your laptop overheated, and the Macbook case melted. It may be a small bit of damage that does not affect your Macbook’s performance, but laptop overheating is an issue that must be dealt with to prevent further damage.

Overheating and Macbook Cases

When your Macbook melts like butter, overheating is the problem. Overheating can be caused by fan failure, dust accumulation, and setting your laptop on soft surfaces with poor ventilation.

Some Macbook cases block air vents, turning your Macbook into an oven that cooks itself. They insulate the heat so that the heat cannot disperse through the thick, strong case material. Consider getting a more appropriate case if your Macbook is overheating; plastic case is better than foam. Also, try removing your Macbook from its case if the Macbook is getting too hot.

You may also have to use fans underneath or behind your laptop as you use it, to try to cool it down. However, this is really just a temporary fix.

Get Your Computer Repaired

For further assistance, go to the Apple store or contact TalkLocal to be connected with computer repair professionals in your area. Just tell us what you need, where you are, and when you’re available, and we will connect you directly with up to three local professionals. You will be able to get the help you need, when you need it, in just minutes — for free!

How to Replace A Motorcycle Tire

Sunday, April 14th, 2013

How to Replace A Motorcycle Tire - Auto Repair

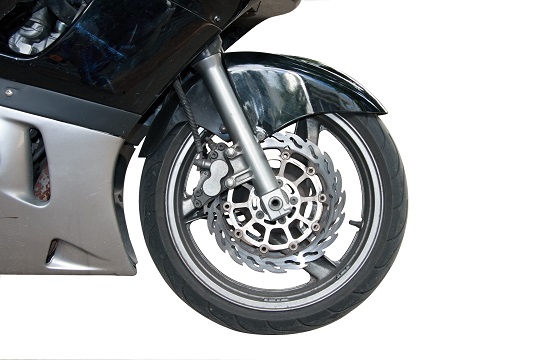
You might think that changing a motorcycle tire is very similar to changing a tire on a car, but this is not true.  It is actually a bit harder, but not impossible if you have the right materials and follow the right steps. We can show you how to replace a motorcycle tire, and any other motorcycle parts, right here!

Materials You Will Need

– Tire iron

– Valve core tool

– Bead breaker

– Compressed air

– Rim protector

– Spray-on lubricant

How to Replace A Motorcycle Tire

1) Gather all of your tools and materials.

2) Holding the valve core tool very tightly, deflate the old tire.

3) Figure out which way the wheel turns and mark the rim.

4) Break the bead away from the rim with the bead breaker tool (you should hear a pop).

5) Flip the tire and break the bead on the other side.

6) Spray lubricant on both sides of the tire beads.

7) Insert the tire iron to pry tire off the rim on both sides.

8) Lubricate the sides of the new tires.

9) Match the new tire with the mark you made on the rim.

10) Place the tire on the rim firmly (you may need the tire iron to do so).

11) Use the compressed air to add a little more air to the tire.

12) Insert the tire beads into the rim on both sides.

13) Add more air as necessary.

Further Assistance

If you would prefer to have a professional replace your motorcycle’s tire for you, you can use TalkLocal! We will connect you with up to three motorcycle repair professionals in your area in just minutes. Just tell us where you are, what you need, and your availability, and we’ll find the right professional for you, when you need them most!

My Dog Has Diarrhea

Saturday, April 13th, 2013

My Dog Has Diarrhea - Veterinarians

“My dog has diarrhea!” Diarrhea could be an indication of a larger health issue in your dog. Before going to a vet, it is advised that you run some simple, at-home medical procedures on your dog so that the vet will be able to assess and prescribe the situation better. Read this guide on what to do before you go to the vet when your dog has diarrhea.

What To Do

1. Of course, the cause of the diarrhea may be your dog’s diet. Fast your dog (do not give it anything besides plenty of water – even treats and toys that involve chewing are included) for 24 hours to cycle out any of the potential causes of the problem.

2. After 24 hours, feed it something “bland” — as in, something without any seasoning or sodium, such as boiled chicken and rice. This is to make sure that your dog is able to sustain itself and will generate fecal matter for a local vet to examine. When you are boiling the bland food, take care to get rid of any floating oils.

3. When feeding the bland food to your dog, give it frequently in small portions. Make sure that the dog is also drinking plenty of water. Any bones present in the bland food should be minimized in order to ease the burden on the dog’s digestive system.

4. Continue feeding your dog the bland diet until it produces a solid stool. Then, carefully package the stool in a ziplock, air-tight bag — This is to show the stool to a vet and to identify the problem. Take your dog to a vet.

Before going to a veterinarian it is recommended to take notes of your dog’s behavior throughout the day, including diet, activity levels, and sleeping habits. This will help your veterinarian identify the problem better and more quickly.

Additional Help

“My dog has diarrhea, even after I fed it bland food – what do I do?”

If you feel like you would rather consult a veterinarian on your dog’s health, use TalkLocal to find one. We will connect you with up to three vets in your area who will be available to help you when you need it most.

How To Restore Leather

Saturday, April 13th, 2013

How To Restore Leather - Furniture Upholstery

If you have a piece of leather furniture that has endured some wear and tear, don’t think about throwing it out or trying to reupholster it just yet. Learn how to restore leather or connect with professionals who can get your leather items looking as good as new.

Some Tips On How To Restore Leather:

NOTE: Avoid using saddle soap or anything with neetsfoot oils. They tend to stain leather and leave streaks after use.

What You’ll Need:

– Petroleum jelly

– Olive oil

– Multiple clean cloths

– Sheepskin pad

What To Do:

1. First, use a clean rag to remove any dust or dirt from the leather.

2. Next, apply some petroleum jelly to a new, clean cloth and slowly work it into the cracked, old leather. Be gentle and slow; use circular motions. This adds a lot of moisture into the leather. Lack of moisture is typically what causes leather to crack and peel.

3. Use another clean cloth to wipe away all excess petroleum jelly, being careful not to disturb the cracks too much.

4. Now that you have removed the dirt and grime, added some moisture and removed the excess moisture, you can use a leather stain to get the color back. You want to be sure to use a sheepskin pad to apply the stain slowly and carefully, using circular motions to really work in the color. Start off with a little and add more if necessary, keeping a clean cloth nearby to remove excess stain just in case.

5. Finally, you want to apply a leather sealant. Use a very soft cloth to rub this in and do so very slowly and gently. Being too rough may cause slight loss of color. Once the sealant is applied, allow 24 hours for it to dry before touching or using the leather.

Furniture Upholstery Professionals Are A Click Away

Some leather furniture upholstery jobs require professional attention instead of a home remedy. Even if a home remedy works, you may have questions regarding products to use or the process. TalkLocal easily connects you with those professionals who can field your questions about how to restore leather. We take the work out of the search.

Hem Up Pants

Saturday, April 13th, 2013

Hem Up Pants - Tailors

Sometimes those new pants you just bought are a little too long for you.  That’s when hemming comes in handy. Knowing how to hem pants allows you to alter the length of your pants at the leg cuff, so that they fit perfectly! This guide will help you learn how to hem up pants.

How to Hem Up Pants

1. Remove any existing hem if there is one by removing the stitching and unfolding the hemmed material.

2.Try on the pants with shoes. Mark the desired hem with some chalk or pins using a ruler or yardstick.

3. Take off the pants so you don’t stitch them to your legs. Press the new hemline into place lightly. Pin the fabric to the inside and try on the pants again. Keep making adjustments as necessary.

3. Again, remove the pants before re-hemming. Trim the excess fabric but leave a hem allowance of 1-1/2 to 2 inches for dress slacks.

4. Press the new hemline. Use a press cloth if you want to avoid harming the fabric of your pants.

5. Use basting stitches to ease any fullness in the fabric. These longer stitches are easily removable for temporary stitching.

6. Finish the edge of the fabric. Try to mimic the original hem and apply hem tape for bulky fabric.

7. Stitch the hem into place (either by using a machine or by hand).

8. Press the hem.

Then you’re done! Your pants now have a hem that fits you perfectly.

Find A Tailor

If you don’t feel comfortable doing this yourself you can try going to a tailor. TalkLocal will give you immediate access to many local tailors. Tell us what you need, where you are, and your availability, and we will connect you directly with up to three tailors in your area in just minutes, for free!

CD Door Won’t Open

Saturday, April 13th, 2013

CD Door Won't Open - Computer Repair

If you can’t open your CD tray, you might think you’re stuck and in a jam, but there usually are a couple of easy ways to diagnose and solve your problem. We have some tips for you if your computer or laptop’s CD door won’t open.

Step 1: Check Possible Locking Software

Some software can actually prevent the CD drive from opening, so make sure that such software or programs are not currently running.  If you can’t figure out which program is locking the CD drive, you can always reboot your computer and eject the tray as it’s booting up.

Step 2: Virtual Eject

Open up My Computer, right-click the disc drive, and choose Eject.  If this ejects your CD drive, then the drive most likely has a faulty eject button, and you should replace it as soon as possible.

Step 3: Check Cable Connections

Check the cable connections within the computer.  The power connection leading to the CD drive may have gotten loose or disconnected.  If that’s the case, once you open up your computer’s casing, make sure you discharge any excess static and then reconnect the power cable to the CD drive.

Step 4: Manual Eject

You can use a paper clip or a pin to manually eject the CD drive.  There should be a small recessed button by the tray eject button that should manually eject the disc drive.  However, if you plan on continuing to use the disc drive, your disc drive is most likely defective and should be replaced as soon as possible (rather than continuing to use a paper clip).

Further Assistance

If none of the above steps worked for you, or you are unclear about how to proceed with any of these steps, use TalkLocal to contact a local, high-quality IT professional immediately.  It’s fast, easy, and requires almost no effort on your part!

A Moment to Seva: Nine 90-Second Ways to Wait 90 Seconds

Saturday, April 13th, 2013

Written by Dallea Caldwell

moment to seva

You know what they say, “Idle hands do the devil’s work”. They also say, “The Devil is busy”. So, what do idle hands do once they’ve started doing the devil’s busy work and have become decidedly less busy? Well, rather than send you spiraling into the abyss of circular logic, we at Seva Call want to ensure that even though we’re saving you time and energy when finding the right helping hand for your everyday service needs, there are plenty of other things your hands can do. After they enter your location, service need, and click for us to call, that is. So, without further adieu, here is a hand full of ways to keep your hands full while waiting for the call from a local pro.

Your Moment to Seva

Twiddle: Feel free to twiddle your thumbs. You may seem a little high-strung for doing so since the wait time to find area pros doesn’t get any shorter, and life is pretty short too. But, hey, go for it.

Wrestle: More fun than twiddling your own thumbs is twiddling someone else’s — if you call thumb clotheslining a competitor before locking them in a thumbhold for the win twiddling! Spend the first 30 seconds drawing luchador masks on each competing thumb for even more fun.

Tap A Diddy: Find a clear space on a table. Test tap various spots to see where variations in the grain of the wood and hollowness of the structure create complexities in the sound. Then, go all Drum Hero. Table drum standards include “Real Love” by SWV and “The Other Way of Stopping” by The Police. Have a friend drop some dope rhymes on the one as well, if you’re feeling it, of course.

Crack: No, I mean your knuckles, silly. It’s great for releasing pent-up aggression from calling a million dead-end business listings before finding Seva Call.

Air Boxing: Also great for releasing tension. When you deliver the air that knock-out blow, be sure to raise your fists into a V for victory gesture, jog in place, and make the ‘H’ sound to simulate a large cheering crowd that adores you, the undefeated Light-Wait Champion of the World, (pun intended).

Tweet: Better yet, tweet us! Employ the old noodle to craft the most awe-inspiringly clever, Shakespeare-quality, 160 characters the world has ever seen. #MomenttoSeva

Manicures: Snip those overgrown tips with some clippers, and then zip the emory board across them for a smooth finish.  Guys, you can do it to. It is called a MANicure, after all. When the ladies say they want a handsome man, they’re not talking about your face, if you know what I mean [see: wink-wink, nudge].

Shadow Puppets: Especially if you have kids, creating a fun short story with your hands and a flashlight is a great way to pass the time. Just keep it brief so they won’t be too disappointed when the first of the electricians calls.

Read Palms: In 90 seconds, you will receive a phone call from an area professional who knows your problem and wants to help. Look, you have a long lifeline connecting you to more area professionals in seconds. See, it’s easy!

Whatever you do with your hands, it will sure beat dialing number after number or scrolling through infinite online listings, and consumer reviews. So, enjoy your moment to Seva and we’ll have one of your top-rated, neighboring pros talk to you very, very soon.

PS… These suggestions also apply if you just have a really slow internet connection!

How to Get Rid of Mistletoe

Saturday, April 13th, 2013

How to Get Rid of Mistletoe - Landscapers

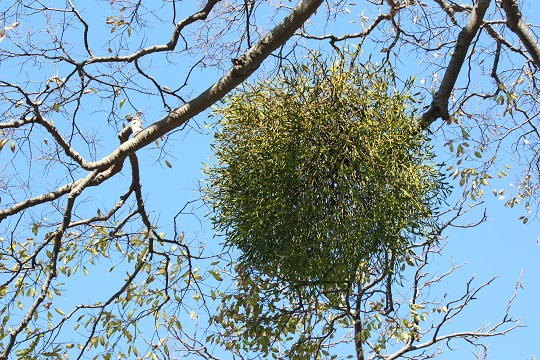
Believe it or not, mistletoe is not as romantic as you may imagine. They are actually parasitic plants that depend on other plants, or hosts, for energy. Despite their romantic holiday symbolism, mistletoe can actually present a threat to the life of your plants. Keep reading to find out how to get rid of mistletoe.

The Effects of Mistletoe Infection

Birds that eat mistletoe berries spread the parasite through their feces, which contains mistletoe seeds. Mistletoe infect their host by anchoring themselves to a plant’s branches and absorbing its water and nutrients. They draw a lot of water from the host, which can desiccate the host during droughts. Mistletoe can cause the death of tree branches, and in worse cases, the death of the tree — although this would take many years.

Plants Prone to Mistletoe Infection

The plants that are most likely to be infected by mistletoe include:

– Maple

Oak

– Other hardwoods

– Pine trees

– Other conifers, excluding juniper and cypress

How to Get Rid of Mistletoe

If any of your plants or trees are infected with mistletoe, take the following steps to get rid of it.

1. Trim and prune your plants at least 12 inches behind the mistletoe to prevent it from harming your plants. Mistletoe tend to grow on higher branches in trees, so it might be tricky to get them. We recommend hiring a professional arborist to climb the tree safely with the proper equipment.

2. This process will need to be repeated every year, as this does not cure the host plant entirely; it only expands the lifespan of your plant or tree. Do not over-prune the host plant, as this causes extra stress on the plant.

3. You may also try to cover the mistletoe with black plastic to cut it off from sunlight. Although it is unsightly, this will slowly kill the mistletoe. You can use an herbicide, but there is a large risk of damaging or even killing the host plant.

4. If the parasitic plant has infected most of the host plant, then it might be wisest to remove the host plant altogether and plant something new later.

Seeking Professional Help

If you are having serious mistletoe problems, call an arborist to help you regain control of your plants. TalkLocal can connect you with the best arborists and tree removal services in your area who can help you control your mistletoe infestation. Talk Local is completely free, so try it out today!