Archive for 2013


When to Get Puppy Vaccinated

Sunday, March 31st, 2013

When to Get Puppy Vaccinated - Veterinarians

If you have a new puppy, getting it properly vaccinated is an important first step to helping develop its immune system. Immunizations can keep a puppy healthy much like they do babies. Vaccines are designed to stimulate the immune system and prevent future infection by producing antibodies. If you’re wondering exactly when to get Puppy vaccinated, just keep reading.

When to Get Puppy Vaccinated

Your puppy should first get vaccinated at the first visit to the veterinarian. During the first visit, the veterinarian will give your puppy a DHPP, or combination vaccine that protects your puppy from canine distemper, infectious hepatitis, parainfluenza, and parvovirus infection. These are four important vaccines that each puppy generally gets in their early weeks, usually when they are 6 to 8 weeks old.

At the second visit, after about 10 weeks, your puppy needs to get a second DHPP vaccine and vaccines against other diseases that they may be at risk of. These vaccines are against coronavirus infection, Lyme disease, leptospirosis, and kennel cough.

During the next visit, your puppy will get her their first rabies shot, along with another DHPP shot, and possibly some boosters. Also, if your veterinarian recommends something else, it is advisable to take the vaccinations they recommend. Once your puppy has all of these vaccinations, he should be ready to go.

There are some ongoing vaccinations as well, as booster shots will need to be administered every year to ensure the vaccine remains effective. Also, every one to three years, your puppy will also need to get a booster shot for rabies.

The risk of side effects remains, but they are uncommon. Any vaccine reactions or side effects are usually mild, and not something to worry about. However, on the rare occasion your puppy has a bad reaction to the vaccine, be sure to contact your vet immediately.

Find Vaccinations for Your Puppy

If you need to get your puppy vaccinated, consider using TalkLocal to find a veterinarian for you. TalkLocal is a free service that will connect you with top-quality, veterinarians in your neighborhood within minutes. Just enter in your specific problem, location and availability, and up to three companies will call YOU directly, saving you the time and stress of finding one yourself.

How to Set Up TV Projector

Saturday, March 30th, 2013

How to Set Up TV Projector - TV Repair

Having a projector enhances the viewing experience of your TV. It instantly makes the screen easier on the eyes and larger. Although projectors can be expensive, the main reason that people shy away from purchasing a projector is because they fear that it will be too complicated for them to set it up themselves. Have no fear, and read this guide on how to set up TV projector.

What to Do

1. Assess the room in which you want to set up a projector. The room will need to be dark, so that the projections are shown clearly. You will also need a white, flat wall that the projector can shine onto directly. Also make sure that there is no heavy traffic between the projector’s place and the wall (in order for uninterrupted viewing).

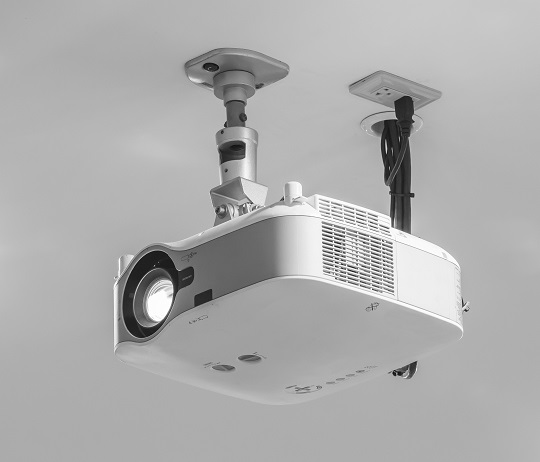
2. The projector can be either mounted from the ceiling or from the ground. Choose a placement that allows the projector light to hit your wall space evenly. and make sure that the projection lens is parallel to the ground. Depending on the location of the mount, drag and fix the electrical wires so that they are connected (the power wire and the projection wire).

3. Place the cords between the power outlet and the video output so that people stepping near the area will not trip over them. Then test if everything is connected properly by turning on the projector and the video output device and checking if you see any projections.

4. The projector turning on signifies that the connection between the power outlet and the projector is secure. The projector receiving an input (i.e. playing a channel) signifies that the connection between the video output and the projector is secure.

5. Check to see that the projection is not tilted in any way. If the projection is tilted, it means that the projector itself is tilted – adjust the knobs at the top or the bottom of the projector to achieve a straight, even projection.

Additional Help

If you feel like you need professional help setting up your TV projector, TalkLocal will connect you with up to three, reputable professionals in your area, in just minutes!

When Can I Remarry After A Divorce?

Saturday, March 30th, 2013

When Can I Remarry After A Divorce? - Lawyers - Family

Falling out of love can be emotionally and physically draining, as is getting a divorce.  The process can be ugly and frightening. The fighting, the crying, the dividing of assets can all take a lot out of you.  But some people will still find love again and want to remarry.  A common question is “When can I remarry after a divorce?” The process of getting remarried after you have been divorced requires some work, but is not impossible.

Legal vs. Religious Restrictions

Getting a divorce in the first place is a difficult concept.  There are two issues that can come into any divorce: legal and religious.   Because there are sometimes conflicting statements from the two on the concept of divorce, getting remarried can be difficult.

From a purely legal standpoint, anyone can get divorced and remarry.  In the eyes of the law you will be legally bonded to your new spouse if you abide by the rules and follow all of the correct steps in divorcing your previous spouse.  Once your divorce is finalized you can legally remarry anybody that you want.  You should be careful to research all of the rules for getting a divorce for your specific area so that you are 100% sure you are legally divorced. A divorce in not finalized at the final hearing, as most states require a 90 to 120 day waiting period. It also depends on whether or not your divorce was contested or uncontested.  Once the waiting period is over, and all of the regulations have been met, you are legally free to remarry.

Divorce is a little more complicated if you want your remarriage to be recognized religiously.  Most Christian sects do not accept the concept of divorce. Similarly, Indian religions such as Hinduism, Sikhism, and Jainism also have no provisions for divorce and therefore none for remarriage.  Both Islam and Judaism, however, do recognize remarriage as they believe in the act of divorce.  You can remarry as soon as you are divorced in these religions. Overall, you will need to consult with the religious institution to which you belong if you want a divorce and subsequent remarriage to be recognized.

Consult a Lawyer

If you have more questions about getting remarried after a divorce, you could speak with a lawyer in your area.  TalkLocal will connect you with up to three, reputable lawyers in just minutes, so you can get the help you need, when you need it.

Virus Removal on Android

Saturday, March 30th, 2013

Virus Removal on Android - Computer Repair

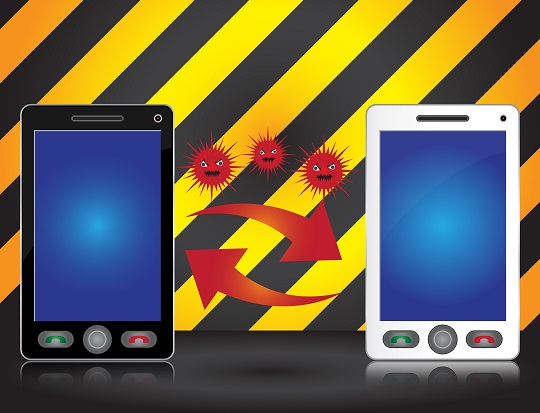
Android products are a little more prone to contracting viruses because their application market is not as carefully vetted as the iPhone apps.  In the event that you do get a virus, you should take certain steps to delete it and prevent further threats.  The Google operating system for phones and tablets is reliable but sometimes flawed, so here are some tips for virus removal on Android.

Recent Events

Google recently discovered about 21 free applications on its market that had been hacked, infected with malware, and were affecting people’s devices.  They began by deleting the apps, and then remotely began to remove the infectious applications from phones and tablets.  About 50 malicious apps were cleared off of the Android marketplace. Google has also been going into people’s phones and killing the infected applications directly.  If you have any of these threatening apps on your phone you should try and delete them because they may be the cause of your problems.

Next Steps

If you do not see your problem being resolved there are a couple more things you could do.

1. Try a factory reset. To do this you need to go to the main menu, enter Settings, select Privacy, and then Factory Data Reset. Verify the required information and press reset to return your phone to its original settings.

2. Another possible reason for your virus is that you are using the wrong charger.  If you use a Motorola Charger for a different type of phone it will send random signals to the touchscreen, which can seem like a virus.  There is no clear explanation for why this occurs, but you should either use a different charger or turn your phone off while it is charging.

3.You could also attempt to clean your SD card and memory card.  If you connect your phone to your computer through a USB port, you can scan and clean the SD and memory cards using your computer’s antivirus programs. If you want to use a mobile antivirus software you can use free versions such as AVG mobilation, comodomobile security, or lookout.  If you can, or would prefer, to use a paid service, try Norton, bullguard, or Kaspersky mobile securities.

Continuing Problems

If you cannot seem to figure out what is wrong with your Android you should seek professional help.  Use TalkLocal to be connected with up to three IT professionals in your area. Just tell us where you are, what you need, and when you’re available. We’ll find the professionals, and then send them directly to you, in just minutes.

How to Treat Periodontal Disease

Saturday, March 30th, 2013

How to Treat Periodontal Disease - Dentists

Knowing how to treat periodontal disease can be a tough task. Thankfully, hygienists are trained for years to help you treat and get rid of periodontal disease. Not only can hygienists and doctors help you with gum disease, they also assist you with cosmetic improvements. The following are some options to help guide you through the process of periodontal disease treatment.

How to Avoid Periodontal Disease

Unfortunately, there are some of us that will get periodontal disease no matter how hard we try to keep our teeth clean, but for the majority of us, periodontal disease is avoidable. Brushing and flossing regularly are key to avoid any type of gum disease or tooth decay.

Simplest Periodontal Treatment

The simplest treatment for periodontal disease is non-surgical. Scaling and root planning cleans off the roots of your teeth by removing the plaque buildup on your teeth. This is extremely helpful because it removes any toxins or bacteria forming around your teeth, and helps prevent future decay of your teeth and gums.

Usually, after you have had a scaling and root planning procedure, more intensive procedures are not necessary. Either a hygienist or a dentist can perform this procedure, and you may be given a bacteria-fighting gel following the procedure.

Completing a full scaling and root planning procedure may take more than one visit to the dental office. This is because you may need to be numbed during the procedure, and it is common practice not to numb the entire mouth at once. That would be a lot of work being done on you during one day and would be much more comfortable for you to spread out the work.

Get Your Periodontal Disease Treated

Do you think you need treatment for periodontal disease, or want to know more about how to treat periodontal disease? If so, check out TalkLocal. We will connect you with up to three, reputable dentists in your area, so you can get the help you need at a time that is most convenient for you.

Couch Reupholstery Steps

Saturday, March 30th, 2013

Couch Reupholstery Steps - Furniture Reupholstery

Buying a brand new couch when yours is torn up and stained can be expensive, time-consuming, and frustrating. The good news is that your couch can avoid being doomed to the dump with these simple couch reupholstery steps. Reupholstering a couch can also give a new look for your home, whether you’re looking for a dramatic change or a simple new style.

Couch Reupholstery Steps To Follow:

1. Take pictures. You want to do this before you tear off the upholstery. Take pictures of the couch at every angle, inside and out, before, during, and after the reupholstery. If the process takes longer than you expect, this will help you remember each step in detail.

2. Disassemble the couch. You want to do this carefully, like this:

– Lay the couch on its back or upside down

– Remove the duster (extra fabric) from the bottom

– Put the sofa in its upright position

– Remove the outside back

– Remove the outside arms

– Remove the inside back

– Remove the inside arms

– Remove the deck

– Keep the old cover around if it fits well to help you measure for the new cover.

3. Check all of the cushions to make sure you don’t need extra padding or stuffing. If you do, get high-quality foam. It’s pricier, but low-quality foam quickly deflates, which might mean you have to do this all over again sooner than you’d hoped.

4. Use a large, flat space to measure and cut the fabric for your new cover. If it is in good enough shape, use the old couch cover to help you with this. Also use your photos as a guide here.

5. Sew the cover. You will want to use an older, heavy duty sewing machine here, as well as heavy duty needle and thread.

6. Use a heavy duty staple gun to connect the rest of the fabric to the couch.

7. Attach the new material from the inside out. Consult the list in step 2 and go backwards.

You have a beautiful new couch that will last you many more years. Some couches are too far gone, though, and may need to be disposed of properly.

Get A Professional’s Help

If you need help with other around-the-house fixes, we can help you with that. At TalkLocal, we take the stress out of finding the right professional for any job by connecting you with the professionals in your area.

How to Clean Up Vomit on Carpet

Friday, March 29th, 2013

How to Clean Up Vomit on Carpet - Carpet Cleaners

Uh oh. Whether it was you, your pet, or a friend or family member who got sick, you have just discovered an unsightly mess on your carpet. Vomit. Not only does it look gross and smell gross, but it is probably the last thing you want to clean up. Where do you start? And what do you need to make sure there are no leftover stain markings? Here’s a quick step-by-step procedure on how to clean up vomit on carpet.

How to Clean Up Vomit on Carpet

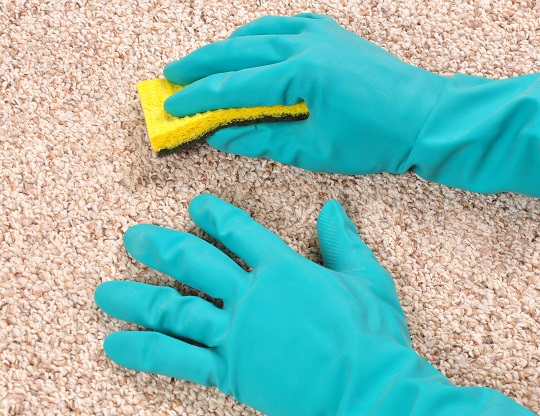
1. Acquire the necessary tools: grab some gloves, a dustpan or trash can, a large spoon or brush, paper towels or old wash rags, a bucket filled with warm water, an enzyme-based rug or carpet cleaner, a vacuum cleaner, and some baking soda.

2. Take the dustpan or trashcan and the large spoon or brush, and scrape off as much of the mess from the carpet as possible. The spoon/brush is super handy in this situation to help prevent you from having to touch the gross stuff yourself.

3. Once all the big particles are cleaned up, use the paper towels/rags to soak up as much of the moisture as you can by blotting over the stain. You can repeat several times using warm water as well to “rinse” off the area.

4. Now, sprinkle baking soda over the stain. This will help to soak up any remaining liquid residue as well. Let it set in for about 10-15 minutes for full effect.

5. Vacuum up the baking soda, and apply the enzyme-based cleaner to the area. You can find one in your local store’s pet or cleaning aisle. If you don’t have one, you can substitute with a warm water-dish soap-vinegar mixture. This will help break up the stain, as well as tackle the remaining odors. Let it sit for a few minutes, and blot with towels/rags.

6. Repeat this as necessary to fully eliminate the stain and any lingering odors.

Additional Help

If this job is too big for you to handle or if you are just too skeeved out by the mess to even go near it, you can try locating a carpet cleaning service to help you out. Try using TalkLocal to find a company near you. Our free service will connect you with top-quality, reputable professionals in your neighborhood, within minutes. Simply enter in your problem, location and availability and TalkLocal will contact several carpet cleaning companies, who will then call YOU directly, ready to help.

Does Opening A Mac Void Your Warranty?

Friday, March 29th, 2013

Does Opening A Mac Void Your Warranty - Computer Repair

With so many options for new technology and so many loop holes in the guarantees that you receive from companies, you may find yourself wondering how to get the most out of your warranty.

A lot of people have asked themselves, does opening a Mac void your warranty? How can you dodge voiding your warranty? What can I do to get the most out of my warranty?

Here’s some information on your Mac’s warranty that might help:

Does opening a Mac void your warranty?

The answer is no. Simply opening the Mac will not void your warranty on the product, but making significant changes or damaging the Mac can indeed cause your warranty to be voided out. If you want to take a look inside of your Mac or other Apple product, you can do so; just be as careful as possible when you do.

Do I void my warranty if I alter the inside of the product at all?

Technically, yes. You should not remove or add anything inside of your product if you are hoping to act on the warranty’s guarantee. The warranty works to help protect you if there is an accident that causes damage to your computer. If you drop it, spill water on it or have an issue with a horrible virus, your warranty can help you out. If you perform actions that cause damage to the system, though, your warranty is voided because those actions are considered intentional. Even though you were probably trying to do a good thing, if you end up damaging something, Apple can’t help you very much from there.

How do I dodge voiding my warranty, then?

If your computer is damaged or giving you problems, instead of opening it up and trying to fix it yourself, take it to an Apple representative and let them try to fix it. Get professional advice first and foremost. This is the easiest way to avoid any confusion that might lead to a voided warranty.

Find Local Computer Repair Technicians

If you need help finding professionals for your computer repair, we are at your service. TalkLocal works to seamlessly connect you with the local professionals in your area who can lend a hand when you need it most.

How to Install Satellite TV Dish

Friday, March 29th, 2013

How to Install Satellite TV Dish - TV Repair

A satellite dish is one of the best ways to get both cable and premium channels. A satellite dish’s strength is in its channel package. Satellite dishes carry tons of channels that are not on cable. Installation of a satellite dish can be done by a professional from the service provider. If you want to save money instead of hiring a technician, here are the steps on how to install satellite TV dish.

Positioning

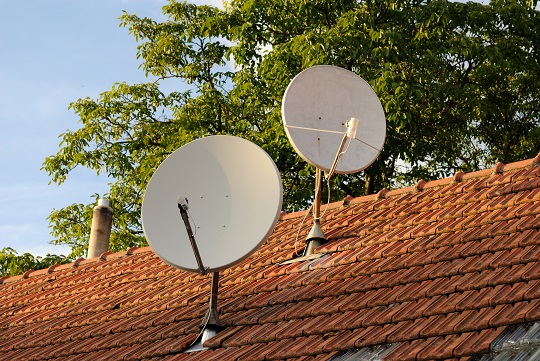
Positioning is the critical factor in installing a satellite dish. For the satellite dish to work properly, the dish must be in position with the service satellite in orbit. Due to the service satellite’s orbit, the satellite dish must be positioned south when north of the equator or positioned north when south of the equator. The satellite dish needs to be positioned where it can be easily fixed and have minimal interference from inclement weather. Avoid any obstacles that could obstruct the signal such as trees or electrical poles.

How to Install Satellite TV Dish

1. Unscrew the plate with a drill to expose the wiring for the dish.

2. Align the mount with the wall or roof.

3. Drill the appropriate holes that are needed to secure the mount to the wall or roof.

4. Fill the holes with caulk to prevent water from seeping through.

5. Drill the screws into the holes to secure the mount in position.

6. Position the satellite dish onto the mount and screw the bolts into the mount. Do not tighten the screws yet.

7. Assemble the low-noise block down converter (LBNF), and connect the coaxial cable to the low-noise block down converter or LNBF.

8. Connect the coaxial cable to a satellite meter to see if the dish can receive a strong signal in its current position.

9. When you find an optimal position for your satellite dish, tighten the screws to the mount.

10. Remove coaxial cable from the satellite meter and connect it to the TV receiver. Connect the TV receiver to your TV.

11. Test that you have a signal on your TV, and setup your new channels!

Find Professional Help

If you would prefer to have a professional TV repairman install your satellite dish, just use TalkLocal. We will find and connect you with up to three, reputable professionals in your area in just minutes!

Symptoms of UTI in Cats

Friday, March 29th, 2013

Symptoms of UTI in Cats - Veterinarians

Urinary Tract Infection, or UTI, is a serious problem that is most common in cats and dogs. There are a few symptoms of UTI in cats that you can use to identify whether your cat is suffering from this deadly infection. Here are the symptoms to look for.

Symptoms of UTI in Cats

Changes in urination patterns are one of the earliest symptoms in determining if your cat has UTI. Knowing your cat’s normal urination patterns is a big help in this regard so you can spot changes in their behavior.

Related symptoms include straining when trying to urinate and urine that smells extra bad. If your cat is trying to urinate and only a few drops of urine are coming out at a time, there’s a very good chance your cat is suffering from UTI and needs to be treated. Urine that smells extra bad is also an indicator that your cat may have an issue with their urinary tract.

Another symptom of UTI is if your cat seems to be avoiding their litter box. If they are urinating in seemingly strange places like sinks, this may be a sign they have UTI, and are avoiding their litter box because they associate the pain from UTI with the litter box.

If your cat seems to be grooming his or her genitals frequently, this can also be an indicator of UTI. It is possible your feline friend could be suffering from swollen and painful genitals caused by a urinary infection. If your cat is making a whining noise when grooming their genitals, this is an even more obvious indicator of UTI and it is important to get your cat checked out as soon as possible.

A definite indicator of UTI is if your cat has blood in their urine. If there is blood in your cats’ urine, your cat needs to be treated as soon as possible.

Treat Your Cat’s UTI

If you’ve noticed that your cat is experiencing even a couple of these symptoms of UTI in cats, you’ll want to get your cat checked out as soon as possible for UTI. If you need help finding a veterinarian, consider using TalkLocal to find a veterinarian for you. TalkLocal will connect you with top-quality veterinarians in your neighborhood within minutes. Just enter in your specific problem, location and availability, and up to three companies will call YOU directly, saving you the time and stress of finding one yourself.