Archive for 2013


How to Install Car Battery

Monday, March 25th, 2013

How to Install Car Battery - Auto Repair

A car’s battery is one of the main components of the engine.  It allows the car to turn on and provides electricity to the entire automobile.  On average you will need to replace your car battery every four years.  This time period should be adjusted based on the weather, how much you drive, and a number of other factors.   If you are not sure, you can have your battery tested annually to ensure that it does not die on you. But, eventually, as with other parts of your car, your car’s battery will need to be replaced.

How to Install Car Battery

If your car won’t start and a jump isn’t helping, you will need to replace you battery.

1. Turn off your car. You need to open up the hood and retrieve a blanket to place over the fender.  This will protect your car from any battery acid corrosion.

2. Once you locate the battery, detach all the cables connected to it.  Be careful when you are doing this.  You should consult your owner’s manual to make sure that your car has negative ground.

3. Using an adjustable wrench, loosen the clamps holding the battery down.  Remove them and place them to the side to avoid getting shocks from them. Disconnect any other pieces holding the battery in place.

4. Pull the battery up and out of the engine.  Be sure to wear gloves so that you don’t get hurt.  There is a tray underneath the battery which should be cleaned before putting in the new battery.  If it is rusty you can use a solution of baking soda dissolved in water to clean it.

5. After the tray is completely dry, replace it and put the new battery in place.  Reattach the battery to the engine.  Close the hood and start your car to ensure that the battery is working properly.

Find An Auto Mechanic

If you have more questions about how to install car battery you should speak to a professional auto mechanic. TalkLocal will connect you with up to three mechanics in your area, in just minutes!


TalkLocal Shows The Magic City a Little Magic of it’s Own

Monday, March 25th, 2013

Seva Call Shows The Magic City a Little Magic of it’s Own - Seva Call

TalkLocal is thrilled about its launch in Birmingham, Alabama and can’t wait to show off it’s brand of time-saving magic. Birmingham earned the name The Magic City because its revolutionary growth in the late 20th century, but the pioneers who built this city on iron and steel did work, not tricks. And while even the Vulcan statue knew that  Birmingham, Alabama was headed straight to the top, the city’s founders could not have imagined how tricky modern life could be.

“Birmingham’s lived in the shadow of what’s often called  The Heaviest Corner on Earth,” Seva Man observed while admiring the staggeringly tall buildings on 20th St and 1st Avenue. “Sounds to me like they could stand to take a load off.”

That’s where TalkLocal comes in. TalkLocal saves  you the trouble of scanning searches or classifieds, calling countless dead numbers and dead-ends, or waiting for a response to your countless voicemails/emails/carrier pigeons. Just fill out a simple request and get up to three phone calls from top-rated professionals in your area who have heard exactly what you need and are ready and able to help. Neat trick, huh?

So, if you’re in Birmingham, Alabama and need anything from a vet to an accountant, or would like to register as a local service provider for free, just go to TalkLocal, and experience the magic!

Solar Panels Installation Guide

Sunday, March 24th, 2013

Solar Panels Installation Guide - Roofers

Saving money on energy through solar panels is becoming more popular than ever these days, but it isn’t exactly common sense to install them. There is a lot more to the process than more traditional projects, like re-shingling your roof.

If you need to save money and want to help the environment, solar panels are perfect for you, and our solar panels installation guide can help get you started. Although you may need professional help in some cases, these steps will almost always get the job done for you.

A Quick Solar Panels Installation Guide:

1. Figure out what kind of panels you need. This is going to depend on how much energy you need to produce. Different panels come in a range of voltage and wattage so you can pick what you need.

2. Figure out the angle at which your panels should lie to be most efficient. This is based on meteorological information about your specific location and the way the sun will hit the panels.

3. Prepare the location. When you decide where you’re going to place your solar panels, build a platform for them complete with conduit from your home or business. Use concrete pillars and wood for the platform itself.

4. Mount the panels to the platform. You can use angle brackets at the points where you want your panels mounted, but be sure to center the panels’ front feet before securing them into place.

5. Secure the back legs. Use the information garnished from step No. 2 to help you angle the panels and secure the back legs appropriately.

6. Secure the solar modules. Strip the modules and pair them up to wire them in couples that should end up connected altogether at a central fuse box. Be sure to be careful when working with electricity!

7. Connect the exterior and the interior wiring. Use a solar breaker and a circuit breaker connection for this step.

8. Use the conduit to connect cables from the solar panels to the controls in the house. Connect them to nylon rope so they will be easier to thread through the conduit.

9. Use a grounding rod. Tap it into the ground, leaving about five to six inches free, and run copper wire between this rod and the fuse box.

10. Make the proper electrical connections inside. Be sure to be safe with this!

When In Doubt, Seek Help

Although it is possible to install solar panels yourself, it can be dangerous and tedious. We can help you find trustworthy professionals to do it for you and avoid any risks. TalkLocal connects you to the local roofers you need when a do-it-yourself project turns out to be a bit more difficult than you thought, so you TalkLocal today!

Why is it Important to Spay and Neuter Pets?

Sunday, March 24th, 2013

Why is it Important to Spay and Neuter Pets? - Veterinarians

Spaying and neutering your pets can seem inhumane but it is a very necessary step to take.  Why is it important to spay and neuter pets? Well, for one, there are many dogs and cats that are shelter animals without caring families, so there is no need for every animal to reproduce. Pets can lead a normal life even after being spayed and neutered.  There are numerous reasons to spay and neuter your pets.

1)     Your female pet will live a longer, and overall healthier life if you have her spayed.

2)     It will stop any unnecessary reproduction of cats or dogs, decreasing the number of strays and shelter animals.

3)     Neutering prevents testicular cancer in male pets.

4)     Male pets won’t want to roam away from home after they have been neutered.

5)     The pet will be better behaved after it is spayed or neutered.

6)     There is a positive cost-benefit ratio because it is less expensive than having to care for a litter.

7)     Unspayed or unneutered pets roam, prey, and can cause damage around the community.

8)     Spaying and neutering fights over population among cats and dogs.

9) Spaying and neutering can reduces health problem in your pets.

10) It can also eliminates heat cycles in pets.

Getting your pet spayed or neutered is good not only for the animal but for yourself and your community.  You should look into it as soon as you begin thinking about getting a pet.

Still Want More Information?

If you have more questions about spaying or neutering your pet you should speak with a local veterinarian who performs spaying and neutering. TalkLocal will connect you with up to three veterinarians in your area, within minutes!

Repair HP Laptop Cracked Case

Sunday, March 24th, 2013

Repair HP Laptop Cracked Case - Computer Repair

Different parts of your computer are subjected to different amounts of stress as you continue to use it.  Often times, areas such as the hinges and the casing are subjected to enough stress that they end up cracking.  However, while these cracks may seem inconsequential at first, it’s important to repair them in order to stop them from spreading and destroying the rest of your laptop case.

How to Repair HP Laptop Cracked Case

1. Clean out all the cracks with a can of compressed air.  It’s important to completely and thoroughly clean out the crack, or else the repair won’t last.  If the surfaces of the cracked area are covered in dust, then any glue you try to use will bind to the dust, rather than the actual surface itself.

2. You should then evaluate the type and degree of damage and repair the case accordingly.

For small cracks:

3. Super glue should do the trick here.  All you have to do is press the plastic together as close as possible, and then fill the crack with super glue.

4. Continue to apply pressure for about 2 minutes before releasing the plastic and make sure the glue is dry before continuing to move and use the case.

For large cracks:

5. A soldering iron will work best in this case.  Use a flat tip soldering iron and plug the soldering iron in.  After it has fully heated up, melt the plastic on either side together and then press the two sides together.

6. Continue to apply pressure until the plastic has cooled down and bonded.  Make sure during this that the plastic melts deeply and heats up to high temperatures, allowing the plastic to bind together permanently. However, be careful not to damage any of the surrounding pieces or hardware of the laptop.

For extremely large cracks:

7. You can follow the same procedure as for large cracks, but you should also find an additional small piece of plastic to melt into the crack as filler material.  The filler material will help plug up the hole so that the two sides can meet and bind together.

 Find A Professional

If you’re using a soldering iron, make sure to be extremely cautious and place it only on its stand.  If you don’t have a soldering iron or if you believe the damage is far beyond these methods of repair, you can always use TalkLocal to instantly connect yourself to local computer repair professionals.  All you have to do is input your problem and availability and TalkLocal will connect you to reliable professionals in minutes.

10 Things To Know About Shiatsu

Sunday, March 24th, 2013

10 Things To Know About Shiatsu - Massage Therapy

If you are experiencing back pain, headaches, or an unusual amount of stress, you may be considering different types of massage therapy. Prior to making your decision, here are 10 things to know about Shiatsu massage therapy.

1. Shiatsu has been shown to relieve a variety of ailments such as back pain, headache, PMS, neck and shoulder pain, fatigue, stress, arthritis, constipation, poor digestion, depression, anxiety, insomnia, and can even aid in injury recovery.

2. The pressure used in Shiatsu massage is more localized than other types of massages because the fingers are used more than the palms.

3. Localized pressure on certain points — sometimes called trigger points — may be tender, though many describe it as a “good pain.”

4. Although many people enjoy the pain because they can tell that the massage is effective, you should alert your therapist if you are uncomfortable and he or she can adjust the pressure accordingly.

5. The traditional explanation of how Shiatsu works states that it helps improve the flow of “qi”, or energy.

6. The scientific explanation suggests that the localized pressure calms overactive sympathetic nervous systems. This also improves circulation, which relieves stiff muscles and alleviates stress.

7. Shiatsu differs from other forms of massage therapy in that no massage oil is used. This means you will remain fully clothed, though you may want to wear comfortable, non-abrasive clothing to your session.

8. Shiatsu also differs in that the table is generally either lower than a traditional table or completely on the floor.

9. As with other forms of massage therapy, don’t eat a heavy meal prior to your session. Many therapists will suggest not eating anything prior to your session.

10. There are many complications that may result from a Shiatsu massage that you should consider. People who should abstain from shiatsu massage include: those with infectious diseases, rashes or open wounds, people who just had surgery or chemotherapy, and those who are prone to blood clots.

A licensed massage therapist can help explain these 10 things to know about Shiatsu massage therapy, and much more.

Where Can I Find One?

A reputable massage therapist will have forms for you to fill out to evaluate if you are a good candidate for this type of massage. TalkLocal can help you find the right massage therapist. Our service is fast, easy, and free. Try it out to be connected with the right professional, when you need them!

When to Change Transmission Fluid

Sunday, March 24th, 2013

When to Change Transmission Fluid - Auto Repair

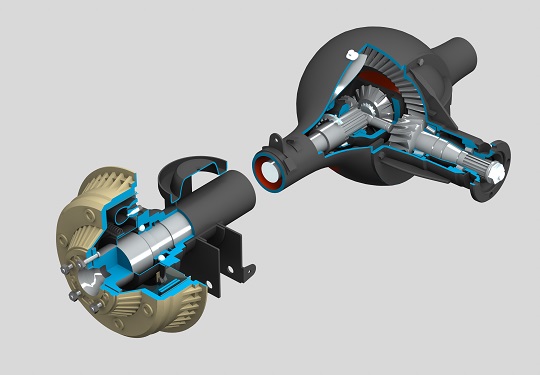
Knowing when to change transmission fluid in your car varies between makes and models, so check your car manual to get an idea of when to change the fluid. Some cars will claim that the transmission fluid is good throughout the entire life of the car. If this is the case, you should still check on the fluid at least once or twice per year to be safe.

Testing Your Transmission Fluid

Testing your car’s transmission fluid is quite easy. New or good fluid should have a reddish-pink hue when blotted on a paper towel. If the fluid is tinged brown, it is a sign that you should change the fluid. Compare your car’s transmission fluid to new fluid on a paper towel. If the two colors seem exceptionally different, then you should probably change the fluid. You should also change the transmission fluid if it has a burnt smell.

Every car is different, so it is important to read the owner’s manual carefully before doing any maintenance on your car. If your transmission has a fluid dipstick, try testing the fluid levels about once per month to make sure you are not running low. You should also have the fluid tested every time you take your car to the mechanic for a tune-up.  Add fluid when levels are low and completely replace the fluid when there is a change in color or smell.

Get Your Transmission Fluid Tested and Replaced

If you would like to get your car’s transmission fluid tested or changed, TalkLocal can find a local, high-quality mechanic for you. We’ll connect you with up to three auto repair shops in your area, saving you the hassle of finding one yourself.

Different Types of Sinks for Kitchen

Sunday, March 24th, 2013

Different Types of Sinks for Kitchen - Plumbers

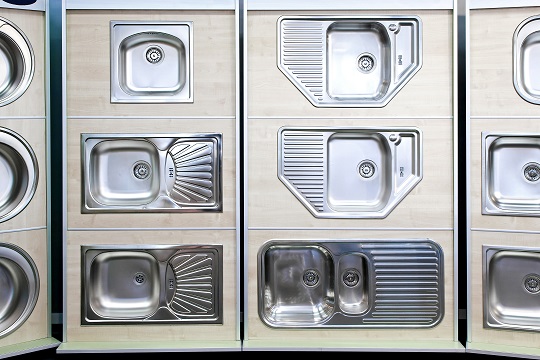
The sink is definitely the most-used installment in the kitchen (aside from the fridge, which isn’t really an installment). And it is important to choose the best type of sink in order to maximize your convenience and to add to the value of your home. Read this guide in order to find out about different types of sinks for kitchen, so you can choose the best one for your home.

Undermount Sinks are mounted below a countertop in order to eliminate the annoying traditional “bump” around the sink, and are quite common sinks for modern kitchens. It is mainly designed this way to minimize the waste of space and to look appealing. Although poorly installed undermount sinks leak, quality epoxy and silicone-lined sinks should look subtle and be highly useful.

Drop-In Sinks are exactly what they sound like: they have rimmed edges, with some loss of usable surface area on the countertop. These rims hold the sink in place when it is installed by being “dropped-down” into place. These are the most common, and usually the cheapest type of sinks available.

Composite Sinks are similar to undermount sinks, but are made with a “composite” material that is more appealing to the eyes (as opposed to bland metal) and also more durable (impact and temperature variations). Because of the different material with out of which theyvare made, composite sinks tend to be more expensive, but also easier to install, as they aren’t very heavy.

Bar Sinks are small sinks that are designed for small-duty use such as cleaning out glasses or washing fruit, as opposed to more heavy-duty work like washing dishes. They are easy to install as they are small, and can add a lot of convenience to a home bar area, or as an alternate sink on the opposite side of the kitchen from the primary sink.

Cast Iron Sinks are known to be both durable and customizable. Cast iron is naturally a very workable material. Also, being customizable allows for the cast iron sink installment to fit into your home much easier. However, these sinks are much heavier than any other material, and thus, likely must be installed by a professional.

Additional Help

If you feel like you need professional consultation on deciding between different types of sinks for kitchen, TalkLocal can find a highly-qualified professional plumber for you. We will connect you with up to three plumbers in your area within minutes.

Front Door Lock is Jammed

Saturday, March 23rd, 2013

Front Door Lock is Jammed - Locksmiths

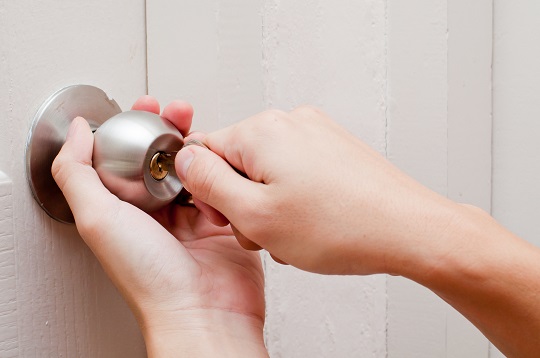
No one enjoys being locked outside of their own home.  If the front door lock is jammed or stuck, hopefully you keep camping equipment in your car. But seriously, a jammed door lock can pose a real security threat for your home. You will want to figure out exactly how and why your front door lock is jammed. We have some tips for you below, so you won’t have to pack a portable home in your car all the time.

What to Do When Your Front Door Lock Is Jammed

1. You can un-jam the lock by removing it from the door and cleaning it.  Use a screwdriver to unscrew the lock from the door. Most locks are held in place by two long screws.  Set the screws aside so that you can reattach the lock later.

2. Now you can clean each piece of the lock. Use rubbing alcohol and a cotton swab q-tip to get all the dust and dirt particles off each piece.

3. Pour a little bit of rubbing alcohol into the keyhole and let it sit.  With the rubbing alcohol in the keyhole, insert the key in and out a couple times to loosen any internal gunk.

4. Once as much dirt and dust is removed from the lock as possible, spray each part of the lock with a light coating of lubricant, such as WD-40.  This will keep the parts in working order and help the lock function properly.  Make sure lubricant is applied outside and inside the lock.

5. Once the lock is dry you can test it to see if it jams, before re-installing it in your door.

6. Re-install the lock into the door, using the screws you removed before. If this does not solve your problem you may have to replace the entire lock.

Find A Reputable Locksmith

If your front door lock is jammed, and cleaning out the individual pieces does not help, you will need to call in a locksmith. TalkLocal will connect you with up to three, high-quality locksmiths in your area. We’ll have you speaking to a professional in just minutes, so you won’t need to spend the night in your front yard!

How to Remove Dog Ticks

Saturday, March 23rd, 2013

How to Remove Dog Ticks - Veterinarians

Ticks are nasty little creatures that can cause Lyme disease in humans, and can also be harmful to dogs.  You should be very careful if your dog has ticks and try to remove as soon as possible, as ticks can transfer very dangerous diseases to your dog. We will give you some tips on how to remove dog ticks.

Things to Keep In Mind

1. First, determine whether or not your dog has ticks.  Take extra precautions during tick season, typically April to September.  Check thoroughly through your dog’s fur.  Also inspect inside and behind the ears, and around the eyes.  Your dog may scratch frequently at an area where a tick resides, so keep an eye out for unusually frequent scratching.

2. When removing ticks, there are a couple of things you need to keep in mind.  Do not throw the tick in the trash or flush it down the toilet once you remove it because neither of these are a guaranteed way to kill it.  You should actually keep the tick in a jar – preferably one with a screw top and some rubbing alcohol.  If you keep the tick, your veterinarian can test it in the event that your dog becomes ill.

3. If you are removing ticks you should also wear latex or rubber gloves to avoid any direct contact with the tick.  It may also be better to have someone else hold your dog to keep it from squirming while you are removing the tick.

How to Remove Dog Ticks

1. Removing a tick from your dog is a delicate process. First treat the bite area with rubbing alcohol. This will help prevent infection, as removing the tick will leave a small, open bite wound on your dog’s skin.

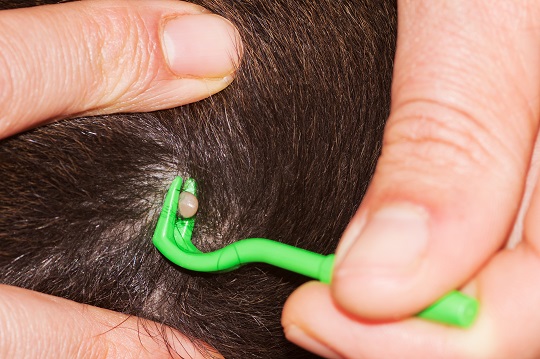
2. You can either use a pair of tweezers, or a tick tick (pictured above), available at pet stores or your veterinarian’s office. Using the tick pliers, If you are using tweezers, grab the tick as close to the skin as possible.  Make sure you grab it by the head or mouth and not the body.  Pull straight upward with even pressure.  Do not twist or jerk when removing and do not squeeze or crush the tick.

3. Once the tick is removed examine the area again to make sure none of it got left behind.

4. Treat the bite area with a warm compress.  Clean up completely and disinfect the bite site.  Even if you are wearing gloves wash your hands with soap and water and sterilize your tweezers or tick pliers with alcohol and heat.

Tick Problems?

If you have more questions about how to remove dog ticks, try talking to a veterinarian.  Use TalkLocal to be connected with up to three veterinarians in your area. Just tell us your problem, location, and availability, and we’ll find the right professional for you!