Archive for 2013


How to Get Rid of Hornets

Sunday, March 17th, 2013

How to Get Rid of Hornets - Pest Control

Hornets are among the most timid members of the bee family. They are only aggressive when the hive is threatened. Still, they are dangerous, especially for people who are allergic to hornet stings. Before you think about calling a pest control company, you may want to look into how to get rid of hornets yourself.

The Plan

1. Buy aerosol insecticide specific to hornets. Home improvement companies typically have the largest selection of insecticides. Find the insecticide with the widest spray range, so you can be farther away from the hornet nest when applying the spray.

2. Have some protective gear ready when applying the spray. Find some clothes that can cover your entire body. Exposed skin on the body can be at risk for hornet stings when applying the insecticide.

3. The application of insecticide should be at night. The hornets are the least active at night, so there is a lower risk of a counter-attack from the hornets.

Attack!

1. Begin to apply the insecticide as far from the hive as you can, getting closer and closer to the hive a few seconds after each application. The insecticide works instantly, so as you get to the hive most of the hornets should be dead.

2. The next day, remove the hive and dispose of it in a tie-off trash bag.

Protection against Future Hornets Nests

– Do not have any type of protein products exposed. A hornet’s diet includes meat. Keep meats, compost piles, and pet food out of the yard or in sealed containers.

– Seal  and clean all garage containers on a regular basis. Find a trash can with a tightly sealed lid to prevent pests from eating the trash.

Professional Help

If you are severely allergic to hornet stings or do not want to remove the hornets yourself, find a local pest control technician. TalkLocal will connect you with up to three professional pest control companies in just minutes!


Choosing Exterior House Paint

Sunday, March 17th, 2013

Choosing Exterior House Paint - Painters

An attractive exterior house color can contribute to its curb appeal and even increase its resale value. Color is one of the first impressions someone has about your house, so make it represent you. Consider these tips when choosing exterior house paint.

Rules of Thumb

– Choose a trim color first. The main house color should be two shades apart on the same color strip.

– Natural lighting can drastically change how a color appears. When selecting exterior colors, look at the color strip outdoors where it will be used. Similarly, interior colors should be viewed indoors.

– Plan out what you are painting and how many colors you are using. Too many accents on one side of the house can make it look lopsided. Don’t try to use everything on the color wheel; stick to a few main shades that work well together. Consult with employees at a home improvement store or search online for ideas.​

Permanent colors

Certain colors on or near your home cannot change, such as brick, roof shingles, or landscaping. Select an exterior color that plays off of these constants. For example, look for color specks in your roof shingles or a color scheme from nearby flowers. You wouldn’t want to select a clashing house color, and then have to replace other parts of your home.

Geography

Sunlight tends to wash out colors, so bright shades are suitable for sunny locations. Muted shades are better for cloudy regions because a brightly colored home may look out of place or overwhelming.

Context

Observe your neighbors’ houses and their color schemes. Make sure your color choices do not clash with theirs, but instead, stand out subtly. Mismatched houses work against each other, so drive around your neighborhood to get a sense of what other people are doing.​​​

Accents

You can use an accent color to highlight unique architectural details or any part of the home you want to stand out. Lighter colors are popular for windowsills because they reflect the sun’s light and heat. Dark accent colors add a crispness to your house’s appearance, and can also hide less attractive parts of your home, such as gutters or air conditioning units.

Visual Tricks

Light colors bring objects into the foreground, while dark colors recede into the background. If you want to make a house appear bigger or closer to the curb, choose a lighter color.  If you want to downsize a large house, choose a darker color.  You can also scale down the height of a house by painting the upper half a darker color. A lighter color also makes a house seem welcoming, whereas a darker color makes a house seem grounded.

Additional Help

If you are looking to get your house painted, consider seeking professional help. A painting contractor can help you choose the most appropriate colors, as well as paint the house for you. TalkLocal will connect you with up to three, high-quality painting contractors in your area. Let Talk Local find the professional help for you!

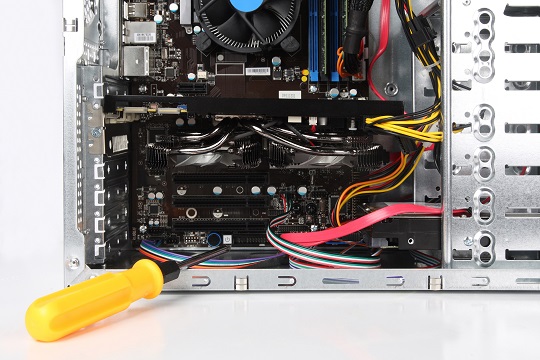
How to Clean Inside of Computer Tower

Sunday, March 17th, 2013

How to Clean Inside of Computer Tower - Computer Repair

Why Clean Your Computer Tower?

Dust can cause many issues inside your tower that will prevent your computer from functioning properly. Dust clogs the fans, which are crucial for cooling your circuit boards, and you run the risk of overheating. Dust can even slow down your computer. Overall, it decreases the lifespan of your computer tower.

Cleaning your computer tower is very important for its durability and longevity. If you want to know how to clean inside of computer tower, you can do this yourself at home.

Materials Required

You will need:

– A cotton or microfiber cloth

– A compressed air can

– A screwdriver

– A vacuum or a small handheld dust buster

How to Clean the Inside of the Computer Tower

1. Disconnect all of the cables connecting your computer with your computer tower.

2. Remove the screws on the back of the computer tower that hold the side panel in place. If you have one, disconnect the side fan that is plugged into the computer tower. Put the side panel aside.

3. Slightly dampen the cloth and wipe down the inside of the side panel. This will remove any dust. If you have a side fan, blow the dust away with the compressed air can.

4. You will need a vacuum hose or a small handheld dust buster in conjunction with a can of compressed air. You may need to place your computer tower on its side to thoroughly clean the inside easily. Aim the end of the compressed air pipe at the fan inside the computer tower. While you are blowing the dust out of the fan, use the vacuum to immediately suck up the dust so that it does not settle back into the computer tower.

5. Using the compressed air and vacuum, spray the heatsink, cable tray, fans, and motherboard until dust no longer comes off of them. Remember to spray and vacuum together so that no dust remains.

6. Use the damp cloth again to wipe dust from the bottom of the tower.

7. You are now ready to reassemble your computer tower. Re-tighten the screws that hold the side panel and computer tower together. Reconnect your computer and tower.

Further Assistance

Cleaning the inside of your computer’s tower is a fairly easy process, but if you would like professional assistance, just use TalkLocal. We will connect you with up to three, high-quality, computer repair technicians in your area, so you can find the help you need.

How to Report Downed Power Lines

Sunday, March 17th, 2013

How to Report Downed Power Lines - Electricians

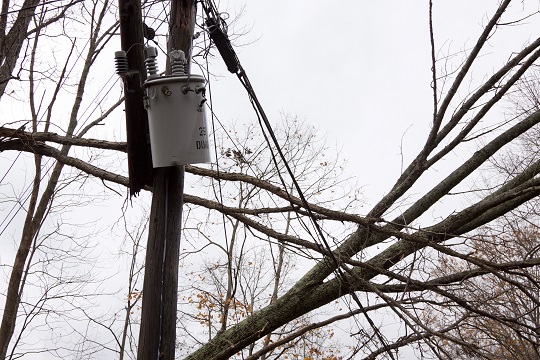
Downed power lines are dangerous, and are often the cause of fires and electrocution. Power lines can be taken down during severe storms and particularly high winds. A fallen tree could also knock out the power to an entire neighborhood. Here is how to report downed power lines in your area.

1. Ensure that the issue actually is a downed power line. The power lines are the long black wires that are connected to the wooden poles. If they are on or close to the ground, then they are down. Do not walk near the power lines. If down, the power line is carrying an electrical current, and you may be at a higher risk of electrocution.

2. Keep yourself and others away from the power line. If you are in your car, do not get out, and put on your hazard lights to warn other drivers of the risk.

3. Immediately call the police or emergency services. Downed power lines need to be blocked of immediately to avoid any risk of injury.

4. Report the downed power line in as much detail as possible. Tell the exact area of the downed power line. If you don’t know the area, describe the area’s landmarks and buildings. Also give a detailed description of the position of the downed power lines.

5. Call the electrical company with the detailed report of the downed power line.

Finding a Professional Electrician

If you need help finding a professional electrician in your area, there is no better place to turn than Seva Call. Seva Call is a free service that will connect you with up to three professionals in your area, saving you the hassle of searching and calling yourself.

Ten Reasons You Should Pour Out One for Ole’ Saint Patrick

Sunday, March 17th, 2013

Written by Dallea Caldwell

Ten Reasons You Should Pour Out One for Ole’ Saint Patrick - Seva Call

If you’re over 21, not the designated driver, and plan to enjoy a spirited beverage or two in celebration of Ireland’s rich cultural heritage, perhaps- when skimming off the froth, you should pour out a few drops for our Saintly departed Saint Patrick. It’s his day, after all.  Besides, archaeologists have recently discovered ancient scrolls dating back to the 5th century indicating that the patron Saint of Ireland literally prayed for rain to disrupt the St Patrick’s Day parade and probably needs help loosening up.

Historians offer 10 speculative reasons:

1. It’s the anniversary of his death, so he wouldn’t really be in a celebratory mood.

2. He was probably all holier-than-thou when it came to drunks, likely because he would have been the designated charioteer every time.

3. He preferred the original holiday’s color, which was blue.

4. He probably often forgot to wear green and got pinched a lot; and, that’s just cruel!

5. He was probably too humble to enjoy all the honorary hoopla and would feel like a false idol  in a way.

6. Nobody says, “Kiss me. I’m not actually Irish but rather British-Roman.”

7. Clovers gave him allergies so he’d never put one in his hat.

8. Beef and cabbage gave him belly aches mixed together like that.

9. Everyone acts so silly and he’s all serious and stuff.

.            ..and…

10. No one remembers his birthday.

Don’t believe us? It is written:

“I’m not some ‘ole stick-in-the-mud Buzz O’Killington.  Of course I want you to have fun celebrating Irish heritage. I’m a saint for Pete’s sake! I would just prefer that you choose safer, more wholesome, less decadent activities like [blah, blah, blah]” – St. Patrick

Happy St. Patrick’s Day from the TalkLocal Team!

Garbage Disposal Troubleshooting

Sunday, March 17th, 2013

Garbage Disposal Troubleshooting - Plumbers

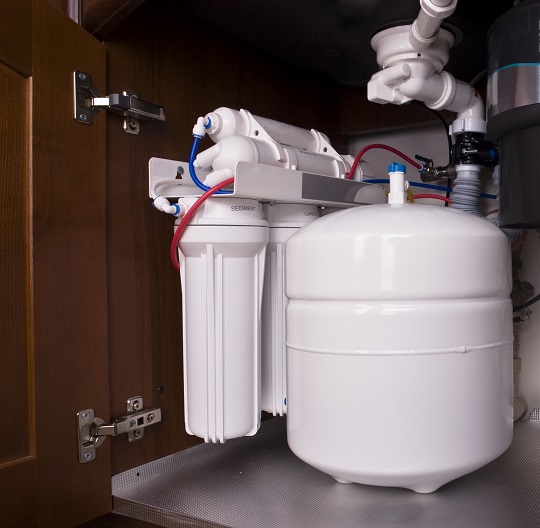
A garbage disposal helps with grinding food into the sink without throwing food into the trash. Usually, garbage disposals can be fixed without the need of a plumber. However, you may not always need a plumber to keep your garbage disposal from acting up. Here are some tips for garbage disposal troubleshooting.

WARNING: Never Put Your Hands Inside the Garbage Disposal.

Humming Noise

If you hear a humming noise, shut down the garbage disposal immediately. Humming noises come from the motor. This means either that there is a stuck flywheel or that the motor is malfunctioning. To remove the jam in the flywheel:

1. Insert pliers into the disposal  and twist them to dislodge any obstructions in the flywheel.

2. If that does not work, insert a ¼ inch Allen wrench port on the bottom, center of the disposal under the sink to wiggle the masher plate (inside the disposal) to dislodge any obstructions.

3. If everything has been dislodged and the garbage disposal still does not work, replace the motor.

Leaking

There can be different leaks in various places of the garage disposal. The common leaks are at the sink flange, the dishwasher connection, and the discharge drainpipe.

Sink Flange Fix

1. Turn off the garbage disposal.

2. Loosen and remove the unit from the mounting flange.

3. Tighten the mounting bolts.

4. If they are already tight, loosen the bolts and reapply the plumber putty between the bolt and the sink.

5. Tighten the bolts and remove any excess putty.

6. Recheck the disposal for leaks

Dishwasher Connection Fix

1. Tighten the clamp on the dishwasher hose connected to the dishwasher inlet.

2. If the hose is leaking, it will need to be replaced.

Discharge Drainpipe Fix

1. Check the tightness of the bolts on the disposal’s discharge drainpipe.

2. If re-tightening the bolts does not work, remove the bolts and the pipe, and replace the gasket.

3. Reinstall the bolts with the new gasket and tighten.

Find A Plumber

If these fixes do not work, the garbage disposal may need to be replaced. For garbage disposal installation use TalkLocal. We will connect you with up to three high-quality plumbers in your area, within minutes!

Bathroom Outlets Don’t Work

Saturday, March 16th, 2013

Bathroom Outlets Don't Work - Electricians

The electrical outlets in your bathroom are probably the most used in the house.  Electrical toothbrushes, hair dryers, straighteners, curlers, air fresheners, and chargers all need outlets when you are getting ready for your day.  When the bathroom outlets don’t work you find yourself in a serious pickle.  You will need to address this issue as soon as possible because otherwise you will be extremely inconvenienced.

What to Do If Your Outlets Don’t Work

1. Unplug everything from the outlets.  You don’t want to short out your various bathroom appliances.

2. Check your breaker panel because any number of tripped breakers could cause the outlets to stop working.  You will need to reset them to see if this helps the situation.

3. Bathrooms usually have ground fault circuit interrupter outlets (GFCI) which can trip as a result of being around the hot water vapors of a shower or a bath.  Make sure these outlets haven’t been tripped because otherwise you will need to reset them as well.  Sometimes home builders will skimp out on the GFCI requirements.  They may install less GFCI’s than usual and connect more loads than there should be. As a result of this the GFCI’s could become overloaded and trip.

4. A GFCI receptacle is smooth and rectangular with two pushable buttons between the outlets.  One button is a test and the other is the reset.  If tripped, you will need to push in the popped out reset button.  This type of protection device is needed for all bathrooms, garages, kitchens, etc., so if the trip is not in the main breaker you should look for the GFCI receptacle.

Further Assistance

If you have more questions about tripped breakers and why your bathroom outlets don’t work, you should try to talk to a professional electrician.  The easiest, fastest way to get in contact with reliable electricians in your area is to use TalkLocal. Tell us what you’re looking for, and we will connect you with the right professional, quickly and completely free of charge.

How to Tint Car Windows

Saturday, March 16th, 2013

How to Tint Car Windows - Auto Glass Repair

Sometimes it just gets way too hot outside and just air conditioning in the car isn’t enough. This is when tinted windows can be more than just a slick look for your car. You may be surprised to hear that tinting your car’s windows at home is fairly easy. We have some simple steps on how to tint car windows yourself.

Before you tint your windows, make sure you know the regulations about tinted windows in your state. Most states have regulations on how dark a window tint can be, and breaking these rules could result in fines or other legal trouble.

Materials Needed:

– Tint solution. You will be able to buy this at an auto parts store. Most tints are graded, which determines how dark the tint is.

– Window cleaning solution

– Sponge

– Single-edged razor blade

– Utility knife

– Squeegee

– Lint-free cloth

How to Tint Car Windows

1. Clean your windows thoroughly using the window cleaning solution and the rubber side of the squeegee. Make sure both sides of the window are clean.

2. Identify which side of the tinted film is the liner and which side is the film itself. Usually, the silk side is the liner and the sticky side is the film.

3. Carefully roll the film on the window with the liner facing outward.

4. Use the single-edged razor blade to carefully cut the extra parts of the film. Exercise extreme caution while doing this and always make sure that you cut the film at least one inch larger than the size of the car window.

5. Make sure that the bottom-most side extends to at least one fourth of an inch below the top of the inside casket.

6. Spray the outside of the film with the application solution and use the sponge to smooth the surface.

7. Use the utility knife to trim the vertical edges of the film.

8. Lower the window to about two inches and further trim the film to fit the shape of the window glass.

9. Clean the inside of the window with the application solution.

10. Put the film on the outside of the window glass.

11. Very carefully remove the liner.

12. Spray the inside of the window with the application solution, and then remove the film from the outside of the glass and place the wet part against the wet glass.

13. Use the squeegee to place the film in position.

14. Roll up the window, so the film continues to secure itself into position.

15. Push all of the water out.

16. Make sure there are no air bubbles.

17. Wipe any extra solution off.

Need Help?

If you would prefer to have a professional help you tint your windows, just use TalkLocal! We can connect you with up to three auto glass professionals in just minutes. Our service is fast, free, and easy.

No Wireless Connection Icon

Saturday, March 16th, 2013

No Wireless Connection Icon - Computer Repair

Does no wireless connection icon appear on your computer screen? There are three common problems to that can cause the wireless connection icon to disappear. This can be extremely frustrating when you’re trying to troubleshoot your networking problem.  The majority of these problems are easily solved and require only minimal effort on your end.

Incorrect Installation

You first must ensure that your computer can actually use a wireless connection.  Therefore, you need to ensure that your wireless card was installed correctly.  If you installed the wireless card yourself, you’ll need to ensure that you installed the card properly and that the card is not faulty (bent pins and connectors can indicate a bad card).  Furthermore, check that your wireless card is compatible with your computer and that it is the right size for the slot.

Out Of Date or Incorrect Drivers

Another common problem is that you may have out-of-date or incorrect drivers for your wireless card or connection.

1. Go to your Device Manager and then open up the Network Adapter subheading.

2. Click on the wireless card or device and click “Update Driver.”  Windows will automatically check for working driver for your wireless device from the manufacturer.

Zero Wireless Configuration Problem

The Zero wireless configuration service coordinates all of your wireless connections and networks.

1. Make sure that the service is running by going to the Start menu and clicking on the “Run” option.

2. Type in “services.msc,” which will bring up a list of running services, and look for Wireless Zero Configuration.

3. Check to see if it’s running. If it isn’t, start up the service.

Let Us Find the Right Help for You

If you have tried all of these steps and you still have no wireless connection icon, then it’s time to call in a professional to diagnose your computer troubles.  TalkLocal can connect you with up to three, high-quality computer repair technicians in just minutes!

Cats Teeth Cleaning

Saturday, March 16th, 2013

Cats Teeth Cleaning - Veterinarians

Many people keep pets and don’t realize that similarly to humans, cats need to have regular checkups and dental care.  Cats are notoriously not very people friendly, and when you try to clean their teeth you can face even more hostility.  You should take the correct steps when trying to clean your cat’s teeth.

Cats Teeth Cleaning

There is no requirement to how often you should do so, but you should just routinely check the teeth and gums of your cat every few weeks just to be sure nothing is wrong.  Dental cleanings for cats range from $150 to $250, so instead of letting it get bad enough to need professional cleaning,  try to do it yourself.  Cats do get pockets of infection, gum disease, tooth decay, or gingivitis so you should try to prevent these diseases from occurring in your cat by cleaning regularly.

1. One way to tell if something is wrong is to check your cat’s breath.  A mild fishy scent is normal but a truly repulsive odor can be worrisome.

2. If your cat has trouble breathing or is drooling excessively you should clean their teeth immediately.

3. Adult cats are more resistant to teeth cleanings so you should start with your cat when they are young.  You can get them used to brushing by using your finger wrapped in cotton or gauze and dipped in tuna water.  You need to use toothpaste that is specially made for cats.  Do not use human toothpaste because the fluoride in this type of toothpaste can be very dangerous to cats.

4. The best method to cleaning your cat’s teeth is to go in from behind.  Cradle your cat from the back and cup its chin.  Lift up its lip and begin to brush it’s teeth.

5. You should also try to massage the cat’s gums to prevent gum disease.

6. You can also give your cat tartar control chew treats in moderation.However, this is not necessarily sufficient for a complete cleaning.

Continuing Problems

If you have more questions about cleaning your cat’s teeth you should try to talk to a professional.  The easiest, fastest way to get in contact with reliable local veterinarians is to use TalkLocal. Tell us what you need and let us do all of the work.  Within minutes you will be connected to a veterinarian in your area.