Archive for 2013


Top 5 Reasons to Buy a Generator

Sunday, March 10th, 2013

Top 5 Reasons to Buy a Generator - Electricians

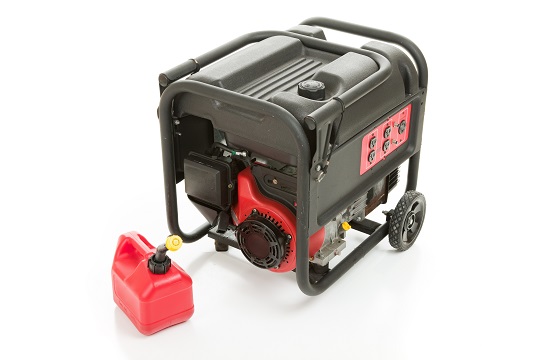
The following are the top 5 reasons to buy a generator. If you are going back and forth debating whether or not it is worth the money to buy a generator, this article is for you.

Top 5 reasons to buy a generator

1. You live in a natural disaster-prone area. If you live in a region that may be damaged as a result of hurricanes, earthquakes, tornadoes, snow stores, or ice storms, purchasing a generator may well be worth the money. Living without power and electricity for extended periods of time can be difficult, and even traumatic. It can be increasingly difficult to purchase a generator when you need it if everyone else is running to the store to purchase a generator during the storm’s aftermath.

2. Occasionally there will be that tree that falls over and disrupts power to your home. You may be temporarily without power until the electrical company can come out and fix the power lines.

3. Camping is an opportune time to use a generator. While truly roughing it without a power source can be fun for camping, a generator allows you to enjoy some of the comforts of home in your campsite.

4. A backup generator is a great go-to power source if you need emergency power for a business as well. We most commonly think of generators being useful for our homes during emergencies but a generator can also be key within the business world. What happens to your backup digital storage when the power goes out? A generator may save you from losing a whole lot of data.

5. Take a generator with you while you are boating. This can be a lifesaver if you run out of electricity when you are out in the middle of the water.

Further Assistance

Take care of yourself and your loved ones and consider buying a backup generator. If you need a generator installed or have questions about cooling, check out TalkLocal. You will be connected for free to up to three electricians in your area who will have all of the information you need to get you started with your new generator.

Home Remedies for Bed Bugs

Sunday, March 10th, 2013

Home Remedies for Bed Bugs - Pest Control

Bed bugs are one of the most difficult pests to get rid of. Their size, high birth rate, and sense of chemical odor have made for a difficult bug to exterminate entirely. Here are some home remedies for bed bugs.

Vacuuming

This can be as easy as owning a vacuum cleaner. Vacuuming up bed bugs can remove some bed bugs. If they are in one area and low in number, the remedy may temporarily remove the problem. Usually vacuuming is ineffective in removing all bed bugs and should only be used to control an infestation. Bed bugs and eggs are often burrowed deep into the furniture where the vacuum cannot reach.

Extreme Temperatures

Instead of removing furniture or clothes, which can be costly, these items can be put into extreme temperatures kill bed begs. Bed bugs are not adaptable to these environments and they die. There are three ways to exposes these bed bugs to extreme temperatures: washer and dryer, steamers, leaving items outside, or using your heating system.

1. Washer and dryer is the best for clothing items such as bedding and t-shirts. Wash and dry these items on the hottest setting.

2. Bed bugs in furniture can be removed with steamers or leaving them outside. Steamers can effectively kill bed bugs on contact but commercial steamers cannot penetrate deeply into the furniture.

3. In an area with extremely hot or cold temperatures, leave infested furniture outside. For effective results, furniture must be out for several weeks.

Natural Insecticides

There are also natural products that can be used as insecticide. The most effective natural insecticide for bed bugs is diatomaceous earth. Diatomaceous earth is an off-white powder which is fossilized remains of marine phytoplankton.  The powder is extremely sharp to bed bugs and cuts them up, but is safe to humans. Diatomaceous earth is actually in grain-based foods we eat to keep bugs from eating the grain. Canola oil and pyrethrin also attack their nervous system, killing the bed bugs.

Further Assistance

For complete extermination, home remedies may not be the best answer and professionals are needed. For pest control services, use TalkLocal. TalkLocal will connect you with up to three pest control professionals in just minutes!

How Do You Lubricate a HVAC Motor?

Sunday, March 10th, 2013

How Do You Lubricate a HVAC Motor? - Heating and Cooling

How do you lubricate a HVAC motor? That is a question that many people ask, and this article is here to help you figure out the answer! The following are some tips and tricks regarding how to properly maintain your HVAC motor.

How to tell if you need to oil your HVAC motor

Whether or not you need to oil your HVAC motor depends on the type of model you have. If you own one of the newer models, there are no oil ports because the newer models are made with a sealed bearing.

The older models are a different story and they will need proper upkeep. Place a few drops of oil in the oil ports each year and you should be good to go.

5-10 year maintenance

To maintain the proper care for your HVAC motor, we recommend performing the following checklist every 5 to 10 years.

Additional Help

Check out more HVAC cleaning tips here. Properly maintaining your HVAC motor requires a lot of time and effort. It may be a lot easier to simply have a professional do the upkeep or replace the motor in general. Check out TalkLocal to be directly connected to a service professional right in your neighborhood. You will be speaking to a professional that can fix your exact problem at the time that is most convenient for your schedule!

How to Connect A MacBook Pro to an HDMI TV

Sunday, March 10th, 2013

How to Connect A MacBook Pro to an HDMI TV - Computer Repair

You have a MacBook Pro. You have an HDMI TV. What better way to use them then together? Connecting these two electronics is really quite simple. This article will tell you how to connect a MacBook Pro to an HDMI TV.

Connecting to an HDMI TV with a Newer MacBook Pro

Newer models of the MacBook Pro (April 2010 and beyond) have a Mini DisplayPort connection, which makes it much easier to connect your MacBook Pro to your HDMI TV. Simply go to the Apple Store and purchase a Kanex Mini DisplayPort to HDMI cable and you should be able to use it to connect to your TV.

Connecting to an HDMI TV with an Older MacBook Pro

Older versions of the MacBook Pro may have a variety of connections, so you will have to buy a different adapter to connect to your TV depending on which model you have. The Apple Store sells adapters for virtually every model they have ever made. You can go online and compare the different connections to your MacBook Pro to determine which adapter you need to buy.

Additional Help

If you are still confused, you may want to seek the help of a computer professional to help you figure out which adapter to buy and how to set it up. With the help of TalkLocal you can receive calls in minutes from high quality computer professionals in you area that are available when you are.

St. Patrick’s Day Planner – Crafts, Activities, and Meals – For the Kids!

Sunday, March 10th, 2013

Written by Dallea Caldwell

St. Patrick's Day Planner - Crafts, Activities, and Meals - For the Kids! - Seva Call

St. Patrick’s day is Sunday March 17th. That means the kids will be home from school and if they’re still cool enough to dork around with mom and dad all day, you can have a day full of fun- celebrating Irish culture! If you’ve got more enthusiasm than you do ideas, here’s an itinerary that will make this holiday one you won’t forget!

St. Patrick’s Day Planner

Breakfast- Irish Soda Farls
Served fresh with butter and jam, in 20 minutes you can turn all-purpose flour, butter milk, table salt, and baking soda into a delicious authentic Irish breakfast. Here’s the recipe!

Craft- Have fun trying to lure your own leprechaun to the house. Take a page from this craft mom for the kiddies and maybe even come up with a “booby trap”- no need for anything too sophisticated, ropes and baskets should be fine. Then, get away from the house so as not to scare the lucky little guy off!

On the road- Ask the kids to spot as many different types of green colored objects as they can and reward them with a green M&M for each once you get home (not all in one sitting of course).

Explore- Hopefully the sun is still as high and as warm as it’ll get all day. So head over to the park and search for clovers, or maybe just play tag.

Lunch- If you have a hankering for classic corned beef and cabbage, you’re in luck. Go ahead and whip up this delish sandwich.

Now, let’s get moving!

Activity- Leprechaun hide and seek!
Everyone else close your eyes or gather in one room! Each of you gets a chance to be the Leprechaun, hide the “Pot of Gold” (created using whatever household materials or dollar store props you like) and tuck away in your secret hiding place. The family has 10 minutes to find you and/or your Pot of Gold. If someone finds your pot of Gold but you haven’t been found, they can steal the gold and return the pot! If they find you, they get three guesses/clues, but if they’re wrong, they let you go find a new hiding space. The goal to the get the most charm points.
Finding the Leprechaun- 3pts
Finding the pot of Gold- 3pt
Finding just the pot- 2pts

Dinner- With such a busy day, it might be a smart idea to save time with a simple one pot solution. How about this crockpot Irish Chicken Stew recipe!

Make St. Patrick’s Day A Family Day

Whatever you do, enjoy this day as another opportunity to make precious memories before the little ones run off chasing their respective pots of gold in life.  And, if you want to (what the hey!) throw a party, TalkLocal can help you find a last minute party planner too!

Residential Roof Inspections

Sunday, March 10th, 2013

Residential Roof Inspections - Roofers

Residential roof inspections are often required before a mortgage or home loan can be secured. During these inspections, all parts of a roof are inspected – the shingles, the gutters, the flashing, and even the inside of the roof from the attic. Roof problems usually result in expensive repairs, so inspecting the roof also helps owners identify any problems before they become too serious.

How to Pass Residential Roof Inspections

If you are getting your roof inspected, there are a few steps you want to take to ensure your roof passes the inspection. Checking the inside of your roof (from the attic) is a good place to start.

1. When you get to your attic, start looking around for any evidence of water. Dark stains, puddles, and sagging or cracking rafters are indicative of water in your attic. If there appears to be water, look at the wood for a clue as to the age of the leak. Dry and firm wood indicates an old leak. Lesser-quality woods may have even begun the rotting process if left alone long enough. If there is any water damage, you will want to find a roofer to fix this before your inspection.

2. The next thing you will want to inspect are the shingles on your roof. To do this, grab a ladder and place it against your house. Climb your ladder and stop when you are at roof-level and able to gauge the condition. Shingles that appear to be cracking or splitting or even missing should be fixed or replaced. Asphalt shingles with dark patches likely need a new granular coating to ensure their effectiveness. Also, if you saw areas of the roof that appeared to be sagging when in the attic, you will want to have someone take a look at those areas as well.

3. Next up to inspect are the flashing and gutters around the roof.

4. Check for any loosely attached downspouts and make sure everything is working effectively.

5. Check to make sure all the gutters are not clogged or leaking. If you have trouble recognizing leaks like this, you can try pouring some water down the roof to test the gutters and downspouts. You will also want to inspect the flashing around the chimneys, vents, and walls. If there are any problems with the flashing, you will want to get them fixed or replaced.

Further Assistance

Certified roof inspectors are paid to recognize breakdowns and faults in your roof, so ensure this doesn’t happen by following this checklist. If you would like to have a roofer help you repair your roof, consider using TalkLocal to find a roofing company for you. TalkLocal is a free service that will connect you with top-quality, reputable roofing professionals in your neighborhood within minutes. Just enter in your specific problem, location and availability, and up to three companies will call YOU directly, saving you the time and stress of finding one yourself.

How to be Safe When Cleaning Up Yard After Storm

Saturday, March 9th, 2013

How to be Safe When Cleaning Up Yard After Storm - Landscapers

So the storm is over and now your yard is full of fallen trees and branches. Now begins the clean-up process. You may want to rush to get your yard cleaned up as fast as possible, but it is important to follow safety precautions when removing debris from your yard. The following tips will help you stay safe when cleaning up your yard following a major storm.

How to Be Safe When Cleaning Up Yard After Storm

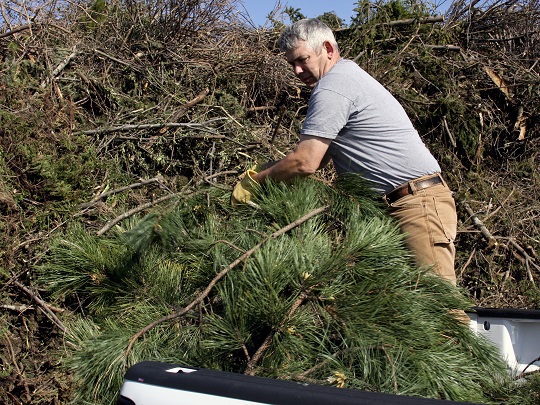
– Electrocution is particularly dangerous when cleaning up after a storm. Power lines can become tangled in fallen trees and they may not be clearly visible. Before you begin any tree removal make sure you are completely clear of any power lines. Call your utility company or a professional electrician if there are any power outages or power lines down following a storm.

– If you use a chain saw to break down fallen trees and branches, makes sure to wear proper eye wear to avoid any eye injuries. Wear ear protection to prevent any long-term ear damage as well.

– When using a chainsaw, do not just start hacking away at any random pile of branches. Try to pull out the smaller branches first, before chopping up larger branches and the trunk of the tree.

– Kickbacks by chain saws can cause serious injury. Make sure your chain saw is in good condition before you begin.

– Wear long pants, heavy gloves, and work boots for protection.

Additional Help

Need professional help? Use TalkLocal to find a landscaping contractor or outdoor cleaning service for you! We will connect you with up to three local professionals in just minutes.

How to Waterproof a Roof

Saturday, March 9th, 2013

How to Waterproof a Roof - Roofers

A roof is one of the most important structural features of a house. An inadequate roof means the rest of your house may be subject to damage during a big storm. Regardless of whether you have a flat roof or a slanted roof, ensuring that the roof is waterproof is an important step in making sure your home isn’t damaged by water. If you want to know how to waterproof a roof, don’t worry – it’s not too difficult.

How to Waterproof a Roof

1. The first thing you want to do is gather the necessary equipment and the materials: find a ladder, silicone sealant or something similar, and a caulking gun.

2. Climb the ladder to get onto the roof and try to identify any spots on the roof where it may be most susceptible to water damage. This means any points where water may slip under the shingles and any places where shingles have been damaged or displaced.

3. Once you identify these areas, seal the three open sides of the shingles using the can of silicone sealant and caulking gun. Make sure the sealant actually seals the openings to ensure no water can get through the roof. If it doesn’t work on your first try, continue sealing the gaps of space under the shingles to waterproof the roof. If there are any gaps left, water can seep into these spaces under the shingle and cause water damage to your roof and in your attic.

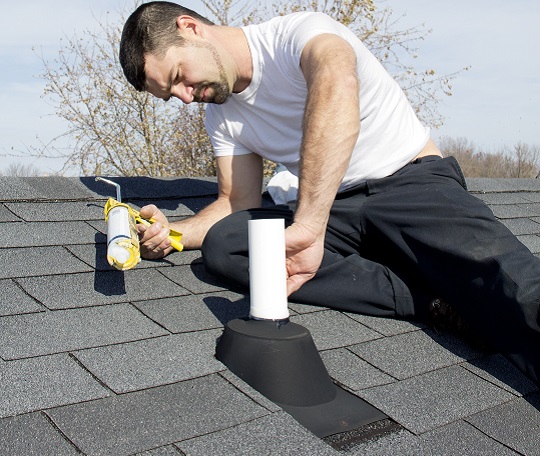
4. In addition to the shingle openings, you want to seal any other openings you may see. Check the flashing used around the vents and chimneys to determine if there are any poorly sealed areas. If there are, seal them tightly with the silicone to protect against leakage.

Additional Help

If you would prefer professional help, consider using TalkLocal to find a roofing company for you. TalkLocal is a free service that will connect you with top-quality, reputable roofing professionals in your neighborhood within minutes. Just enter in your specific problem, location and availability, and up to three companies will call YOU directly, saving you the time and stress of finding one yourself.

Windows XP Printer Connection Cannot Be Removed

Saturday, March 9th, 2013

Windows XP Printer Connection Cannot Be Removed - Computer Repair

A common problem that seems to be popping up for people running computers on the Windows XP operating system is that the printer connection cannot be removed their from the network.  People try to remove their printers for multiple reasons.  They may need to add a different printer, the printer may be malfunctioning or broken, or they may just want to change the printers set on the network.  Whatever the issue may be its quite frustrating when you cannot get it to react the right way.

Error

When a printer connection cannot be removed from a Windows XP computer, you may get an error that says “Printer connection cannot be removed.  Operation could not be completed.”  A lot of people try to remove the printer driver, restart the spooler, disable the sharing ability from the computer, among other things, but none of these processes seem to do the trick.

Solution

There is one fail-safe way to fix this issue that takes almost no time at all.  If you disconnect the network cable and delete the printer, then the printer should be disconnected or removed after you restart the computer. However, if the error you receive says “access denied” instead of “operation cannot be completed” you are in a domain environment and it is the default policies of this domain that may be causing the issues.

Further Assistance

If your printer connection cannot be removed after attempting all of the above solutions, please try to get in contact with someone with IT experience who can help you.  If you are looking for a reliable local service or business use TalkLocal to be put in contact with a professional within minutes.  All you have to do is input your problem and availability and TalkLocal will do the rest.  We will connect you with up to three computer technicians who will be available to help when you need them.

Formatting Your HDTV

Saturday, March 9th, 2013

Formatting Your HDTV - TV Repair

You just got the perfect TV. It’s the right resolution and it’s the perfect size and price. But how do you format it to make the picture look great? We have some tips if you are having trouble formatting your HDTV. There will be a lot of cables involved, but the one you should pay the most attention to is the HDMI (High Definition Multimedia Interface).

Formatting Your HDTV: HDMI Cables

HDMI cables are the cables that carry high-resolution images and sound to your television. Don’t worry about getting the most expensive HDMI cables, as long as it is an HDMI cable you should be fine. But you should definitely get one. The size and resolution of your television are utterly unimportant without the HDMI cable. That little cable is the most important piece for ensuring the performance of your HDTV.

If you haven’t upgraded your other gadgets, you should do so ASAP.

1. Make sure that your DVD or BluRay player is ready for your HDTV. Go into the setup menu and make sure it’s set to output a 16:9 ratio image. If it’s an older player, you could set the resolution to 4:3 (like old TVs). If you set the aspect ratio to 16:9, the picture will look fantastic on your HDTV!

2. The same is true for your cable or satellite box. Make sure you switch the cable or satellite box to 16×9. If your box is capable of HD, take this moment to set it to output 1080i (but if you want it to show HD make sure you have that in your agreement with your cable company).

Additional Help

If you need more help formatting your HDTV, use TalkLocal! We can connect you with up to three professional television repair services in your area, in just minutes!