Archive for 2013


Recover Lost Network Password

Sunday, March 3rd, 2013

Recover Lost Network Password - Computer Repair

We all had a time when we have forgotten passwords. Forgetting a network password is worse, as this gives you access to the Internet, the place you want to go the most on your computer. Recovery of a password is an easy and simple process. All you have to do is access your wireless router. Below are the steps to recover lost network password.

Connect to the Router​​

1.     Start the command prompt.

2.     Run “ipconfig”.

3.     Find “Default Gateway”- the number specified is the router IP address.

4.     Copy & Paste the router IP address into an Internet browser. This will prompt a username and password for access to the router.

5.     Type the default password and username, provided in the router’s manual, or put your configured password and username for the router into the prompt. After this you should have access to your router’s password.

6.     If you have forgotten your password or username to the wireless router, reset your router as specified by the manufacturer and then use the default password and username to access the router.

Suggestions for network passwords

1.     Do not store your passwords anywhere on your computer.

2.     If you can’t memorize the password, write it down and store it in a secure location.

3.     Make the password hard for others to guess but easy to remember. Try using a combination of capitalized and lower-case letter, numbers, and symbols. Also avoid family birthdays or names, as these can be easy to discover.

Additional Help

Passwords can be easily forgotten, but always try to make them accessible and memorable for yourself. If you would like a computer technician to help you find a lost password, or if you have any other computer trouble, use TalkLocal. We will connect you with up to three high quality computer technicians in your area, who will be available to help you when you need them.

Pros and Cons of Tree Removal

Sunday, March 3rd, 2013

Pros and Cons of Tree Removal - Tree Removal

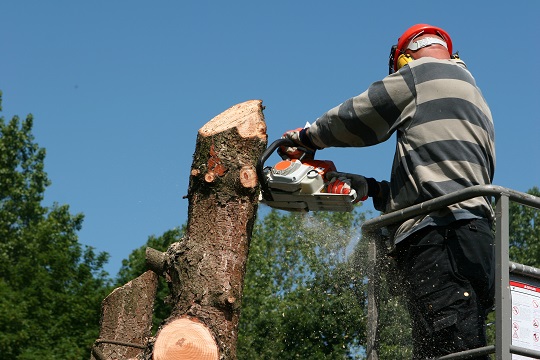
Trees should only be removed if necessary. They provide natural habitats for wildlife and shades for humans on the hottest summer days. However, when a tree is diseased or dead it is time for it to be cut down. Keep reading to learn about the pros and cons of tree removal.

Pros of Tree Removal

The advantages of tree removal include safety and disease prevention.

Dead trees are unstable and cannot handle natural stresses, such as weight and weather. They could spontaneously fall, which could injure people or destroy property. Also, if a part of a tree, such as a large branch, is hanging over your property, you may need to remove the tree entirely, but try to see if you can just remove the overhanging part before taking drastic measures.

Diseased trees must be treated or removed if the disease has spread too far. Sick trees could spread their disease to neighboring trees and plants. They also invite many unwanted microorganisms and pests. Diseased trees, like dead trees, are also very unstable and cannot handle natural elements or support their own weight. Overall, remove unhealthy trees for the benefit of the landscape.

Cons of Tree Removal

If you want to clear trees to build a garage or other structure, you may want to think twice. Can you live without the extra space? If so, do not remove the trees because they are more beneficial than you think.

Trees provide homes for many creatures and give you shade in the hot summer months, reducing your energy bill. Many animals, such as birds and squirrels, make homes in trees. Trees also help create oxygen and purify the toxins in the air we breathe. You are actually healthier for having trees around your home! They also serve as windbreakers. Wind can damage delicate plants and blow away topsoil, and trees can ease the severity of the gusts.

In addition to destroying wildlife habitats, tree removal can be expensive. Each tree removed could cost you $300 or more! So seriously consider the pros and cons of tree removal before you fire up that chainsaw.

Transplanting Trees

If you need to remove an inconvenient, but healthy tree, you can transplant it to a new location on your property where it will be of less risk to damaging your home. It would be a waste of nature to destroy a thriving tree.

Consult a tree removal expert to evaluate your trees. TalkLocal can connect you with top tree removal companies in your local area, so you can get the help you need, when you need it.

Flat Roof Tar

Sunday, March 3rd, 2013

Flat Roof Tar - Roofers

A flat roof is very susceptible to water damage unless steps are taken to prevent this. Some people prefer to install pipes that are designed to guide water away from the roof, while others prefer using methods involving tar. Traditionally, most flat roofs use tar or tar paper that is applied to keep the building watertight. Gravel or something similar is then used to protect the tar. If you  live in a home with a flat roof, knowing how to keep it watertight can save you major headaches and money.

Applying Flat Roof Tar


1. Gather your materials. You will need a roller, an extension pole, and enough tar (or tar paper) to cover the surface of your roof. For the tar, we recommend finding a product that is white to help it reflect UV rays.

2. Prepare the roof surface for the tarring. This means cleaning and drying all of the surfaces where tar will be applied.

3. Before you begin the tarring process, make sure the conditions allow for a clean setup. Make sure the temperature is not too hot or too cold, or else the tar may melt too quickly or not seal at all if it’s too cold. With this in mind, it is time to start tarring.

4. Keep in mind, not all tar products are the same, so you will first want to read the directions on the container of the tar.

5. Start in the corner of the roof that is furthest from where your ladder is. Using a roller, spread the tar around with smooth strokes to cover the entire area. A second or even third coating can help to protect areas such as flashings or pipes that may be more at risk for water damage.

5. An alternate method is to use tar paper instead of just tar. These papers do essentially the same thing, but the application process is slightly different. Rather than coating areas, you apply strips of tar paper to areas that need to be kept watertight.

Further Assistance

If you would prefer professional help, consider using TalkLocal to find a roofing company for you. TalkLocal is a free service that will connect you with top-quality, reputable roofing professionals in your neighborhood within minutes. Just enter in your specific problem, location and availability, and up to three companies will call YOU directly, saving you the time and stress of finding one yourself.

Magnavox TV Keeps Turning Off

Saturday, March 2nd, 2013

Magnavox TV Keeps Turning Off - TV Repair

Magnavox televisions are considered a thing of the past, but some people do still enjoy the antique feel of such a TV. The problem is, fewer and fewer parts are available for Magnavox TVs, making repairing a Magnavox increasingly difficult. A common problem with Magnavox TVs is that they have a tendency to turn off randomly. If you are someone with the issue of having your Magnavox TV keeps turning off, don’t worry – there are solutions.

What to Do If Your Magnavox TV Keeps Turning Off

1. Check the power cable and make sure it is completely plugged in and there are no breaks or openings in the wire. If everything appears normal, the next step is to consult your user manual to see if there is anything there that may help you troubleshoot the problem.

2. Your manual may instruct you to unplug your power cord for roughly 60 seconds before plugging it back in. This step allows your TV to reset itself, hopefully triggering something internally to remedy the problem. If this does not work, then your TV has a component failure.

3. Something else you can try is to replace your power cord. Oftentimes, this is the root of the problem and your television is turning off to protect the TV from harm.

Prevent Your TV from Breaking Down

1. There are steps you can take to prevent issues from arising with your television. Utilizing a wall mount can be helpful to help with airflow and prevent dust from accumulating around your TV.

2. Keep a fan around your TV to keep it cooled. Overheating can ruin parts within the TV, so taking steps to prevent overheating can be well worth it in the long run.

If you have tried the above steps and still find yourself having trouble with your television, it may be best to simply replace your old TV with a new one. Sure, getting it fixed may solve the problem temporarily. But it’s only a matter of time before something else goes wrong, as one bad part may cause a domino effect for other parts.


Additional Help

If you are having television issues and would prefer to consult a professional, consider using TalkLocal to find a reputable TV repair service for you. TalkLocal is a free service that will connect you with top-quality, TV repair companies in your neighborhood within minutes. Just enter in your specific problem, location and availability, and up to three companies will call YOU directly, saving you the time and stress of finding one yourself.

Lawn Mower Problems Troubleshooting

Saturday, March 2nd, 2013

Lawn Mower Problems Troubleshooting - Landscapers

We’ve all been there: mowing the lawn on a hot summer’s day, trying to get it done, when the lawn mower just stops running. Luckily, there are a few tricks you can try to troubleshoot your lawn mower’s issues.

Lawn Mower Problems Troubleshooting

1. Check your gas tank. Is it filled? Needless to say that once a lawnmower runs out of fuel, it won’t start up – fill it to a significant amount to make sure that this isn’t the problem before continuing the troubleshooting.

2. Make sure that the gas is being fed into the engine by inspecting the flow of gas (check for any blockages in the pipelines, etc). Clean up any pipe buildups if there are any and continue. Also check to see if the incline (slope) on the pipelines naturally feeds the gas into the engine.

3. Check to see that the pull (the handle that you pull on to start up the engine) is smooth – if you are having difficulty pulling the pull, this means that there is a mismatch in the internal combustion engine (the engine that propels the blades cutting the grass)

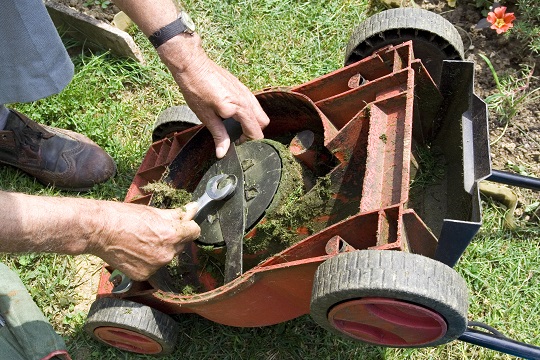
4. If you are having a problem with the pull or if the lawnmower still isn’t starting up after going through these checks, it’s time to check the internal engine. Undo the screws on the external shell of the lawnmower to reveal the engine inside – and take a look to see if any parts are damaged or worn.

5. Check also to see that there are no gas leaks from the pipelines or the engine.

6. Finally check to see if the oil is fresh – unchanged/stale oil can wear out the engine much faster.

My Lawnmower Won’t Cut Grass

1. If your lawn mower is running properly, but will not cut the grass, check the blades of your lawnmower. Turn off the engine and try to turn the blades manually while the mower is upside down.

2. Check to see that the rotor spinning the blades is connected to the engine and check to see if the engine is working. If the engine is working but the blades are not turning, check the connection between the rotor and the engine.

3. Check to see if the blades are dull as well. Unbalanced or dull blades can throw off the balance of the lawnmower – look for replacement blades in your local utility store if this is the case. Also check to see that the blades are set low enough on the mower that they will actually cut grass instead of just hovering in the air.

Additional Help

If you feel like you need professional help on lawn mower problems troubleshooting, or if you would like to find a lawn service, just use TalkLocal. We will connect you with up to three landscaping professionals in your area, who will be able to help you out.

Tips for Training Young Trees

Saturday, March 2nd, 2013

Tips for Training Young Trees - Tree Removal

Training a tree is the process of pruning that creates good form and shape, as well as improves branch structure when the tree is young. Training is important for the tree’s health as well as the overall look of the tree. Keep reading to learn some tips for training young trees.

Why Train Young Trees?

Training trees improves their strength and structure. This corrective pruning method prevents the tree from having branch or trunk problems in the future, which means the tree will have a longer, healthier lifespan.

When to Train Young Trees

Training begins when the tree is 3 years old. This ensures that its growth is not stunted. You may begin removing dead, broken or diseased branches at any stage in the tree’s growth.

Tips for Training Young Trees

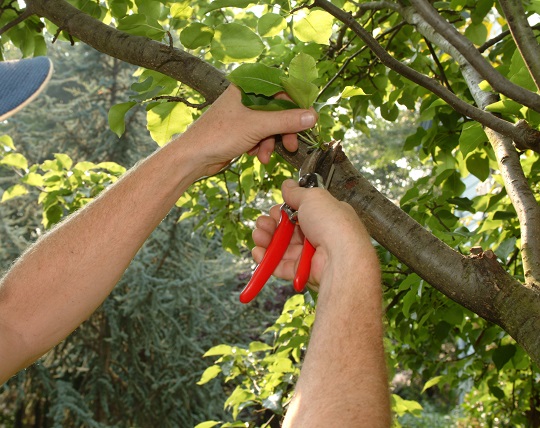
1. Pick a high branch to be the leader, in other words, the highest branch at the top to “lead” the tree upwards. There is usually a central stem that grows in the middle of the tree. Select the most vertically oriented stem and prune away the surrounding ones so that they do not compete for sunlight with the central stem.

2. Choose the lowest permanent branch. This scaffold branch will be determined by how you plan to use the tree and where the tree is located. For instance, if you plan on putting a sidewalk beneath the tree, you want the lowest permanent scaffold branch to be higher up so that you have room to comfortably walk beneath it. This branch must be strong and stably joined to the tree trunk, and must have a diameter of at most half of the trunk’s diameter where it is attached to the trunk.

3. Select the other permanent scaffold branches that are firmly and strongly attached to the trunk and remove competing branches. This will help the tree’s form and will help maintain a stable structure. The permanent scaffold branches should be about 12 inches apart from each other. Weak branches need to be removed or pruned in such a way to direct them.

4. As the tree ages, the scaffold branches will thicken and the space between them will decrease, so you may need to remove some of these branches.

Overall, prune just enough to direct the tree’s growth and correct structural weakness.

Additional Help

If you would like more tips for training young trees, or if you want professional help, just use TalkLocal. We will connect you with up to three high quality, local landscapers in your area, in just minutes!

Does Interferential Electrotherapy Work?

Saturday, March 2nd, 2013

Does Interferential Electrotherapy Work? - Chiropractors

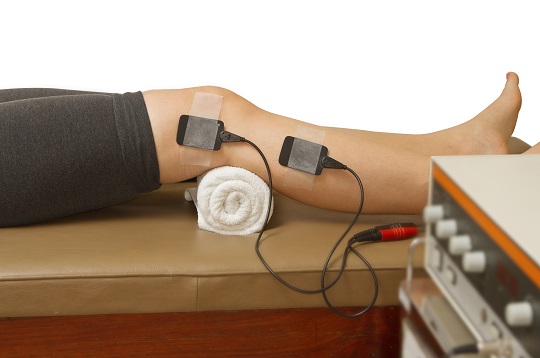
Interferential electrotherapy uses medium frequency electrical currents to stimulate the nerves and muscles and help relieve pain. Interferential therapy uses two medium frequency currents whose paths cross and interfere with one another. The interference of the currents imitates low frequency nerve stimulation that penetrates deeply into the nerves and muscles and helps heal soft tissue. So, does Interferential Electrotherapy work? Keep reading to find out!

Benefits of Interferential Electrotherapy

Pain Reduction

This form of therapy helps reduce pain in muscles and joints, as it relaxes the muscle while promoting endorphin release.

Decreases Swelling

Nerve swelling, which causes back pains, is significantly reduced with interferential electrotherapy. The electrical current releases the tension that strains nerves and causes them to painfully swell.

Muscle Toning

It can help support the strength in your muscles and maintain muscle tone until your health improves.

Movements Restoration

If your back feels stiff or too painful to function normally, interferential electrotherapy helps you regain your normal movements over time. As your muscles and nerves heal, you will eventually be pain-free.

Promotes Release of Endorphins

Interferential Electrotherapy stimulates your body’s natural painkillers, endorphins, to combat back pain.

Speeds up Healing

Muscle strains or ligament sprains heal quickly through Interferential Electrotherapy. It promotes muscle and soft tissue healing.

Control Muscle Spasms

The electric current will relax your muscle, allowing you to have more control over it.

Additional Help

This type of electrotherapy has no known side effects and is drug-free. Pregnant women should not use interferential electrotherapy. You should consult your doctor to see if interferential electrotherapy is appropriate for you. TalkLocal can help connect you with local, high quality chiropractors in seconds! Simply enter in your information and provide a brief description of what you need, when you need it, and where you are located. We will find the chiropractors for you!

Seva Call Rocks- So We Put The Tech Cocktail DC Mixer on the Rocks!

Saturday, March 2nd, 2013

Seva Call Rocks- So We Put The Tech Cocktail DC Mixer on the Rocks! - Seva Call

At the Tech Cocktail DC Mixer and Startup Showcase last week, they announced that our innovative, ambitious, tech-savvy peers voted Seva Call as DC’s Hottest Presenting Startup! We had to tether Seva Man’s over-inflated orange head to a table leg to keep it from floating all the way to the ceiling. Any guy comfortable in an orange leotard is bound to have a huge ego; and, the one thing Seva Man loves more than getting attention, (he stuck out like a tangerine in a barrel of suits, ties, Apples, and Blackberries), is earning recognition for Seva Call’s revolutionary service solution.

Check out this interview with our co-founder Manpreet Singh. Regarding why Seva Call was selected over the other amazing and inventive ideas featured at the event, according to Tech Cocktail’s Zach Davis:

“Finding local service providers -like dentists, computer repairmen, and movers- should be easy.   Unfortunately, in many parts of the country it isn’t.  Good news- for those who live in one of the sixteen cities covered by Seva Call (including DC, Boston, and Philadelphia), it is”.

Of course, DC is full of great minds doing incredible things, regardless of whether they presented that night. Like…

Relay Foods, a grocery delivery service that makes buying fresh produce straight from the farm super convenient! Now serving DC, Maryland, and Virginia.

SnobSwap, a high-fashion online clothing exchange that eradicates your retail addiction by helping you swap, sell, and nab gently loved designer finds!

AppTalia, a producer of children’s educational apps where children can learn a language, a life lesson, or  age appropriate science-based answers to questions like “where does rain come from”!

Encore,  a creative new way for organizations to connect with on-the-ground events and the people living them in real time!

And so much more!

We’re super humbled- well, Seva Man isn’t but the rest of us are- to have been recognized for a service based on an idea as simple as it is revolutionary: that you shouldn’t have to scour the whole world wide web to find and talk to local professionals.

How to Completely Erase a Hard Drive

Saturday, March 2nd, 2013

How to Completely Erase a Hard Drive - Computer Repair

Completely erasing a hard-drive is not easy, and there are various misconceptions. We have some tips to let you know how to completely erase a hard drive.

Deleting Files Manually

Completely erasing a hard drive is not easy, as manually deleting files does not do the trick. In deleting files,  the files are not actually erased. Their locations have become invisible to the computer’s operating system. With a simple file retrieval program, deleted files can be recovered and your sensitive information that you deleted can be used for malicious purposes.

Formatting 

Formatting can make it more difficult to recover files than deleting them from your recycle bin, but not it does not completely erase your files. Formatting erases all bookkeeping information and checks for good and bad sector (ones that are scratched). Then it creates local internal address tables for the location of information. Formatting does not delete files, so a computer specialist or downloadable programs can recover most or all the files. Again, this can leave your data open to misuse. The only way to completely erase a hard drive is by wiping it.

Wiping

Wiping or disk scrubbing is the only way to completely erase a hard drive. Wiping overwrites your hard-drive with data several times until it is impossible to recover any files that existed before the wipe. Most programs overwrite the data with numbers, and do some formatting. There is free software available that can let you perform a disk wipe. One of most popular is Darik’s Boot and Nuke. Here is how you can use Darik’s Boot and Nuke to wipe your system.

1.     Download Darik’s Boot and Nuke from the website.

2.     Boot Darik’s Boot and Nuke CD ROM before your hard drive boots. Darik’s Boot and Nuke Screen will appear.

3.     Type in autonuke to automatically disk wipe or enter to start a  customizable disk wipe. ​

4.     For customizable disk wipe press “M” for methods, these will show you various methods the program can use to wipe your hard drive, and select one.

5.     Select a drive for wiping and press the spacebar to start the wipe

Additional Help

In using disk wiping, a hard drive can be completely erased and can be now to safely donated, sold, etc. For professional help in completely erasing your hard drive, just use Seva Call. We will connect you with up to three high quality computer technicians in your area, in just minutes.

Detecting Roof Leaks

Friday, March 1st, 2013

Detecting Roof Leaks - Roofers

A roof leak is something that can be extremely dangerous and costly if not dealt with properly. If you suspect your roof may be leaking, you should waste no time looking for its source. Water damage can be very costly, as it ruins roofs, ceilings, walls, and even your floors. Detecting roof leaks early enough allows you to ensure all this is prevented and your repair costs are minimal.

Detecting Roof Leaks

Detecting certain roof leaks can be pretty simple. When there are water stains on walls and ceilings of your home, you can be certain you have sprouted a leak. However, most leaks aren’t as obvious as these, so there are other places that you will need to check.

Your attic is often the first place to show any water damage. Shingles are placed on roofs to prevent water from reaching the roof, but when a shingle breaks or comes loose, your attic is very susceptible to water damage. Check the attic for puddles of water. If these aren’t present, check the ceilings of the attic to see if your roof is in the process of sprouting a leak. If you do detect any stains, put a nail through it to see if any water falls out from above. Detecting water stains can be difficult at times, so using this nail trick can be helpful in detecting roof leaks. Another thing to keep in mind is that flat roofs are more susceptible to sprouting leaks than sloped roofs.

If you believe you have a leak and are unable to find the source, consider waiting until it is raining and wait in the attic to hear for sounds of leaks. Bring a flashlight and look around for any signs of water damage or water running down a wall or beam. Find the source and call a roofer immediately before the damage gets worse.

Additional Help

If you have detected a roof leak in your home and want to get it fixed before the damage becomes any worse, consider using TalkLocal to find a roofing company for you. TalkLocal is a free service that will connect you with top-quality, reputable roofing professionals in your neighborhood within minutes. Just enter in your specific problem, location and availability, and up to three companies will call YOU directly, saving you the time and stress of finding one yourself.