Archive for 2013


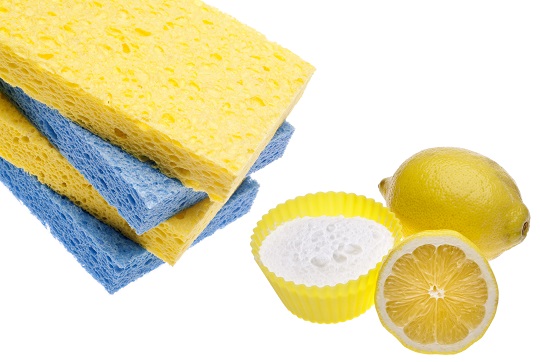
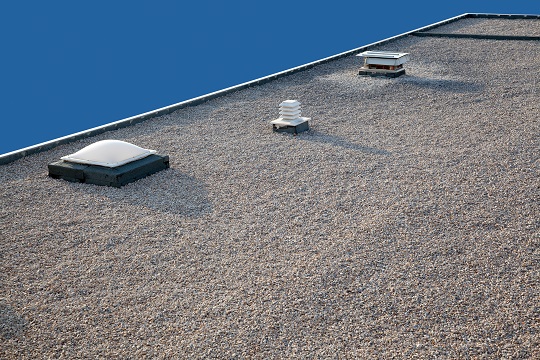
How to Get Rid of Mildew in the House

Friday, March 1st, 2013

How to Get Rid of Mildew in the House - Maid Services

Mildew is a common household problem that results from humid conditions in closed spaces.  Mildew can be potentially harmful and you should try to get rid of it as soon as possible.  A type of fungi, mildew can be thin or thick, black or white, and can grow on a variety of surfaces.  If you find mildew in your home you should take immediate action to get rid of it and put in precautions to prevent future growth of it. This article will explain how to get rid of mildew in the house- from a variety of surfaces.

How to Get Rid of Mildew in the House

The simplest way to get rid of mildew in your house is to create a cleaning solution.

– Mix 1 gallon of water with 1 cup of chlorine bleach.  This combination will effectively remove mildew. You can also use detergent, vinegar, or ammonia if you do not have bleach.

The type of surface the mildew is growing on will determine how you get rid of it.

1. If the mildew is on a wood surface you need to get a soft haired brush.

2. Mix 8- 10 tablespoons of washing soda with a gallon of water and scrub the surface.  Use the soft bristled brush so you don’t leave scratches.

3. Once the mildew is removed rinse with water and dry completely.

Mildew will also grow on ceramic tile.

1. Wash the tiles with a solution of a gallon of water mixed with ½ a cup of ammonia, ½ a cup of white vinegar, and ¼ cup of washing soda.

2. Rinse and scrub thoroughly.  If the mildew stays, lay a paste of baking soda and bleach onto it and let it set.

3. Scrub the paste and mildew away with a toothbrush.

4. If there are stains left behind put pure bleach on the surface for 15-20 minutes and rinse and dry.

In order to prevent mildew from growing in the future you should take certain steps.  Keep the surfaces of your home clean and make sure there is no dampness anywhere.  You should also try to dry the air by getting rid of humidity.  Mildew thrives in wet humid areas so do not let your house become too humid.

Additional Help

If you have more questions about how to get rid of mildew in the house you should try to talk to a professional maid service.  The easiest, fastest way to get in contact with reliable local cleaning businesses is to use TalkLocal. Just tell us what service you’re looking for, and we will connect you with up to three high quality professional maid services in your area.

Fertilize Oak Trees

Friday, March 1st, 2013

Fertilize Oak Trees - Landscapers

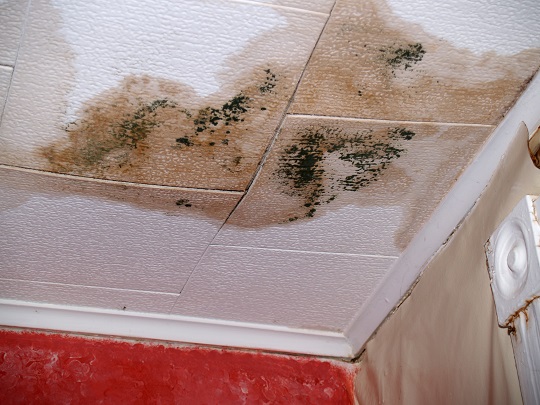
Taking care of your oak tree will ensure its health and longevity. Some fertilizers are good for oak trees, but they can damage the environment. Harsh industrial chemicals found in fertilizers usually contain an herbicide and can distress the surrounding wildlife. When picking a fertilizer, try to purchase one that is as natural as possible—or your tree can fertilize itself! Keep reading to find out how to fertilize oak trees the natural and healthy way.

Using Composting to Fertilize Oak Trees

Compost is defined as decaying organic matter that can be used as fertilizer. It is like nature’s own recycling system. Start a compost heap by your oak tree. Try to grind or cut up the compost into small pieces so that the oak tree can easily absorb the nutrients.  Appropriate compost material includes:

-Leaves

-Twigs

-Some animal manure (cow, poultry, rabbit, horse)

-Fruit rinds

-Lawn clippings

Do not compost:

-Cat and dog manure

-Meat

-Dairy

-Diseased plants

Oak Tree Litter

The oak tree litter- including leaves, branches, and oak wood chips- is great for the tree. Leave the oak tree’s natural mulch underneath the tree. Oak leaf litter naturally falls to the ground and provides nutrients for the tree while supporting many microorganisms. The microorganisms in the oak litter protect the tree from fungal diseases. Simply weed around your oak tree regularly to ensure that weeds do not take away water and nutrients from the tree. Overall, oak tree litter is great, helping the tree absorb water and nutrients while protecting the tree from diseases.

Further Assistance

Natural fertilizers are the best choice for oak trees. Have a professional landscaper examine your oak tree to determine what is best. TalkLocal can help connect you with quality landscapers in your local area. We will connect you with up to three professionals in just minutes.

Mac OSX Lion: Issues

Friday, March 1st, 2013

Mac OSX Lion: Issues - Computer Repair

The Mac OSX Lion stated its purpose as simplifying the existing operating system and combining it with an iOS experience. What Lion was supposed to deliver was the simple and easy to use interface that the iPhone and iPad held and bring it to the desktop experience. This doesn’t seem like such a bad thing when put like that but what Lion has brought to the users is a new version of an operating system where even though the user experience has been simplified in some areas and oddly complicated it in other areas, the fact remains that there are performance issues with Lion.

Mac OSX Lion: Issues

– The memory management is broken. Lion has slowed down the user experience for many users because it is very memory-greedy.

– Lion has been known to randomly crash, resulting in a totally black screen and the recovery time is very high.

– The Wi-Fi connection seems to be dropping at fairly regular intervals, and the only way to get it back up is turning the adapter off and on again.

– Running Lion causes a significant drop in the MacBook Pro battery life

– There have been known to be video crashes which cause freezes.

– Rosetta is Apple’s Power PC emulation software and Lion does not support it.

– There are several other such apps which work fine on Snow Leopard but appear to be broken when run on Lion.

– The auto-light feature is known not to work very accurately.

Additional Help

These are just some of the issues that users have been facing as they use Lion. Even though it has attempted to simplify the user experience many users seem to think that they’d still rather stick with Snow Leopard. If you are having these or similar issues with Mac OSX Lion, use TalkLocal. We can connect you with up to the computer repair technicians in your area in just minutes.

End Domestic Partnership

Friday, March 1st, 2013

End Domestic Partnership - Lawyers - Family

If you are in a legal domestic partnership and wish to end the relationship, you will have to do it officially and legally. Depending on the state that you live in, you may just have to file a notice of termination with the Secretary of State or you may have to go through an official divorce or annulment process, as if you were married.

Divorce or Annulment to End Domestic Partnership

If you live in a state that requires you the go through the divorce or annulment process in order to end your domestic partnership, you will have to determine whether you qualify for an annulment, or if you will have to get a divorce. You qualify for an annulment if one party was married or in another legal domestic partnership prior to the creation of your legal domestic partnership. Additionally, if your legal domestic partnership was created under the circumstances of force, fraud, or physical/mental incapacity, you qualify for an annulment.

Differences Between Ending a Domestic Partnership and Ending a Marriage

The laws about the ending of a domestic partnership differ from state to state, but they are typically less strict than laws related to the ending of a marriage. Most states have laws that require married people to live apart for a certain amount of time before they can file for divorce, but this type of law is atypical for ending a domestic partnership. Monetary laws such as tax consequences and spousal (partner) support are usually less harsh or nonexistent.

How to End Domestic Partnership

When a domestic partnership ends, the court will typically divide the assets of the couple. If there are children, custody will be granted to one party and the other will be required to pay child support or alimony. After the domestic partnership has been ended, you may marry or enter into a domestic partnership with someone else.

Providing Notice About the Ending of a Domestic Partnership

After your domestic partnership has ended, you are required by law to provide notice to your employer or anyone else that is providing you with benefits due to your domestic partnership. If you do not notify your provider(s) of benefits within a reasonable amount of time, they may sue you.

Legal Representation to End Domestic Partnership

You are not required to hire a lawyer in order to end your domestic partnership. However, laws about the ending of a domestic partnership are relatively new and vary from state to state, so it is recommended that you consult with a lawyer that understands the laws regarding the ending of a domestic partnership in your state. With the help of TalkLocal, you can receive up to three phone calls in minutes from up to three high quality, local divorce attorneys that will be available when you need them.

Painting Around Chair Rail

Thursday, February 28th, 2013

Painting Around Chair Rail - Painters

Chair rails, also known as dado rails, are decorative wooden fixtures that go around walls. Although they add class to any home, their main purpose is to protect walls against couches or chairs. Keep reading to learn more about painting around a chair rail.

These fixtures make painting a wall a little more difficult, but nothing you can’t handle. If you choose to paint the chair rail a different color than the wall, we recommend getting all of the appropriate supplies for a clean paint job:

– Paint

-A brush or a roller

– 2” painter’s masking tape. The tape is your most important tool because it will protect the chair rail from paint drips or brush strokes.

Painting Around Chair Rail

1. Place the tape along the edge of the chair rail where the wall meets the rail, but do not press the tape on the rail. It should create a tent above the chair rail to act as an umbrella against paint drips. Do this above the chair rail and below it. Get the tape as close as possible to where the rail and the wall meet so that you have a clean straight edge.

2. Paint your wall as usual around the chair rail. Your chair rail is safe from unwanted paint.

Chair rails give you the opportunity to paint your wall two different colors. Check out this article about two-tone paint colors to figure out what combination matches best. You can add some edge to your living room by mixing and matching colors.

You may also paint the wall one solid color. Usually if this is the case, the chair rail is painted glossy white, which contrasts nicely with a matte wall.

Additional Help

If you are looking for a professional painter to help you get the job done, use TalkLocal to connect you with up to three local painters. Simply enter our website and enter your availability, location and a brief description of what you need. You will be speaking with painting professionals in just minutes!

Best Safe Cleaning Products

Thursday, February 28th, 2013

Best Safe Cleaning Products - Maid Services

Most commercial cleaning products are made from man-made chemicals. The chemicals contained in these products are usually bad for the environment and your health. Products such as chemical drain cleaners can also damage the plumbing in your house. There are homemade and commercial cleaning products that are safer and even better than their chemical counterparts. Here is brief list of the best safe cleaning products for your home.

Lemons, Oranges, and Vinegar

Who would have thought that those orange and lemon peelings could be useful. The oil from these fruit peelings contains citrus. Citrus is great degreaser and all-purpose cleaner. Vinegar also contains acidic qualities that makes it a great degreaser and antibacterial. The citrus and vinegar mixture is a great homemade all-purpose cleaner, and it can leave a refreshing smell as well.

Corn Starch

Corn starch is very absorbent. Its absorbency is excellent for removing grease, extra polish, or other oils from tables and stoves. Corn starch mixed with soap and water is a good homemade window cleaner due to the starch being non-abrasive. Corn starch can even be used as a carpet fresher.

Baking Soda and Borax

Baking Soda and borax can be used for many types of cleaning. These cheap products are good for deodorizing, cleaning bathrooms and kitchens, laundry detergent, toilet bowl cleaner, and bug poison. However, borax can be dangerous to animals.

Commercial

There are many commercial products available to buy that use some of the same ingredients as homemade cleaners. Most of these commercial products are plant-based, biodegradable, eco-friendly, and have not been animal tested.  Seventh Generation is the best safe and eco-friendly product available. Dr. Bronner’s Sal Suds, Method, Soy Clean, and Earth Friendly Products are other great, safe, commercial cleaning products.

Additional Help

Maid services also offer safe cleaning products when cleaning your home. To find a maid service use TalkLocal. We will connect you with up to three maid services in your area in just minutes!

Flat Roof Water Drainage

Thursday, February 28th, 2013

Flat Roof Water Drainage - Roofers

A flat roof has its advantages – they offer more stability and surface than do slanted roofs – but flat roofs also have their disadvantages. Flat roofs are prone to water damage and need to be re-coated and sealed every couple of years to prevent leaks. If not properly maintained, a flat roof can sprout leaks and replacement costs may be much higher than maintenance costs. Any issues you may have with flat roof water drainage can be handled if you maintain the roof properly and utilize the right tools.

Flat Roof Water Drainage

There are a few flat roof water drainage solutions that can help you avoid structural damage and leaks to your roof.

Scupper drains are an inexpensive drainage solution designed to provide efficient drainage by guiding water that would otherwise gather, towards the water downspout. Although this is a fairly simple system, a licensed plumber should install the scupper drains to ensure its effectiveness.

– An internal drain is an alternative option if you’re not looking to spend too much money. These can be combined with an existing home drain system to ensure your flat roof is drained of water effectively. An internal drain is installed into areas where water pooling occurs and works by installing metal inserts to guide the water away from the roof. This system is slightly more complex than using scupper drains, but they are roughly as effective as each other. To be safe, a licensed plumber should install this drainage solution.

There are some other less commonly used methods as well like using drainage helperstrue-sloped isulation, and step-sloped insulation. These methods generally require more steps and more money, so it is best to stick with the first two methods.

Flat roof water drainage can be successfully done if you utilize the right methods. Having a system of drains and gutters allows the water to flow to the ground while preventing damage to your roof. If you have a flat roof and want to avoid paying expensive replacement fees, get your roof inspected today.

Additional Help

Using these flat roof drainage solutions, you can avoid running into problems that can cause damage to your roof. If you are looking for a professional plumber to install these drains, or you would like a consultation from a roofer, consider using TalkLocal. TalkLocal is a free service that will connect you with top-quality, reputable roofing contractors in your neighborhood within minutes. Just enter in your specific problem, location and availability, and up to three companies will call YOU directly, saving you the time and stress of finding one yourself.

How to Thin Shrubs

Thursday, February 28th, 2013

How to Thin Shrubs - Landscapers

Overgrown shrubs are not a pleasant sight and can invite unwanted pests near your home. Don’t be stuck in a jungle! Learn how to thin shrubs yourself.

Why is Pruning Necessary?

Thinning out your shrubs is the least noticeable form of pruning. It is like cutting your hair because it involves selectively removing branches, flower buds, roots, or seed pods so that the shrub can grow healthily, as well as look aesthetically pleasing. Dead or diseased branches can invite insects, so pruning is important for keeping away nasty bugs.

Thinning also serves to thin out branches in order to allow more sunlight to reach the entire shrub and other plants around it. Long branches overcrowd shrubs and prevent a healthy amount of sunlight from shining through. Plants underneath shrubs are also blocked from receiving sunlight, and run the risk of decaying and attracting insects. It is important to thin out shrubs not only for the sake of the shrub, but for all of the plants surrounding it.

How to Thin Shrubs Out

The best time to thin out shrubs is in the Fall, Winter or early Spring. If you have shrubs that have flowers, do not thin out the shrub in early spring because you will end up trimming the flower buds.

Before you begin, think about the natural shape of the shrub. Remove branches that do not fit in the regular form of the shrub. Thin out the shrub so that it maintains its form; do not try to turn it into another shape.

Use a saw, loppers or pruning sheers to thin out shrubs.  You never want to trim out more than 1/3 of the shrub at a time. If you have an overgrown shrub, bring it down only 1/3 and then another 1/3 the next time you thin it out so as to not severely damage or shock the shrub. You may trim down to wherever the overgrown branch meets another branch.

When removing a diseased branch, stump, or root, use a sterilized blade. Disinfect the blade or cutting tool between each cut or chop. Use beach or wood alcohol. If you are not cautious, the blade could spread the disease.

Additional Help

If you need major shrub trimming, TalkLocal can help connect you with the best local landscapers in your area. You will be connected with up to three landscaping contractors who will be available to help you when you need them.

Seva Call is Riled up for Raleigh, North Carolina Launch

Thursday, February 28th, 2013

Seva Call is Riled up for Raleigh, North Carolina Launch - Seva Call

Seva Man can hardly contain himself. Today he opened up his Seva Call services to Raleigh, North Carolina- the city that Entrepreneur Magazine calls the “#1 Entrepreneurial Hotspot” and Time Magazine listed as one of the top 15 cities for job growth. Seva Call is riled up for Raleigh! With its rapidly evolving business community, there are many new or unknown businesses waiting to be discovered by the customers who need their help and they, like Gotham City, certainly deserve a hero.

No matter how urgent the need or how well hidden the available professionals who can fill it, Seva Call will connect Raleigh residents to local businesses in minutes. Leave the research projects to NC State. The Yellow Book can collect dust or function as a door stop. All you have to do is enter your confidential contact information, give your location, and describe your needs and availability. We’ll search and deploy up to three applicable businesses that match your needs. Just answer the phone when we connect you with your friendly neighborhood godsend!

“The service we provide is invaluable to a community like Raleigh”, says Seva Call President and founder Manpreet Singh, “Raleigh’s new and growing businesses need a direct connection to their customer base and customers need help to keep up with new service providers- especially when the well-known ones are unavailable or inadequate.”

Seva Call is ready to take your city from entrepreneurial hot spot to solar flare…supernova even! Free to use and free to register, customers and businesses have got to visit www.talklocal.com to reap the benefits of doing business the hassle-free way.

Data Backup and Restore in Windows XP

Thursday, February 28th, 2013

Data Backup and Restore in Windows XP - Computer Repair

Every computer user’s worst fear is losing valuable data to a crashed computer. Don’t let these files disappear forever! Using the built-in backup program in Windows XP will save your files and allow you to restore your computer after an emergency. Use this guide to data backup and restore in Windows XP so that your files can be restored.

Data Backup and Restore in Windows XP

If you have Windows XP Professional, then the restore program is already installed in the system. For Home Edition users, the backup utility must first be installed. The utility is available on the operating disk acquired when you purchased the system.

1. Insert the disk. When the welcome screen appears, click “Perform additional tasks.”

2. The system will then ask, “What do you want to do?” Click “Browse this CD.”

3. A menu will appear. Click on the “VALUEADD” folder. Inside this folder is the “MSFT” folder. Open this folder.

4. From there, open the “NTBACKUP” folder. This folder contains the backup utility installation packages.

5. Click on the “NTBACKUP” file and let it install.

6. After installation, close out of the window. The backup utility can now be found in “Accessories” > “System Tools.”

Using the Backup Utility

1. Open “Backup or Restore Wizard”.

2. Check “Back up files and settings” and click “Next”.

3. It will ask, “What do you want to back up?” Read over the options and choose the one that works best for you and click “Next.”

4. The program will then prompt you for the A disk. Click “No.”

5. Next it will ask you to “Choose a place to save your backup.” Click “Browse” to view possible storage spaces. For the most secure backup it is recommended that you save your information to an external drive. After the drive is connected to the computer, click on its icon to save your data.

6. Name your backup file and click “Next.”

7. The prompt will now say, “Completing the Backup or Restore Wizard.” Click “Finish” to compress the file and save it to the external drive. Make sure you back up your computer regularly to ensure no important data is lost.

Restoring Backed Up Data

1. Open the Backup program located under “System Tools” in the “Accessories” folder

2. ​Click “Next” on the Welcome Page and check “Restore files and settings.”

3. The prompt will now ask, “What to Restore.” If your missing files are located on an external drive, then click “Browse” which will open a new prompt. Click “Browse” again to find your external drive.

4. Click on the appropriate back up set and click “OK.”

5. After a few seconds, the file should appear in the “Backup Identification Label” window

6. Double click on the backup set to view its files

7. The backup set will appear under “Items to Restore.” By double clicking on the file you can view all of its backed up items. Check the files you would like to restore and click “Next.”

8. The files will automatically restore to their original locations unless this is changed under the “Advanced” settings. Click “Next.”

9. It will then ask if you would like to “Leave existing files.” It is recommended that you leave this checked. Click “Next” and then “Next” again to keep the default options selected. Click “Finish.” After the program runs your files should be restored!

Additional Help

If you ever have a complete computer disaster, feel free to use TalkLocal to find a high quality computer professional to help you in minutes!