Archive for 2013


How to Tell if your Dog is Sick

Monday, February 25th, 2013

How to Tell if your Dog is Sick - Veterinarians

Knowing how to tell if your dog is sick is a very complicated task. On the one hand, you do not want to jump to a rash conclusion, but on the other, you do not want to overlook a serious medical condition. Keep reading as we provide you with some tips and pointers on figuring out how to tell if your dog is sick. The common symptoms of a sick dog are listed below:

Vomiting and Diarrhea

Vomiting is a key indication that your dog is sick. Note the color of the vomit as well as the consistency. Is it mostly liquid or are there chunks of food present? If you observe that your dog has diarrhea once, it may not be serious. However, if the diarrhea persists, your dog may be dealing with a bigger issue. Excess diarrhea or vomiting will result in the loss of electrolytes, so if you notice blood in either one, call your veterinarian immediately. Also, have you noticed a change in appetite? If your dog is eating less than normal or skipping meals, it could have a small stomach ache. If there is a drastic decrease in appetite, consult your vet.

Behavioral Changes

If your dog is sleeping more than normal or becoming extremely lazy, there may be an underlying issue. If your dog is typically healthy and energetic, then suddenly inactive, seek help for your dog. If your dog is acting lazier than normal, try taking it on routine walks. Also, if your dog is stumbling or walking differently, consult a veterinarian immediately because your dog may have a serious health issue.

Other Signs

You should do regular examinations of the following points:

– the dog’s odor

– the color of its eyes and mouth

– the color of urine

These are all good indicators of health issues and should be checked frequently. Contact your vet if you observe something abnormal.

Additional Help

Does your dog need help now? Still not sure what to do with your dog? Check out TalkLocal. You will be connected directly to local, high quality veterinarians who can help you at the time that is most convenient for you. TalkLocal’s service can find you reliable professionals in minutes!


How to Treat Fire Ant Bites

Monday, February 25th, 2013

How to Treat Fire Ant Bites - Pest Control

Fire ants can be aggravated easily and their bites can be painfully annoying. Just walking with 15 feet of a fire ant hill can aggravate them enough to swarm and attack you. Just in case you run into trouble with fire ants, here are some methods on how to treat fire ant bites.

How to Treat Fire Ant Bites

1. First of all, get rid of the fire ants, because once they start biting you, they won’t stop, even if they’re out of venom. Neither will their friends. So brush them off, and get away from the area that the attack occurred. Slapping them will only aggravate them more.

2. Wash the bites with cold water or put ice directly on the bites to numb the pain.

3. Next, cover the bites with alcohol to neutralize the poison. You can dab alcohol onto the bites with a washcloth or a cotton swab. You can also take aspirin instead of alcohol to dull the effects of the poison.

4. Put an anti-itch cream on the bites and make sure you don’t scratch them. Scratching them can re-aggravate them, and make them scar.

5. If the ice and cold water didn’t numb the pain enough, try soaking the bites in salt water. This will kill the pain for hours.

6. Use Neosporin or any antibiotic to keep the bites from getting infected. Fire ant bites are notorious for developing into infections.

Additional Help

If your fire ant bites become infected or will not subside with these methods, see a doctor immediately. If you have a fire ant infestation, talk to a pest control professional. TalkLocal will put you in contact with up to three pest control professionals in your area who will be able to rid your home of fire ants.

USB Flash Drive Not Working

Monday, February 25th, 2013

USB Flash Drive Not Working - Computer Repair

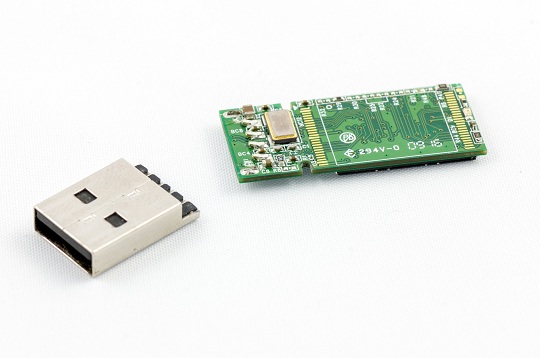
USB flash drives are an amazingly easy way to  transfer data from your computer and take it with you.  But when your flash drive begins to malfunction it can be incredibly annoying and unhelpful.  You should consider a couple of different things that could be the cause of your USB flash drive not working.

Possible Problems

1)     It’s at the end of it’s life expectancy.

2)     The files are corrupt.

3)     The files were not copied properly.

4)     Driver problems.

5)     General compatibility issues.

Solutions

Generally a USB flash drive has a life expectancy of approximately ten years. Now, this should not be an issue since flash drives are typically not used for that long. However, if the drive has reached its life expectancy, you simply need to replace the drive and you’ll be good to go.

A file that has become corrupt will not be allowed to open on your computer.  You need to delete the file, save it again, and then open it.  Your computer will not allow the file to open in order to save itself, the USB, and other files from becoming corrupt.  It may seem like your USB has stopped working, but in fact your computer is simply protecting itself.

Your USB will also not work correctly if your files have not been copied properly.  In this case you will read an error, but don’t worry;  simply copy the file onto the flash drive again.  You should remember to properly remove your flash drive from your computer.  On your desktop’s toolbar, look for an icon called “Safely Remove Hardware from Your Desktop.” Click the icon, click on your device, and click Eject. Your computer will prompt you in a few seconds, when it is safe to remove the drive. Removing the drive improperly will lead to files becoming corrupted or not copied properly.

Many people who upgrade their operating system to Windows 7 frequently complain that they are having issues with using their USB flash drives.  This is a problem because the upgrade can cause a driver problem.  There is a missing driver or the driver needed to read the USB is currently being used.  You should go to the Microsoft website to get this issue resolved.

Continuing Problems

If the USB continues to malfunction it may be a more serious issue with the computer or the device.  You should try to talk to a professional so that you can get the best help possible.  The easiest, fastest way to get in contact with reliable local IT service technicians is to use TalkLocal. We will connect you with up to three reliable technicians in your area, so you can get the help you need.

How to Change Your Name Legally

Monday, February 25th, 2013

How to Change Your Name Legally - Lawyers - Family

Your name is what defines you.  It gives you your identity.  People can have normal names, unique names, even strange names.  Whatever the name your parents gave you when you were born, you may at some point need to change it.  Whether you are getting married, you hate your name, or you just want to add something to it, you need to do so legally in order for the change to be recognized by your state. You can learn how to change your name legally below.

How to Change Your Name Legally

The first thing you need to do when changing your name is make sure you are 100% sure that you like what you are changing it to.  Practice signing it. Have people call you by it. Determine that you know for sure that this is what you want.  Furthermore you should make sure that you are not taking a name that is already taken by a trademark or someone else.

You should now call your local government office, and find out what documents you need in order to change your name officially.  Generally, they will include a petition, an order granting the change, a legal backer, a notice of the petition to the public, and an affidavit of consent. You may also need to submit an affidavit of service of notification to the authorities if you are an alien, ex-convict, or an attorney.

Once you fill out these forms you should get them notarized by an authorized notary, or signed by a court clerk.  Retain copies of every form you want to submit just to make sure you can refer back to them.  Turn the forms in to the appropriate place.  Now all you have to do is wait for approval.

Once you receive approval you will need to address the public.  Put the name change in the newspaper or in a public place like a bulletin at the courthouse according to the requirements of your local govt.  Return the filled out affidavit to the court clerk and wait for the order granting the name change that should also have your new ID.  You will need to go to the DMV, social security administration, and bureau of records in the state you where born to get a new license, social security card, and birth certificate.

Additional Help

If you have more questions about changing your name legally, you should try to talk to an attorney.  The easiest fastest way to get in contact with reliable local law businesses is to use TalkLocal. Just put in your problem and availability and let us do all the work.  Within minutes you will be connected with up to three legal professionals who will be able to help you.

Seva Call Launch Enjoys Some Charlottean Hospitality

Monday, February 25th, 2013

Seva Call Launch Enjoys Some Charlottean Hospitality - Seva Call

Seva Call gets a hearty serving of southern hospitality today as we set up shop in Charlotte, North Carolina. Charlotteans may  speak slowly, but we’re sure they’ll love our high speed market impact; theirs is home to The NASCAR Hall of Fame, after all. Aside from being fast, there’s much more to love about Seva Call’s presence in the most populous city in the Tar Heel State. Seva Call, a service that finds local professionals  for needed services like plumbers, roofers, and computer technicians; and connects you in real time. We pride ourselves on being a brand of hospitality by:

So Charlotte, if you’re tired of reaching for your reading glasses and scanning the Yellow Book or the classifieds every time you need some help, then use Seva Call and save yourself a whole heap of trouble. In fact, we’ll be going to www.talklocal.com to find a gym for when we’re in town- the pork barbecue is delicious and addictive!

How to Prepare Wall for Paint

Monday, February 25th, 2013

How to Prepare Wall for Paint - Painters

Painting your room is the best way to achieve a new look for your home’s interior.  Repainting can give your home a completely different feel.  Turn your drab, old, white walls into ones that pop with color.  You can choose from pomegranate red or sea foam green.  A little bit of color change can truly brighten up your home.  You will need to prepare your wall before you begin to paint.

How to Prepare Wall for Paint

The first thing you need to do when painting is remove everything from the room so it does not get covered in paint.  This includes all of the furniture, rugs, and decorations.  If you cannot take some stuff out you should cover it with a plastic sheet.  This will protect the furniture from any damage.  Lay down sheeting on the floor as well to make sure that paint does not get all over your floor or carpeting.

Dusting and cleaning the walls is the next step to preparing for painting.  You should use a damp towel and be sure to reach all corners of the wall. You should also vacuum the wall as strange as this must seem.  If you are wiping down walls in a bathroom or kitchen in order to paint make sure you use a gallon of water with three teaspoons of laundry detergent.

You also need to scrape anything that is remaining on the wall.  There may be cracked or flaking paint, or glue from the wallpaper.  Use sandpaper to get rid of any stubborn imperfections.

Tape up anything attached to the wall that you want to keep paint off of such as sconces and electrical outlets, or along the ceiling.

When you start painting make sure you use a cutting in method with your paint brush that is angled.  Also apply paint around the trim and corners with smaller brushes so that the paint does not get in places it shouldn’t be.  Another good tip when painting is to first paint a large W pattern and then go up and down through it to get an even spread of paint.

Additional Help

If you would like some professional assistance for painting your house, just come to TalkLocal.  We will connect you with up to three painting contractors in your area, who will be available to help you when you need them.

How to Rekey a Lock

Sunday, February 24th, 2013

How to Rekey a Lock - Locksmiths

Not knowing if you are the only one who has the key to your new home can be a very scary feeling. Unfortunately, finding a locksmith who can rekey your lock can be expensive. You can rekey the lock yourself while saving a lot of money. Below are the simple steps on how to rekey a lock.

1. First buy a rekey kit. You can find the appropriate kit according to the brand of your lock. This should be available for $8-$10 online or in a hardware store. The kit should come with two new keys, pins, and a wire tool; you will also need a screwdriver.

2. Once you have the kit, remove the doorknob. Insert the wire tool into the knob hole, and press to knob clip to remove the lock from the door.

3. Push the lock cylinder out of the knob and use the ring tool to free the cylinder.

4. Use the old key to turn the lock 90 degrees in one direction.  Take the key out and use the plug follower tool to push the plug through. While doing this make sure you don’t lose the springs.

5. Now, put the new key in the lock. Use tweezers to insert new pins into the plug.

6. Reassemble the doorknob, and test the new key to make sure that it works properly in your rekeyed lock.

Additional Help

If you don’t feel up to disassembling and reassembling a lock, and would prefer to have professional help, just use TalkLocal! We will connect you with up to three professional locksmiths in your area who will be available to help you when you need them!


How to Take Care of Perennials

Sunday, February 24th, 2013

How to Take Care of Perennials - Landscapers

Perennials are plants that will grow and last for a few to several years, most commonly sprouting during the spring or summer, receding in the colder seasons, and then re-growing once it becomes warm again. These are great plants to have in your garden, and although they don’t require replanting each season, they do need to be taken care of to ensure survival throughout the year. Here are some critical tips on how to take care of perennials.

1. Water your perennials only when they need it. A good rule of thumb is to look at the soil. If the top 4 or 5 inches of soil is dried up, then it is time to water. Usually, this can translate to once per week in the summer months, once every two weeks in the spring and fall seasons, and once every month during the winter.

2. A process called “deadheading” is another important step in caring for perennials. Deadheading is the task of cutting off the top-layered, dead flower heads of your perennial plants. This removes any unhealthy parts, and lets new flower heads grow in. Doing so before letting seeds to form allows for new flower heads to keep blooming. This can be done several times throughout the blooming season, as well as before winter sets in.

3. After deadheading, remove all dead foliage and flower heads and dispose of them for a quick clean-up of the garden. This will allow the newly growing flowers to flourish.

4. In preparation for winter, it is also important to provide a new layer of compost and mulch before the cold season arrives. A few inches of compost will provide key nutrients for the soil to soak up, preparing it for fresh growth in the spring. Above the compost, also lay down between 5-8 inches of mulch; this can include bark chips or straw.

Additional Help

If you would like some professional assistance in maintaining a healthy perennial garden, try locating a landscaper near you with TalkLocal. TalkLocal is a free service that will connect you with top-quality, reputable landscapers in your neighborhood, within minutes. Simply enter in your problem, location and availability and TalkLocal will contact several companies, who will then call YOU directly, ready to help.

Benefits of Impact Resistant Windows

Sunday, February 24th, 2013

Benefits of Impact Resistant Windows - Window Replacement

The are many benefits of impact resistant windows. They help provide and enforce safety and security to your home or business. Whether you are worried about robbery, baseballs smashing through the windows, or storm-related damages, impact resistant windows can help protect your home.

Burglary: With impact resistant windows, you may be able to hinder break-ins onto your property. The extra resistance may be just what is needed to keeping your home impenetrable.

Storms: Storms such as hurricanes can be disastrous. Thankfully, impact resistant windows have been proven to provide protection. Sturdy windows will protect against strong winds and objects hurled against them. This may save you a lot of money when it comes to keeping rainwater out of your home and causing damage. Extreme flooding could result if rainwater were to enter; but the impact resistant windows would protect against most storms.

UV Rays: Impact resistant windows can also come equipped with UV ray protection! Why does this matter? UV light causes damage to many objects in your home, especially furniture with colorful fabrics.

Heating and Cooling: Impact resistant windows will help cut heating and cooling costs. If you have windows that insulate your building or room, you are investing in cutting costs on future heating and cooling bills. The money you pay upfront now for impact resistant windows may be well worth it in the end.

Impact resistant windows are made from acrylic-like plastics that are structurally stronger than glass. These windows are anchored to the sides of the building, so when the window receives heavy impact, the force is transferred away from the window itself, reducing the chance of cracking or breaking.

Additional Help

There are many different grades of impact resistant windows. The type of window that is optimal for your specific case may vary depending on a number of factors. If you would like to gather more information about impact resistant windows and get help with the installation, check out TalkLocal. You will be connected directly to up to 3 local, high-quality service professionals who can help you at the time that is most convenient for your schedule. Check it out!

How to Delete iPod Backups on Computer

Sunday, February 24th, 2013

How to Delete iPod Backups on Computer - Computer Repair

Your iPod is the device where you can store and listen to every song you love, watch every video you want, and store any information you need.  Having an iPod is such an easy and convenient thing.  This device is a great way to improve your life.  But what happens when you can’t update your iPod because there is an old backup already stored on your computer?  You should attempt to rectify this problem immediately so that you can use your iPod to its maximum potential.

How to Delete iPod Backups on Computer

1. First, you’ll want to open iTunes. You need to change your device’s preferences so that you don’t have to keep deleting backups in the future.

2. In iTunes, go to Preferences, and click the Devices tab at the top of the window.

3. You should see a list of all of the different iPods synced to your computer.

4. Select the one you wish to delete, and click Delete Backups.

5. After this has been completed, you can go back to the main iTunes window, click on your device and choose the Back Up Now option.  Everything should work from here.

Delete iPod Backups from Different Operating Systems

There are a couple different ways to delete iPod backups if you have different operating systems.

Mac OS


1. When using a Mac you can go into your iTunes library and then application support.

2. From there go into Mobilesync and click on Backup.

3. If you see any old backups saved from previous occasions you can delete them.

Windows XP

1. You will have to go into your Documents, then Settings.

2. Enter your username and enter application data.

3. Click on Apple > Mobilesync > Backup, and delete any old backups in a similar fashion.

Windows Vista or Windows 7

1. Go to Users, enter your username and click on Appdata.

2. Go to Roaming, click on Apple, and enter Mobilesync’s backup.  Delete from here.

If none of the above solutions work for you, you may want to delete iTunes and completely and re-install it.  This will cause you to lose your music but at least you will be able to start backing up your iPod.

Additional Help

If you are having problems deleting old backups of your iPod from your computer, you should seek professional help.  Use TalkLocal to be connected with up to three reliable, local IT service technicians within minutes.