Archive for 2013


How to Treat Bed Bug Bites

Sunday, February 24th, 2013

How to Treat Bed Bug Bites - Pest Control

Bed bugs are a big pest that many people have to deal with.  They are tiny little parasitic bugs that feed on blood.  They usually are found in homes, especially in or near beds.  Usually it is very hard to tell if you have bed bugs unless you get bitten; but if you think you do have them, you should take action immediately. In the meantime, this article will give you some hints on how to detect bed bugs, and how to treat bed bug bites.

What Do Bed Bugs Look Like?

Adult sized bed bugs can be colored from light brown to reddish brown, depending on how much they have fed, with a banded appearance.  They have flat, oval-shaped bodies with front wings and are usually about 4-5 millimeters long.

Do You Have Bed Bugs?

– Examine bites to diagnose them and pay attention to when you got them.

– Check your bed for any signs of them (spots of blood on the sheets/squashed bodies/etc). Look all over, including the seams and underneath the mattress.

– Call an exterminator.

How to Treat Bed Bug Bites

– Apply an over-the-counter anti-itch cream with hydrocortisone or cortisone steroid in it.

– Use calamine lotion to treat the rash.

– Apply a topical anesthetic to relieve pain or itching.

– Take oral allergy tablets.

– You can also take ibuprofen, advil, or tylenonl.

–  If your symptoms do not clear up you should seek professional help.

Additional Help

If you have more questions about your bed bug problem, it may be time to speak with a professional pest control technician.  The easiest, fastest way to get in contact with reliable local doctors is to use TalkLocal. Just tell us what issue you are having, and we will connect you with up to three pest control professionals in your area in just minutes.

Why is Temperature Gauge High?

Saturday, February 23rd, 2013

Why is Temperature Gauge High? - Auto Repair

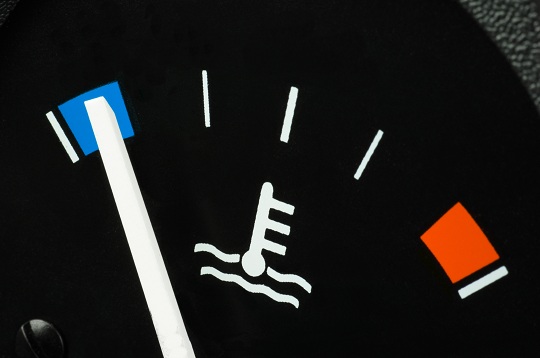
The temperature gauge measures the temperature of your car’s engine coolant. It is important to take note of this gauge because it will tell you if your engine is overheating. Typically, the gauge should read “cold” when you start the car and get warmer as you drive.

Why is Temperature Gauge High?

1. You have lost coolant. This may mean a small leak or gradual evaporation. Check your engine to make sure you have enough coolant and add more if necessary.

2. The thermostat is broken. A malfunctioning thermostat may not be letting coolant into the engine.

3. There is a water pump or a water pump gasket failure. This failure may cause the engine to overheat.

If you notice the temperature gauge is reading higher than average, and it is not particularly hot outside, you should have your car’s cooling system checked out as soon as possible. If the temperature warning light comes on or the gauge reads higher than average while driving, you should safely pull over to the side of the road. It is likely that your car’s engine is overheating and further driving may cause severe engine damage.

You can turn on your car’s heater to cool down the engine as you pull over. If it is hot outside, you can also roll down the windows and direct the air vents away from passengers. This is a quick way to cool down the engine as you look for a place to pull over to check the engine’s coolant and water levels. You should never open a hot radiator. If needed, you can add water through the overflow tank.

Additional Help

It is important to seek professional help to repair a malfunctioning cooling system. TalkLocal is the place to go for reliable local auto-repair professionals! Just tell us what the issue is, and we will connect you with up to three professionals in just minutes.

Modify Child Support Agreement

Saturday, February 23rd, 2013

Modify Child Support Agreement - Lawyers - Family

Child support is the obligation of one parent to periodically pay the other to cover, in part, some of financial burden of raising the child.  Child support is decided based on each individual parent’s income, usually around the time of divorce.  However, sometimes parents can get new jobs, their incomes can change, and they may need to modify their child support agreement.

Modify Child Support Agreement

1. Determine the reason why you want to change your child support.  Have you or the other parent had a change in income? Has it been a while since you established your guidelines?  Whatever the reason, make sure you know exactly why you want to reestablish the agreement.

2. Contact the person who handled your child support case and research the acceptable reasons for changing a child support agreement in your area.  Different states have different qualifications.

3. You will need proof that your income or your ex’s income has changed. You can visit the Alllaw website to use their child support calculators and determine your guidelines.  The process to changing your child support agreement can be long and tiring, but it is necessary.

4. You will need to go to your provincial court. If both parties agree to the change, you will need to go to the court where the original agreement was made.

5. Collect and fill out the appropriate forms– there are different types of child support documents. Usually the change can be made without a hearing. The process is a little more complicated if your child support order came from the Supreme Court. If you have an agreement, and both parties concur, you can change it by simply writing a new document.  If you have a court order you will need to go to court to get it changed.

Additional Help

If you have more questions about changing your child support agreement you should try to talk to a professional.  The easiest, fastest way to get in contact with reliable local law offices is to use TalkLocal. We will connect you with up to three lawyers in your area who will be able to help you out.

Transferable Diseases between Dogs and Humans

Saturday, February 23rd, 2013

Transferable Diseases between Dogs and Humans - Veterinarians

Some diseases that your dog can carry may be transferable to you if you come in contact with your dog’s urine, feces, saliva, or blood. To avoid dangerous diseases, be careful when cleaning up after your dog and wash your hands thoroughly. Also, take your dog a veterinarian regularly to receive all the recommended vaccinations. Below is a list of transferable diseases between dogs and humans.

Rabies

Rabies can be transferred from a dog to a human when a rabid dog bites a human. In both dogs and humans, rabies will result in the brain deteriorating. Signs that your dog has rabies include: acting more scared or angry, struggling with balance and coordination, and failing to function on a basic level. Signs of rabies in humans include: tiredness, headaches, a lack of appetite, and later, hallucinations, seizures, and paralysis. If not treated, rabies will eventually result in death in both dogs and humans.

Leptospirosis

If you come into contact with a leptospirosis-infected dog’s drinking water or urine, the disease may be transferable to you. Leptospirosis results in internal organs deteriorating in both dogs and humans.

Rocky Mountain Spotted Fever

Your dog may acquire Rocky Mountain spotted fever from being bitten by a tick. The disease may be transferred to you if you come in contact with your dog’s bodily fluids. Symptoms of Rocky Mountain spotted fever in both dogs and humans include: tiredness, lack of appetite, depression, fever, joint pain, and diarrhea. Additionally, humans may see red spots on the palms, wrists, and the bottom of the feet. Luckily, it can be treated with antibiotics.

Parasites

Roundworms, hookworms, and ringworms hatch their eggs in the intestines of both dogs and humans and will result in internal organ damage, as well as malnutrition. If your dog has any of these parasites, they can be transferred to you via contact with your dog’s saliva or feces.

Additional Help

If you believe your dog may have any of the above diseases, it is imperative that you take your dog to a veterinarian as soon as possible. If you do not have a veterinarian, you can use TalkLocal to receive up to three phones calls within minutes from high quality veterinarians in your area, who are available to help you when you need them.

Folder Sync Windows 7 over Network

Saturday, February 23rd, 2013

Folder Sync Windows 7 over Network - Computer Repair

Are you tired of having to email documents to colleagues or classmates in order share them?  Are you annoyed with having to sign into GoogleDocs to access shared files? Does it bother you that your colleagues or classmates can edit and save over the files you share through your Dropbox? Windows 7 has the solution built right in! Here are some tips for file sharing with ease.

Windows 7 Homegroups

Create or Join Homegroups and Workgroups:  Homegroups and Workgroups are groups of computers that share folders.  Using Windows 7, you can easily define which of your folders are shared and which are private and then customize how you share files with people on your network.  For more information on which one of these groups will best suit your need, check out the Microsoft Help Page that explains the differences between the different types of file sharing groups.

Folder Sync Windows 7 over Network

When you are inside of a folder in Windows 7, there is a dropdown menu across the top that says “Share with.” Clicking the dropdown will give you a series of options of who you share the folder with. These options are:

Another more basic option for file sharing is the Public Folder option.  Files you place in this folder are instantly available to other people in the network.  You have ​public folders located inside every one of your document libraries.  Although these are easy and quick, be aware that you cannot edit permissions within your public folders.  Everything you put in these folders is available to everyone in your network.

Additional Help

If you are have having difficulties getting your files to sync with other computers in your network, or if you are having other computer-related problems, visit TalkLocal. We will connect you with up to three local computer technicians who will be able to help you when you need it.

How to Install Underground Sprinkler

Saturday, February 23rd, 2013

How to Install Underground Sprinkler - Landscapers

Are you tired of watering your lawn? A great time saving solution is to install an underground sprinkler system. Newer systems are easy to assemble, and you can save some money by installing the system yourself. Once the sprinkler system is in place, you can program it to water your lawn on a regular schedule.

How to Install Underground Sprinkler System

1. Measure your water pressure. You can purchase a simple pressure gauge at most home stores. Measure how much water your system delivers per minute. To do this, let the water to flow freely into a measure-marked bucket for one minute.

2. Send for a system layout and materials list. Mark down the water pressure information and send it to your chosen sprinkler manufacturer. You should also include a scaled drawing of your property. In return you should receive a system layout and materials list, including items not sold by the manufacturer. Contact the manufacturer for instructions on how to order the materials.

3. Run the pipes. You can dig the entire system by hand, but it may be easier to rent a pipe-pulling machine. If you dig the entire system by hand, dig the main runs first and then the branch lines. Dig at least 6 in. deep to make enough room for the pipes. If you’ve rented a pipe-puller make sure to read the directions thoroughly. Start by attaching the pipe to the machine’s blade. With the pipe connected, move the machine forward and lower the piping into the ground.

4. Assemble the zone-valve sets. You should do this above ground before cementing them to the underground piping. Install a plastic inline drain fitting on the downstream side of each valve. Connect the cable wires, making sure one of each pair of valve lead wires connect to a common white cable wire that will service all valves. Connect a color wire to each remaining lead. Once all the valves are connected and wired, install valve boxes and backfill.

5. Install a drain fitting at the lowest point of the feed line. Using Teflon tape, thread a brass drain head into the threaded end of a PVC tee and install the tee downwards at a 45-degree angle. Dig a small hole underneath the drain and fill it with gravel and sand.

6. Tunnel under obstacles, such as walkways. You can do this using a homemade sluice pipe. Attach a pointed sluice nozzle to one end of PVC pipe. Connect a hose to the other end of the pipe, and dig shallow trenches on either side of the obstacle. With the hose connected, turn on the water and push the pipe back and forth under the sidewalk to create the hole.

7. Slide a crimp ring onto each pipe and insert the barb fitting. This will connect the pipes in the system. Slide the rings in place and crimp them tightly with pliers.

8. Install the sprinkler heads. The simplest method to do this is to install a 90-degree ell pipe at the sprinkler head and thread a riser into the top of the head. If you need seasonal drainage, install a 90-degree drain head. Install it upright with the threads at the top. Tighten the sprinkler heads.

9. Fill in the hole. Backfill the hole 4 inches at a time and tamp the soil with a rubber mallet. Top off the soil with sod.

Finishing Touches

–          Follow local plumbing codes to tap into your household water system

–          Once you’ve tapped into the water system, install a full-flow ball valve

–          Install a brass nipple and the reduced-backflow preventer

–          Connect the backflow preventer to the pipe installed through the rim joist

–          Install the control panel

Additional Help

Installing your own sprinkler system is not easy, but it can save you money. If you would like to skip the work and hire a professional, TalkLocal is here to help! Just enter your problem, location, and availability into our system and TalkLocal will connect you with up to three landscaping contractors in minutes!

What are Low-E Glass Windows?

Friday, February 22nd, 2013

What are Low-E Glass Windows? - Window Replacement

What are low-e glass windows and how can they be helpful to me? Good questions! Low-e glass windows are gems that help reduce money and save energy. They have unique properties that allow them to behave in ways that typical windows can’t. Not only do they keep out heat rays during the summer, but they also have another unique property that you can learn more about below!

What Makes Low-E Glass Windows Unique?

Low-e glass windows stand for low-emittance windows. The reason that they have this name is because they contain layers of material that keeps out radiant heat. Low-e glasses keep out heat flow and reduce the U-factor with the extremely small, undetectable layers of metal and/or metallic oxides contained in the glass.

How are Low-E Glass Windows Beneficial?

Low-e glass allows visible light to travel through it! So although you are keeping out the rays that make your home too hot, you are still allowing the room to become filled with the natural, outdoor light. By using low-e glass windows, you are also reducing your energy bill, by preventing your house from being overheated by the sun’s radiation beaming through your window.

Are There Different Types of Low-E Glass?

Yes, there are different types of low-e glass. Your climate and house may require different solar gains depending on where you live and how many heat rays you would like to enter into your home. Different solar gains will have different impacts on your house’s temperature. For example, high solar gain glazings will be great for the winter when you would like to keep your home warm. However during the summer, low solar gain windows are optimal.

Additional Help

Not sure which window type would be best to help you save the most amount of money? Already know which windows you want, but need help with the installation? Check out TalkLocal! You will be directed within minutes to up to 3 local, high-quality professionals who can assist you at the time that is most convenient for your schedule. Try it out!

What is a Kryptonite Lock?

Friday, February 22nd, 2013

What is a Kryptonite Lock? - Locksmiths

Are you looking for a reliable lock to protect your bicycle? Try looking into Kryptonite locks. You may be wondering, “what is a kryptonite lock?” Well, it has nothing to do with the Man of Steel, but it is useful for locking your bicycle!

What is a Kryptonite Lock?

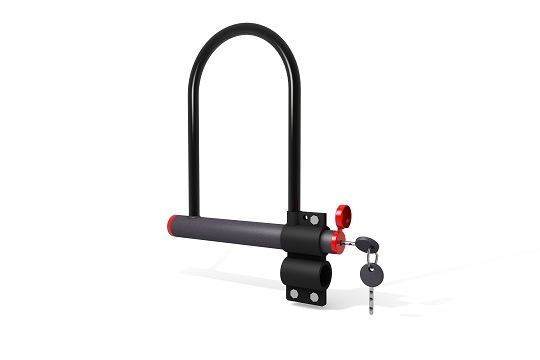
Kryptonite locks, generically known as a U-shaped bicycle lock, were originally manufactured by Ingersoll Rand in the 1970s as a bicycle lock. Previously, people used big bulky chains to tether their bicycles, but even those were easily broken by thieves who used regular bolt cutters. Kryptonite locks are U-shaped steel bars with a crossbar that cuts across the top of the “U” that can be removed to unlock the bicycle. These have proven to be extremely hard to remove using standard and widely available tools and unless the would-be thief had a disk grinder or a cutting torch, your bike is perfectly safe. They come in a variety of sizes and security levels, so you can find one that fits you and your bicycle’s needs. Getting a lock that’s too large for your bike can result in a less secure bike, so select the smallest model that fits your bike.

The downside to using a Kryptonite lock is that they’re quite heavy; a side effect of being very secure. Many people who ride their bike to work simply leave the lock on the bike rack at work to avoid having to carry it back and forth.  Also, don’t buy a secondhand model that was made before 2004! Models that were made before 2004 had a tubular pin tumbler lock, which could be easily opened with an inexpensive BIC pen. Make sure that the Kryptonite lock you own was made after 2004, during which Kryptonite started using an I-shaft on their locks.

Additional Help

If you lost the key to your Kryptonite lock, then you should contact Kryptonite to ask for a replacement key. In the case that your lock is still attached to your bicycle and/or the bike rack, find a local locksmith immediately with TalkLocal to get your Kryptonite lock off!

Restoring Lost Favorites in Outlook 2010

Friday, February 22nd, 2013

lost favorites outlook

“Favorites” are shortcuts in Outlook 2010 that refer to your most used folders, such as your Inbox and Sent items. These are likely the folders that you use the most often in Outlook 2010. Losing your favorites can be a slight inconvenience, if not a big hassle. But don’t fret; restoring lost favorites in Outlook 2010 is a quick and easy process.

Restoring Lost Favorites in Outlook 2010

The “Favorites” tab in Outlook 2010 is found in the Outlook Navigation Pane. If your favorites are disappearing and reappearing between Outlook sessions, try resetting the Navigation panel by using the following command line:

1. Click Start > Run

2. Enter the following text. Be sure to include the quotation marks. If necessary, you can just copy the code from here and paste it directly into the text box.

“C:\Program Files\Microsoft Office\Office14\outlook.exe”/resestnavpane

3. This command will reset the Navigation pane and restore your missing favorites.

Additional Help

If the above command does not work, or if you seem to be losing your Outlook 2010 favorites a little too often, it may be time to speak with a professional. Use TalkLocal to help you find one! We will connect you with up to three computer repair technicians in your area who will be able to help you when you need it most!

How to Connect Computer to TV

Friday, February 22nd, 2013

How to Connect Computer to TV - Computer Repair

You would think that your TV and computer are two separate electronic devices that wouldn’t work in tandem.  Technology is constantly evolving and changing, and today, it is possible to connect the two and use your TV as a large computer monitor.  Connecting a computer to a TV is a process but it is completely doable.

Why Connect Computer to TV? There are several benefits to connecting your computer to a TV!

– Your TV provides a larger screen for you to work from.

– Your TV may also have better resolution than your computer.

– You can use an Internet connection to stream and watch movies or TV shows online, on your TV screen.

– Connecting your computer to your TV enables you to use a TV sound system.

How to Connect Computer to TV

1) Turn off your computer and examine the back of it to find the cable plugged into the output of the video card.

2) There should be a DVI or VGA port located directly next to it.

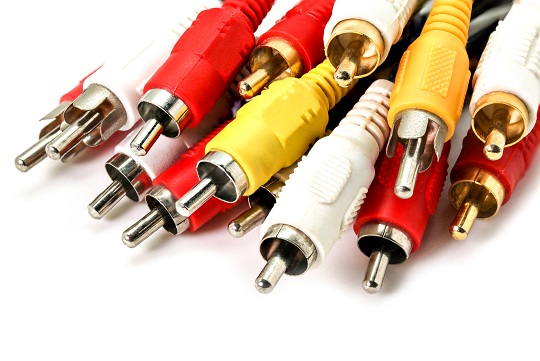
3) Use a composite/S video/component video cord to connect the TV to the computer. These are only video cords so you will need to get another cable for audio. However, if you use a VGA cord you will get both video and audio.

4) Turn the computer on.

5) Configure your display settings to show on the TV properly by going to Start -> Control Panel -> Display -> Settings -> Advanced.

8) Make sure the aspect ratio is set properly (to make sure the computer screen image will fit completely in the TV screen) and adjust the resolution.

You should now be able to use your TV as a monitor for your computer.

Additional Help

If you have more questions about how to connect your computer to your TV, you should try to talk to a professional so that you can get the best help possible.  The easiest, fastest way to get in contact with reliable, local technology companies is to use TalkLocal. We will connect you with up to three technicians in your are who will be available to help you when you need them.