Archive for 2013


What is a Dental Crown?

Sunday, February 3rd, 2013

What is a Dental Crown? - Dentists

Knowing what a dental crown is and how it relates to your tooth can be extremely helpful when going through the experience of visiting the dentist. Dental crowns are known to be quite expensive, and who would want to pay for something that is expensive and seemingly unnecessary? We’re here to help you understand the purpose of dental crowns.

What is a Dental Crown?

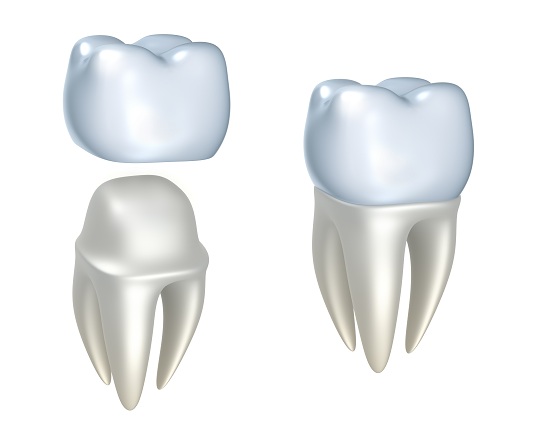
Dental crowns are most often associated with root canals. In addition, they are used if you have a crack in your tooth. In both cases, the crown plays the role of covering either part of the tooth or the entire tooth. This protects the tooth from further damage and keeps the tooth from splitting or breaking off. Crowns make the tooth look better and provide the tooth with a more appropriate shape and size. Crowns are also used with dental implants and bridges. Crowns truly play a large role and are used to cover many different types of dental work.

What are dental crowns made from?

There are 4 types of dental crowns: all-resin, all-metal, porcelain-fused-to-metal, and all-ceramic.

1. An all-resin crown is used when the tooth needs to be artificially rebuilt using a resin composite material. Often this will be done before a ceramic or porcelain crown is placed over the resin build-up.

2. All-metal crowns give off the typical silver appearance. All-metal crowns are typically used in the upper, back portion of the mouth where they are the least visible.

3. Porcelain-fused-to-metal (PFM) dental crowns have metal shells, on top of which is fused a white porcelain crown. This gives the crown more strength while leaving the appearance of a white tooth. PFM crowns are most common for frontal dental crowns.

4. All-ceramic crowns match the color of your surrounding teeth. The ceramic allows them to be colored accordingly. Usually ceramic crowns will be used in areas that are visible when you open your mouth to talk or eat. Having a tooth-colored crown will allow you to have a crown without the appearance of a crown in your mouth.

Additional Help

Would you like to learn more about crowns or schedule an appointment with a dentist? If so, check out TalkLocal! You will be connected directly to local, high quality dentists right in your area that are willing to help you at the time that is most convenient for your schedule. Check it out!

Does Carpet Cleaning Fade Carpet Color?

Sunday, February 3rd, 2013

Does Carpet Cleaning Fade Carpet Color? - Carpet Cleaners

When it comes to carpet cleaning the square footage of any home can seem like a pretty daunting task. In fact, most people don’t even recognize the cushy layer of fabric that covers their floors until there is a major blemish. Even if you have the most amazing maid services, many times a proper cleaning falls by the wayside. With all the stains that could possibly dirty up your carpet, it begs the question: does carpet cleaning fade carpet color?

Does Carpet Cleaning Fade Carpet Color?

The answer to that question is an astonishing yes. With the broad range of chemicals available to clean carpets it is not uncommon for a carpet to be subject to color loss. And the common culprit for color fading is often times bleaching agents. Many household items contain these chemicals. Perfumes, aerosol sprays, laundry detergents even pesticides. If there is a chance for it can get on the bottom of your shoe then it’s probably in your carpet too.

A possible alternative to using damaging chemicals is to find natural, or home-made, carpet cleaners. These can often decrease damage to your carpet’s fibers, extending the life of your carpet.

Additional Help

If you’re feeling overwhelmed by keeping your carpet clean, don’t worry, you are not alone. Millions of people all over the world are simply uneducated on the proper way to prevent color fading and carpet cleaning. Luckily, TalkLocal has got you covered. With TalkLocal will connect you with up to three high quality carpet cleaning professionals in your area, who will be available to help you when you need them.

Kitchen Exhaust Fan Repair

Sunday, February 3rd, 2013

Kitchen Exhaust Fan Repair - Appliances Repair

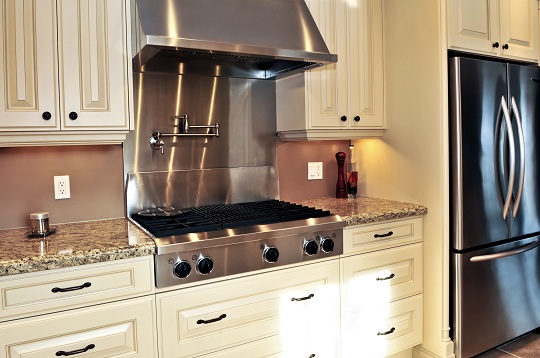
The most important appliance in your kitchen is not the blender, or the toaster, or the sink.  In fact the thing you probably need the most is your exhaust fan over the stove.  This device sucks all of the smoke and smells out of the air in the kitchen so that your entire house does not get clogged up.  Cooking on the stove can create various aromas and odors as well as steam and smoke.  If your exhaust fan is broken you should take measures to repair it as soon as possible.

Kitchen Exhaust Fan Repair

Here are some tips on kitchen exhaust fan repair.

1. Make sure that the device is receiving power. Use a voltmeter to make sure that whatever outlet the exhaust is plugged into is live.  This step needs to be done before you turn the power off.  The problem may not be with the actual fan but with the electrical wiring in your home.

2. Now that you have determined if the problem is with the actual fan you can turn the electricity in your kitchen/home off.  Do not touch the fan if it is still on.  Once you switch the power off, unscrew the vents to access the fan. Once you can see the fan, disengage it and remove it completely from the exhaust.

3. With regular use, the exhaust fan will gather dust/grease so it will stop working as efficiently.  You should inspect each part and clean the entire fan.  The gears can get clogged and prevent the blades from spinning. Removing all of the dirt obstructing the fan will help it work more efficiently. If the filter for the kitchen exhaust fan is dirty as well, you can run it through the dishwasher to clean it.

4. If cleaning the exhaust fan does not fix the problem you should check the wires in the appliance.  Visually inspect the connections and use a voltmeter to figure out where the kink is.  The vibrations from the fan can loosen the connections and screws, and the heat from cooking can melt the wiring.  Oil up all of the moving parts in the fan after doing this and reconnect the fan to the exhaust unit.  This should take care of your exhaust fan problem.

Additional Help

If you have more questions about kitchen exhaust fan repair you should try to talk to a professional so that you can get the best help possible.  The easiest, fastest way to get in contact with reliable local appliance service companies is to use TalkLocal. Just put in your problem and availability and let them do all the work.  Within minutes you will be connected to someone who should be able to help you out

Dell Laptop Overheating and Shutting Down

Sunday, February 3rd, 2013

Dell Laptop Overheating and Shutting Down - Computer Repair

Dell Laptop Overheating and Shutting Down?

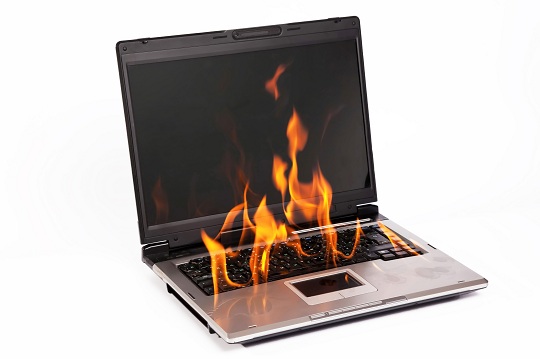
Overheating is a very common problem for laptop owners.  When too much heat builds up inside your computer or the computer’s battery it will often shut itself down in order to avoid permanent damage.  This can be very frustrating, especially if it is happening regularly.  Luckily, there are some simple steps that you can take in order to fix overheating problems.

Clean Out Your Laptop’s Fan and Vents

You might have noticed that your computer’s fan was spinning very fast and making a lot of noise as your laptop got hotter.  This is the sound of the fan working as hard as it can to cool down the computer. Most of the time, overheating in a laptop is caused by a blockage of the airflow in the vents of its cooling fan.  When these vents get clogged, hot air is unable to escape and your fan is unable to keep the laptop from overheating.  The most common cause of clogged vents is dust, hair, or fluff that gets sucked in and builds up around the exhaust vents.  In order to fix the problem, this dust buildup must be removed.  The easiest way to do this is to buy a can of compressed air and spray all the holes and vents in your laptop, particularly where the fan is located.  If you are unable to get everything cleared you may need to open up your laptop’s case in order to get the vents completely clean.  Once the dust is gone your laptop’s overheating problems should be cured.

Use a Cooling Pad

If your laptop is dust free but still overheating, you may want to consider purchasing a cooling pad. These are flat metal stands that have built in cooling systems to keep your computer from getting too hot.  There are some great deals on cooling pads at Newegg.  Another possible cause of laptop overheating is using the laptop on an uneven surface that might be physically blocking the airflow of the vents.  This is especially common when using laptops right on your lap or on a bed.  Having a cooling pad will fix this issue, or if you don’t want to invest in one you can try simply using your laptop on a flat, even surface that allows for unrestricted venting.

Additional Help

Are you still having issues with your Dell laptop overheating and shutting down?  If your laptop is still overheating and shutting itself down, there may be a malfunction with the actual hardware.  It might be time to call in professional help.  You can use TalkLocal to get in contact with a reliable local computer technician within minutes.  Just enter a description of your problem, availability and location and TalkLocal will connect you directly to someone who can help.

How to Dispose of Toxic Chemicals

Saturday, February 2nd, 2013

How to Dispose of Toxic Chemicals - Garbage Removal

It’s time for that in-depth home cleaning, and you are ready to get rid of any old cleaners and chemicals that have been sitting around. Unfortunately, many household chemicals, such as paint removers, weed killers, and oven cleaners, are toxic and contain liquids like ammonia and bleach, which can be harmful to those who come in contact with them or the environment. Before dumping them down the drain, pouring them on your lawn or flushing them down the toilet, read through the following disposal suggestions so that you will know how to dispose of toxic chemicals safely.

How to Dispose of Toxic Chemicals

1) Read container labels. All toxic chemicals will come with labels which provide instructions on how to dispose of the leftover or unused liquid.

2) Waste centers. Many communities and cities have permanent locations for residents to drop off toxic waste. Check with your community to find out more about the location and hours.

3) Collection days. Many cities and towns host annual or semi-annual collection days specifically intended for toxic chemical collection. Depending on your community, the toxic materials might be picked up from outside your home or they might need to be dropped off at a designated collection center. Contact your community for more information.

4) Business collection locations. While your city’s waste center may accept toxic chemicals, some businesses nearby might also accept them for recycling. Businesses dealing with automobiles, construction, painting, etc. are most likely to collect these types of chemicals, since they will know how to dispose of them.

5) Toxic chemical exchange locations. Oftentimes what you may be looking to dispose of, someone else can safely use. Find out if your city offers a location for chemical exchanging, where leftover materials can be dropped off and picked up for reuse.

6) Toxic chemical pickup. If you cannot find a way to recycle or dispose of chemicals through community programs, contact a garbage removal company or an environmental agency near you to find out more about the services they offer. Many offer curbside pick-up of toxic chemicals at little or no cost to you.

Need to find a way to remove your toxic chemicals? Use TalkLocal to get in touch with local garbage removal companies. We will connect you with up to three professionals in your area who will available to help you when you need them.

Chiropractic Treatment for Degenerative Disc Disease

Saturday, February 2nd, 2013

Chiropractic Treatment for Degenerative Disc Disease - Chiropractors

Degenerative disc disease refers to the common condition in which the discs in a person’s spine (usually in the neck or lower back) break down, causing pain. If you have degenerative disc disease, you know how much it can hurt and how badly it can affect your quality of life. Fortunately, for those of you looking for a more “hands-on” treatment for degenerative disc disease, chiropractic treatment is available. While each chiropractic treatment will be tailored specifically to your situation, there are several standard treatment options.

Diagnosis

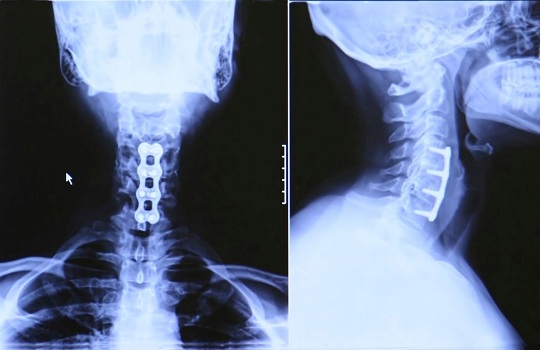
The chiropractor will first check to see whether or not you actually have degenerative disc disease by taking your medical history, asking you to do some basic exercises, and looking at your posture when you walk. The chiropractor may also ask you to an x-ray or get an MRI taken to make sure the diagnosis is correct.

Treatment Plans

After diagnosis, the chiropractor will then craft a treatment plan to specifically target the symptoms of degenerative disc disease. Chiropractic treatment for degenerative disc disease typically entails three different types of therapy: spinal manipulation, manual therapy, and anti-inflammation techniques.

Spinal manipulation uses gentle force to help restore flexibility to the spine and to alleviate pain. Your chiropractor will identify the areas of stiffness in your spine and your large joints and will use a gentle thrusting movement to restore movement and flexibility. You may be asked to lie on a table to “distract” or stretch your spine out so that the chiropractor can flex the affected area.

Manual therapy mainly uses physical exercises to relieve tension from the back muscles so that the spine has greater freedom of movement. Trigger point therapy puts direct pressure on the tight and painful muscles, while therapeutic massage can melt away the tension locked up in your back muscles. Your chiropractor may also want to you to do manual joint and resistance exercises.

If you have a more severe form of inflammation in your spine, the chiropractor may advise you to undergo ultrasound or electrical stimulation therapy. Ultrasound can be used to reduce the frequency of muscle spasms and enhance circulation along your spine while electrical stimulation therapy uses a low current to reduce inflammation along your spine.

Additional Help

If you think you could benefit from any of the treatments listed above, you should immediately contact a chiropractor. The sooner you address your symptoms and get chiropractic treatment for your degenerative disc disease, the more likely you can recover your quality of life. TalkLocal can help you make that search incredibly fast, connecting you with a high quality local chiropractor in just minutes!

Move Out Cleaning Tips

Saturday, February 2nd, 2013

Move Out Cleaning Tips - Maid Services

Moving out can be a stressful process. Packing your things, finding a new place, cleaning up, making sure everything is taken care of; you can go crazy trying to handle it all.  You need to make sure that the place you are leaving is in tip top shape so that the next person to move in has no problems.  You should not only take all your stuff and not leave anything behind but you will also need to clean the place.  A moving out cleaning is a little different from a general upkeep.

Move Out Cleaning Tips

1. One of the things you will need to do when moving out is cancel all of your utilities.  Make sure you call all of the utility companies so that everything is scheduled to be turned off in time.  This includes water, electricity, phone, internet, and cable.  This may not seem like something to be included in a moving out cleaning but it is very important. Otherwise, the next resident will keep receiving bills with your name and information on them.

2. You should also consider the state of your walls, ceilings, and doors.  The surfaces of your place speak volumes to how you have cared for it.  Remove any and all nails, staples, and hanging devices used to decorate.

3. You should also try to patch up the holes and remove any scuff marks so that everything looks pristine.

Now lets get down to the actual physical cleaning.  We’ll start in the kitchen.

4. Clean out the refrigerator by removing all the food.  Now you can wipe down all the surfaces inside and get rid of any crumbs.

5. The oven will also need to be scrubbed down.

6. Empty the cabinets, fix the light fixtures, and wipe down all the counter surfaces.  Do not forget to clean the sink and sweep/mop the floor.

7. Clean the bathrooms in a similar way.  Take care of the sink, tub, toilet, and shower.  Scrub carefully and remove any stains or buildup.

8. Clean the mirrors and vents and  mop the floor.

9. The next room is the bedroom and living room.  Make sure you vacuum the floors and wipe down all the surfaces.

10. You will also need to throw out all of your trash.

11. Do one last inspection before turning in your keys to ensure you have not left any mess behind.

Additional Help

If you have more questions about how to clean when you are moving out you should try to talk to a professional so that you can get the best help possible.  The easiest, fastest way to get in contact with reliable local cleaning businesses is to use TalkLocal. Just put in your problem and availability and let them do all of the work.  Within minutes you will be connected to someone who will be able to help you when you need them.

Upgrade Memory in Tablet

Saturday, February 2nd, 2013

Upgrade Memory in Tablet

How to Upgrade Memory in Tablet

Tablet PCs have been around for a while, but the tablet format has surged into public popularity in the last few years with the launch of the iPad.  There are many different brands and models available, with multiple different hardware options and operating systems.  If you currently own a tablet and are looking to upgrade its memory there are a couple things you must take into consideration.

Types of Tablets

First we must make the distinction between tablets and tablet PCs.  Tablet PCs are more similar to a standard laptop and really only differ from them in their “tablet” form factor.  They typically will run standard operating systems like Windows 7 or Linux.  Tablet PCs come in as much variety as laptops and are usually relatively easy to upgrade.  If you want to add more RAM to your tablet PC there are some great step by step instructions here.  Be sure to purchase the correct type of RAM that will be compatible with your specific system.  Removing and replacing the hard drive in a Tablet PC is sometimes possible depending on the model, but much more difficult.

The newer generations of tablets tend to run on their own unique operating systems.  The big brand names like the iPad2, Kindle Fire, Nook Color, and Samsung Galaxy, and other Android tablets all fall under this second category.  Unfortunately, these types of tablets are not really designed to be upgraded and are limited to memory card slots for adding a bit of extra storage. There is no way to add RAM or switch out the hard drives in these systems (most don’t actually even have hard drives and rely instead on flash memory).  If your particular model does have a slot for a memory card then adding some extra storage space is as simple as buying and inserting the card. Otherwise there is nothing you can do besides buying a new tablet with a larger memory capacity.

Additional Help

If you are not very tech savvy you might want to use TalkLocal to find a computer technician in your area to ask about upgrading the memory in your tablet for you. TalkLocal will connect you with up to three professionals in your area who will be available to help you when you need them.

How to Dethatch Lawns

Saturday, February 2nd, 2013

How to Dethatch Your Lawn - Landscapers

In order to keep your lawn beautiful and healthy, you will sometimes need to dethatch it. As your grass grows, plant material will build up in between the green part and the roots. This is called thatch. Thatch is necessary for your grass to grow because it provides a shield against potential harm for the roots. However, if too much thatch builds up, it can be harmful to your lawn by blocking oxygen, water, and other nutrients from the roots, so you will need to dethatch it. This article will teach you how to dethatch lawns. If you mow your lawn regularly, leaving only small clippings off grass on your lawn, you should only have to detach your lawn once every 2-3 years.

How to Dethatch Lawns

If you suspect your lawn has acquired an excessive build-up of thatch, you can figure out if this is true through the following method.

1. Take a tuft of grass from your lawn.

2. Measure the length of the thatch layer, starting at the end of the roots and finishing at the beginning of the green grass.

3. If the thatch layer is greater than 1/2 inch you will need to dethatch your lawn.

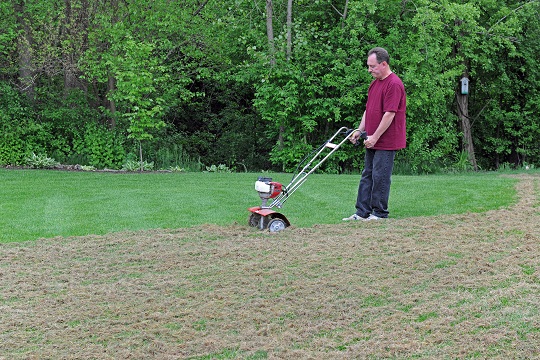
In order to dethatch your lawn, you will need to cut through the thatch layer. You cannot successfully dethatch your lawn with a normal metal rake. You will have to purchase a special thatching rake (usually around $30) or some other thatching equipment in order to detach your lawn.

Do not dethatch your lawn in the spring as this is when the grass is in between dormancy and growth and the grass roots are lowest in energy and nutrients.

Dethatching your lawn can cause stress to your lawn, so you you make sure to fertilize it and water it before your dethatch it in order to prevent damage. Also, give your lawn a break and do not do all of the dethatching in one day. This will also help to prevent damage.

Additional Help

If you do not wish to dethatch your lawn yourself, you can contact a landscaping professional to do it for you. With the help of TalkLocal, you can be on the phone in minutes with up to three high quality landscaping professionals in your area that are available to help you when you need them.

Join Seva Call this Groundhog Day for Some Spring-Time Preparation!

Saturday, February 2nd, 2013

Written by Dallea Caldwell

groundhog day

February is approaching, and all of us at Seva Call are anxiously waiting for the groundhog’s prediction for 2013.  On this Groundhog Day, February 2nd, if the groundhog sees his shadow, there will be 6 more weeks of winter.

Don’t let the groundhog ruin your last month of winter! At the Seva Call office, we’ve been discussing ways we can enjoy the chilly month of February even if the groundhog does see its shadow.

All of us are looking forward for the Super Bowl. Naturally, most of us are rooting for the Ravens, but some of us are cheering for the  49ers as well. Whatever the case is, we’re all looking forward to Super Bowl parties. Have your own Super Bowl party! It’s a great time to sit around with friends and family, eating delicious food, and watching the game and all of the entertaining commercials!

The winter also gives us the excuse to snuggle up in flannel pajamas, watch movies all weekend by a fire, and drink a lot of hot cocoa. Although escaping the cold is relieving, don’t be scared to beat the cold with fun outdoor activities!

Many of us in the office love skiing and snowboarding down the slopes. Look up ski and snowboard deals from the ski-resorts near you. Our local ski-resorts allow college students to ski for $35 on Wednesdays!

As much as we try to pretend the groundhog’s prediction doesn’t matter, there is a little part of all of us that is crossing its fingers for the groundhog to welcome an early spring. If the groundhog answers our wishes, we’re more than ready to put away the blankets and firewood, and break out the shorts and barbeque.

Get a head start on your spring-cleaning early with Seva Call! We can help connect you to your local professional maid services, carpet cleaners, and moving and storage professionals.