Archive for 2013


Replacing a Computer Screen for Laptop

Thursday, January 10th, 2013

Replacing a Computer Screen for Laptop Computer Repair

When your computer screen is not powering up, don’t worry! It might not be your computer itself but a faulty screen.  Before throwing out the entire laptop, you should assess the damage, take action, and try to salvage what you can.  Your problem may just be a faulty screen, and not the computer itself. Here are some directions on replacing a computer screen for your laptop.

Assessing the Problem

Your first step should be to determine whether or not it’s just the screen that has lost power or whether the entire computer has been affected.  For example, you could have dropped your computer and fractured the screen.  Try plugging into an external computer monitor through the VGA port.

If all you see is gibberish, lines, or maybe even nothing at all, the problem is severe. However, if everything pops up on the screen, it’s good news! Your hard drive and computer are intact and you will be able to access all your data. If it is possible, you can replace the screen (details below). If you cannot replace the screen yourself, take your laptop to a professional to find out if he or she will be able to replace the screen. If not, get the professional to extract your data and input it to a new computer.

Replacing the Screen

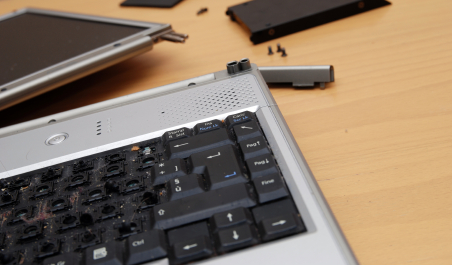
When replacing a computer screen, first turn the computer off, remove the battery and power cord and then unscrew the screen from the computer using a small Phillips screwdriver. These screws hold the screen and bezel together. Once the screws are out, you can gently pull the bezel away from the LCD screen. It should not break because it’s generally pliable. Once the bezel is removed, gently take the screen off.  Look for the part number on the screen and order the same type from the manufacturer. Be sure to keep the screws and bezel in a safe place while you await the replacement screen. Once you receive the new screen, attach it to the computer with the bezel and the screws, replace the battery and power cord, and power up the computer. You should be able to see everything and be able to use your laptop normally.

Continuing Problems

If you feel nervous about removing the screen, or if you cannot locate another monitor to check for screen damage, or if it appears that the computer itself is damaged, you should seek professional help.  Use TalkLocal to be put in contact with a reliable local business. All you have to do is input your problem and availability and within minutes TalkLocal will do the rest: you will be connected with an IT service company almost immediately.

Old City, New Service: Seva Call Launches in Providence

Thursday, January 10th, 2013

Old City, New Service: Seva Call Launches in Providence Seva Call

Seva Man has been all over the East Coast this Fall season, helping people find the right service professional. Now, you can see him in Rhode Island’s capital city, Providence, which is one of the first cities to be established in the United States.

So you’re looking for a plumber, but it’s taking forever to find the right one for you. You’re tired of researching, reading all of the ratings, and calling numerous companies. Cue Seva Call – our service will let you sit back, relax, and have service professionals call you!  It’s simple, by visiting www.talklocal.com, entering your location, availability, a brief description of your problem, and contact information, we’ll be able to connect you with up to three highly rated service professionals. There are hundreds of listings for each service industry in Providence’s local directory, so Seva Call will be able to match you to the best ones who already know what you need help with.

“I”m Seva, Seva Man – here to help you find the right service professional,” says Seva Call’s secret spy agent. In honor of James Bond, Seva Man has been in his 007 mode to see who needs help.

Maintenance Tips for Refrigerators

Thursday, January 10th, 2013

Maintenance Tips for Refrigerators Appliances Repair

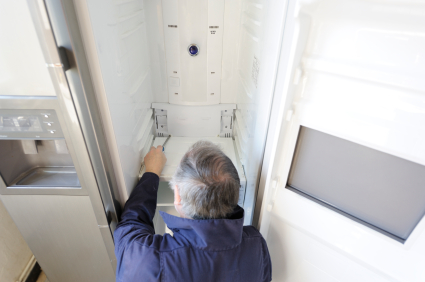
There are few household appliances as important and frequently used as refrigerators.  No matter your living situation, the amount of time you spend at home, or your place in the family, you probably visit this type of machine several times each day. Every machine will eventually put itself out of use, but being conscious of a few things can help prolong the life of your refrigerator.  Here are some maintenance tips for refrigerators to ensure their longevity

Again, every appliance will acquire some problems over time, but don’t get yourself into a refrigerator predicament before absolutely necessary!  By stationing the machine appropriately and performing these routine maintenance tasks, you can more effectively avoid expensive repairs and enjoy the proper functioning of your refrigerator.

However, problems may still prevail after performing routine maintenance tasks. Use TalkLocal to find reputable local handyman in your area that can fix your essential household machine.

Stop Programs from Automatically Starting Up

Tuesday, January 8th, 2013

Stop Programs from Automatically Starting Up Computer Repair

The following are the quick and easy steps for PC and Windows users to stop programs from automatically starting up:

1. Click Start >> Run.

2. When the Run text box opens up, type “msconfig” into the word box.

3. Select the Startup tab. Uncheck all the programs that you do not want to start when your computer boots up. Then, select Apply.

Following these steps will allow your computer to turn on and load faster because all the programs will not attempt to run at once. Beware that some of the programs that are running are necessary for your computer to function and must keep running. Use your own discretion when turning off or deleting programs if you are unsure of their functions.

For Mac users, take the following steps to stop programs from automatically starting up:

1. Open up the System Preferences on your Mac by clicking the Apple icon located in the upper left hand corner of your home screen. There you will find the System Preferences selection.

2. From there, select “Accounts” or “Users and Groups” based on which Mac model you have.

3. If you selected “Users and Groups” button on your Mac, move on to step four. If you have the other model of Mac and selected the “Accounts,” then select the programs you want to stop from automatically starting by checking the boxes next to the specific programs and then hitting the subtraction button.

4. In the center right of the next screen that comes up, select “Login Items.”

5. Select the programs you wish to stop from automatically starting. Then, hit the subtraction button.

Additional Help

If you have carried out the above steps and are still having issues with your computer, feel free to contact a computer specialist. Check out TalkLocal! You will be connected directly to professionals right in your neighborhood who can help you out with your problem at a time that works for you.

How to Replace a Garage Door Window

Tuesday, January 8th, 2013

shutterstock_63340165

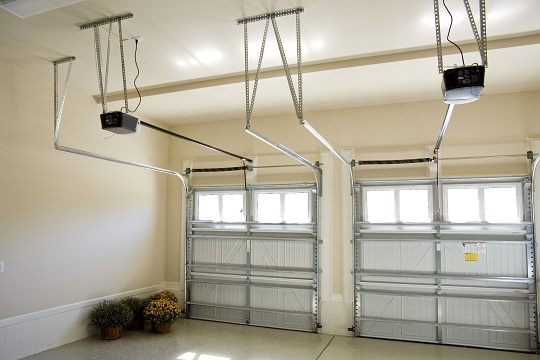
While garage door windows are great decorative additions to your home, they have the potential to break and pose a danger to anyone using the garage. If your garage door windows ever break, you need to replace it as soon as possible since broken glass can drop from above when the garage door is open. Use this guide to learn how to replace a garage door window.

Prepare the area

You’ll first want to disconnect all power from the garage door opener, unplugging it and disconnecting the opener from the power supply.  You’ll also want to remove any loose glass from the window from the top down.

Remove the window frame

Inspect the inside of the window frame for any screws or snap-over retainers that are securing the frame to the door. This will differ based on whether you have an insulated or uninsulated garage door. You’ll need someone to help hold the frame from the outside while you remove the screws/retainers with either a Phillips head or a flathead screwdriver. At this point, you’ll want to take measurements for a replacement window that you can usually order from any glass supplier.  Refer to your garage door manual or manufacturer for the specifics regarding the window material.

Reinstall the window

Clear out any excess glass that was left in the window (you can even remove it from the door if that makes it easier). Replace the frame into the window and place the glass into the window frame and secure it as necessary. If you have snap-over retainers, use a rubber mallet to reinstall the retainers on the frame. Remember to tap the mallet gently so you don’t damage the window or frame again.

While this may seem like a simple task, removing the frame and finding the correct type of glass may be extremely time-consuming, so you may want to consider finding a garage door professional to do the replacement for you. Consider using TalkLocal to make the search process go by in a flash!  You’ll be talking to a local high-quality garage door service company in just minutes!

Are Carpet Cleaning Chemicals Harmful for Pets

Tuesday, January 8th, 2013

Are Carpet Cleaning Chemicals Harmful for Pets Carpet Cleaners

Carpets and rugs take a lot of abuse and inevitably need to be cleaned. This cleaning often involves the use of many different chemicals, so pet owners may be asking themselves, are carpet cleaning chemicals harmful for pets? The answer to this is yes and no.

Some carpet cleaners, and spot removers in particular, can be very dangerous. These products contain chemical solvents that dissolve dirt without soap or water, but give off strong odors as a tradeoff of sorts. These odors may contain chemicals that are not safe for human consumption, and certainly not okay for pets, who are smaller in body size and closer to the ground. During the cleaning process, the chemicals in carpet cleaners and protectors evaporate and may be concentrated in the air. This indoor air pollution is even more likely if the area isn’t well ventilated, or if the weather is hot and humid. This chemical pollution can cause headaches, irritation to the eyes, nose, and lungs, congestion, nausea, sneezing, and other problems. Some of these chemicals have even been reported to cause sever diseases like Kawasaki Disease, although the evidence supporting this is limited.

In short, it’s very possible that carpet-cleaning chemicals are harmful for pets. Many people have reported that their pets have grown ill and died not long after a carpet cleaning – even cleaners claim their products are not pet-safe. If you want to avoid these complications, be certain to avoid carpet-cleaning methods that utilize large amounts of chemicals and be sure to interrogate the carpet cleaners (and their superiors) about the ingredients within the products they use. Even if the supplies claim to be pet-safe, it may be a good idea to research the ingredients to see if anyone has run into any complications. If not, purchase the pet-safe carpet cleaning supplies.

Pet-safe Cleaning Methods

If you want to keep your carpets clean without the use of chemicals, you’ll want to vacuum often, especially during the summer when your pets shed more frequently. You can make a spot-cleaning solution by mixing vinegar and water. This mix is both natural and quite safe for pets, they just won’t care much for the smell (but then again, who does?).

Professional Help

If you want your carpet cleaned professionally, call your local carpet-cleaning company and ask them what products they use. Research these and if they seem okay, feel free to book an appointment. If you need help finding a local carpet cleaning professional, consider using TalkLocal to find a carpet cleaning company for you. TalkLocal is a free service that will connect you with top-quality, reputable carpet cleaning companies in your neighborhood within minutes. Just enter in your specific problem, location and availability, and up to three companies will call YOU directly, saving you the time and stress of finding one yourself.

How to Change Icons on Windows 7

Tuesday, January 8th, 2013

How to Change Icons on Windows 7 Computer Repair

One of the easiest and most unique ways you can personalize your Windows 7 computer is to change your icons.  You can choose from a variety of different icons that Windows has built into the system, or you can even create your own icons from scratch! Read on to learn how to change icons on Windows 7.

To change your desktop icons:

1. Right click an empty area of the desktop and click Personalize.
2. There should be a “Change desktop icons” link in the upper left corner.
3. Select the icon that you want to change and click Change Icon.
4. Select a new icon or you can hit “Browse” to select something you’ve made from scratch. Remember that if you choose to make or use your own icon, it will need to be in a 256×256 pixel .ico file so that it will display correctly at different resolutions.
* Remember that you can also restore the default icon by clicking the “Restore Default” button in the middle pane of the icon selection screen.

To change a library icon:

1. Open up Notepad or your favorite text editor and drag the icon over from Explorer.
2. You’ll see (or need to add) the iconReference line that should look like this:

<iconReference>C:\Windows\System32\shell32.dll</iconReference>

The path to the icon file (.ico) should go between the two iconReference tags.

Additional help

If you’re still confused about how to change your icons, or if the above instructions didn’t work for you, you can always contact a local IT professional to change your icons for you!  TalkLocal can instantly connect you to three high quality local computer repair professionals. Best of all, the three companies will be able to accommodate your busy time schedule and cater to your specific location. You’ll be personalizing your desktop to your heart’s content very soon because TalkLocal finds you help in just minutes!

Car Radio Troubleshooting

Tuesday, January 8th, 2013

Car Radio Troubleshooting Auto Repair

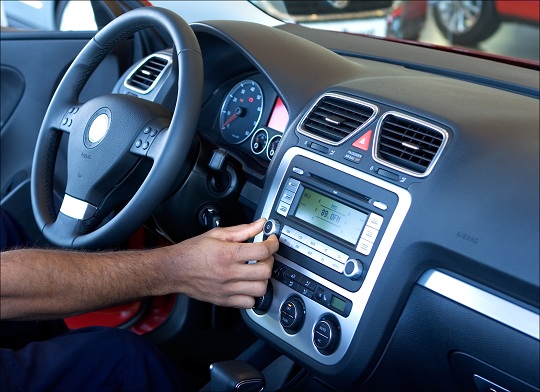
You may find that when you turn your car on, the radio does not turn on with it, does not output any noise, is not playing through all the speakers, or produces distorted, fuzzy sounds when turned on higher volumes. These are all common issues that occur, and with some troubleshooting tips, you may be able to solve them on your own with the steps below. Read on if you are experiencing car radio troubleshooting.

If the radio does not turn on when your car is running, the associated fuse may be blown or broken. You should read the owner’s manual for your car to find the location of the fuse. In most cases, there are two fuses: one of them will be in the car cabin and the other will be in the engine area. In the cabin’s fuse box, it should be fairly simple to locate the correct fuse; they should be clearly marked. Once you find it, remove it and replace with a new one. You should be able to purchase one at your nearest auto parts store.

If you turn your radio on, but it does not produce any noise or is not playing through all the speakers, you need to do an inspection. There could be two possible problem sources: the speakers themselves or the speaker wiring. Experiment with the fader and balance controls on your radio and try to isolate which, if any, particular speaker is not working. If you find it, locate the physical speaker (you may have to remove the interior door panels). Check the speakers for visual damage. If they appear to be intact, check the wiring that comes from the speakers and connects to the radio unit. If you find any damage, you will most likely need to replace the speaker.

Lastly, you may find that when turning your radio’s volume up, the sound is distorted and/or fuzzy. An explanation for this is that the radio’s wattage is not high enough to accommodate the speakers. To solve this, you could do two things. First, you could try purchasing a car amplifier, which would increase the radio’s wattage capacity and lessen the distorted sounds. Second, you could replace the speakers themselves with models that match the output of the radio.

If you are having trouble with any of these suggestions, or are experiencing a problem not listed here, it may be best to take your car to an expert for help. Try using TalkLocal to locate an auto body shop near you. TalkLocal is a free service that will connect you with top-quality, reputable auto repair professionals in your neighborhood, within minutes. Simply enter in your specific problem, location, and availability and TalkLocal will contact multiple auto shops, who will then call YOU directly, ready to help.

Seva Call Launches in Connecticut’s Capital City!

Friday, January 4th, 2013

Seva Call Launches in Connecticut’s Capital City! Seva Call

Seva Call is bringing its service to Connecticut’s capital and third largest city, Hartford! Being the oldest of many things, the Seva Call team is excited to be introducing something new to the city of Hartford. Our service will make life easier for the Hartford residents, and less stressful.

Local consumers of Hartford won’t have to worry about spending time finding a service professional now that Seva Call has launched in their area. With Seva Call servicing in over 40 different industry categories, Hartford residents will be able to receive the help they need for a variety of tasks. Residents of Hartford, get ready to be connected, in an average of 100 seconds, to three service professionals that will help you with what you need done. Seva Call will not only be helpful for consumers, but businesses as well. So, fear not, Hartford businesses, we are here to help you too! Seva Call is a great way to broaden your client list. Our service allows you to accept or reject calls based on your availability, location, and the task at hand.

Seva Man is especially excited for another city launch. “Who doesn’t like traveling to different cities?!”, asks Seva Man. “I have the perfect job – helping people and being able to site see, it doesn’t get any better than that!”

Seva Call is on it’s way to launching in more cities around the nation, so keep a look for that! We are also running beta requests nationwide, so feel free to use us from anywhere in the country.

Remove a Trojan Horse Virus

Thursday, January 3rd, 2013

Remove a Trojan Horse Virus Computer Repair

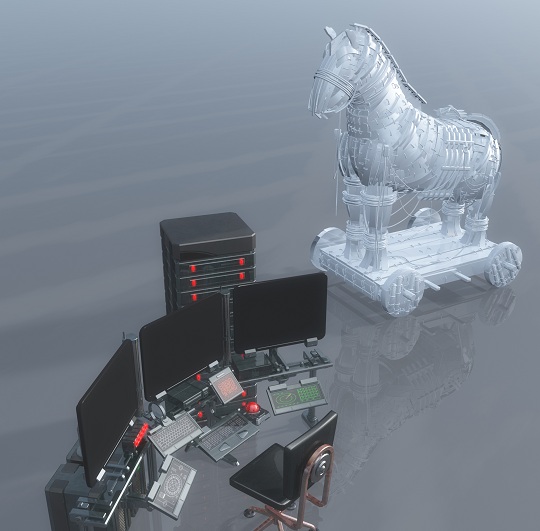
You should remove a Trojan horse virus as soon as you can after you realize it has infected your computer. Trojan horse viruses attach themselves from the Internet onto programs within your computer and penetrate the infrastructure of your computer. The following are a few helpful tips when it comes to protecting and maintaining a safe computer.

– Avoid getting a Trojan horse by using caution and discretion with the websites that you click. Do not link to random websites or cruise sites that look fishy. Take extra precaution by having a secure wireless connection. Check out this helpful link for more information about how to remove a Trojan horse virus from your computer.

– Do not download the “exclusive” videos that you can only find on one site. Most likely, it is a fraud and will download a bug onto your computer. Chances are if the content seems to be one of a kind, then it is only titled that way to get your attention and draw you into downloading the fake link.

– If you have to turn off your protection to enter into a trusted site or download a secure file, remember to return your security settings to full protection after you have finished your task.

– Remove the registry files that have been infected along with the .exe files. If you are removing registry files, do some research beforehand and consult the professionals for help. If you accidentally remove the wrong files, these actions can seriously damage your computer. For more help, check out TalkLocal. TalkLocal is a local service search engine that can direct you to a top-rated computer specialist right in your neighborhood. Within minutes you will be speaking to a professional who can help you at the time that is most convenient for your schedule. Try it out!