Archive for 2013


How can I tell if my Pet has Worms

Thursday, January 3rd, 2013

How can I tell if my Pet has Worms Veterinarians

You might wonder, how can I tell if my pet has worms?  There are five main types of worms you should worry about your pet contracting: tapeworms, roundworms, hookworms, whipworms, and heartworms. They each have different symptoms, and can range from essentially harmless to extremely dangerous for your pet.

Tapeworms:

Tapeworms are the most common parasite to infest your pet. Your pet will often either do the infamous carpet scoot or continuously lick around the anus area in an attempt to get rid of the itch caused by the worms. You can tell if your pet has tapeworms by checking for worms or worm eggs in its stool. Tapeworm eggs look like grains of rice, and will be located in your pet’s stools, around its anus, or even on your carpet. Pets that have tapeworms will have an increased appetite, but will often be thinner than usual due to the worms using up the consumed nutrition. Other common symptoms include stomach aches, constipation, fevers, and coughing.

Roundworms:

Roundworms are common in puppies and kittens because they pass from mother to offspring. The roundworms first form cysts in the mother that remain dormant and cannot be treated by medication. These roundworms cysts are then activated when the mother becomes pregnant, and are passed onto the offspring. Roundworms can also be transferred through the mother’s milk. Symptoms of roundworms, particularly in newborn animals, are distended stomachs that are bloated with worms. Animals may also have a loss of appetite and weight, in addition to diarrhea and vomiting. Just like tapeworms, roundworms will also cause an itchy anus.

Hookworms:

Hookworms “hook” themselves onto the interior wall of your pet’s intestines by biting onto the sides. Their eggs are not visible to the human eye, and will require a microscopic examination at the vet to diagnose. At worst, hookworms can cause anemia and bloody stools, posing a big threat to your pet’s health.

Whipworms:

Whipworms are very thin worms about two to three inches long that attach themselves to interior walls of your pet’s intestines. They are hard to detect even with multiple stool screenings, but signs of a heavy infection are bloody stools, chronic or acute diarrhea, mucoid stools, and even anemia.

Heartworms:

Probably the most dangerous type of worm, heartworms live inside an animal’s lung vessels and can take up the chambers and vessels of the heart if the infection is serious enough. They can cause respiratory problems, major lung damage, and even cardiac arrest. Heartworms are also very hard to detect, which means the infection could quickly spiral out of control. You’ll notice coughing and a lack of stamina in active dogs, but for sedentary dogs, heartworms are difficult to detect. When you notice weakness and a lack of luster in the fur, heart damage has already occurred. Heartworms are more prevalent in dogs because heartworms that infect cats die out quickly before they can multiply.

Many of these worms can be controlled through deworming medications, such as Iverhart Max, which provides protection against heartworms, hookworms, roundworms, and tapeworms. Usually, you’ll only need to give your pet one dose every month, but check the labeling for the specific dosage for your pet’s weight. You should also go for regular vet checkups for your pet to discover infestation cases before they get out of hand. There’s no better way to book an appointment with a high quality local veterinarian than through TalkLocal.

How to Fix Overloaded Circuit

Thursday, January 3rd, 2013

How to Fix Overloaded Circuit Electricians

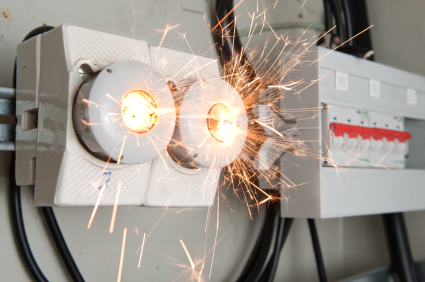
You know when it happens.  You have too many appliances running at one time, when suddenly, the power shuts off.  An overloaded circuit breaker is easy to point out as the culprit.  But how do you fix the problem?  Luckily it is a pretty simple fix.

How to fix overloaded circuit

1.      Locate your electric circuit panel.  This is typically behind a small metal door located in a dry utility area such as the garage, basement, or laundry room.

2.      Open the metal door and check on the positions of the circuit breaker switches.  All except for one should be in the “on” or “off” positions.  The switch that is stuck in a neutral position belongs to the overloaded circuit.

3.      Flip the overloaded switch to the “off” position.  Wait a few seconds, and then switch it into the “on” position.  This should restore power to the overloaded circuit.

4.      If the circuit quickly shuts off again, you probably have too many appliances on one circuit.  Unplug or turn off some of them before you restart the circuit breaker.

If you continue to notice problems with your electricity you may have a different problem that needs professional help.  Use TalkLocal to find a top-quality electrician in your area today.

How Long After Fertilizing Can Pets Go On Lawn?

Thursday, January 3rd, 2013

How Long After Fertilizing Can Pets Go On Lawn Landscapers

If you are wondering how long after fertilizing can pets go on lawn, look no further. It is well known that the chemicals in lawn fertilizer are toxic and can be particularly harmful to pets because they lie closer to the ground and clean themselves with their mouths. Although it is safest to avoid using chemicals dangerous to your pets, it is probably safe to let your pet on a fertilized lawn after two days have passed and the lawn has been watered. Always make sure to read the directions carefully before using fertilizer.

Symptoms of Fertilizer Poisoning

Symptoms of poisoning include nausea, vomiting, difficulty breathing, weakness, twitching, collapsing, irritability, and seizures. If you believe your pet has been poisoned, then call a veterinarian immediately.

Precautions 

Dangerous fertilizer chemicals can be tracked into the house from neighboring yards and public areas. Look for flags noting recently fertilized grass and keep pets and children away. Clean off your pet immediately if you notice it has wandered into fertilized grass. Since pets often lick their coats, it is important to wash off the fertilizer as soon as possible to avoid ingestion of poisonous chemicals.

Pet-safe Alternatives

There are many chemical-free alternatives to toxic fertilizer. Grass needs nitrogen, phosphorous, and potassium to produce a healthy green coating. These nutrients can be naturally obtained from other plants. Sprinkle grass clippings, shredded leaves, or compost onto the lawn to provide these essential nutrients. You can also try using organic fertilizer on your lawn. These are fertilizers made from natural materials or organisms. Corn gluten, manure, and bone meal are a few examples.

If you have questions concerning pet safety and lawn care, look no further than TalkLocal. TalkLocal can connect you to quality veterinarians and landscaping professionals.  Help is just a few clicks away, so try TalkLocal today. Best of all: It is a completely free service!

Webcam Not Working On Skype

Thursday, January 3rd, 2013

Webcam Not Working On Skype Computer Repair

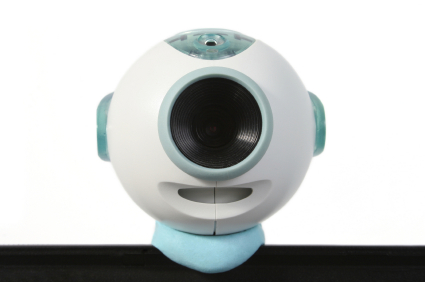
You answer a Skype video call and see your friend’s face appear on you computer screen. The problem, however, is they can not see you. It can be frustrating when you find your webcam not working on Skype, but try the tips in this guide before hanging up on your friend. If your screen is black and Skype video is enabled, double-check the following points:

– Close other programs, such as Yahoo, Windows Live, and Photo Booth, that also use the webcam feature. Then, restart Skype.

– Check that the webcam is turned on and correctly connected to Skype.

To do this:

1. Open Skype’s main window.

2. Click Tools >> Options…

3. Under General, click Video Settings. If the webcam is connected, you should see a live picture of yourself. If you do not see yourself, try updating your Skype to the latest version. Check that your webcam is compatible with your Mac, PC, or Linux. There may also be a problem with your webcam drivers.

For Windows

If those tips don’t work, try the following steps for your version of Windows. Then, move on to the final step.

Windows 7:

1. Click the Windows button >> Control Panel >> Hardware and Sound.

2. Under Devices and Printers, click Device Manager.

3. Click the arrow by Imaging Devices.

Windows Vista:

1. Click Start Menu >> Control Panel.

2. Click System and Maintenance >> Device Manager.

Windows XP:

1. Click Start Menu >> Control Panel.

2. Click System.

Final Step: Your device should be listed under Imaging devices. If not, reinstall your webcam driver.

Additional help

If your webcam is still not working, TalkLocal can connect you to local professionals who can solve your problem. Don’t keep your friend waiting on Skype forever; let TalkLocal find you the service you need from a reliable computer repair company. After filing a service request with TalkLocal, you can expect to talk with a professional on the phone within minutes.

Integrated vs Dedicated Graphics

Wednesday, January 2nd, 2013

Integrated vs Dedicated Graphics Computer Repair

When you’re shopping around for a new PC, you’ll definitely want to pay attention to whether to laptop has integrated graphics or a dedicated graphics card.  Depending on what you plan on doing with your laptop or computer, a dedicated graphics card may be worth the extra investment.

Integrated vs Dedicated Graphics

Integrated and dedicated graphic processors are the two main types of graphic processors you’ll find in a computer.  Integrated graphic processors are included in the motherboard, dynamically allocating your system’s RAM for video processing.  Since the graphics card is integrated, it improves battery life and allows your system to run cooler since there isn’t a second chip to cool down.  However, integrated graphics parts reduce your systems total available RAM (since it shares it with your system), which may slow your computer slightly.

Dedicated graphics card are always faster and more powerful than integrated graphics parts, so they’ll be able to perform more intense processes.  It doesn’t need to share RAM with your main system and can be removed and easily serviced if there’s a problem.  However, they will almost always be more expensive than an integrated graphics processor.

How do I choose?

It all depends on what you plan on doing with your computer.  If you just want a simple computer that can surf the web, type up documents, and make presentations, you won’t need to invest the extra money into a dedicated graphics card.  However, if you’re looking to edit videos, play games, or work on graphic design, you may want to invest the money in a dedicated graphics card or you may be unable to run many of the graphically intensive applications.

Professional Advice

If you’re still unsure about which type of card to choose when purchasing a new computer, you may want to consider asking a computer professional.  TalkLocal can connect you, in minutes, with a high quality local IT professional who can advise you which type of card you need to get!

Get rid of Centipedes in your House

Wednesday, January 2nd, 2013

Get rid of Centipedes in your House Pest Control

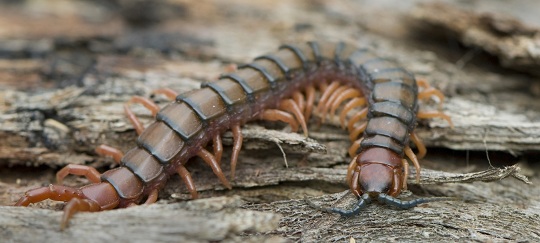
House centipedes have a monstrous appearance that is in stark contrast to their harmless nature. They rarely ever bite humans, and if they do, it does not hurt very much. In fact, they feed on the other bugs inside your home, which makes them desired by some homeowners. This also means that if you absolutely loath the creatures, you’ll need to get rid of all the other bugs before you can get rid of centipedes in your house. The other requirement for centipedes is a damp home, as they lose moisture through their exoskeleton. Decreasing the humidity of your home, especially in dark and damp areas like your basement, is a necessity. Centipedes will be especially prevalent in your house during the winter, when it’s cold outside and warm inside your home.

The catch-all solution to prevent most bugs from entering your home is to seal up all the cracks inside and outside your home. Use caulk and sealing tape to plug up cracks in window and door frames. Make sure that the mesh screens on your windows and doors do not have holes and are securely attached the frame. Remove any piles of leaves, branches, or logs outside your home. These places create the perfect breeding ground for all sorts of insects, including centipedes. Try to kill any known infestations of other pests within your home first, and possibly consider hiring a professional exterminator to have a look at your house. Run a dehumidifier in your basement and other damp areas of your home to discourage centipedes from staying. If you have any windows in your basement, fit them with window wells to prevent water from getting in.

If worst comes to worst, you’ll need a professional exterminator to get rid of all the other pests in your home in order to finally drive the centipede hordes away. However, you won’t have to spend any extra time or money to find one if you just use TalkLocal!

How to Insulate a Garage Door

Wednesday, January 2nd, 2013

How to Insulate a Garage Door Garage Door Repair

During the winter, you’ll always be looking for ways to cut down on your heating costs and better weather-proof your home. One of the best ways to retain heat and lower your heating bill is to insulate your garage door since it’s one of the most exposed parts of your house. Another way is to buy a pre-made garage door insulation kits. In the off-chance that you can’t find a insulation kit, you can actually do it yourself with foam core and tape. Read on to learn more about how to insulate a garage door.

Select your insulation

Most of the time, you’ll be choosing between two types of foam: reflective foil insulation or molded polystyrene panels. The reflective foam contains two layers of polyethylene foam covered by aluminum foil and is usually cheaper than the alternative. The polystrene has a higher R value which means it is a better insulator, but you’ll be paying more for it. Choose based on your price point and what you’re willing to spend. 

Install your insulation

To install your foam, all you need to do it to cut it down to the size of a garage door panel using a straightedge and a utility knife. Then use double-sided tape or aluminum foil tape to secure it.  Depending on how much insulation you’re adding to your garage door, you may need to rebalance your garage door tension springs. Unless you’re familiar with garage door openers and mechanisms, this job is best left to a professional.

Weatherproof your garage door

Over time, it’s possible that the weatherproofing along the bottom of the garage door has cracked or split, making it less effective. If that’s the case, you’ll want to replace the rubber along the bottom to ensure that the garage door creates an effective seal against the outside elements.

Once again, unless you really know what you’re doing with the garage door, please leave the work to a professional.  If you don’t want to deal with finding a local professional, TalkLocal can help you!  TalkLocal will find you a high quality garage door professional in just minutes and you’ll be talking to them in no time!

Professional vs Home Carpet Cleaning

Wednesday, January 2nd, 2013

Professional vs Home Carpet Cleaning Carpet Cleaners

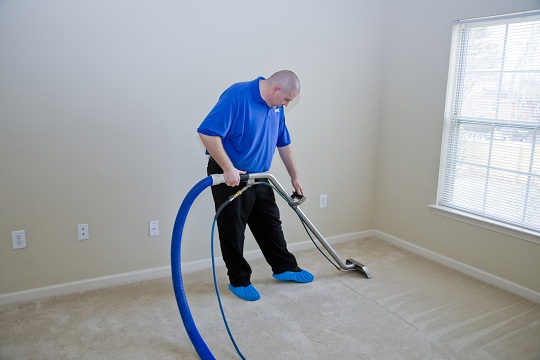
Carpet cleaning is something that anyone is capable of, but few are great at. To do a thorough carpet cleaning, you need the right supplies, time, and an understanding of how carpets work. So if its professional vs home carpet cleaning, then unless you are the rare individual with all four of those things, you will want to find yourself a professional carpet cleaner.

This article will steer you toward finding a professional carpet cleaner simply because their experience and convenience outweigh the money you may save overtime by doing it yourself. And even that isn’t a sure thing, as carpet cleaning supplies and equipment can run you quite a bit of money. However, if you do want to do your own home carpet cleaning, keep reading for some tips and general info on how to do so.

How to Clean your Carpet

If you have a lot of carpet in your home and plan on cleaning your carpet frequently, you will want to purchase rather than rent the needed equipment. You will also need supplies, which consist of carpet cleaners like Resole and Spot Shot, as well as special carpet cleaning powders that are engineered to attract and absorb soils and stains within your carpet. If you don’t feel like spending money, powdered laundry detergent works just the same.

The first step is to vacuum your carpet thoroughly by vacuuming in multiple directions (up and down, and left to right). This method will remove any loose dirt that may be lying near the top of your carpet. Next, treat specific areas that need extra cleaning with your carpet cleaner. With these pre-cleaning steps out of the way, the next step is the actual cleaning of the carpet.

General tips for Carpet Cleaning

Begin cleaning wall to wall and then divide the area into quadrants, cleaning every quadrant before moving on to the next. Overlap quadrants and movements, as well, to ensure everything is cleaned. Also, take your time and do a thorough job, otherwise your carpet will reflect this. Once you are done cleaning, wait overnight before resuming use of the carpet to ensure it has time to dry thoroughly. Most newer carpet cleaning machinery dries the carpet fairly quickly, but it’s better to be safe than sorry. You can also apply a carpet protector if you want to prevent stains from penetrating deep into the carpet and ensure easier stain removal in the future.

Professional Help

While these tips may allow you to clean your carpet effectively, we still recommend leaving your carpet cleaning to the professionals. If you need help finding one, consider using TalkLocal to find a carpet cleaning company for you. TalkLocal is a free service that will connect you with top-quality, reputable carpet cleaning companies in your neighborhood within minutes. Just enter in your specific problem, location, and availability, and up to three companies will call YOU directly, saving you the time and stress of finding one yourself.

How to Repair a Head Crash

Wednesday, January 2nd, 2013

How to Repair a Head Crash Computer Repair

A hard drive head crash is a serious problem that presents a loss of data. The hard drive can be recovered, but the success of the recovery and depends on the extent of the original damage to the hard drive. The term “Click of Death” is referred to hard drive crashes because the clicking sound originating from the storage systems indicates that the device has failed. This generally means a file read or a writing error. The error is most likely the cause of a physical breakdown of internal components (a manufacturer’s error). Read on to learn how to repair a head crash.

What to Do

Most experts recommend a quick home solution for this catastrophe. Place the hard disk drive inside a plastic bag (or a ziplock bag — the point here is to seal the contents in an airtight container so that the components do not get further damaged). Then place the bag in a freezer for about an hour.

The reason to make the drive colder is because the lack of heat makes the internal components of the drive more compact, thereby minimizing the friction/mismatch between the physical parts that may have caused the problem.

The louder the problematic noise is, the more drastic the problem — in worse cases, a professional’s help is advised to change the head mechanism on your hard drive. Stop operating the problematic drive if you hear extensive noise on your drive under operation.

In requesting professional’s help, you must package the hard drive to send it to a professional. Wrap the drive tightly so that air will not get in and make sure that the hard drive stays stable inside the package. If it is loose, internal parts may collide and cause further damage.

If you feel as if the noise is minimal and there isn’t too much damage to the drive, try a different operating system (such a Linux) to see if it works under different settings. Linux is recommended because it skips over some imperfections in the data and still operates under adverse conditions.

Additional Help

If you feel like you need professional help on how to repair a head crash, TalkLocal can help with finding the correct local experts in this case, saving you time and energy in what may be a stressful situation.

Wishing you Happy New Year!

Tuesday, January 1st, 2013

Wishing you Happy New Year! Seva Call

At Seva Call, we’re wishing you a happy New Year by giving you a sneak peak at a few of the things that we’re working on in the office. Look out for these exciting new additions to Seva Call!

1.     In the office, we are eager to launch of our free iPhone and Android apps! We’re just adding the finishing touches on these apps, so they’re flawless for you, your friends, and your family. These apps will allow you to easily find the local professionals you need from your home, office, or even your car! Don’t waste an extra minute searching the yellow pages when your smart phone can find you a solution in just a few minutes.
2.     We’re working hard to expand our services to help everyone we can! Seva Call is growing fast! Look out for launches in New York, New Jersey, North Carolina, Georgia, Alabama, Florida, and many other states across the nation.
3.     Our writers are thinking of interesting, important, and useful new articles to post to our website. These articles will help you accomplish tasks from winterizing your house to staying fit for the New Year. We promise you’ll find our tips useful and relevant.

Don’t worry, that’s not all! In the office, we’re always thinking of new ideas. Keep an eye out for our new advancements to Seva Call in 2013.

All of us at Seva Call hope you had a relaxing and fun filled holidays spending time with loved ones. We sincerely wish you a happy and healthy 2013.