Archive for 2013


Should You Replace Your DLP or Buy a New LCD or Plasma TV?

Saturday, July 20th, 2013

Should You Replace Your DLP or Buy a New LCD or Plasma TV? - TV Repair

The core of any good home entertainment system is an HDTV. This may include a plasma TV, an LCD TV, or a DLP television. Should you replace your DLP or buy a new LCD or plasma TV? That is a question that will depend on problems you experience. Various problems can cause you to consider a new TV to use for your home entertainment system.

Why Consider A New TV?

A TV that does not turn on or seems to turn off and on at random times has a power issue. The TV may be plugged into a faulty outlet or you may have a power strip that is not working correctly. A fault with the television itself may also be the cause of a power issue. A television that turns on and off may have a sleep timer turned on. Check the menu of the TV to check this issue. If you leave the television on for long periods of time, then it may overheat and shut down to cool.

The bulb used with the TV can cause problems with the display. If a bulb in your TV fails, then it does not have a source of light. This can result in a black screen when the TV is turned on. The bulbs for the TV will last between 1,000 and 3,000 hours. The lifespan of the lamp is based on the manufacturer and the brand of TV that is in use. Bulbs often receive excess wear if the unit it turned on and off constantly without letting the bulb cool down.

Picture problems with your television may involve lines in the screen or seeing dead pixels. These are issues that a professional will need to repair. If you see discoloration on your screen or distorted picture quality, then you need to adjust options in the picture menu. This can be done using the remove control for your TV.

Sound issues that occur with your television can include a buzzing or humming sound. This issue results from having the volume turned up too high and blowing the speakers. A repair technician can repair a sound issue with your television. Your issue may just involve the mute option being activated. Turn the mute off using your remote control.

So, should you replace your DLP or buy a new LCD or Plasma TV? To answer that, you will have to weigh the cost of repairing an older TV against simply buying a new one. After so many repairs, it can be easier, and less costly, to buy a new TV.

Find A TV Repair Professional

If you do not have the time to troubleshoot your TV, then contact TalkLocal to find a professional who can fix the problem. We will connect you with up to three professional in just minutes, so you can choose the professional who is right for you.

How Can I Stain Fake Wood Paneling?

Saturday, July 20th, 2013

How Can I Stain Fake Wood Paneling? - Painters

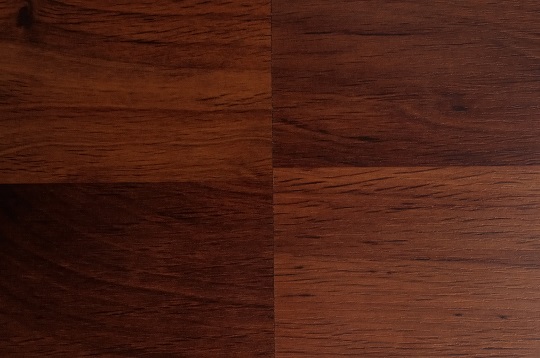
Fake wood paneling can make a room look drab and out of style. However, the paneling does not need to be replaced for the room to have a new look. Staining fake wood paneling with a gel stain can give it a rich color and bring life back into your home. So, are you wondering, “how can I stain fake wood paneling?” Follow the steps below to stain your fake wood paneling.

Materials You Will Need

• Dish washing soap

• Hammer and wood putty(if paneling is not smooth)

• Sandpaper

• Drop cloths

• Blue painters tape

• Gel stain

• Mineral turpentine

• Foam applicator

• Rags

• Clear finish

How Can I Stain Wood Paneling?

1. Choose an appropriate gel stain for your paneling. Make sure to find a gel stain intended to stain the original color of your paneling so that you are sure of what the finished product will look like. A gel stain intended for a much lighter or much darker paneling will not have the results you are looking for.

2. Wash the paneling well with dish washing soap and let it dry completely.

3. Fix any uneven surfaces. Pound in nails and fill any large holes with wood putty. Sand the paneling down with sandpaper to get rid of any smooth, shiny surfaces.

4. Clean the floors of any debris and cover them with drop cloths. Tape any edges (below and above the paneling) with blue painters tape.

5. Take the gel stain and shake it very well. Then, open the can and stir it well to make sure that the color is evenly mixed.

6. Find a piece of scrap paneling and test the stain color. If the color is too dark, thin it with mineral turpentine or check the label for other thinning instructions. Never apply the gel stain to the paneling in your home without testing it first.

7. Use a foam applicator to evenly apply the stain. Make sure to wipe off any extra stains with rags. If you would like to apply another coat to make the color richer and darker, wait at least six hours.

8. Wait a full day after applying the last coat of stain to apply a clear finish.

Need Professional Help?

If you would like a professional to stain your fake wood paneling, just use TalkLocal. We will connect you with up to three, reliable professionals in your area, who can help you when you need them most.

How To Pressure Wash Your Driveway

Saturday, July 20th, 2013

How To Pressure Wash Your Driveway - Handyman

Pressure washing is a great way to remove spots, stains, and areas of discoloration from concrete around your home. One of the concrete surfaces of your home that can easily become dirty over time is the driveway. The driveway is subject to regular traffic from your car tires, people, and pets. It may also become stained from leaking automotive fluids, stains from vegetation that fall on the surface, and more. If your driveway is heavily stained and discolored today, you may be wondering how to pressure wash your driveway.

The Benefits of Pressure Washing

Pressure washing can easily and thoroughly remove stains, spots, and areas of discoloration from this surface. The alternative to pressure washing would be to scrub the surface with a hard brush by hand, and this can be exhausting, time-consuming, and labor-intensive. Pressure washing makes light work of this task.

How to Pressure Wash Your Driveway

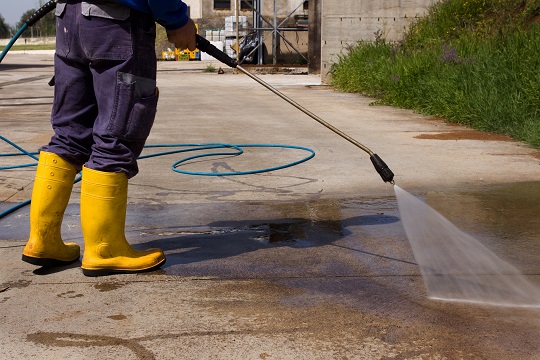
You can pressure wash your driveway on your own by either purchasing a pressure washing machine or leasing one. Once you bring your pressure washer home, you can hook your machine up to your garden hose and focus the stream of the water onto your driveway. You will want to move the stream of water in a uniform fashion, starting at one corner of your driveway and slowly working your way across the entire surface.

Extra Care to Take When Pressure Washing

If mildew is present on your driveway, an anti-mildew agent or special soap may need to be applied to the surface while you are pressure washing it. You should take care to only focus the stream of water on the surfaces that you intend to clean. The stream of water that is created can be damaging to certain surfaces of your home, so you do want to use it with great care.

What You Can Pressure Wash

Pressure washing is a great way to clean your driveway. However, you can also use a pressure washer to clean a wood fence, a wood deck, your patio, your sidewalk, and your garage floor.

Need More Help?

Because it can take so much time to pressure wash these surfaces, and because you should use this machine with care to avoid damaging your property, many people prefer utilizing the services of a pressure washing service to clean their driveway. You can locate a reputable pressure washing company near you with TalkLocal. We’ll connect you directly with the right professionals in just minutes.

Is Massage Therapy Worth It?

Saturday, July 20th, 2013

Is Massage Therapy Worth It? - Massage Therapy

Many people look at the cost of massage therapy and gasp. Most of the world views it as a luxury for those with disposable income. You are asking yourself, is massage therapy worth it? But, you’ve been feeling an awful lot of pain lately and you need to get rid of it.

Is Massage Therapy Worth It?

The first thing you need to do is find out just how much massage therapy is going to cost you. An hour of therapy will run you anywhere from $60 to $120. So, you should look at how much money you spend during a week. See if you can spare $60. Perhaps you have to stay home and rent a movie over the weekend instead of going out.

If you have health insurance, then you might be in luck. Many health insurance providers cover the cost of massage therapy at no charge to you. Other companies will cover some of the cost, but it still might make the trip worth it. You may live in a state that mandates coverage for massage therapy. You’ll just have to go to the doctor and get a prescription. If you are really in pain then a prescription won’t be difficult to get. Or you really might luck out and go to a doctor with a massage therapist on staff whose work will be covered by health insurance.

Find Out For Yourself If Massage Therapy Is Worth It

If you are not covered by insurance, then you may want to know how effective massage therapy is. If it is effective, then you may know the answer to the question, “Is massage therapy worth it.” It can be very effective if the pain is in your muscles. If you have tight muscles, massage therapy will loosen the muscles and increase blood flow. This will flush toxins and help arrange your spine and hips back into place. Massage therapy is a great way to ease musculoskeletal pain.

If you would like to speak with a massage therapist near you, just use TalkLocal. We will connect you with the right, local professionals in just minutes, so you can get the help you need, when you need it.

How To Transfer Contacts Between iPhone and Blackberry

Saturday, July 20th, 2013

How To Transfer Contacts Between iPhone and Blackberry - Computer Repair

In this day and age, most people would think that transferring contacts between the iPhone 5 and Blackberry would be an easy task. Unfortunately, it’s not as straightforward as you would think it is. We’re here to make the job easier for you, but the quickest and least difficult way to do this is by finding a professional to do this for you. Refer to the bottom paragraph for more information.

How To Transfer Contacts Between iPhone and Blackberry

1. Start by going to http://www.google.com/sync/index.html via your Blackberry internet browser.

2. Install the application provided, start it up, and log in to your Google Apps or Gmail account. Once that’s done, you’ll be at the usual welcome screen with the option to sync your data.

3. Hit the sync button and give Google Sync a few minutes to transfer all of your data into your Google account. You can verify that all information was sent correctly by going to https://www.google.com/contacts/, which shows you all contacts that were sent from your device.

4. Now it’s time to pick up that iPhone 5 and transfer the contacts. Using Microsoft Exchange, we’re going to sync the data from Google Sync with your iPhone.

5. Browse to the “Mail, Contacts, Calendars” category within the options menu from your iPhone 5.

6. Choose “Add Account” and pick Microsoft Exchange. You’ll then be asked to enter an email address and a password. Use your Google information and hit the “Next” button. Fill out the following details:

Email: (Google Email Address)

Server: m.google.com

Domain: (Leave Blank)

Username: (Google Email Address)

Password: (Google Password)

7. When asked for what you would like to sync, be sure to click Contacts. You can also sync calendars and Google Apps messages, but that’s not what our objective is.

There you have it. Should you decide to continue using both devices, your contacts should now be synced. Otherwise, this is a one time deal and you’ll be all set.

Need More Help?

Transferring contacts between the Blackberry and iPhone can be a difficult task for some and time consuming for others. I so, find a professional computer repair technician who can do it for you. Just use TalkLocal to be connected with at least three professionals in your area within minutes.

28 (Mis)Adventures: The Time I Really Dug My Car

Saturday, July 20th, 2013

A blog about life experience and inexperience, written by Dallea Caldwell.

“The challenges of being a grownup never get old”

Hi! I’m Dallea. I’ve been living my crazy life for 28 years, yet I’m still a complete amateur. No matter how old I get, it seems that adult challenges never age a day. Admittedly, it’s usually my own mistakes that make life so darn difficult. Luckily, I have a great network of friends and family to get me out of a jam…like the time when me and my car were literally in a jam — a wet, soggy one.

It all started with the kind of bi-polar weather for which the DC Metro area is famous. It was like God got sick, vomited an ocean,  and instantly felt much better. I was half-way along my 60-minute commute to the Seva Call office when the  grey curtain of a downpour lifted to reveal blinding sunshine and baby-blue skies. I wondered who turned on the light and then immediately forgot that there was such a thing as rain.

I’d say that there were a million things on my mind, but that’s clearly hyperbole. Everybody knows that the brain can only juggle 10 items at a time. Clearly, the memory of the rain was number 11 on my list. The point is, I parked on the rain-soaked grass in front of the office. You know what happened next. But, even I have trouble believing what happened when Seva Call founder Manpreet Singh and his lead general Raj came to my aid.

It was around 10pm when I dragged myself to the car only to discover that no amount of pedal-to-metal was enough to drag my car from an apparent ditch. There was only mud splash and spinning wheels. Without recourse, I headed back inside while someone was still awake. The door was locked. I decided that walking around and lightly tapping the glass patio window behind MP’s workaholic back was my best bet, assuming it didn’t give him a heart attack. Apparently, Raj’s Seva senses were tingling, because he came downstairs just as MP let me inside.

Then, things took a turn for the epic. The Seva duo swooped into action! With me at the wheel, Raj and MP heaved and hoed to liberate Bonnie from her tractionless entrenchment.  MP shoulder-butted the right bumper so hard that the car was sent into the air like a white stallion on its hind legs before coming down with an earth-shattering thud.

Things got worse when Bonnie landed on what must have been an Allspark fragment. The dingy car suddenly turned into a Decepticon with me still inside, transforming into a drill in an attempt to bury itself deeper and entomb me forever! Fortunately, quick-thinking Raj jammed a cyber virus flash drive into its USB port returning it back to an inanimate Kia Rio, much to my relief

Finally, to ensure that I didn’t lose to much sleep, MP dug his index finger beneath the muddy wheel and flicked it- the car and I did a triple somersault before landing in Raj’s hands. Raj then power vaulted me and Bonnie into the air. I landed on I-95 North and made it safely home to Baltimore that night. They may deny it, but that’s exactly how it happened… I swear!

I’m really glad that I happened to have colleagues with superhuman strength on hand when I needed help. But, even when they’re nowhere around, I know that I can rely on Seva Call to connect me with towing professionals. In fact, if your luck is anything like mine, you should probably visit www.talklocal.com and save (877) 593-4445 to your phone right now!

Until next time… Life is an adventure. Enjoy the ride!

Wall Colors To Hide Stains

Friday, July 19th, 2013

Wall Colors To Hide Stains - Painters

Parents with toddlers know how common it can be for a wall to end up with crayon drawings, permanent marker lines, and chalk portraits on their walls. Responsible adults too, may make a mistake and end up with a stained wall. At first glance, these wall stains may not seem difficult to remove, but after trying to paint over permanent marker, a person may find it infuriating to see the same markings bleed through one fresh layer of paint after another. Fortunately, there are several strategies to cover over these pesky stains, including using certain wall colors to hide stains.

Rich Wall Colors For Easy Wall Stain Cover-Up

Using wall colors to hide stains might be the easiest fix. A parent with a child who loves to draw could find himself or herself repainting a wall several times a month, and for that reason, a one coat color — reds, blues, and chocolate browns being perfect example — will save a painter-parent time and money. Most stains do not bleed through darker colors — not noticeably anyway — and these colors should not need multiple coats to blend into the surrounding wall.

Applicable Primer Paints For Tougher Stains

However, permanent marker smudges bleed through paint, so using wall colors to hide stains is not an option. For staining products like permanent marker or oil-based foods, such as peanut butter, a stain-covering primer is the best option. One half-gallon of stain neutralizing primer should last, even parents of the most artistic children, several years.

Beware of Faded Paint

By applying a neutralizing primer, the markings below are sealed and returned to a simple paint adhering surface. After the primer has dried, a coat of fresh, matching paint will blend into the wall without notice. Painters should be cautious about how much sun and exposure to elements the wall in question endures, as most paints fade from sunlight, scrubbing, and humidity over time. A wall that has not had a fresh coat of paint in more than one year will likely have subtly changed color, and the original hue will stand out sharply against it.

Find A Professional Near You

Painters beware: stains can be tricky to address, but with careful attention to detail, most jobs are not too difficult. Or, for the toughest work, consult TalkLocal to be connected within minutes to the right professionals in your area.

Where To Buy Kinesio Tape

Friday, July 19th, 2013

Where To Buy Kinesio Tape - Personal Trainers

If you’ve been watching any sports recently, you’ve undoubtedly seen the colorful tapes that have become the rage as of late with elite athletes.  And if you’ve continued to do more research, you’ve most likely found that they’re using kinesio tape, a new modern taping technique pioneered by the chiropractor Dr. Kenzo Kase.  It’s becoming so popular that many personal trainers around the world are picking it up as well to try out this recent taping craze.  Fortunately, if you want to know where to buy kinesio tape to try out this technique yourself, there are multiple locations and sites which sell this useful training tool.

Online Retailers

The easiest place to find kinesio tape is undoubtedly online.  Many online drug stores and medical supply stores will have the tape in stock and easily available to ship to your home.  Furthermore, many of the larger retailers such as Amazon will most likely stock the kinesiology tape.  Simply search for it online and you’ll undoubtedly find a retailer that works for you!

Sporting Good Stores

You may not have the time to wait for shipping and the long process of online shopping.  Fortunately, most sporting good stores, such as Dick’s Sporting Goods or the Sport’s Authority, now have started carrying kinesio tape.  If you can’t find it in-store, be sure to ask the customer service representative about the tape, and they most likely will be able to find kinesiology tape for you locally.

From your personal trainer

While you should always tape with the consent of your personal trainer, you may be able to purchase kinesiology tape from your personal trainer if you ask them.  This is the least preferred method since it will most likely be the most expensive route you can take, but it may be the most convenient method of acquiring kinesiology tape for yourself.

Find Someone Who Knows How To Use Kinesio Tape

Once you acquire the kinesiology tape, make sure that you apply the tape correctly and under the supervision of a certified kinesiology taping expert so that you can get the greatest benefit possible.  TalkLocal can connect you with a high-quality, local personal trainer trained in kinesiology taping in just minutes!

Network Cable Unplugged Error

Friday, July 19th, 2013

Network Cable Unplugged Error - Computer Repair

If you are having problems with your network connectivity, you will probably see a network cable unplugged error message. This pop-up may come up on your screen once every few days or once every few minutes depending on how severe the problem is. There are several possible causes for this problem, and it happens most commonly when an Ethernet adapter is trying to make a network connection.

Possible Solutions For Network Cable Unplugged Error Message

Disable the Ethernet network adapter if you are already running a WiFi home network with computers that have built-in Ethernet adapters.  On Windows, double-click the small Network Cable Unplugged error window and click disable.

Check each end of the Ethernet cable and make sure they are plugged in all the way and not loose.

Replace the Ethernet cable with another one.

Update the network adapter driver software from the appropriate manufacturer’s site.

Replace the Ethernet network adapter by removing and reinserting the existing adapter to make sure that the card is connected properly. If the card is damaged in any way, replace it with a different card.

Need Professional Help?

This can be a very annoying error if you don’t know what is causing it, but with just a little troubleshooting you can fix the problem yourself. If the issue persists after trying all of these methods, then just come to TalkLocal. We will connect you with up to three, high-quality computer repair technicians in your area in just minutes. Don’t bother searching for help. We’ll find the right professional for you.

Dryer Vent Installation

Friday, July 19th, 2013

Dryer Vent Installation - Appliances Repair

Dryers employ forced heat in order to dry your clothes, which means that there must be an exhaust system of some kind. If the moist heat from the drying clothes can’t escape, the dryer’s contents would just stay hot and wet. This is where a dryer vent comes into play. A properly functioning vent is especially important on a gas-powered dryer due to of the risk of carbon monoxide buildup. Unfortunately, this isn’t something that comes conveniently packaged with your dryer. It must be purchased and installed separately. Here’s how to install a dryer vent.

Dryer Vent Installation

1. Choose your supplies carefully. Most dryers will accept a four-inch vent duct, which should never be made of flexible materials. Their inability to support their own weight can cause them to accumulate lint, which presents a serious fire hazard. Furthermore, any blockage of airflow can allow toxic carbon monoxide to build up in your home. The ducting you choose should be made exclusively of sheet metal. You’ll also need foil duct tape, a hole bit, power drill, caulking gun, and a tape measure.

2. Assuming you’ve already measured the shortest route to a ventilation area, you’ll need to cut a hole in the wall to make way for the vent. This is the most tedious part of dryer vent installation. Drill a pilot hole and go outside to confirm its position. If all looks well, use a power drill equipped with a four and one-quarter inch hole bit.

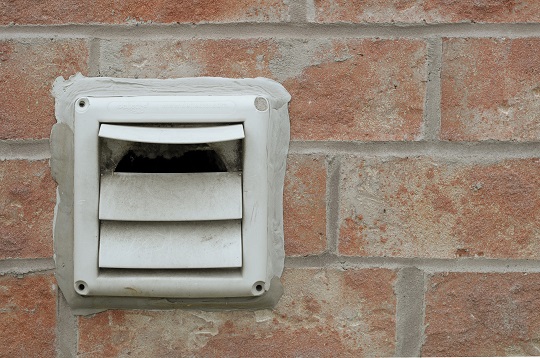
3. After the hole has been drilled, fit the vent cap into it, then fasten it into place using rust-resistant screws. When that’s finished, go inside and squeeze the ductwork into the back of the vent. Use a high-quality caulk to seal around the edges of the vent.

4. Depending on the location of your dryer and the construction of the room it’s in, you may need to install support for the ductwork. Stainless steel straps are best suited to this. Similarly, you should also use your foil duct tape to secure the piping joints together.

Need More Help?

Because some of the steps of dryer vent installation can be difficult, and because doing something wrong presents a danger, you might prefer to hire a professional to do this job. Fortunately, TalkLocal will connect you with an experienced, local appliance repair technician who can do the job right.