Archive for 2013


Cost Of A New Deck

Wednesday, July 17th, 2013

Cost Of A New Deck - Landscapers

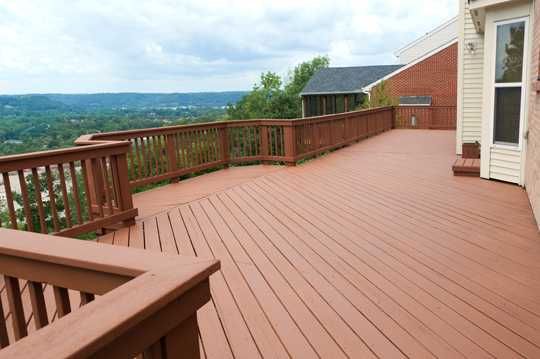
A deck can be a great place to rest and enjoy your neighborhood, or even entertain guests during cookouts or special occasions. It can also be a unique addition that sets your home apart from others.

Before you decide to start building, it is good to know the cost of a new deck. This way, you know what to expect and can set a budget accordingly.

Here’s how to calculate how much a deck will cost you.

1. Measure the area where you want the deck built. Measure the length and width and multiply the two figures together to determine the square footage of the area. This will tell you how many boards you will need. Deck posts cost about $6 a piece depending on the type of wood you choose. Deck boards can cost anywhere between $1.25 and $3.00 each.

2. Decide if you want to build the deck yourself or if you plan to hire a contractor. The price of a contractor can vary and can cost you anywhere from a few hundred dollars to a few thousand, depending on the size of the deck and the details involved. If you plan to build it yourself, you can save a lot of money on the cost of a new deck, but you also run the risk of committing a costly error.

3. Add in any extras you plan to have on the deck. These can include banisters, railings, steps or even a roof. All of these things will cost you more money and should be calculated. You can price these items at your local home improvement store to get an accurate estimate of the total cost to build the deck of your dreams.

Don’t let the cost of a new deck surprise or scare you. Do your research and take the time to calculate the cost before you begin the project. Look for inexpensive ways to build your deck if possible to help you save money.

Where To Find Help

There are men and women in your area who can take care of this job for you — you just need to find them. TalkLocal is perfect for that. We bring consumers together with the companies that suit their needs. Try it out. You will be chatting with someone on the phone in minutes.

Asus Netbook Monitor Problems

Wednesday, July 17th, 2013

Asus Netbook Monitor Problems - Computer Repair

Asus Netbooks are cheap, portable computers that are ready to go when you are. That makes it especially frustrating when you expect to get some work done between meetings or on a commute, and your netbook breaks. Asus netbook monitor problems can be frustrating, so here are some things you can do about it.

If the power light is on, but you are still faced with a black screen, try the following:

1. Take out the battery.

2. Unplug the AC adapter.

3. Hold the power button for 30 seconds. This should drain any electrical charges in the system.

4. Connect the netbook back to the power supply.

5. Power on the netbook.

If the screen is still black:

1. Try pressing both Fn and F2.

2. Connect your netbook to an external monitor. To toggle between screens, press both Fn and F10 (or just F6). If the external monitor works, then there is probably a problem with your netbook’s LCD.

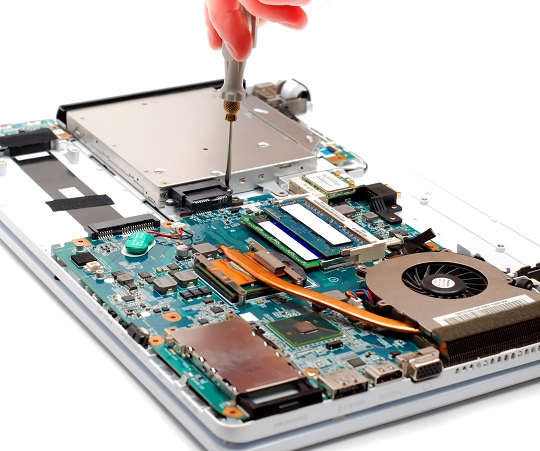
Luckily, you can replace your LCD screen at home. You just need to use a Phillips-head screwdriver.

Follow these steps:

1. Turn off your netbook.

2. Unplug it from any power source.

3. Press the small tabs on the top of the keyboard while lifting it. You should see a metal plate.

4. Slide the plastic cable connector forward to disconnect the metal plate from to the keyboard.

5. Remove the screws on the metal plate.

6. Do the same for the bottom of the netbook (two are found on the front side).

7. Lift the corners of the notebook to remove the plastic housing from the bottom. You should see the motherboard.

8. You should see white plastic plugs on the bottom-center and top-left of the motherboard. Unsnap them to disconnect the five wires.

9. Remove the top screws from the LCD screen.

10. Remove the bottom screws.

11. Separate the two parts of the screen using a thin tool.

12. Remove the screen from the body of the computer.

13. Install the new screen.

14. Reassemble the netbook, tracing back from last step.

Find A Professional

Is computer repair not your forte? Don’t worry; TalkLocal has you covered. Just give us a call to find local service providers to fix your netbook for you. You will be connected with the right professional within minutes.

Do It Yourself Skylight Install

Wednesday, July 17th, 2013

Do It Yourself Skylight Install - Window Replacement

Installing a skylight in your home can brighten your space on a daily basis. This is an improvement to your home that can add value as well as aesthetic appeal to your property. By following this do it yourself skylight install guide, you may be able to install a skylight in your home on your own.

Do It Yourself Skylight Install

1. First, you will need to determine the location in your home where you want to place the skylight. Common areas for a skylight install include the kitchen, bathroom, and family room.

2. Next, you will need to determine if you want to install a curb-mounted skylight or a frame-in-place model. A frame-in-place model is installed using L-shaped brackets while a curb-mounted model is mounted in an elevated position over the frame of the roof.

3. After selecting the right window for your needs, consider the placement of the skylight and of the light shaft carefully. Ideally, you will choose a location for the light shaft that falls between the ceiling joists and that does not require the joists to be cut. These windows are designed to minimize the need for cutting into joists, so a simple adjustment in the placement of the window may eliminate the need to cut into the joists. Framing the light shaft and window will require more effort if you do cut a ceiling joist. Keep in mind that the light shaft can be angled or vertical depending on the style that is suitable for your home.

4. The appropriate skylight framing assembly for the type of window that you have selected will need to be installed into your roof, and the light shaft will need to be framed with lumber.

5. To finalize the installation, the window will need to be carefully installed into the framing and sealed, and drywall will need to be installed in the light shaft.

Or Just Have A Professional Handle It

While you can enjoy considerable benefits from your new skylight, including improved ambiance and added value to your home, this is typically a project that you want to leave to a professional. If you would like to learn more about how a professional can install a skylight in one or more rooms in your home, just use TalkLocal. We will connect you with the right professional in just minutes.

Zombie-Proof Your Home: Windows, Version Zombie.0

Wednesday, July 17th, 2013

Zombie-Proof Your Home: Windows, Version Zombie.0 - Seva Team

Written by Steven D’Adamo

Well, the zombie apocalypse is raging outside, but I’m still alive, and Fort Talk Local has not yet been breached. I have some more tips for you to zombie-proof your home. This time, we’re dealing with windows.

The first question that needs to be asked when it comes to zombie-proof windows is, who needs them? If you’re more concerned with having a nice view of your front yard than you are with zombies breaking in, you probably won’t last long anyway. Windows should give you a view of what’s coming without exposing you to the danger.

1. Board up every window on the first level. Plywood, scrap-wood, or tables work well for this. Bullet-proof sheet metal is ideal. If the barricade can be knocked over or pushed aside, nail it or weld it down. This keeps the Walkers out and your withering sanity in. This applies to sliding glass doors too. Get rid of them. If your garage is attached to the house, block those windows as well. If not, your garage may already be lost.

2. Conceal any upper-level windows with dark sheets or blankets, especially when lighting your house at night. Having light shine through windows, even those on upper levels, is basically the same as screaming through a bullhorn and shooting off firecrackers. A shining light at night is an open invitation for every zombie in sight to come a-knockin’.

3. Use windows strategically to give yourself a vantage point to the outside world. Now, you don’t need a triple-paned bay window to be able to look outside. Choose one or two windows on each side of your house that give you the widest and farthest view. Cover them up as you normally would, but leave one corner or small space covered by a movable barricade, so you can quickly take a peek outside. A PlayStation works well for this — it’s not like you can use it anymore anyway!

Fort Talk Local is burdened with many windows, and two sliding glass doors. Remember that plethora of desks I mentioned last time? Well they’re now blocking the sliding doors, topped with seldom-used whiteboards and rugs. So, even if a pack of zombies breaks through the glass, they’d still have to climb over the desks. Keep in mind that zombies are stupid. It might take them longer than you think to figure out how to climb over random junk in their path.

I hope that helps. We’ll have plenty more to cover, especially if you didn’t already raid the nearest CostCo and are considering eating your shoes. Stay tuned for more zombie-proofing tips to come. Steve out.

Tips On Cleaning Fireplaces

Tuesday, July 16th, 2013

Tips On Cleaning Fireplaces - Maid Services

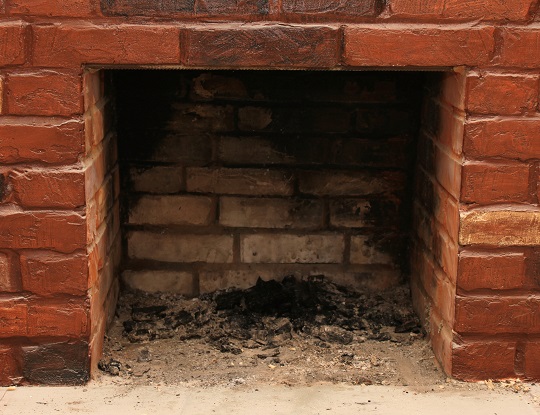
A fireplace can take a living space from dull to cozy. Gathering around a crackling fire can be an excellent way to spend an evening. However, your fireplace must have regular cleanings so that it looks clean and stays safe. We have some tips on cleaning fireplaces to help you stay warm and safe.

A fireplace builds creosote, a chemical, tar-like substance produced from burning wood and coal. Over time, it can build to the point that it becomes a potential fire hazard. This substance should be taken away by a professional annually. In the meantime, there are things you can do on a regular basis to keep your fireplace cleaner and safer.

Tips On Cleaning Fireplaces

Remove the dust and soot from the hearth. Vacuuming and dusting are the two best ways to do this. A shop vacuum works the best, as the filter can handle the ashes.

Do not add much water to the hearth to clean the ashes, or else they will become pasty and difficult to clean up well. If you would like to clean up the fine layer of soot remaining after dusting or vacuuming, use damp paper towels.

-Sprinkle slightly moist coffee grounds over ashes to keep soot and dust to a minimum. This works during both times of burning and of cleaning.

-When cleaning the hearth, never use any household cleaners. They could possibly leave a flammable residue or emit toxic chemicals into the air once heated.

-Be careful not to remove any of the materials right after a fire as they could still be hot; wait at least eight hours for everything to cool down completely.

Tips For Lighting Fireplaces

-Before lighting the fireplace, look over the chimney, flue, and firebox for any creosote accumulation. If there is a lot of build-up, do not light the fireplace.

Burning well-dried logs or special fireplace logs can help to avoid as much of the creosote buildup as possible.

Burn a creosote sweeping log on a regular basis. This type of log breaks down creosote and can keep your fireplace safer in-between professional cleaners.

Find A Professional Who Can Help

To contact a professional for your annual fireplace cleanings, connect with Talk Local to get the best professionals in your area. Just go to the TalkLocal website and tell us what you’re looking for, your location, and your availability. We will connect you with the right professionals in just minutes.

What Is A Transponder Key?

Tuesday, July 16th, 2013

What Is A Transponder Key? - Locksmiths

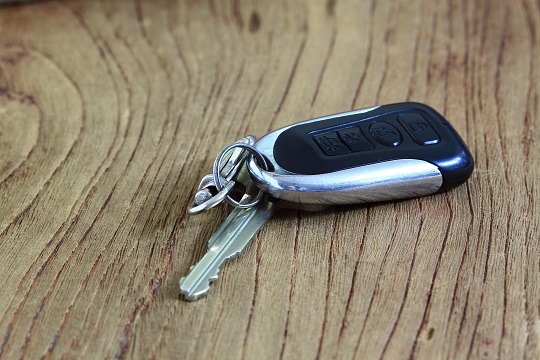
Almost all car keys are transponder keys. They have buttons built into the key that lock or unlock your car, open your trunk, or set off the car alarm. Transponder keys ultimately reduce the risk of theft. So, what is a transponder key? Keep reading to find out!

What Is A Transponder Key?

A transponder key has two components: a transmitter and a responder. A small chip is placed inside your car key. Your vehicle can detect your key’s commands and when your key is in the ignition. This key is important for car safety, as it prevents your car from being hot-wired from someone without the appropriate key. A car will not start without its designated transponder key because the car cannot detect the transmitted low-frequency signal from the key. Even if you make a copy of the car key that does not have the corresponding low-frequency signal, the car will not start.

Transponder keys can also be used for gate openers and keyless entry systems, although they are more popularly used for cars. Some cars’ transponder keys do not even need to be placed in the ignition. As long as the key is within a certain distance of your vehicle, such as in your purse or pocket, the car will run. When the car detects the signal from the key, it starts. However, if the key is a certain distance away from the car, the car’s engine will turn off and the car will lock. Don’t forget to leave the house without your key!

What If I Lose My Transponder Key?

Car dealers usually give you two transponder keys just in case you lose one. If you lose your transponder key, contact your car dealer or a professional locksmith. TalkLocal will connect you directly with the best locksmiths in your local area in just minutes.

How To Upgrade the RAM On A Macbook Air

Tuesday, July 16th, 2013

How To Upgrade the RAM On A Macbook Air - Computer Repair

The RAM on any computer is an important part of your electronic device.  RAM stands for Random Access Memory. It is a form of data storage that allows the information to be accessed in any order.  There are two different types of RAM: static and dynamic.  Both of these data storage types are useful and easy to access.  You should make sure you have the amount of RAM you need when you are buying your computer, because sometimes the option to upgrade it is not a possibility.

How To Upgrade the RAM In A Macbook Air

The Macbook Air has been around since 2008, and since that time the RAM has never been upgradable.  In the product description given by Apple, it is described as “configurable” which many people confuse as thinking that it means it can be upgraded.  Sadly, this is not the case.  The RAM on a Macbook Air is smoldered to the motherboard to save space in this dynamic computer.

Some people turn to the option of taking their computer to a computer store or somewhere that specializes in technology.  This is a risky move.  Best Buy is known for saying that they can help upgrade the RAM at the store if the customer would like them to.  This is strange because it really isn’t possible.  Doing so is also a bad option because it will void your warranty with the Apple store.

There are multiple online blog threads discussing this conundrum because it seems so unreasonable.  User upgrades are not possible, and there are not many alternatives if you find yourself in a situation with not enough RAM.

When buying a Macbook Air, consider what you will be using your computer for.  Always overestimate rather than underestimate how much RAM you will need, because otherwise, you will find yourself strapped for data storage space.  The difference between a 2 GB, 4 GB, and 8 GB RAM is only a couple hundred dollars, so it may be worth it to pay for more space initially than to have to buy a new computer in the long run.

Continuing Problems

If you have more questions about how to upgrade the RAM on your computer, speak with a professional so that you can get the best help possible. TalkLocal will connect you with up to three, high-quality professionals in your area in just minutes.

Cost Of A Riding Mower

Tuesday, July 16th, 2013

Cost Of A Riding Mower - Landscapers

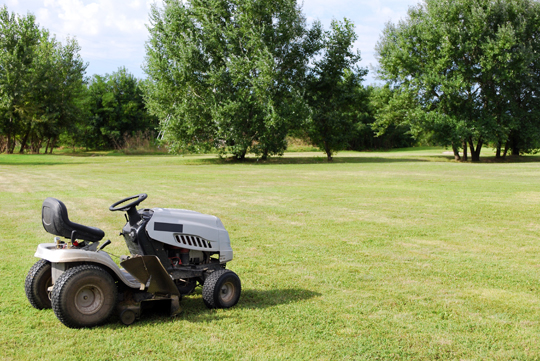
Riding lawn mowers are convenient tools that allow you to mow your yard with ease. Riding mowers can mow a lawn much faster than a traditional push mower and are also much less strenuous to operate. This allows you to mow your lawn more often and keep it looking in tip-top shape.

If you have a riding lawn mower you wish to sell or simply want to know how much it is worth, you need to determine it’s value. If you want to recuperate the cost of a riding mower when you sell it, you should use these tips to calculate its current value.

Damage

Inspect your riding mower for any damage or make note of any mechanical problems that you are aware of. Any of these things will reduce the value of a riding lawn mower. If you have taken care of your mower and made any necessary repairs, it will be more valuable.

Age

An older mower, in most cases, will cost less than a newer one. Consider how long you have had the mower and calculate the depreciation of the mower due to age. Most riding mowers depreciate about 14 percent every year. You can calculate the depreciation of the mower and subtract it from the original cost of a riding mower to help determine the value.

Initial Cost Of A Riding Lawn Mower

The amount you pay, or initial cost, of a lawn mower should be where you start when trying to determine value. When you deduct from the value to account for repairs, damage, or other things, you can subtract the deduction amount from the original cost. This will allow you to sell your mower for a fair price without feeling like you lost a lot of money on it.

Some basic riding lawnmowers go for about $700, but the more heavy-duty models can soar into the thousands of dollars.

Riding lawn mowers can be expensive, and if you are ready to get a new one, you may want to sell your old one. Before you put a price tag on your mower, make sure you have determined the value accurately and are selling it for a price that is fair to both you and the buyer.

If You Want To Pay Someone To Cut Your Grass…

Maybe you want to save both the money AND time by simply hiring a professional landscaper to buzz through and mow your lawn every week. If this is the case, find a local landscaper with TalkLocal. We will connect you with up to three professionals in your area, in just minutes. Searching through the phone book and other online referral sites are a thing of the past. Our new service is the quickest and easiest way to find professional help you need.

Hitachi TV Keeps Turning Off

Tuesday, July 16th, 2013

Hitachi TV Keeps Turning Off - TV Repair

What is more frustrating than being put on hold on the telephone? In the middle of your favorite TV show, your Hitachi TV turns itself off. It may be a quick fix, or you may need to invest in a new TV. Keep reading to find out why your Hitachi TV keeps turning off.

Why Your Hitachi TV Keeps Turning Off

Like a desktop computer or a laptop, TVs can also overheat. Excessive heat can cause your Hitachi TV to sporadically shut off. When the fans in the TV get clogged with dust or stop working, your TV cannot cool off effectively.

Your Hitachi TV could have a failing power supply board. A weak capacitor in the power supply will prevent your TV from functioning properly. Many plasma TVs have this problem, and you should contact a TV repairman to help switch the board.

Dry solder could be causing your TV to spontaneously shut off. The dry joints on the transistors need to be re-soldered. We recommend hiring a professional to do this for you, however if you are TV-savvy and you want to do it yourself, then make sure the TV is not plugged in while you solder.

Your Hitachi TV could be turning off randomly in order to protect itself from a short circuit. Again, check the power supply board and soldering to prevent unexpected turn offs.

Find A TV Repair Professional

If you are having difficulty with your Hitachi TV, TalkLocal can help connect you with top local TV repairmen. Simply enter our website and provide us with a brief description of your TV woes, your availability for service, and where you are located. After you submit your request, you can kick back and relax until you are connected with up to 3 TV repairmen within minutes.

Customer Relationship Management: Good vs Bad Eggs

Tuesday, July 16th, 2013

Customer Relationship Management: Good vs Bad Eggs - Small Business Advice

Written by Talk Local Co-Founder, Manpreet Singh

If contact information turned a reliable profit, then each Yellow Book would be worth its weight in a gold-plated diamond instead of ad revenue. Failing to properly understand the quality of a lead is like counting eggs before they hatch. And, when business owners spend their time and energy chasing leads indiscriminately, it’s like marinating them in barbecue sauce and prepping them for Thanksgiving Dinner too.

The process of determining the likelihood that a prospective customer will actually buy is called Lead Qualification, and it’s an essential part of developing an effective Customer Relationship Management (CRM) strategy. It also just so happens that CRM and Lead Qualification is a lot like poultry farming.

Don’t worry. The following metaphor may be hunger induced, but it actually makes sense. Bare with me- or should I say “chicken with me”- while I get down to the meat of the subject. [Cue uproarious laughter.]

The Hens:

There are a number of lead generation methods: pay-per-click, adwords, and TalkLocal are just a few examples. These methods are your “Hens.” Different hens lay different quantities and qualities of eggs. Your job, as resident Ole McDonald, is to determine how many high-quality eggs you have and give the right eggs your best prenatal care. Right now, we’re just focusing on sorting the eggs. After all, no hen or farmer wants to waste limited resources nurturing a bad egg, right?

The 4 Types Of Eggs:

Mystery Eggs: A lot of lead generation strategies – or hens – lay eggs of high quantity and unknown quality. Those hens just offer a list of names, phone numbers, and addresses (NPA’s). These are called Cold Leads. You can work towards qualifying the leads by cold-calling, adding them to an email listserve, or sending a mail ad. Your method depends on how much time and how many unqualified/cold leads you have. As quickly as possible, you want to get enough information to move those leads to one of the other categories.

Bad Eggs: Before you lavish undue amounts of your feathered warmth on an egg, make sure it’s the right species. Many birds are known to practice Brood Parasitism, leaving an egg in the nest of a different bird or species. Bad eggs can be found in quick questions. Is their address outside of your service area? What service do they need, and do you provide it? Ask the right questions right away to prevent wasting more time, then discard bad eggs or refer them elsewhere.

Golden Eggs: These are actively seeking consumers who are ripe for immediate conversion. They call requesting a quote for a job needed ASAP, for example. Typically, Golden Eggs are very upfront with their requirements, but they may even be lost in the Mystery Eggs bunch. That’s why it’s important to make some form of contact, preferably by phone,  as early as possible. Traditionally called Hot Leads, these eggs are so hot that if not handled efficiently, they can melt and slip right through your fingers and into the hands of a competitor.

Nesting Eggs: These are good eggs. You’ve made contact, and their needs match your services, but the sale isn’t immediate for whatever reason. Like with any clutch of eggs, you can’t know which ones will hatch, but you can improve the odds by warming each of these leads and nourishing their development. They require telephone follow-ups and are susceptible to soft-sells via email or social media. However, their status can change at any moment. Nesting eggs can turn golden at a moment’s notice following a successful marketing campaign, or crack prematurely under the pressure of overly aggressive sales tactics.

The right, well-nourished egg can hatch to reveal a chick that comes to value your deepened professional relationship and relies on your ongoing service and outreach. It’s just a matter of focusing your warmth and attention on those eggs which have the most promise.

Good luck and best wishes toward a nest full of chirping little chicks that shell out lots of chips.