Archive for 2013


How To Jumpstart A Car With A Battery Charger

Monday, July 15th, 2013

How To Jumpstart A Car With A Battery Charger - Towing

We’ve all had it happen — just when we’re in a hurry, we find out that our car is dead. There’s no one else around to help, and the auto club is more than an hour away. Well, if you have a battery charger, it’s fairly simple to go ahead and jumpstart your car’s battery, even if there’s no one else around to help you. Here’s how to jumpstart a car with a battery charger.

How To Jumpstart A Car With A Battery Charger

1. Make sure your car is turned entirely off. Removing the keys from the ignition ensures it’s completely off, and not just dead.

2. Open your hood using the hood release lever inside the vehicle.

3. Verify that your charger is turned off and is not plugged into an electrical outlet before you begin. Place it away from the vehicle, but close enough to connect the cables.

4. Take the positive clamp from the charger and attach it to the positive terminal on your car’s battery. This should be marked with a plus (+) sign, and is often colored red so you can identify it more easily.

5. Take the negative clamp from the charger and attach it to the negative terminal on your car’s battery. This should be marked with a minus (-) sign, and is often colored black so you can identify it. This should provide the power needed to jumpstart the vehicle.

6. Adjust the voltage on the charger. If unsure, consult with the owner’s manual for the best results. A slow, or trickle charge, will usually give you better results.

7. If your charger has this option, decide whether you want it to shut off automatically when the battery is charged.

8. Wait the amount of time indicated by the manual for the type of charger you have and the voltage selected. Attempt to start the car.

10. Turn the charger off and unplug it before removing it.

11. Disconnect the battery charger – first remove the negative clamp from the battery, and then remove the positive clamp.

That’s it! Get in, and you’re ready to go.

Need More Help?

If you need any help, or have any other questions, TalkLocal has professionals who can help. We will connect you with a towing service who can help you restart your car, or bring it to a mechanic.

Chair Rail Ideas

Monday, July 15th, 2013

Chair Rail Ideas - Painters

Chair rails were made to prevent chair backs from scratching and damaging walls when they were pushed against them. Chair rails have become a popular wall design choice and can add character and style to any room.

If you are thinking about adding something different to your walls, consider these easy chair rail ideas.

– Choose chair rails that match the molding around the floor and doorways. You may need to replace the molding or you may be able to find chair rails that match it perfectly. If you cannot find rails and moldings that match perfectly, look for some that are the same color. You can also paint your moldings and rails to match each other.

– Use chair rails to break up two different shades or colors of paint. Paint the top half of the room one color and the bottom a different color. The chair rails can be installed in the middle of the room and will create a nice contrast between the two colors. Many people prefer to paint the bottom half of a room darker than the top half.

– If you like the look of wallpaper but do not want to cover a whole room in it, you can use chair rails to separate the room in half. Apply the wallpaper to the top or bottom half of your wall and paint to the other half. Add the chair rails between the paper and paint.

– Break up sections of paneling and drywall with the chair rails. This is one of the most popular chair rail ideas. You can choose to use chair rails that are made of the same materials as the paneling or choose to go with a different style for a unique look.

These easy chair rail ideas can help you change your plain and boring room into something special. Be creative and use chair rails however you want to complete a certain look or design.

Leaving It To The Pros

Maybe you are not particularly skilled in painting or installing chair rails. That’s all right. TalkLocal can connect you with service professionals who are. We’ll drastically cut down the search process so you can get right to work making your home look great.

How To Fix A Snow Blower

Monday, July 15th, 2013

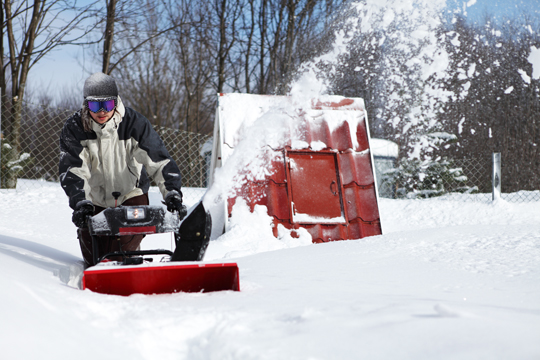
How To Fix A Snow Blower - Snow Removal

Snow blowers are one of the greatest luxuries you can have when heavy snow falls. By using one, you are able to move snow quicker and not strain your back shoveling.

However, just like any other piece of yard equipment, snow blowers can break or experience technical failure. Often, this happens while you are in the middle of using one. If you experience one of the myriad of issues that can crop up, here is some information on how to fix a snow blower.

Snow Blower Is Not Moving Snow

When you use a snow blower, you expect to see snow come flying out of the chute. Unfortunately, this doesn’t always happen. Are you wondering how to fix a snow blower in this situation? Try two things.

1. Inspect the blade to make sure it is not damaged. If the blade is broken, it will not adequately pick up snow.

2. Then, check the chute. Most often, the chute becomes clogged by thick snow, ice, or even a foreign object. Make sure to turn your snow blower off, and use something to break through the build up in order to clear the chute.

Snow Blower Is Not Starting

Maybe you took your snow blower out for the first time in months, but it won’t start. This can be a common issue if you did not take the proper steps to prepare your device for the long period of inactivity.

Make sure the problem isn’t an easy fix — like moving the choke into the proper position. Most likely, the gas that you left in the tank went bad. Empty out the tank and replenish it with fresh gas. This should more than likely get your snow blower roaring once again.

Need Repair Help?

These are just a few of the more common issues you may face as the owner of a snow blower. Some issues are not as cut-and-dry, and you will need to seek the help of a professional. In this case, turn to TalkLocal. We do all the searching for you and yield results you can use in a matter of minutes.

How To Grow Espalier Trees

Monday, July 15th, 2013

How To Grow Espalier Trees - Landscapers

Espalier trees are trees that have been pruned, shaped, and trained to grow in a specific pattern against a flat surface. Both fruit trees and flowering trees can be used in this manner, and both can be eye-catching and impressive if grown right.

Knowing how to grow espalier trees is essential to making them look perfect and keeping them healthy. Here are some tips to help you.

Start with a fruit tree that is young and healthy: The healthier the tree, the more likely it is to survive the pruning and shaping. Make sure the trunk of the tree is strong and green and the branches are small, green, and healthy. Starting with a tree that has small branches will make it easier for you to prune and shape them.

Plant your trees in the appropriate amount of sunlight: Some trees thrive in constant sunlight and others like shady areas. If you do not give your tree what it needs, it will not stay healthy and will eventually die.

Choose the wall or area where you want the plant to grow: Do not plant the tree right next to the wall. Instead, dig your hole about a foot away from this area. Make sure the hole is big enough to cover the root ball.

Tie the branches in the pattern you want the tree to grow in: This can be one of the hardest parts of learning how to grow espalier trees. You will need to work with these branches often to get them to grow into the right pattern. You will also need to prune new branches to help get the desired shape of the tree.

Water and fertilize your plants often to make them healthy during the growing season. Do not fertilize once the ground has frozen. If you learn how to grow espalier trees properly, they will continue to grow and become beautiful, creative works of art.

Do You Give Up?

If you can’t get your trees to grow, call in the professionals. Actually, TalkLocal in the professionals. Use our innovative service to instantly connect with local landscapers who can help you.

Burning Smell From Computer

Monday, July 15th, 2013

Burning Smell From Computer - Computer Repair

Overheating is a pretty common problem with computers. This is most likely what is causing the burning smell emanating from your PC. It can cause permanent technical failures if left untreated. This problem can be avoided by performing regular maintenance on your computer. However, if your computer does have a burning smell coming from it, it is important to turn off the computer immediately to prevent more damage from happening.

What Causes Burning Smell From Computer?

Dust

During normal operation, the fans inside the PC power supply and case form a circulatory system, which draws air in through the vents to cool down the system. This works well for cooling, but a negative side effect is that dust and other air particles are sucked into the computer. Inside, dust is trapped and settles, which can stop the cooling effect and cause things to heat up, causing the burning smell.

Fan Failure

It is common knowledge that parts inside the computer reach high temperatures during operation, which is why it is essential that the internal fans cool the systems down and stop them from burning out. If the CPU fan fails, the operating system will increase in temperature and overheat.

Blocked Vents

When a computer has been running for a while in a dirty environment, it is possible for the air vents inside the case to become clogged with dirt, dust, and other harmful particles. This prevents fresh air from coming into the case, which will cause it to heat up. Many higher-end cases put filters over the air vents, which are hidden for aesthetic purposes. Many people do not know that they should regularly clean these air vents.

Faulty Components

Faulty components may cause a burning smell when they fail, depending on how bad the failure is. In the worst-case scenario, these components can short out, which draws large amounts of current and causes them to heat up immensely, causing complete system failure.

Need Computer Help?

If a burning smell continuously comes from your computer, you may want to seek professional help. Use TalkLocal to get the best help you can get from local IT service professionals to find the cause of the problem and fix it before your PC fails completely. We will connect you with the right professionals in just minutes.

Celebrating Sikh Centennial: Seva Call Founder Attends White House Event

Monday, July 15th, 2013

Celebrating Sikh Centennial: Seva Call Founder Attends White House Event - Seva Call

In 1913, Bhagat Singh Thind came to the US in pursuit of education and opportunity. He became the first Sikh to fight alongside Americans in the armed forces (serving in World War I), but his citizenship was rescinded twice because of his race. Still, he did not let the Supreme Court decision discourage him.  He continued his education, became a religious leader and activist, and eventually became an American after a 1935 law allowed all vets to take the oath.

On July 12, 2013, 150 Indian-American business leaders came to the US in pursuit of an event celebrating the Sikh centennial. All shared Thind’s Sikh faith and strong drive, and most shared his Singh name as well. The attendees included innovators like Sunny Singh of Edifecs, Savneet Singh of Gold Button International, and Seva Call’s very own Manpreet Singh. All of these attendees epitomize Mr. Thind’s indomitable spirit, proving through their professional and personal contributions that America gains innumerable value through our acceptance of one another.

Manpreet Singh is a prime example. He became the youngest CFA charter holder in the world and got his MBA at Wharton Business School before co-founding Seva Call.

The prestigious event was organized by the Sikh Council on Religious Education, of which Manpreet Singh is an active member. The very public, symbolic embrace of the community by the Obama Administration is in stark contrast to the pervasive fear and misunderstanding Sikh’s face across the country and abroad.

Introducing Steven D’Adamo, Seva Call Intern

Monday, July 15th, 2013

Introducing Steven D’Adamo, Seva Call Intern - Seva Team

Written by Steven D’Adamo

Hey guys! You’re probably feeling bombarded with Seva Call intern info pages (there are a lot of us!), but now it’s my turn to introduce myself.

Technically, I’ve been writing to you guys through the Seva Call blog since January. You know all of those service category articles we publish? There’s a real, live person who edits, rewrites, and publishes those, and for the last 7 months, it’s been me. Yes, I am a veteran among the Seva Call interns.

Well now I’ll also be writing less helpful articles for your reading pleasure, like our recent series about zombies. Check it out.

So, time for a little about myself.

1. I’m a native Marylander. I love my home state, even though I’ve spent 5 of the last 7 years living outside of it… or maybe that’s why I love it.

2. I tell people not from Maryland that I’m from Baltimore, because no one has heard of or cares about my suburban hometown of Columbia.

3. I have traveled to 14 countries, mostly over the last 2 years, and I still want to see more. And below is me, on a camel, wearing a turban, in the Moroccan Sahara.

Introducing Steven D’Adamo, Seva Call Intern - Seva Team

4. My favorite book is The Hobbit. And yes I saw the first movie in theaters… twice.

5. My favorite band is the Foo Fighters.

6. I will eat any type of food once, and there is very little food that I actually dislike.

7. It is a life goal of mine to drive through every US state, even Alaska if possible. I’m not sure if renting a car in Hawaii after flying there counts.

8. I also want to be a college professor at some point. Who wouldn’t want summers off?!

9. I respond to comments on the blog. So leave a comment!

10. I thoroughly enjoy editing and writing for Seva Call, no joke. So I really hope you all enjoy reading.

Is that enough Jaime? I’m pretty sure that is all of the information about me.

How To Defrost Locks

Sunday, July 14th, 2013

How To Defrost Locks - Locksmiths

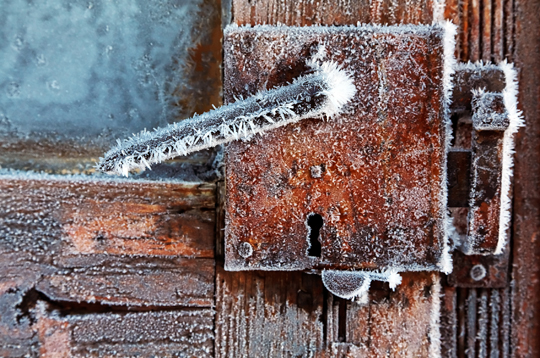
It is never any fun to go to unlock your car or home door only to find that the lock is frozen. This scenario only seems to make a day go from bad to worse. Fortunately, there are some fairly easy and fast methods for how to defrost locks that do not necessarily require supplies from inside the house. Be sure to check that the lock is actually frozen and not just jammed.

Car Locks

Lighter: This may seem obvious, but if you have matches or a lighter handy, use them to heat up the metal of the key (carefully). Insert the key into the lock and wiggle it around very gently in order to unthaw all parts of the lock. Remember, when metal is warm, it is much more pliable, so be careful not to contort the key in a way that will render it useless.

Hand Sanitizer: While not everyone carries a lighter, many people are now carrying small bottles of hand sanitizer. If you cover the key in the sanitizer and place it in the lock, the alcohol will melt the ice on the inside. If you didn’t carry sanitizer before, you probably will now!

Home Locks

The previous two methods will work on the home lock as well, but if you have just arrived home, you have another asset you can use: your engine block.

A car’s engine will heat up and stay hot for quite a while, even in cold temperatures. Hold your key to the hot engine block and then use the warm key to unthaw the lock. Be careful, as the engine will be very hot and can easily burn you.

Arguably the simplest way to defrost locks is through utilizing lock deicer, which is generally sold at most supermarkets. These products are made for the sole purpose of breaking up ice that has developed and clung to the inside of locks. The product comes with a few step-by-step instructions printed on the packaging, making for very easy use.

You Can Always Use A Locksmith

If the lock still will not budge, it may be time to call in the professionals. Many locksmiths are available for 24-hour service. TalkLocal can help find a professional in your area who will know how to defrost locks quickly. We will connect you with the right professionals in minutes, and our service is absolutely free.

How To Install Wallpaper

Sunday, July 14th, 2013

How To Install Wallpaper - Painters

If you want to give a room in your home a different look, you may be considering adding wallpaper to it. Wallpaper comes in a variety of patterns, colors and textures and can change the style of a room dramatically. Once you wallpaper, though, it will be tricky to switch over to paint on a whim.

If you do not know how to install wallpaper, consider some of these tips. They will not only show you the basics of installation, but also how to get the paper smooth and prevent it from peeling or falling off the wall.

1. Create a water box or fill your bathtub with a few inches of water. You will need the water to wet the back of your wallpaper to activate the paste that will adhere it to the wall.

2. Unroll your wallpaper and cut it into manageable sections. If the wallpaper has a pattern, try to cut in location that will be easy to match to the piece that will be pasted beside it.

3. Hold the wallpaper up to the wall and smooth it from one corner to the next. Be sure to smooth out any wrinkles as soon as possible. Once the paste is dry, it will be extremely difficult to get the paper smooth and remove all the wrinkles.

4. Add the next piece of wallpaper to the wall. Make sure the ends match up and there are no gaps between the pieces. When you are learning how to install wallpaper, this can be the hardest part to master. Wallpaper that has patterns or pictures on it can be tricky to perfect. If you are not confident that you successfully install it, you may want to choose a solid color.

Once you have learned how to install wallpaper, you will be able to do it in any room that you please. Always take your time and make sure to smooth out each shape as you install it. Wallpaper can be a great way to change the look of a room if you install it properly.

Hire Someone For The Job

If you find yourself looking to hire someone to install wallpaper for you, visit TalkLocal first. We offer consumers all around the country a resource with which to connect with service professionals of all industries. Need a painter that can hang wallpaper? Submit a request and we’ll have you talking with someone who can help in just minutes.

Build A Metal Arbor

Sunday, July 14th, 2013

Build A Metal Arbor - Landscapers

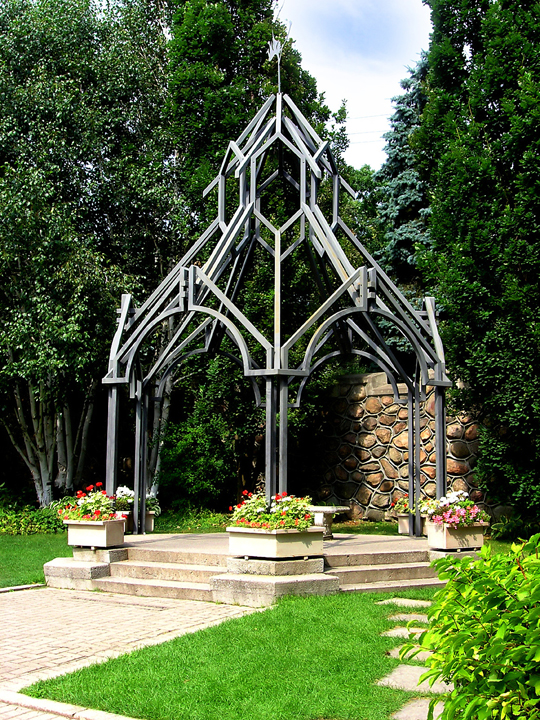
So you’re not a skilled metal worker — so what?! You still probably have what it takes to build a metal arbor.

The beauty of metal arbors is that they do not have to be perfect, nor do you have to use brand new pieces of metal. The arbors with the most character show their age and are a little dilapidated. This gives your arbor a rustic look that always complements a garden quite well.

The toughest part will be finding your materials.

Where To Find Materials To Build A Metal Arbor

As stated above, sometimes the older looking arbors have the most character. For this reason, you can go to a metal scrapyard and look for materials that might work well with your arbor.

You have to find materials for the minimal arbor, which is essentially three trellises — two that stand vertically with the other resting over the top. Of course, you can always purchase the materials, too. A lot of products are treated to look like they have a lot of age on them. You can still achieve a rustic feel with new materials.

Installing A Basic Metal Arbor

Using metal wire, you can fasten the top portion of the arbor to the two trellises. Make sure that the trellises are securely fastened to the top piece before you go forward installing the arbor.

To ensure that the arbor does not tip over, you’re going to have to drive it into the ground a little ways. You can always measure where the feet of the trellis will fall, and dig small holes there. Once the feet fall into the holes, fill them back up with dirt to make sure it is secure.

Professional Help Is A Click Away

If you do not have any desire to build a metal arbor, professional landscapers can install them, and other features, for you. Don’t know where to find reliable help? Try using TalkLocal. We scour your local area and find qualified help that you can count on. You just wait by the phone for someone to call you. It’s that easy.