Archive for 2013


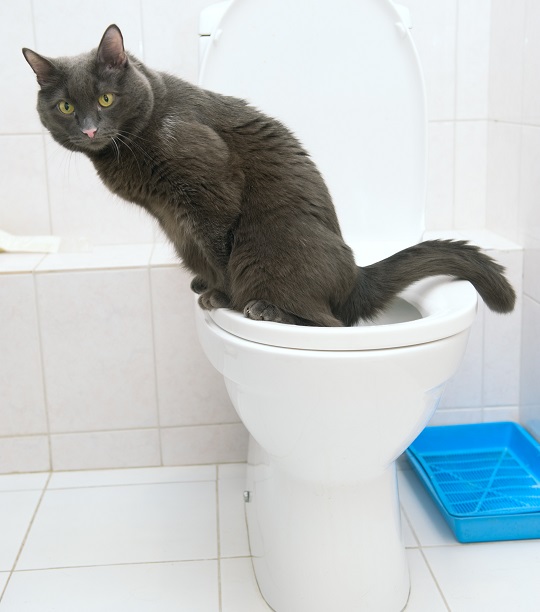
Train Cat To Use Toilet

Sunday, July 14th, 2013

Train Cat To Use Toilet - Veterinarians

Toilet training your cat is not only cost-efficient, but more eco-friendly. The transition from litter box to toilet can be a slow process, so be patient. Keep reading to learn how to train cat to use toilets.

Toilet Training Your Cat

1. Start by moving your cat’s litter box next to the toilet, so that it familiarizes itself with entering the bathroom to do its business. Over time, place books underneath the litter box to elevate it so that your cat familiarizes itself with heights. Do this until the litter box is about as high as the toilet seat.

2. Find a bowl, preferably of stainless steel, that fits in the toilet between the toilet seat. Fill this bowl with kitty litter. Treat this as a regular litter box; scoop any clumps and keep it clean. Make sure the toilet lid is never down or else you will have a mess.

3. After your cat familiarizes itself with the litter bowl, use a plastic tray or heavy cardboard to serve as a platform for your cat to sit on. Make sure it is sturdy and fits over the bowl you placed in the toilet. Cut a small hole in the center of the platform so your cat can still dig a hole in the litter bowl. At first, your cat might miss the hole, but you are on the right track to toilet training your cat.

4. Decrease the amount of litter in the bowl over time until you have a small amount. Then, empty the litter and fill the bowl with water. You will need to rinse out the bowl in the toilet until your cat becomes accustomed to this step.

5. After your cat familiarizes itself with the water switch, you can remove the bowl. Cut a bigger hole in the platform to start training your cat to support itself on the toilet seat. Gradually increase the size of the hole in the platform until it is as wide as the toilet seat.

Find A Vet

Remember to reward your cat after a successful toilet experience. If you are experiencing difficulty training your cat, use TalkLocal to help connect you with the best local veterinarians. We will connect you with up to three veterinarians in your area, so your cat gets the training and medical care it needs.

To DIY Or Not to DIY: How-To Link Roundup

Sunday, July 14th, 2013

Written by Dallea Caldwell

There are a number of dubious television shows targeting impressionable adults, pressuring them to do it themselves. No longer is parental permission and supervision advised, not even for activities involving sharp objects or choking hazards (or what toddlers like to call bite-sized), or when operating heavy machinery — their oversized peanut heads before they grow into them, for example. For years, an audience who – for social responsibility’s sake – were told “don’t try this at home,” are now being indoctrinated into a trendy self-reliance that beckons them to the unknown dangers of D.I.Y.

It is up to responsible of adults to determine whether a task is doable, too daunting, or too dangerous to “D.I.” without a trained professional. One must research to learn the requirements of the project and be capable of an honest self-assessment. Otherwise, a project can go from home addition to hospital admission. (more…)

Exterior House Painting Preparation

Saturday, July 13th, 2013

Exterior House Painting Preparation - Painters

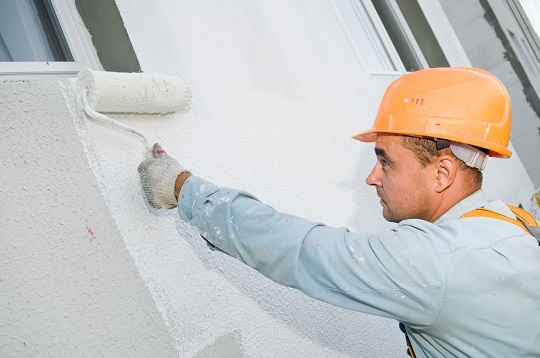
Painting the exterior of your home is a big job. But you can’t just dive in and start painting. Following the proper steps for exterior house painting preparation can increase the lifespan of your new paint job. Consider these factors before you begin painting.

Access to the Work Site: You might need scaffolding or a ladder in order to reach higher places. Scaffolding might be better because it gives you more room to move.

Cover and Protect: Set up a tarp to catch dust and scrapings. Cover anything you do not want painted, such as shrubs, flowerbeds, lawns, or trees near your house. Use drop cloths instead of a plastic trap because it will allow your plants to breathe while being protected from paint.

Remove Fixtures: Remove any shutters, light fixtures, or external decorations from your home.

Proper tools You Will Need

Pull Scrapers: These will help you remove any old paint on the house. Scrape horizontally, not vertically, so that you do not damage the wood. Scrape any paint that comes off easily.

– Electric Sander: Use an electric sander to get off any remaining paint that the scraper could not remove. Keep moving the sander around in order to prevent damaging the wood.

– Molding Scraper: Remove paint around windows or other fixtures with a molding scraper.

– Infrared Paint Stripper: In order to easily remove paint, especially on narrow window frames, use the infrared paint stripper. Infrared radiation penetrates through the paint and releases the adhesion between the wood and the paint. Check with your local equipment rental store or home improvement retailer if you are going to use one.

Wash and Dry: Once you have removed all the old paint, wash your house to remove any debris. Allow your house to dry for a few days before you begin painting.

Caulk: Caulk any gaps in moldings, door frames, windows frames, and anywhere else that needs to be sealed, so that paint does not leak in and damage the internal layers of your house.

Prime: Once you have removed all the old paint and your house is dry, apply a primer. The type of primer will depend on the type of paint you use. For example, if you use latex paint, you will use latex primer. Primer serves as a shield against nature’s elements and allows for strong paint adhesion.

Hire A Professional Painter

If you are considering painting the exterior of your home, TalkLocal will connect you with the best local painters. Just tell us your what you need, where you are, and when you’re available, and we’ll find the professionals for you, in just minutes.

Troubleshooting An Unrecognized Wireless Mouse

Saturday, July 13th, 2013

Troubleshooting An Unrecognized Wireless Mouse - Computer Repair

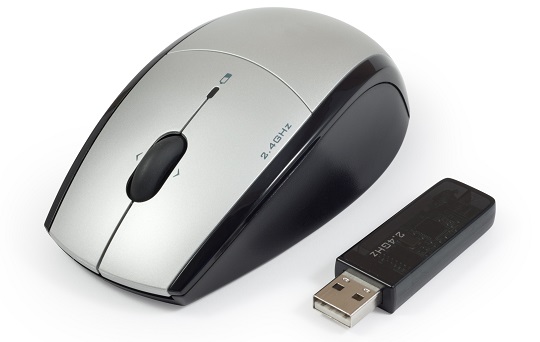
Nothing can be more frustrating than dealing with a wireless mouse that just doesn’t seem to work. Before you throw the mouse across the room, try these methods to get everything back in working order. Here are some tips for troubleshooting an unrecognized wireless mouse.

Try A Different Port Or Environment

Try to connect the receiver to a different USB port to test for any problems with the original port. Also, try to connect the receiver to a USB port located on the back of the computer, because these usually have more bandwidth power available. Be aware that items such as desktop fans, metal furniture, and fluorescent lights may interfere with the signal from the pointing device. Try moving to a different location to test your wireless mouse.

Replace The Batteries

This issue may occur if the battery power is low. Experts recommend using batteries that are designed for use with electronic equipment.  Replace the batteries to determine if this solves the problem. Make sure you resync your mouse after replacing the batteries.

Test The Device On A Different Computer

If the issue continues to occur, test the mouse on a different computer. If the problem persists when connected to a different computer, you may have a defective mouse.

Uninstall Any Conflicting Mouse Software

If you have any other mouse software installed, such as Logitech or touchpad software, it may interfere with your wireless device software. Uninstall any interfering software to see if this solves your problem.

Still Need Help?

If you are still having problems troubleshooting an unrecognized wireless mouse, you may be wondering if you should buy a new one. Before you rush out to the store, try speaking with a computer repair technician. They will be able to tell you whether you actually need a new mouse or not. TalkLocal will connect you with up to three computer technicians in your area in just minutes. Try it for free!

Trellis Fencing Ideas

Saturday, July 13th, 2013

Trellis Fencing Ideas - Landscapers

Trellis fences are small strips of wood that are nailed together to create lattice, which has many uses. Some people prefer to use trellis fences for decorative purposes, because they are not as strong or durable as traditional fences, and do not offer much in terms of privacy.

If you are in need of some trellis fencing ideas, consider these.

Privacy Hedge

While a trellis fence may not be able to provide much privacy alone, it can be a great structure for plants and vines to grow on and around. If you can grow your plants thick enough, they can cover the holes in the trellis and create a privacy hedge that looks natural, yet neat and tidy.

Contained Garden

If you are limited in gardening space and want to keep your plants from taking over your whole yard, you may want to use a trellis fence to help contain them.

Add the trellis to the borders of your garden and allow the plants and vines to grow on one side of it. Create a gate to enter the garden, and plant all of your flowers and plants inside the perimeter of the garden. A contained garden will help your yard look neat and clean, while still allowing you to enjoy a variety of garden plants.

Edging Around Decks

If you have a deck or porch that is built up, you may want to use the trellis fence to cover up the sides. The trellis will allow you to hide the underpinnings of the deck and anything that is stored under it. You can also plant flowers and vines around the trellis for a more decorative look. This is one of the most popular trellis fencing ideas.

Use Talk Local To Find Help

These trellis fencing ideas are perfect for any size yard or garden. Be creative, and think of new ways to use your trellis to make your home and yard look good.

If you need professionals to help put your vision into action, visit TalkLocal to be connected with one in your area. Our service is fast, easy, and free!

When To Replace The Timing Belt

Saturday, July 13th, 2013

When To Replace The Timing Belt - Auto Repair

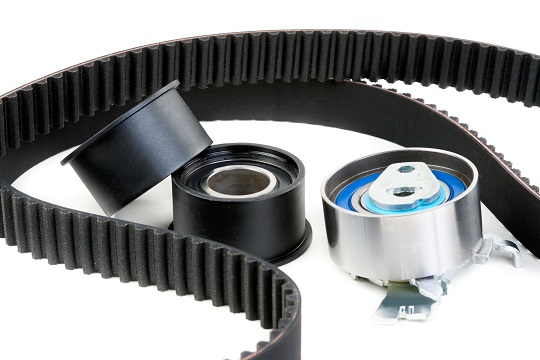
We work hard to protect our vehicles and to keep them maintained. However, while we maintain our tires, engines, and transmissions, the timing belt is often overlooked. Knowing when to replace the timing belt on your vehicle is very important, and a failure of the timing belt can turn into a major problem.

Replacement of the timing belt is an essential service operation which every car owner needs to be aware of. To best understand why the timing belt is so important and, in return, what we can do to stop it from malfunctioning, we need to find out more about what it actually does and what the life expectancy of the timing belt is.

What Does The Timing Belt Do?

The timing belt in your car helps to make your engine work. Without it, the engine cannot run smoothly because the camshafts in the engine will not work well. A camshaft is a shaft in your engine that controls the intake and exhaust valves, which allows air in to create combustion and vents the exhaust. A properly running timing belt is essential in this process.

When To Replace The Timing Belt

When figuring out when to replace the timing belt, find out if you have an “interference” or “non-interference” engine. Interference engines have limited space between all the valves and pistons; non-interference engines are more spacious. Because an interference engine has such a small space between the pistons and the valves, any break in the belt can cause a huge problem and can ruin the entire engine. These timing belts need to be changed more often. Because a non-interference engine has more space, a break in the belt is usually not as damaging. However, in both types of engines, timing belt failure will stall the engine and it will not start again without major repair.

Fortunately, timing belt failure can be easily prevented with care and maintenance.

1. Check the owner’s manual to see when to replace the timing belt in your vehicle.

2. Check the last time the belt was changed. A general guideline is that the timing belt should be changed every 60,000 to 80,000 miles.

3. If your timing belt is reaching the point when it should be changed, or if a change is overdue, take your vehicle to a certified mechanic. All timing belt service intervals should be followed carefully to protect your vehicle and to protect you.

Find A Mechanic

To find out more information about auto repair and protecting your vehicle, find a quality mechanic near you. TalkLocal will connect you with up to three mechanics in your area, so you can get the help you need, when you need it.

Environmental Problems Caused By Disposal Of Batteries

Saturday, July 13th, 2013

Environmental Problems Caused By Disposal Of Batteries - Garbage Removal

Just think about how many gadgets and other electronics you have in your home that require batteries. Thus is the case for most households, making the number of batteries that are thrown into the garbage and into local landfills an astronomical figure. This might lead many to contemplate the environmental problems caused by disposal of batteries. If more people learned of the possible hazards this poses, they might more carefully contemplate how they go about disposing of batteries.

Which Batteries Can Be Thrown In The Trash?

The environmental problems caused by disposal of batteries hinges on the type of battery. It certainly does not hurt to recycle all of your batteries, but these days, more traditional batteries (A, AA, AAA and D-Cell) contain far fewer harmful chemicals and toxins than the batteries of old. If you have old batteries, make sure you recycle them to cut down on the environmental impact.

Rechargeable batteries and car batteries do, however, contain significant chemicals and must be disposed of with care. It is best to recycle them.

What Effect Do Batteries Have On The Environment?

By throwing batteries in the trash and into local landfills, you are essentially introducing such harmful chemicals as lead, lithium, cadmium, and mercury to nature. These substances and pose serious health issues to both humans and animals.

Air Pollution

Like all other garbage, batteries undergo a photochemical reaction as they decompose in landfills. This reaction causes gas emissions. Such harmful chemicals can produce O-Zone via the photochemical reaction, which can contribute to the greenhouse effect here on earth.

Water Pollution

The harmful chemicals found in batteries can also run off into local water supplies. Not only is this dangerous to the people who drink from the supply, but the chemicals can kill both plants and animals, putting the ecosystems of streams, rivers and lakes in serious jeopardy.

Find A Recycling Service

If these environmental problems caused by disposal of batteries have made you think twice, you can easily find professionals who will help you recycle your old or used batteries. Simply type the necessary information into TalkLocal, and we’ll connect you with one immediately.

Raid Configuration Error

Friday, July 12th, 2013

Raid Configuration Error - Computer Repair

RAID is a redundant array of independent disks that’s main function is storage.  It combines a various array of disk drive parts into one device.  The data from your computer is distributed among the various levels depending on their importance.  This device plays an important role in data storage for your computer, so it can be a big problem when it stops working properly.  If you have a raid configuration error you should definitely look into the issue immediately. Here are some ways to resolve a raid configuration error.

Delete and Reinstall Programs

Your first option in fixing a RAID configuration error is to delete and reinstall the programs.

1. You will need to delete all of the RAID sets and shutdown your computer.

2. You can then move the cables to slots that show failed drives.

3. When you reboot, login into Areca Bios once again.

4. From this area, create Raidset to ensure that all channels are available.

If your problem persists shutdown the system and repeat this process once more.  If the same slots show failed drives, then the problem is either with the cable or back plane.  You can look into these from there.

GPT Protective Partitions

Another way you can go about solving this RAID configuration error is to consider the GPT protective Partitions.

1. Once you connect the drive to a PC using either internal or external connections, go to My Computer and then to the Managing tab.

2. In Managing there should be Disk Management, which you should verify is the GPT protective partitions.

3. Once you see them you should delete them.

If you are running on Windows disk management you cannot do this by simply hitting delete or moving them to the trash.  You should look up more in depth instructions on how to move forward in your manual.

Find Computer Help

If neither of these options work to help you fix your RAID configuration error you may need to seek professional help.  Use TalkLocal to be put in contact with a reliable, locally based IT service company.  You don’t have to do any work! Simply input the problem you are having, along with your availability, and within minutes you will be connected with someone who can help you out.  Leave the stress and time consuming calls in the past. The time is now for a more advanced service search where you barely lift a finger!

Optimizing HDTV Settings

Friday, July 12th, 2013

Optimizing HDTV Settings - TV Repair

If you have an HDTV, you know how crisp and sharp the screen can be. Before you start watching your favorite show, you may want to use some of these tips for optimizing HDTV settings. Once your settings are optimized, you will be watching television that is so clear, you will feel like you are really in the show.

Adjust The Backlight

When you buy a TV, the backlight is usually turned up really bright, so the TV can stand out among the bright store lights. Your home may not be as bright as a store, and therefore, the backlight can be turned down to better fit your needs. You can adjust the backlight using your television remote or by accessing the settings menu on your console.

Adjust The Contrast

In order to make the colors on your TV look better, you will need to adjust the contrast. You can change these with your remote or the buttons on the TV. When you adjust the contrast, you will want to make the dark colors on the screen as black as possible. You can also fix the bright colors, but be careful not to make them too bright or the picture will look fuzzy and odd-colored.

Device Settings

Optimizing your HDTV can allow you to change certain settings for certain devices. You may be able to set a certain contrast or backlight for DVD players, cable boxes, or another device that you connect to your television. See your user manual to find out exactly what settings can be assigned to these devices and how you can go about setting them.

If you are planning on optimizing HDTV settings, make sure you have consulted the user manual and have the appropriate time and patience to complete the task. Some TVs are easy to optimize and others are more difficult. When you are finished optimizing, your television should display the perfect screen.

Need Expert Help?

TV repair technicians can help you in optimizing HDTV settings, and they can even fix televisions that are broken altogether. To find one in your local area, trying using TalkLocal. We will connect you with the right professional in just minutes.

Master Key Auto Jigglers

Friday, July 12th, 2013

Master Key Auto Jigglers - Locksmiths

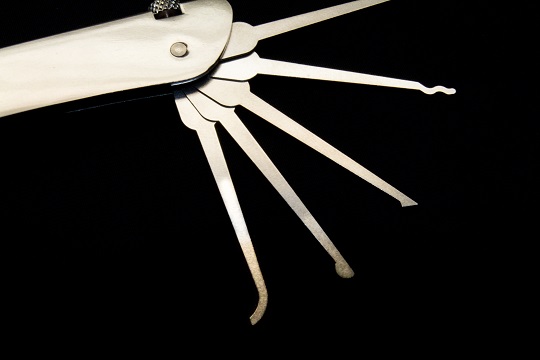
Auto jigglers, also know as tryout keys, are required tools for locksmiths and auto dealers. They are lock picks for cars. These master key auto jigglers can be used on almost any vehicle, and even padlocks. They are the key to (some of) your car problems!

How Do Master Key Auto Jigglers Work?

The cuts on the auto jiggler keys are very similar to the contours of a variety of car keys. The master key auto jiggler works by inserting it into the car lock and literally jiggling it around until the car unlocks. A skilled locksmith should know the correct position and amount of jiggling required to unlock a car quickly.

Can I Start A Car With Auto Jigglers?

Yes, it is possible to turn on a car’s ignition with jiggler keys. However, modern vehicles usually operate with a transponder key that sends a signal to the car. The car detects the signal as the appropriate key and turns on. A few cars do not have a key; rather, they work with a remote that is not shaped like a standard key. This remote also carries a transponder chip which allows the car to detect it. Although auto jigglers can open these modern cars, the jiggler keys probably cannot start the car, since they are not equipped with this transponder chip.

Due to the widespread availability of auto jigglers, there is a high risk of car theft. Be careful where you park your car, especially if it is an old vehicle that does not operate with a transponder key.

Find A Professional Locksmith

If you are locked out of your vehicle, TalkLocal can connect you with the best local locksmiths. Simply enter our website and provide a brief description of your problem, availability for service, and location. We will connect you with up to three, highly qualified locksmiths in just minutes.