Archive for 2013


Chair Rail Designs

Wednesday, July 10th, 2013

Chair Rail Designs  - Painters

Consider different chair rail designs when you are looking to create added interest in any room. A chair rail typically wraps around the center of the room and was originally designed to prevent chairs from dinging walls. It is now just as much a decorative piece as it is functional, and there are many design options on today’s market. It often stands alone, but can also be found atop wood paneling. Here are three basic options for chair rail designs in your home.

Two-Piece

This type of chair rail will actually consist of a backer board (designed for the purpose of holding a chair rail) and the chair rail itself. You can customize this design by choosing different cuts of trim with which to form the top piece of the chair rail.

Three-Piece

This type of chair rail consists of the backer board, a stop bead, and a layer of half rounds. The appearance of this type can be altered depending on the profile of trim you choose for the stop bead.

Ledge

This type of chair rail creates a small ledge at the top of the design. It consists of a bullnose piece that sticks out on top of a backer board, and a small piece of molding to finish out the angle where they meet.

These are the most popular types of chair rail designs, although there are certainly more. Additionally, not all chair rails are made of wood. There are many companies that supply all types of molding — chair rail included — in other materials. If no one in your house will touch your molding (like with crown molding, for example) they can make it in Styrofoam. In the case of chair rails, they will usually be constructed out of a durable polystyrene resin that only needs a coat of paint.

Not Sure?

If you are not sure where to begin, a professional’s help may be required. TalkLocal can find you the right professional for the job. He or she will be local, and our service is completely free. You will be on the phone with someone to answer your questions in minutes.

Build A Wooden Arbor

Wednesday, July 10th, 2013

Build A Wooden Arbor - Landscapers

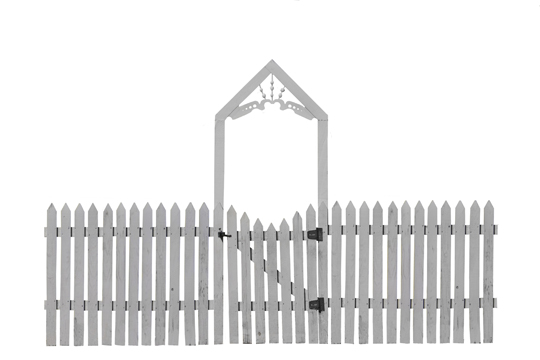
A wooden arbor can serve many purposes in your yard. It can create a place for vines and plants to grow, act as a border or help you section off your yard and add a decorative touch.

You can purchase wooden arbors from many stores, but they tend to be a little expensive. You can build a wooden arbor yourself for a fraction of the cost. Here’s how.

How To Build A Wooden Arbor

If you want to build your own wooden arbor, you need to make sure you have the right supplies. You may need to ask a friend or family member help you build it as well.

1. Square off the place where you will place your wooden arbor. Use small stakes and some string and be sure to measure accurately. This will help you determine where to dig your holes and how the arbor will look when it is finished.

2. Use a post hole digger to make the holes for the posts. You will have four posts, so you will need to make four holes. They should be at least a foot deep.

3. Add gravel to the bottom of each hole. Make the depth at least three inches, and place the posts in the holes. Pour concrete around the posts and make sure they are straight and level so your arbor is not crooked.

4. Create an arbor top from wood. You can choose to have an arched arbor or a flat one. Make sure the top of the arbor is the same width as your posts. Attach the top of the arbor to your posts.

5. Add pieces of lattice to the sides or back of the arbor if desired. If you want to add plants to your arbor, plant them around the posts or against the lattice.

Or, Call A Professional

There are many professionals that would find it a breeze to build a wooden arbor. You also gain the peace of mind that they will do it correctly, and it will stand the test of time.

Visit TalkLocal, and get started on finding the right service professional for your project. Simply answer a few questions about the services you need, and we’ll track down three businesses or professionals who can help. You still hold the power to select the right professional for you.

Best Types Of Radiators

Wednesday, July 10th, 2013

Best Types Of Radiators - Appliance Repair

Many homeowners throughout the United State use radiators as a cheaper alternative to heating their homes. Some radiators even have a retro look to them, so it essentially doubles as a decorative piece.

There are many different types of radiators available on the market. They operate and generate heat in different ways. Finding the best types of radiators means pinpointing the radiator type that would work best in your home.

The following are some of the best types of radiators.

Fan-Assisted Radiators: These are popular among homeowners and could be perfect for your home or apartment because they are smaller than traditional radiators. These radiators do not have to be very big, because they use a fan to help usher the heat from the radiator into the home. The heat is generated from hot water and a heat exchanger, which is built into the unit.

Under-the-Floor Radiant Heating Systems: Considered to be some of the most up-to-date style of radiators, these are installed underneath the floor. These are also considered to be the most efficient way of heating a home.

Tubing is installed underneath the floor and heated with one of a number of different substances. The heat is then transformed into the room via convection. You do not even need ducts or vents.

Traditional Radiators: While some might consider these to be a bit outdated, many people still rely on traditional ribbed radiators to heat their homes. They have stood the test of time and could still be considered among the best types of radiators.

These radiators are comprised of pipes that carry heat throughout the radiator. This heats the air in the living space.

Is Your Radiator Busted?

If the radiator in your home or apartment ever breaks, it might mean a cold night for you. Luckily, with TalkLocal, you can get help immediately. Our service is designed for folks looking for service professionals in a pinch. We do all the work and deliver you results within minutes.

How To Prevent Tree Diseases

Wednesday, July 10th, 2013

How To Prevent Tree Diseases - Tree Removal

Trees, like all plants, occasionally become infected with pathogens which cause them to become ill. Many of these pathogens can cause severe damage to once-healthy trees, sometimes killing or permanently disfiguring them in the process. However, you don’t have to stand by and watch your trees wither away. Here’s how to prevent tree diseases.

Clean Your Tools

If your tools have come into contact with soil, are coated with rust, or have been used on other plants previously, make sure to properly clean and disinfect them before using them again. Soil and residual plant sap may harbor parasites, bacteria, and viruses that can make your trees sick. Remove all debris with soap and water and soak tool blades in either isopropyl alcohol or a bleach solution. Make sure to repeat the sterilization process before working on another tree with the same tools.

Use Sharp Tools

If you’ve ever used dull pruners or shears, you’ve probably seen how the blades tend to crush the wood instead of cut it. When this happens, it’s much harder for the tree to heal, and healthy new growth is disrupted. On the other hand, using sharp tools gives a nice, clean cut that heals quickly and is less likely to be attacked by pests and pathogens.

Proper Feeding

Some tree types, especially fast-growing varieties and fruit-bearers, require huge amounts of nutrients in order to stay healthy. Like people and animals, malnourished trees are more vulnerable to not only pests, but also diseases. Therefore, it’s important to provide heavy feeders with regular fertilization. Purchase a plant food that is designed for your particular type of tree.

Bandaging Wounds

When removing large branches from trees, keep in mind that doing so creates a wound. Its delicate inner tissues are left exposed to hoards of insects, viruses, and bacteria just waiting to attack. Closing up these wounds speeds healing for the tree and makes it less likely for diseases to occur. It’s recommended that you use either spray paint or a specialized tree sealer to do this.

Need To Remove A Diseased Tree?

Lush, green, and disease-free trees are lovely things to behold, but keeping them that way takes some work. Use TalkLocal to locate a professional tree service near you that will be able to advise you on how to properly prevent diseases, or remove a diseased tree. Talk Local will connect you with the right professionals, in just minutes.

Zombie-Proof Your Home: Lock It Up For Lockdown

Wednesday, July 10th, 2013

Zombie-Proof Your Home: Lock It Up For Lockdown - Seva Call

Written by Steven D’Adamo

Greetings fellow survivors. Hopefully there are still enough of you left to get this article some decent hits. I kid, I kid… but seriously, the digital cash is somehow still flowing into my PayPal account from my pay-per-click ads… so thanks for that.

I promised that I would be back with some helpful hints to zombie-proof your home and survive the zombie apocalypse, and I’m here to deliver.

I’ve decided to help you out by letting you in on how the Seva Call Team has managed to keep Fort Seva Call up and running, starting with those all-important passages to the outside world: doors.

Now, we totally know that not everyone lives in a castle. And if you do, you probably don’t need to read this. So for those of us who actually live in the 21st century, post-apocalyptic wasteland: pay attention!

In general, you’ll want to protect your doors, while still being able to escape if your house is being overrun.

1. If your garage is directly attached to the house, make sure to reinforce the doors with plywood, or perhaps that absurdly heavy liquor cabinet you never used to store your one bottle of bottom-tier vodka.

2. You’ll want to have one door for primary entrance and exit. Make sure that you choose the heaviest, strongest door in your house for this. And then…you guessed it: reinforce it. But keep the peep-hole intact!

3. You’ll also want an alternative escape route. Perhaps an upper-level window near a tree, or a ridiculously-planned route from the attic, over the roof, and through the backyard would work best for this. The key is, everyone in the house must know this route, and it must be well-hidden and protected from randomly curious zombies.

Here at Fort Seva Call, we have a seldom-used garage filled with junk to act as an alternative escape. The garage can only be opened from the inside, and the scattered, dusty furniture acts as a pack-rat’s obstacle course for the zombies who will likely chase us through there at some point.

We also happen to have a surplus of oversized desks that have been recycled into barricades. Only a start-up home office could be so fortunate.

Hope this helps you zombie-proof your homes. I’ll return with further updates. Steve out.

Reinstalled OS System and Lost Data

Tuesday, July 9th, 2013

Reinstalled OS System and Lost Data - Computer Repair

If you reinstalled OS system and lost data, don’t worry because most of the time this won’t lead to permanent data loss. Your data can still be recovered using Data Recovery Software. Should you choose to recover your data, stop using the drive and do not save any data to the disk, as this could cause overwriting and permanent loss of your data.

Why Was Your Data Lost After OS Reinstall?

When you reinstall the OS over the existing installation, the following happens:

– The original system files are copied to the hard drive.

– Certain windows settings are reset to default values.

Normally when you reinstall the OS, the ‘Documents and Settings’ folder will be reinitialized, and all files in that folder will be deleted. However, these deleted files are recoverable if you don’t overwrite them. When you overwrite data, you replace previously stored data in a disk with new data. Recovering data is easier for smaller, less fragmented files and data on larger disks.

Re-Installing the OS Is Necessary When…

– A file that is required to run for the system to work gets either deleted or corrupted

– A program that runs at startup causes an error that results in a computer crash

– The registry has been corrupted

– Hardware failure during startup causes the system to crash

How Do you Recover Lost Data After OS Reinstall?

Try using a FAT Recovery or NTFS Recovery from the Disk Doctors Windows Data Recovery category to recover your files quickly in case of formatting, reinstalling your OS, repartitioning, or any other data loss disasters. These programs should get your data back without overwriting your system.

Need Computer Help?

If you still cannot recover your data after trying all these things, then you should use TalkLocal to get the best help you can get quickly from local IT service professionals.

Does My Vehicle Need A Fluid Flush?

Tuesday, July 9th, 2013

Does My Vehicle Need A Fluid Flush? - Auto Repair

Does my vehicle need a fluid flush? You might be asking yourself that question because a mechanic at a shop or quick lube station is advising you to. It’s always tough to decipher whether these suggestions stem from their own monetary gain or if your vehicle truly needs a fluid flush.

It is important to know when these flushes are needed so you won’t shell out the unnecessary expenses. The following are some fluids that might need flushing along with some information on how often they need it.

Radiator Fluid: The radiator holds a diluted form of antifreeze and is responsible for both keeping the engine cool as it runs and preventing it from freezing during the extremely cold months. Flushing this helps avoid sediment build-up. Plus, the older the fluid gets, the less effective it will be. Still, this does not have to be done often. Most experts suggest a radiator fluid flush every 40,000 to 60,000 miles.

Transmission Fluid: In automatic transmission vehicles, this fluid is of the utmost importance. To keep your vehicle shifting gears seamlessly, you will want your transmission flushed roughly every two years or every 30,000 miles. However, the caveat to this is the fact that there are long-lasting transmission fluids available that can last all the way up to 100,000 miles. You will need to know what sort of fluid your vehicle has before determining whether you need a flush.

Brake Fluid: With choice vehicles, a professional might suggest flushing out the brake fluid. This is likely not needed, and your vehicle should be fine without the service.

Power Steering Fluid: This is another low-priority flush, as power steering fluid can last a long time. If, for peace of mind, you would like your power steering fluid flushed, wait three to five years between services.

Find Someone To Perform The Flushes

Still asking: Does my vehicle need a fluid flush? Consult an expert — but know your stuff even when you do. TalkLocal offers a free service that gives you instant access to local auto repair professionals. We’ll connect you with the right professionals in just minutes.

Are Chemical Paint Strippers Harmful?

Tuesday, July 9th, 2013

Are Chemical Paint Strippers Harmful? - Painters

We’ve all been there. Ten years ago, that orange and black striped theme for the living room really sounded good, right? But now, it’s not quite as appealing as you’d hoped. You need to start again, but the colors are so bold that painting over them is tough.

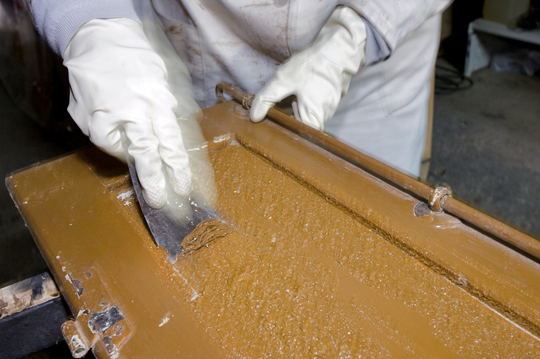
Trying to remove paint can be quite a challenge. Chemical paint strippers can make the process easier, but with all of the chemicals mixed into them, you might find yourself asking: Are chemical paint strippers harmful?

Here’s some information about chemical paint strippers that might come in handy when deciding if you should use them.

Origins: Chemical paint strippers became popular for removing old, lead-based paint without spreading the lead around the room like other techniques might. Although they are popular for keeping us safe from a harmful substance, it must be understood that they include chemicals in their make-up as well.

Chemicals: Different strippers have different chemicals in them, but most of them include some amount of methylene chloride and other abrasive chemicals which can cause paint to peel off. This chemical is typically considered by doctors to be harmful to your health if ingested.

Proper Precautions: Although the chemicals in paint strippers can be harmful, as long as you follow the proper precautions, your health will not be at serious risk.

1. Go outside. Using a chemical paint stripper indoors lets the chemicals build up in your breathing space, thus contaminating the air. If you can take the object you have stripped outside, then do it. If not, open all windows, and turn on fans to help the chemicals blow outside. Also, take many breaks for fresh air.

2. Protect yourself. Wear a good quality breathing mask, goggles, gloves, and long sleeves or pants.

3. Stay focused. Do not eat, drink, smoke, or otherwise ingest anything while using the chemical stripper. If you accidentally get the stripper on your skin or face, wash it off immediately.

Should You Use Chemical Paint Strippers?

Are chemical paint strippers harmful? Well, they can be harmful. If you’re pregnant or unable to follow the suggested safety procedures, then you should not use them. But as long as you do it the right way, you should be able to remove the paint easily and effectively. If you need professional assistance, TalkLocal can connect you with painters in your area who can help. Our service is fast and free.

How To Tell If You Have Bedbugs

Tuesday, July 9th, 2013

How To Tell If You Have Bedbugs - Pest Control

Bedbugs are not just fictitious creatures our parents warned us about when we were little. They can present a serious issue. Bedbugs are tiny, reddish-brown in color, and nocturnal. That means while you sleep the night away, they’re up and running around, looking for a good meal.

Since most of the pesticides which prevent bedbugs have adverse effects on humans, we don’t often make it a point to spray our beds with them. Learning how to tell if you have bedbugs is the key to knowing when you need to implement the typical prevention methods.

How To Tell If You Have Bedbugs:

Is your bed stained?

Bedbugs leave behind secretions, similar to human sweat, which may stain your sheets, headboard, and baseboard reddish-brown. These secretions can stain pretty much every part of your bed. The stains aren’t always large and noticeable, like spilling grape juice on the sheets. You should inspect the bed carefully to look for even miniscule reddish-brown stain spots.

Do you smell something abnormally sweet?

The same secretions which leave those reddish-brown stains also produce an odor that has become telltale for bedbugs. This odor is typically musty and sweet, comparable to over-ripened raspberries. Even the slightest smell can be a sign that you have bedbugs. If the smell is incredibly strong, that means you have a rather large infestation.

Have you noticed rashes on your body?

Although you can’t feel when a bedbug bites you because it anesthetizes the area like mosquitoes do, you can certainly feel the after-effects. The small rashes surrounding the bites look like hives, are red, and are very itchy. The itch can be alleviated with topical creams available over the counter, but the rashes themselves take a few days to heal.

Can You See Them?

Bedbugs are small and often hide when you are on the lookout for them during the day. Check the creases of your mattress. They often hide there. Spotting a bedbug puts the mystery to rest.

Where To Find Professional Help 

If you used these tricks on how to tell if you have bedbugs and determined you do have an infestation, it’s time to get rid of them. Pest control specialists have this down to a science and can be a huge asset. To find one locally, visit TalkLocal and put in a request for service. We do all the work while you sit back and wait for help.

How To Build A Pebbled Path

Tuesday, July 9th, 2013

How To Build A Pebbled Path - Landscapers

Making a pathway in your yard or garden is a great way to break up the look of your landscape and avoid stepping on your lawn or plants. For instance, you could start your path at the patio and wind it throughout the yard.

You have many options when it comes to the type of pathway you want to make. Some people prefer to make wooden pathways, others like cement pathways.

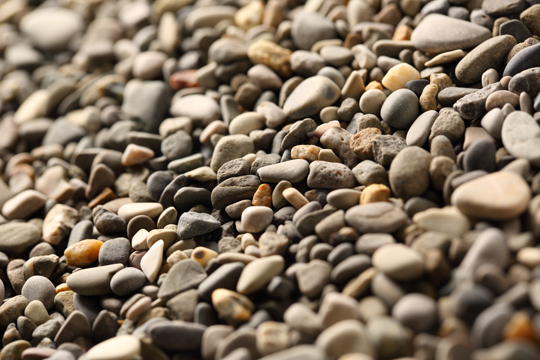
One of the most inexpensive and easy-to-make pathways is a pebble pathway. Here’s how to build a pebbled path that will make your garden or yard look great.

How To Build A Pebbled Path

1. Mark off the area where you want to build the path. You can use stakes and string to do this. Make sure you mark both the length and the width of the path.

2. Use a shovel to dig up the area of the path. Dig four to five inches down into the ground. Try to make this dug-out path as level as possible.

3. Add gravel a little at a time and use a shovel or rake to spread them easily along the path. Add the gravel in layers instead of sections so you can keep the pathway level.

4. Once the gravel has been added, use a water hose to wet it down. This will prevent the dust and dirt from getting out of control and allow you to see and breath more easily while working on the path.

5. Use a hand tamper to compact the gravel and prepare it for the pebbles.

6. Add the edging to the pathway. The edging will help keep the pebbles from spilling over into the yard and will give the pathway a clean look.

7. Pour the pebbles on top of the gravel and spread them evenly across the path. Make sure they do not spill over the edging.

Now that you know how to build a pebbled path, you can make as many as you want. Get creative and try new shapes and designs. Not only are pebble paths easy to make and nice to look at, but they are also useful and can improve the appeal of your yard.

Landscapers Can Help, Too

If you do not want to take on this task yourself, simply contact professionals in your area who have mastered this type of landscaping. Don’t waste your time looking for these landscapers in the phone book, though. Log on to TalkLocal and find out why countless people use our service to find professionals in all industries. We connect you with the right professionals in just minutes.