Archive for 2013


Glass vs Plastic French Press

Friday, June 21st, 2013

Glass Vs. Plastic French Press - Appliance Repair

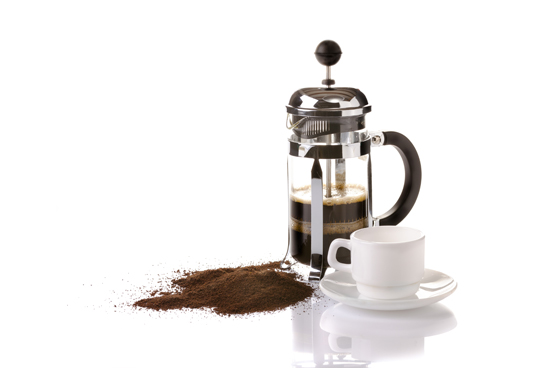
If you want to make your coffee with a French press, you have several material options. Two of the most common are glass and plastic.

The glass vs plastic French press battle is a common one, and there are benefits to owning both types. If you are trying to choose which one to buy, consider these points about each one.

Glass Press

A glass coffee press is the popular choice of many coffee drinkers. Not only do glass presses come in a variety of shapes, styles, and designs, but they also have an elegant look to them which many people prefer.

Glass presses that are made of thick glass can also help keep your coffee hot longer. Glass presses are sturdy and heavy but, because they break easily, they can be difficult to store or take with you while traveling. Glass presses can be purchased from most home and kitchen supply stores and are often given as wedding or graduation gifts.

Plastic Press

Plastic presses are a good choice because they are often inexpensive and portable. Most plastic presses are made of strong plastic that does not crack or break easily. Some people claim that plastic presses can give the coffee a strange taste. They come in a variety of shapes and designs and can be purchased from most kitchen goods stores.

If you like to travel or camp often or want a press to keep in your office or dorm, a plastic press may be the better option in the glass vs plastic French press debate.

If you are still having a hard time deciding between a glass vs plastic French press, consider trying them both. Use each one for a while and decide which one you like best. You can always sell the one you do not like at a yard sale or even return it to the store where you bought it.

Help With Coffee Makers And Other Appliances

TalkLocal is a great resource when you need your French press, coffee maker, or any other appliances repaired. Our concierge service connects you with local service professionals in all industries, so you don’t have to waste time tracking them down yourself.

Car Towing Tips

Thursday, June 20th, 2013

Car Towing Tips - Towing

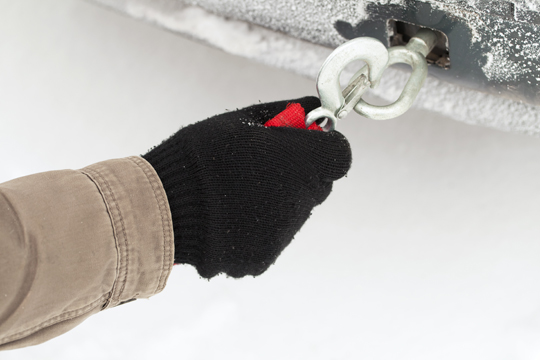
Not everything you need to transport fits snugly in your vehicle. This is why towing is necessary. Whether you are towing another vehicle, a camper, or a trailer full of stuff, there are some steps you need to take in order to transport them safely and efficiently. Not heeding certain car towing tips could cause you to lose control of your vehicle or cause unnecessary damage to it.

The following are some car towing tips you can utilize in the future.

Reduce Blind Spots: Make sure you are able to see all of the areas surrounding both your vehicle and the load you are hauling. Often, your vehicle’s standard rearview mirrors do not allow you to see everything. In this case, install mirror extenders, which increase your view. You want to be able to see all around your vehicle and whatever you are towing so you can make the right moves on the road.

Do Not Overload Your Vehicle: Few things are more dangerous than trying to tow a load that is too heavy for your vehicle. This is a recipe for an accident. The owner’s manual of your vehicle will likely list the maximum weight that your vehicle can tow. Do not exceed that amount.

Make Sure Lights Are Working Properly: The lights on your vehicle and the load you are towing are not just essential during night time (although, they are very important in that setting). Brake lights, for instance, are important no matter what time of day it is. Make sure all lights — headlights, brake lights, turn signals — are working properly before you get on the road. You always want to signal your intentions so that other drivers know your maneuvers in advance.

Do Not Drive Too Fast: When you are towing a load, you need to be extra cautious. This means you can’t drive as fast as you normally might. With the added weight, you will want to drive at a slower pace to ensure your safety.

Install the Right Hitch: Certain hitches are designed to tow certain loads. Only use hitches for the purposes they were intended for.

Need Help?

If you need towing help, don’t worry. TalkLocal has you covered. You won’t need to burn an entire day trying to find a reliable company on your own. We do that for you. Visit our website and try our free service. We’re confident you’ll be amazed at the results.

Western Digital Hard Drive Installation

Thursday, June 20th, 2013

Western Digital Hard Drive Installation - Computer Repair

It’s no mystery that as technology continues to evolve, computer users turn to the most updated forms to meet their needs. When it comes to hard drives, Serial ATA drives are now taking over, proving superior to IDE hard drives. Western Digital is one manufacturer that produces SATA drives, making it important for most users to learn Western Digital hard drive installation techniques.

In this article, we offer you a crash course.

Placing And Mounting Your Drive

Just like when you replace or add an IDE hard drive, SATA drives can be mounted on any available bays in your computer. Make sure that the drive is securely mounted and screwed in.

If you are adding a SATA drive, look around your computer for an available bay. If you are replacing your old drive with a SATA drive, just place the SATA drive in the old one’s place.

Using Special Cables To Connect

Western Digital hard drive installation is different from installing an IDE hard drive because SATA drives require a special kind of motherboard cable.

This cable will come with your SATA drive, just make sure you don’t get it mixed in with IDE hard drive cables.

Connect one end of the cable into the end of your SATA drive. Connect the other end of the cable to the motherboard, allowing the two entities to communicate.

Many Computers Will Automatically Recognize Your New SATA Drive

This quick and easy installation should be all you have to worry about. However, some computers or operating systems might not immediately recognize your SATA drive.

In this case, access your system BIOS by pressing the key you are prompted to during the start up process. There, you will find an auto configuration option.

Find Help…NOW!

You don’t have to wait for days to get help with your computer problems. TalkLocal gets you on the phone with help in just minutes. We completely eliminate the tiresome search process. Try it out and see for yourself.

What Does An Orthodontist Do?

Thursday, June 20th, 2013

What Does An Orthodontist Do? - Dentists

What does an orthodontist do? The short answer: a lot of things.

Move Teeth

Orthodontists can spend up to 10 years in school training to do a variety of dental and orthodontic procedures. One of the most common procedures which orthodontists perform is adding braces to teeth.

Orthodontists study the movement of teeth and are capable of manipulating these movements. This can include installing spacers which help move teeth apart or together, retainers which are worn after braces are removed in order to keep teeth from moving out of place, and head gear which helps move and space a patient’s teeth at night.

 Most Dentists Are NOT Orthodontists

Orthodontists often have their own offices, and it is not uncommon for more than one orthodontist to practice in one office. Sometimes, orthodontists will partner with dentists and work in the safe office.

Many require a referral from a dentist before they can work on a patient’s teeth. Orthodontists will often asks patients to see a dentist to have teeth removed or cavities filled in between orthodontic procedures.

 Before They Manipulate Your Teeth’s Movement

Before an orthodontist begins moving the teeth, he or she will often make a mold and take X-rays of a patient’s mouth. This lets the orthodontist see what the mouth looks like from all angles, and will allow him or her to create a treatment plan to fix the teeth.

An orthodontist may have to see a patient several times before he or she starts moving and positioning the teeth. Many orthodontists will not work on children who have not lost all of their baby teeth and whose adult teeth are not in place.

Some will also require patients to have their wisdom teeth removed to help make space in the mouth for other teeth to move around.

Find An Orthodontist Near You

So, what does an orthodontist do? Now you know. If you are thinking about becoming an orthodontist, you should research different colleges and schools to find one that will give you the proper training to pursue your career.

If you’re simply looking for an orthodontist to tend to your needs, rely on TalkLocal. We can help you locate a local one who fits your needs.

How To Save Energy With Home Improvements: Plumbing

Thursday, June 20th, 2013

How To Save Energy With Home Improvements: Plumbing - Plumbers

In the growing conversation about energy-saving tips, rarely does one answer the question of how to save energy with home improvements by suggesting plumbing changes.

While most people think of energy-saving appliances or insulation, few realize how much energy your home can save through the updating of a plumbing system. Find out why it is important and some simple changes you can make.

How Does Your Plumbing Affect Energy?

You may think that, because your water still runs when your power is out, your plumbing doesn’t have an effect on energy use. This isn’t true.

Energy is consumed simply getting water to your home, and it is also consumed at the water treatment plant to treat the water. Therefore, the less water you use, the less energy is consumed.

Low-Flush Toilets

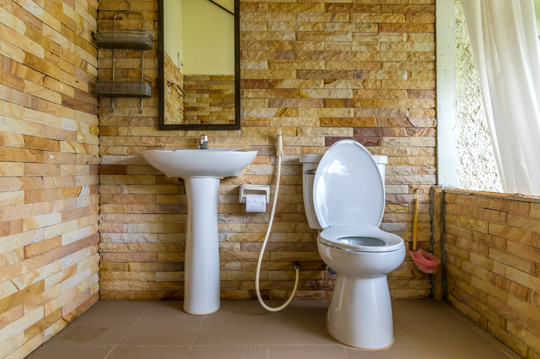
Older toilets use as much as three-and-a-half to seven gallons of water with each flush. Considering the average person flushes the toilet six times per day, that adds up quickly. Replacing your old toilet with a low-flush toilet means each flush will only use about 1.6 gallons of water.

Low-Pressure Faucets

Many are often surprised at the quality showers they receive after installing low-pressure faucets. A reduction in pressure means less water is being forced through. Although their showers use less water, most people still say they feel like their soap rinses clean just as well as it did with the regular pressure faucet.

Fixing Plumbing Problems

Running a faucet for five minutes uses the same amount of energy as letting a 60-watt light bulb burn for 14 hours. Leaky faucets or toilets which run constantly can use a significant amount of energy, so fixing them is worth the investment.

Get Pluming Help Through TalkLocal

To learn more about how to save energy with home improvements, it is best to consult a professional. TalkLocal can find a plumber in your area quickly and easily. Our service is absolutely free, and you’ll be speaking with a qualified plumber in minutes.

Tapered Fence Rails

Thursday, June 20th, 2013

Tapered Fence Rails - Handyman

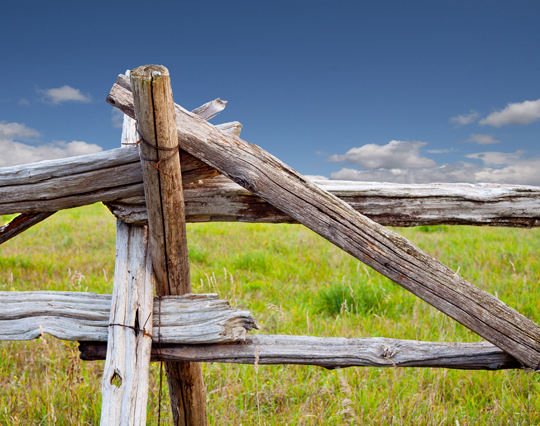
Tapered fence rails can give any fence a decorative feel. You can buy tapered fences from a variety of places. When you are shopping, be sure to compare prices and consider delivery and installation deals.

Here are some of the best places to shop for these fence rails.

Home Improvement Store

A home improvement store is one of the best places to find tapered fence rails. They often have these types of rails in stock. If they are not available in the store, you can ask a manager or employee to order them for you. It usually only takes a few days before they are available and can be picked up or delivered to your home.

Online Stores

If you cannot find the rails you need in stores, consider shopping for them online. Many major stores have websites which offer a selection that is much larger than what can be found in stores. You can order the items online and have them shipped right to your home or the store that is the closest to you. Then you can pick up your rails, take them home and start installing them.

Classified Sites

If you don’t mind buying items that have been used, you may be able to get a good deal on your fence rails. Check online classified sites for the exact size and style of rails that you want. You can contact the seller and make arrangements to see the rails before your purchase them and even negotiate the price or try to barter with the seller to get a deal on the fence rails.

Regardless of where you buy your tapered fence rails, make sure you measure properly and purchase the right size and amount. Take advantage of sales, clearance products and coupons to get the best price possible on your purchase.

Need Help Installing Them?

You might not know it, but your local area is likely loaded with handymen capable of installing tapered fence rails. TalkLocal is the best way to find them. Visit our site and, minutes later, you’ll be talking with people who can help.

Planning A Party Checklist

Wednesday, June 19th, 2013

Planning A Party Checklist - Party Planners

For many, organizing a party can seem overwhelming. Your main objective is for everyone to have a good time, so the stress of ensuring everything is just right can prevent some people from even attempting it.

One crucial step is planning a party checklist. Being able to mark off items to visually see that everything is accounted for can greatly reduce a host’s stress level. Here are a few categories you’ll want to include to make sure that everything is covered:

RSVPs: Do you know how many people expect to attend the party? Prior to starting your checklist, you will need to know how much of everything you will need.

Decorations: Have you appropriately decorated for your party? Generally, decorations are done to taste, but guests often appreciate when a host has gone above and beyond expectations.

Food: This one is big. Check your RSVPs — who has special eating needs? For someone with a gluten intolerance or peanut allergy, having foods he or she can safely eat available will show a great deal of care on your part. Also, add to your list specifically the exact foods you need so that you can check them off as you complete them. If you are doing a potluck, add who will be bringing what dish.

Music: Will you be providing the music with a radio or will you be hiring a DJ? Do you have specific music that you want to play? Add these items to your list as well.

Housework: If your party will be at your home, what needs to be done prior to guests’ arrival? Add a cleaning list or home repair items to your list.

Ask For Help!

If your event is simply too overwhelming and you don’t think simply planning a party checklist will get you through, ask an expert. TalkLocal can find local party planners who are more than qualified to handle your event. The best part is that our service is absolutely free.

How To Stay Cool In The Summer Heat: Landscaping

Wednesday, June 19th, 2013

How To Stay Cool In The Summer Heat:  Landscaping - Landscapers

If you, like most people, are concerned with finding out how to stay cool in the summer heat, you’ll want to think about landscaping.

The arrangement of grasses, trees, other plants, and accoutrements in your front and back yards can make a tremendous difference in your heating bill and your comfort level. Landscaping is a beautiful and natural way to keep the heat off without turning the air conditioning on.

There are plenty of cooling landscaping options that are low-maintenance and affordable on most any budget. Let’s take a look at some.

Carefully placed deciduous trees can substantially lower home temperatures, reducing energy use by up to 25 percent annually. Deciduous trees lose their leaves in the winter, so snow won’t pile up on them, risking water damage when it melts. Placement is important. Trees should be planted on the south and west side of the house.

Climbing vines reduce external home temperatures and provide a cooling barrier between exterior walls and the hot air outside. Hang a trellis to encourage vines to climb and check them occasionally to ensure they aren’t finding their way into the walls and foundation.

Smaller trees or tall shrubs should be planted close to the house to shade doorways and windows. Shade lowers temperature while trees help regulate moisture in the air.

Speaking of shade, gazebos or roll-out awnings can provide shade and comfort to any area you desire. Some gazebos also offer netting to keep bugs out. Roll-out awnings are versatile and can be opened or closed as needed. Used properly, an awning should last for many seasons.

Remember that groups of trees offer greater cooling benefits than the same number of trees spread across a large area. Shading roofs, windows, doors, and window air-conditioning units also add up to big savings on energy bills and helps solve the problem on how to stay cool in the summer heat.

Consult A Professional Landscaper

If you would like to install plants, trees, or other additions to your landscape in order to cool your home, you may want to seek professional help. With TalkLocal, all you need to do is offer us a little bit of information, and we get you on the phone with someone who can help.

Easy Way To Remove Wallpaper

Wednesday, June 19th, 2013

Easy Way To Remove Wallpaper - Painters

At the time, you probably thought that paisley wallpaper looked good in your dining room, but now, you are ready to remodel, and that entails a more modern look.

Many people avoid putting wallpaper in their home because they are afraid of how difficult it will be to take it down when they are ready for something different. Removing wallpaper can be difficult. Because paste is used to hold it in place, the paper often leaves behind a residue and paper remnants.

If you are like most people, you want to know the easy way to remove wallpaper. There are actually several methods that are both fast and easy. Here is one of them.

An Easy Way To Remove Wallpaper

1. Create a 50/50 mixture of hot water and fabric softener.

2. Add the mixture to a spray bottle.

3. Spray each crease in the wallpaper and allow several minutes for the mixture to soak into the wallpaper.

4. Continue to apply more spray to each crease until it is completely soaked into the paper. You may notice the creases start to peel back, this means the solution is working.

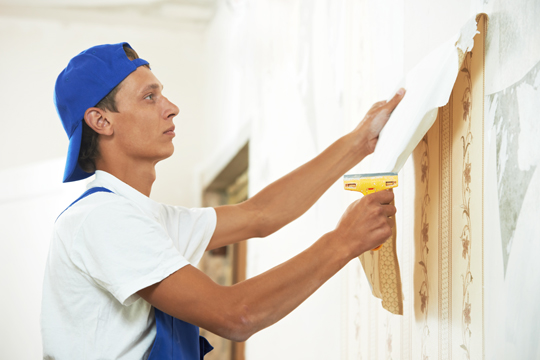
5. Use a drywall knife to scrape off the paper. Apply more of the spray to the paper if necessary. This may be the easy way to remove wallpaper, but it is also time-consuming.

6. Avoid tearing the paper. If it tears, it is much more likely to leave scrap behind. These can also be removed by soaking them with the solution and scraping them. However, it is much easier to remove the paper in large sections at a time.

7. Once the wallpaper is clear, you will still need to remove the glue. Use a sponge and hot water to scrub the wall clean.

Knowing the easy way to remove wallpaper will save you a lot of time and money in the long run. Remember to take your time and make sure every piece of paper and all of the glue has been removed before you install more wallpaper or try to paint the wall.

Finding Help For The Job

You can always hire out this sometimes arduous task. TalkLocal makes the search process easy, using information about your project to pin down three local professionals. We’ll get you on the phone with them and you can make a final decision. It’s that quick and easy.

Best Stitches For Leather

Wednesday, June 19th, 2013

Best Stitches For Leather - Tailors

So you want to make a wallet, holster, small purse, or something else out of leather. Good for you! Leather is a durable, natural material that craftspeople love. The smell, the texture; everything about leather is awesome.

But, it can be tricky to work with if you don’t have the proper tools or contemporary know-how. So what are the best stitches for leather? Let’s take a look.

Tools You’ll Need To Make the best Stitches For Leather:

– At least two large darning needles — you’ll be stitching from both ends

– A good awl designed for leather hole-punching

– Beeswax — natural and undyed

– Waxed thread or simulated sinew

– Pliers, hemostats, or a strong alligator clip

– Some older, damaged leather items to practice on

– The leather for your project

The Saddle Stitch

One of the most popular and best stitches for leather is the saddle stitch. This involves several steps and will produce the strongest, longest lasting bond for leather items.

1. Begin by cutting your leather pieces to size, leaving room for the seams. This part of the project is the most similar to sewing fabric.

2. Once everything is properly cut, you’ll want a way to hold the leather pieces together without crimping, poking random holes, or otherwise damaging the leather. Try something like a spring-loaded clothespin or a binder clip to hold pieces together firmly. Now, it’s time to poke some holes.

3. When using an awl, it’s vital that the leather pieces be lined up perfectly and completely still for this. The holes should be evenly spaced and punched in at a slight angle. The awl step might not be necessary for thinner pieces of leather. Alternatively, some leather workers skip the awl, even for thicker pieces, and use pliers to pull the needles through.

4. To create the best stitches for leather, you’ll want to cut your string about two-and-a-half times the length of the seam you’re stitching. It’s always better to use too much than not enough. Tie one needle to each side. As you stitch, you’ll use the needles to sew from both sides at the same time.

5. This is a simple up and down stitch to close the seam, pulling each needle firmly (without stretching the thread) after each stitch.

6. When you reach the end of the seam, double back a few stitches to prevent unraveling.

7. Some craftspeople will reinforce their saddle stitches with a whip stitch. You can use the same holes with this stitch and only one needle. The whip stitch goes around the seam end so you get a stitch that looks a bit like the spiral in a notebook.

8. Some craftspeople also suggest using an iron to seal the stitches. Instead, you might consider placing your new leather item between two boards weighted with books, canned food, or something else heavy.

Contact A Tailor

Tailors are experts at this type of stuff. Looking for a local one? Use TalkLocal for the job! Our service will find the right professional for you, for free.