Archive for 2013


How Can I Stain Wood Paneling?

Tuesday, June 11th, 2013

How Can I Stain Wood Paneling? - Painters

If you want to change the appearance of your home, possibly to update or modernize it, staining wood paneling is a simple way to do just that. Finishing any wooden fixtures in your house will bring out the natural colors of the wood, giving your home a delightful feeling of rusticness and modernity at once. If you are wondering, “how can I stain wood paneling?” this article will help you learn how to stain your wood paneling.

You Will Need:

–  A bucket

– Some rags

– Wax remover

– De-glossing liquid

– An empty pain can

– Some oil paint

– Paint thinner

– A paint stirrer

– Two paint brushes

How To Stain Wood Paneling

1. If you are staining wood paneling which is already installed, clear the floor below the paneling and lay down paitner’s tarp. If you are staining panels which have yet to be installed, lay each piece of wood paneling on a flat, level surface where it is safe to work, such as on a work bench in your garage.

2. Clean the wood paneling with soap and warm water using wash rag. Begin washing from the top and work downwards to prevent dirt from running onto the cleaner areas.

3. If your wood paneling has been waxed, remove the wax with wax remover. If you do not know if your wood paneling has been wax, play it safe and use the wax remover anyway.

4. If your wood paneling has a gloss coating, use a de-glossing liquid to remove the gloss.

5. Choose the stain that you would like to use on your wood paneling.

6. If your wood paneling is made of a soft wood like cedar or pine, you may want to use a clear conditioner. Soft woods can drain color from your stain, but a clear conditioner can help to prevent this.

7. Paint the clear conditioner onto your wood paneling before you apply the stain using a clean paint brush.

8. Read the package of your clear conditioner to learn how much time to wait before applying your stain, usually you should wait about fifteen minutes.

9. In an empty paint can, mix your stain with one quart of oil paint and 1/2-1/3 quart of paint thinner in order to get the exact color that you would like to stain your wood paneling with. Note that when you stain the wood paneling, it will appear lighter than you mixture will appear in the paint can.

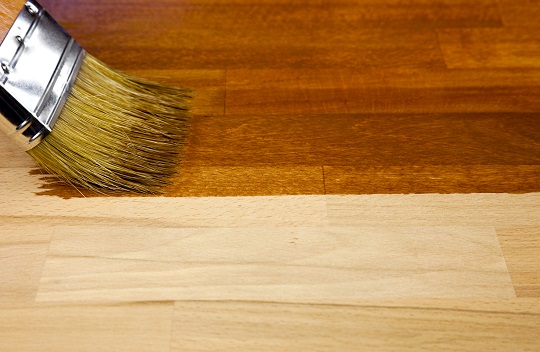
10. Paint your mixture onto your wood paneling using the other clean paint brush.Make sure that you apply the stain evenly, using steady, long strokes with your paint brush.

11. Wipe the wood paneling with a clean rag from top to bottom. The stain will appear lighter than when you applied it after wiping it down. Apply more coats of stain as necessary.

Find A Painting Professional

If you want your wood paneling to be stained professionally, you can contact a professional painter to stain your wood paneling for you. With the help of TalkLocal, you can be on the phone in minutes with up to three, high-quality painting professionals in your area that are available when you are.

Gas Heat vs. Oil Heat

Tuesday, June 11th, 2013

Gas Heat vs. Oil Heat - Heating and Cooling

When it comes to choosing how you will heat your home, there are many things to consider. You can pick from some of the more traditional methods, or even explore some of the more nontraditional ones.

Everyone is different and has different preferences and opinions about the type of fuel that should be used to heat a home. If you are trying to make a decision between gas heat vs. oil heat, consider these points.

Oil Heat

Gas Heat

The choice between gas heat vs. oil heat can be a hard one. Regardless of which one you choose, make sure the heater is checked often and is safe to operate in your home. If you think you may have a gas or oil leak, leave your home as soon as possible and contact the fuel company and 911. Gas leaks can be toxic and oil leaks could cause a fire.

Always Contact Professionals To Fix Problems

Heating and cooling issues are not really do-it-yourself projects. That is why it is so important to connect with a local company or professional to tend to your needs. By using TalkLocal, we eliminate most of the search process for you. We will connect you with three different companies and you can select the best one for the job. It’s easy, effective, and free.

Are Limos Expensive?

Monday, June 10th, 2013

Are Limos Expensive? - Limo Rental

Many people like to rent limousines for special occasions or parties. Limos are definitely a great way to make a good impression and to show off a little bit, but how much do they cost? Are limos expensive? Or, can everyone afford them? Here is a rundown of different limos and their costs.

Standard Limo

A standard limo can hold between six and eight people. They are usually rented by the hour and sometimes by the day. Depending on the company, the rental clock may start as soon as the driver leaves the garage to come pick up the customers. Others start the clock once the passengers are inside the vehicle. These standard limos can cost anywhere from $50 to $100 per hour to rent.

Stretch Limo

Stretch limos are longer than standard limos and can seat more passengers. Some stretch limos have special features such as a swimming pool or mini bar. Stretch limos are usually rented out by the hour or the day. They can seat between eight and 30 people and cost anywhere from $100 to $300 per hour.

Classic Limo

If you prefer a classic style limo such as a Rolls Royce, you should be willing to pay a little more for the rental service. Not every limo service offers these types of vehicles. They can cost anywhere from $200 to $600 to rent per hour. Because classic car limos are rare, companies charge more for them, and many classic car fans are willing to pay the extra cost for the car they want.

Where Do I Find A Limo Service?

So are limos expensive? That depends on what you consider expensive. Most people are unable to pay $100 an hour to rent a limo under normal circumstances. If you want to show up in a limo for a special event such as prom, graduation, or a wedding, you may find that it is worth the cost.

When it comes time for you to rent a limo, use TalkLocal. We allow you to specify exactly what type of limo you are looking for, and then connect you only with companies which offer those vehicles. This takes a lot of wasted time out of the process. Try it out — it’s free!

How To Tow A Car Behind An RV

Monday, June 10th, 2013

How To Tow A Car Behind An RV - Towing

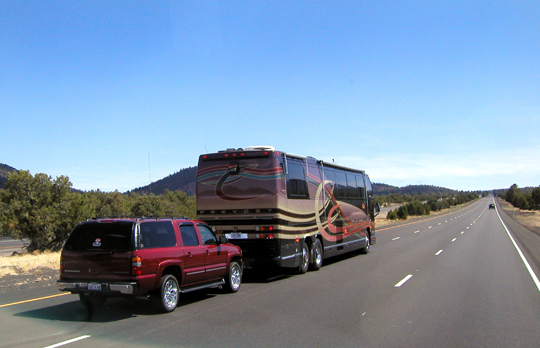
Having an RV is like having ultimate freedom. You can go wherever you want while still sleeping comfortably in a bed you know and love. But sometimes, when you get to where you’re going, you end up wishing you had a vehicle with you that didn’t take up six parking spaces.  Although driving while towing a vehicle may be different, learning how to tow a car behind an RV can make a world of a difference in your trip.

Some options for how to tow a car behind an RV:

Tow bar: You can always just attach the vehicle to the RV’s hitch with a tow bar. This has the vehicle riding on its four wheels as you drive the RV. This will cause wear on your car’s tires, since they are running on the road, but it will not affect your car’s engine at all.

Tow dolly: Another option is using a tow dolly. These types of tow devices attach to the RV and lift the car’s front wheels up, allowing it to follow along on its back wheels. This only wears on the back wheels, and it actually causes wear slower than using a tow bar would. Dollies are a bit more expensive than tow bars, but they cause less wear and tear to your vehicle, and they’re cheaper than trailers.

Trailer: Trailers can be bought or rented for towing your vehicle. You can put the vehicle on the trailer and attach the trailer to the hitch of the RV. Although the trailer is an added expense, this does not cause wear and tear to your car’s tires. Be aware that some RV parking or camping grounds may charge a bit extra for your trailer.

Get More Information

These are the three most common ways to tow a car behind an RV. TalkLocal can connect you with the professionals in your area who can help you find the hardware you need to tow your vehicle, teach you how to use it, or even tow the vehicle themselves.

Proper Air Pressure For Tires

Monday, June 10th, 2013

Proper Air Pressure For Tires - Auto Repair

The proper air pressure for tires will vary from vehicle to vehicle. There is not one universal standard. Air pressure for most common cars or vans range from 27 to 35 pounds per square inch.

This is important because both over-inflating and under-inflating your vehicle’s tires could have a dramatic effect on how the vehicle handles and could put your safety at risk. Having properly-inflated tires can also increase your gas mileage, which ultimately saves you money.

So, how do you find the proper air pressure for tires on your vehicle? Here are some tips.

Do NOT Look On The Tire

Often, drivers will look for direction on the tire itself. Often, the tire lists the maximum pressure the tire can withstand. You do not want to test the limits and inflate your tires with the maximum amount of air.

Refer To Your Owner’s Manual Or Inside Of The Driver’s Door

These are two places that will list more accurate measurements you can use. Your vehicle’s owner’s manual likely lists the appropriate range that constitutes proper air pressure for tires.

Otherwise, you might have a sticker which is placed inside the driver’s side door. This can also serve as a quick reference guide.

Always Work With Cold Tires

All tire pressure measurements must be made when the tires are cold — meaning, you have not driven on them for several hours. This allows you to get an accurate reading. If you have been driving on the tires, the friction from the road heats them up, and the air inside expands, which increases the pressure.

Checking And Refilling

To measure your current tire pressure, unscrew the cap to the valve stem and use a pressure gauge. If the pressure is too low, fill the tire with more air. If, for some reason, the tire is over inflated, let some of the air out.

Need Help With Your Tires Or Other Parts Of Your Vehicle?

With TalkLocal, help for all of your automotive needs is just a few clicks away. We will locate and connect you with three, qualified service professionals in your area, and you get to choose which one is best for you. After all, you shouldn’t have to waste time tracking down quality help.

Different Types Of Patios

Monday, June 10th, 2013

Different Types Of Patios - Landscapers

Having a patio can drastically affect the aesthetic value of your yard and home. A patio can be a beautiful place to sit with your family, enjoy some food from the grill, work while enjoying nature, or even hold a business meeting.

The many different types of patios all offer something for your home. Learning about them, and how to build them, can help you decide which type is right for you.

Some of the more popular of the different types of patios include:

Dry-Laid Patio: This is the easiest type of patio for an amateur to build. Building a dry-laid patio does not require much experience. The simple steps are to select your patio site, excavate it, build drainage for your patio, lay a sand bed and then lay the patio paving stones. You will want to use natural or cut stones for a dry-laid patio.

Mortaring A Patio: This is quite similar to building a dry-laid patio, but you will use mortar to seal the bricks or stones into place. You will follow the same preparation for a dry laid patio, but adding the mortar to seal the bricks insures that they will not sink or produce gaps over time.

Slab Patio: This type of patio is not exactly amateur-friendly, but it can support a lot more weight than a dry-laid or mortared patio. A construction crew must build a shape the size of the desired patio and then pour concrete into the shape. The concrete will have to be continuously smoothed, leveled or sloped (depending on the location) until it is completely dry.

Raised Patios: Although they are the most common, ground level patios are not the only types of patios out there. A patio can be raised from the ground by a few inches or even a few feet. You’ll have to begin with a retaining wall around the patio’s location to ensure that the patio does not fall apart piece by piece.

Find Someone To Help With Your Patio

Patios can add beauty and comfort to your home. If you are interested in more information about a patio, or if you have decided you want to build one of your own, TalkLocal can help you connect with the professionals in your area who can get your project up and running.

Is Borax Dangerous To Pets?

Monday, June 10th, 2013

Is Borax Dangerous To Pets? - Maid Services

Borax is a common ingredient in many pesticides, weed killers, and flea treatments. Borax has many uses, and pets are often exposed to the chemical. So, is Borax dangerous to pets?

Borax is indeed dangerous to pets if ingested. Because the chemical is an ingredient in so many products, pets can easily ingest it. If you have pets, avoid using these products if they contain Borax.

Flea Treatments

Because Borax is such a strong chemical, it is often used in pet flea treatments. Most flea treatments are applied to the back of the neck where pets cannot reach to lick. Many pets are able to get their legs behind their necks to scratch.

If a pet gets the Borax on its paws and then licks its paws, it will be ingesting the chemical. Pets often lick each other and can ingest Borax this way as well. To protect your pets completely, avoid using flea treatments that contain Borax or Boric Acid. Get the highest rated Natural Flea Treatments shipped overnight from Amazon starting at $9.49.

Weed Killers

Pets that are allowed to roam free in a yard could be at risk for Borax poisoning. If you use weed killers which contain Borax, your pets could lick the plants and ingest the chemical.

It could also be ingested by small animals such as birds, mice, and insects. If your pets eat any of these animals, the Borax could be passed to them.

Get the highest rated Natural Weed Killers shipped overnight from Amazon starting at $11.54.

Pesticides

Borax is the main ingredient in most pesticides. Since pesticides are sprayed on plants which your pets could eat, the chemical could easily be ingested. Even if your pet does not eat the plant itself, it could eat the insects that have already been exposed to the pesticide.

Many people wonder, “Is Borax dangerous to pets?” and the truth is yes. Borax is a very strong chemical that can harm pets and even humans if ingested in large enough doses. Use products that do not contain this chemical if you want to ensure that your pets are not accidentally poisoned.

If You Suspect Your Pet Ingested Borax…

Anytime you feel your pet might be sick, contact your veterinarian. If you do not have one, you can easily find qualified help through TalkLocal. Based on the information you give us, we will only connect you with vets that can help you in your specific situation. After all, in times of pet emergencies, there is generally little time to spare.

The owner of this website is a participant in the Amazon Services LLC Associates Program, an affiliate advertising program designed to provide a means for sites to earn advertising fees by advertising and linking to Amazon properties including, but not limited to, amazon.com, endless.com, myhabit.com, smallparts.com, or amazonwireless.com.

Wood Chopping Safety

Sunday, June 9th, 2013

Wood Chopping Safety - Tree Removal

You may chop wood for a variety of reasons. Maybe you use it to heat your home or your need to find a use for a fallen tree. Regardless of why you chop wood, you need to make sure you utilize proper wood chopping safety methods. These safety tips will help protect you and ensure your safety while chopping all types of wood.

Wear proper protection: Always make sure you are wearing safety boots, gloves, and glasses at all times. The boots will protect your feet if you would accidentally strike them with the axe, and the gloves will protect your hands from splinters and cuts. The safety goggles will protect your eyes from any debris or splinters that may fly through the air while the wood is being chopped.

Store your axe properly: Keep your axe in the sheath any time you are not using it. You should not carry the axe without the sheath or set it down on the ground when you are not using it. The sheath is meant to act as a barrier between you and the axe and will protect you from cutting yourself or someone else accidentally.

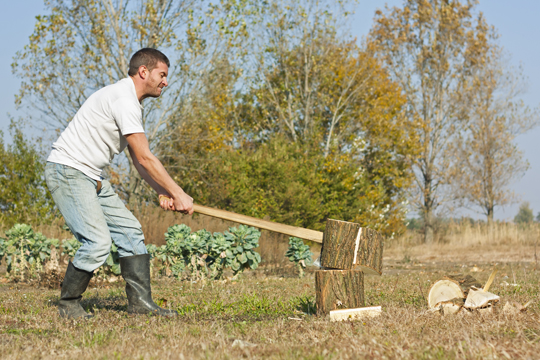
Take the proper stance: Make sure your feet are planted before you swing the axe. If you lose your balance you could accidentally fall backwards or forwards on the axe and cut yourself severely. If you want to follow all of the necessary wood shopping safety rules, you have to be aware of your surroundings. Never swing an axe when other people are nearby and always make sure the area is clear before you swing.

Set the wood on an appropriate surface: Only chop wood on stable surfaces. You do not want your logs or wood rolling and moving around while you are trying to chop them. If the wood moves, you could miss and accidentally cut your foot.

Be Careful Or Get Some Help!

These wood chopping safety tips will protect you and those around you from injuries. Before you start chopping wood, make sure you take every precaution. A tree removal service or a handyman may be able to chop the wood for you You can find someone in your area to help by using TalkLocal. No matter how hard it might seem to find a specific professional, we make the process seamless and easy.

Cheaper-Than-Dirt Decorating Ideas from Pinterest

Sunday, June 9th, 2013

Written by Dallea Caldwell

Cheaper-Than-Dirt Decorating Ideas from Pinterest - Seva Call

Seva Man finally moved off of the Seva Call headquarters couch, which is awesome because the interns were slightly irritated at his habit of drying his socks in the microwave. Strangely though, for his housewarming registry, he listed nothing but double-ply toilet paper, packing crates, and used tires. Apparently, Seva Man is not just cheaper-than-dirt out of necessity, it’s actually on principle. He’s turning his treasured odds and ends into shabby-chic style that’s anything but trashy. And actually, it’s coming along quite nicely. If you’re Pinterested, here are just a few of his nifty home fashion fixin’s.

Used Tire Ottoman: Ottomans aren’t for the shallow and pedantic, so they’re priced around the high 2-low 3 digits to keep out the riff-raff. But, something that’s as terribly riff-raff as an ugly, used tire can be turned into a beautiful ottoman. Fill the center with a round slate of wood, add wheels and legs, and cover either with polyester, braided rope, or with fabric, and a round top cushion.

Crate Bookcase: Wooden fruit crates are available at craft stores and, with some paint, along with a few brackets or wall mounts, can be turned into a modern looking bookcase.  Pinterester Julia got her crates for $12.99 from Michael’s and, because she was furnishing a children’s room, she stacked and bolted the crates to the wall. A freestanding option is done using brackets here, and Apartment Therapy shows how creative you can get with this shelf, uniquely configured in chaotic design.

More Crate Possibilities: These crate-converted creations: coffee table, wall mount, and lamp are also all very striking. Based on their looks, they’re worth at least two to three times as much as the cost of the material.

Shipping Pallet Bed Frame: The pallet-wood from bulk packing can be turned into a low-down, crisp-looking bed frame with lots of minimalist cool. Plus, no boxspring needed — potentially saving you a couple hundred bucks. That’s also one less back-breaking payload you’d have to maneuver up the stairs.

Alternative Pallet Bed Option: To add a touch of the rustic without compromising comfort, opt for a pallet headboard instead. Painted black for a chic take or attention-grabbing at a huge scale, the design element is very flexible and can be adapted to match any style. Soften the look with decals or other embellishments.

Need Help Turning Shabby Into Chic?
A little creativity goes a long way. But, sometimes a lack of skill keeps people from realizing their home improvement hopes. If you need a painter, carpenter, handyman, or any professional in one of our over 50 service categories, visit www.talklocal.com to submit a service request to get connected to available help by phone, and in minutes.

Using Ice And Heat For Back Pain

Sunday, June 9th, 2013

Using Ice And Heat For Back Pain - Chiropractors

Few injuries will take you out like back pain. Your back is central to your body, and nearly every movement affects it. So it only make sense that, when your back hurts, doing anything hurts.

Many products on the market today capitalize on the common practice of using ice and heat for back pain, but they are ultimately only topical ointments and do not reach as deep as the real thing. Here is what you need to know about using ice and heat for back pain.

When And How Long Should I Ice?

If you have an injury, it is best to immediately ice it within five minutes. When the body has an injury, it will send fluids to the area, which results in swelling. Swelling can sometimes cause further injury, causing more swelling, and the harmful cycle continues on.

Ice cools the area, causing the body to send blood to the area, which will clean out the excess swelling and toxins, helping the body to heal. Ice should be applied for 20 minutes on, 20 minutes off for 24 to 48 hours after the injury.

When Should I Apply Heat?

At this point, the area will likely be stiff from the ice and lack of movement. It is now a good idea to apply heat. As with ice, the heat will cause the body to send blood to the area in an attempt to cool it down, which will help heal the injury faster.

It will also cause the muscle to relax, easing pain and stiffness. It is also a good idea to do appropriate exercises and stretches to further assist in the healing process.

If you simply suffer from frequent back pain, such as sciatica, alternating ice and heat on the area may work to shock the body and break the pain cycle.

See A Chiropractor If Pain Persists

Ultimately, only a professional can tell if something is seriously wrong with your back. In these serious instances, simply icing and applying heat to the area will not suffice. TalkLocal can find a qualified professional in your area for free to help provide you with a diagnosis. Our website is user-friendly and cuts the work out of the search process.