Archive for 2013


Wire 3 Way Light Switch

Friday, June 7th, 2013

Wire 3 Way Light Switch - Electricians

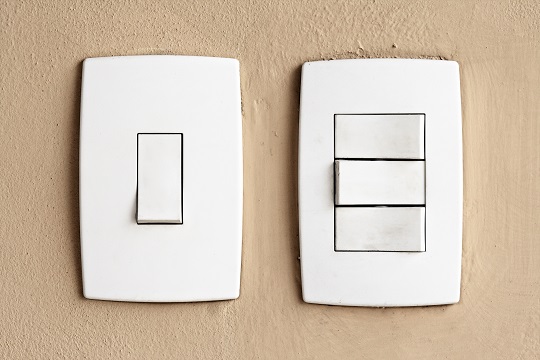
A three-way light switch allows you to turn off a particular light from two different switches, oftentimes on opposite sides of the room. Having a three-way light switch can add many benefits, and could spice up a renovation project in your home. Learning how to wire 3 way light switch is easier than you think.

What You Will Need

2 three-way light switches

1 light bulb

1 razor blade

1 screwdriver

1 pair of pliers

1 pair of wire cutters

14/3 wire

14/2 wire

How To Wire 3 Way Light Switch

1. Before you begin wiring the 3 ways light switch, make sure the power is turned off in the main circuit panel. Check the outlet with a volt tester to ensure that it’s off before you start working.

2. You will use two different wires. You will use a 14/3 wire that contains 4 wires inside, but you will only end up using 2 of them: the black and red wires are for travelers, the white is the neutral, and the grounds wire will be set aside. You will also use a 14/2 wire that contains 3 wires: the black wire is for power, the white wire is neutral, and the grounds wire will be set aside, as well.

3. With a razor blade, cut down the center of the 14/2 and 14/3 wires in order to reveal the contained colored wires. Cut off the insulation that surrounded the colored wires. You might need to use the wire cutters to shorten the wires, but make sure you have enough wire to wrap around the screws and travelers.

4. Tie your white wires (the neutrals) together with a wire nut. Tie your grounds wires together with a wire nut, too. You should be left with three wires: the one supplying power (black wire in the 14/2), which will connect to the black screw on the 3 way light switch, and the 2 wires (black and red in the 14/3) that will connect to the travelers on the 3 way light switch.

5. Using pliers, connect the black wire from the 14/2 to the black screw on the 3 way light switch. Wrap the red and black wires from the 14/3 around the two travelers. You are now finished with your first 3 way light switch.

6. On the second 3 way light switch, separate the two grounds wires and two white neutrals as you did with the first switch. You will have the three wires remaining: the black wire from the 14/2 and the black and red wires from the 14/3. Again, wrap and tighten the black wire from the 14/2 around the black screw. Connect the black and red wires from the 14/3 to each of the travelers.

7. The white neutrals and grounds wires will NOT be used, so leave them aside and tied together with the wire nut.

8. Test the light by flipping each switch. If the light goes on and off for each switch, then you successfully wired a 3 way light switch! Cover the switches with switch plates using your screwdriver.

Find A Professional Electrician

If you are looking for an electrician, TalkLocal can help connect you with quality, local electricians in seconds. Try Seva Call today, for free!

New Home Upgrade Tips

Friday, June 7th, 2013

New Home Upgrade Tips - Real Estate

Whether you are building a home, or inheriting a new one, it never hurts to consider possible upgrades to the house. Many contractors offer so many upgrades, it can be overwhelming deciding which to choose, if any. Here are five new home upgrade tips to keep in mind to protect your wallet and your investment:

Resale Value

Consider the desirability of the home to buyers other than yourself. Not everyone may be a fan of elaborate, ornate crown molding throughout the house. As a rule, the more bedrooms, the better. If you can manage to slip another half bathroom into a level, your resale value will increase dramatically.

Prioritize

Even if this home is your dream home, you may not be able to afford your whole dream right now. Prioritize upgrades in the order of which they must be done while the home is under construction (i.e. floor outlets, wiring for extra lights, etc.). Distinguish which upgrades can be added later (screened in porch, elaborate patio, etc.).

Focus

Consider the part of the home that matters most to you. For example, if you enjoy cooking, you may want to focus your upgrades in the kitchen. This will keep your cost down but still give your home that “dream home” quality.

Price Check

You can’t discuss new home upgrade tips without addressing personal budgets. Upgrades often come with a high price. Check the cost of hiring a contractor to install the upgrades after the home is built.

Provide Materials

Some contractors will allow you to purchase materials yourself. For example, perhaps the price they quoted for hardwood floors is higher than comparable flooring you found at a retail store. Purchase the flooring will help you save significant money.

Find Someone Who Can Help You Invest In Your Home

Following these new home upgrade tips will help secure your investment. If you still are not sure about which upgrades are worth the cost, contact a real estate agent.

TalkLocal can put you in touch with one in your area for absolutely free. Many agents will provide you with information in hopes that you will list your home with them in the future. Still, the information is invaluable.

Seva Call Founder Manpreet Singh Dorks Out As Featured Panelist At Toigo Conference

Friday, June 7th, 2013

Seva Call Founder Manpreet Singh Dorks Out As Featured Panelist At Toigo Conference - Seva Call

Image courtesy of the Robert Toigo Foundation.

It’s like he is a kid in Willy Wonka Land: that’s the way Seva Call founder Manpreet Singh’s face lights up when he talks about investment strategy, core verticals, incremental growth returns, and market disruptors. For a business nerd like him, being a featured panelist at Toigo’s 5th Annual Alumni Investment Conference was like biting into a peppermint patty and getting the mind-blowingly invigorating sensation that he’s submersed in an intellectual debate over the key drivers of above-IPO performance and rattling off statistical evidence of an epic shift in consumer behavior metrics.

Just take that thought and replace it with something normal people find extremely exciting, you get the idea.

At the conference, held yesterday in New York, Manpreet offered his thought leadership on “Navigating Through Disruptive Technologies.” He drew from his experience not only as the founder of a noted venture-funded company, but also as a 3-time start-up leader; the first such venture was in high school. Throughout the the event, Manpreet advocated for further innovation to stay ahead of the ever-evolving market and focus on solving real problems.

Key Points:

He warned of investing in nonessential technology, saying  that any software which users tend to think of as an unhealthy addiction, but is not as addictive as it is unhealthy, may not be the best long-term investment, as it’s just a habit bound to be broken eventually.

He also emphasized the need for more mobile compatibility in online websites. He noted that  only 6.7% of business websites are mobile compatible, but the 25% of users who search on their smartphones and tablets are more decisive consumers: becoming customers 70% of the time and often with the hour. For Seva Call’s part, the upcoming Seva Call iPhone and Android app launch will make searching local businesses online intuitive, even if business owners don’t adapt as quickly to the mobile web-search trend.

“My company’s top priority is perfecting our mobile app and getting it on the market as quickly as possible…. It’s a move that makes perfect sense for our business, so I couldn’t be more excited,” Manpreet Singh added.

A Devoted Small Business Advocate:

As a small business owner and advocate whose innovative service enhances consumer experience while driving much-needed revenue to local businesses, Manpreet is honored to have had the opportunity to meet and speak to his industry peers, and will continue to work for the shared betterment of the business community wherever he can, whether through his work, his words, or on the web. Because he kinda lives for this stuff.

How To Correctly Perform A Push Up

Friday, June 7th, 2013

How To Correctly Perform A Push Up - Personal Trainers

Getting that upper arm strength and toning is one of the most popular reasons why people choose push ups when exercising. However, a personal trainer would likely point out that push ups actually offer a lot more benefits than just toning your “guns.”

They work your back, abs, and endurance levels, as well. They can be tough, but incredibly rewarding if you work at them. Regardless, you can’t reap the benefits if you don’t know how to correctly perform a push up. This guide will help make sure you don’t hurt yourself while working out with push ups.

Step-by-step, how to correctly perform a push up:

Hands: Depending on your experience and endurance level with push ups, your hands will be placed differently. You want them facing forward, with your fingertips pointing away from you. You can turn your hands a little bit inward if it helps your wrists. Make sure they’re aligned with your shoulders in a way that feels comfortable. If they’re too far out, you won’t be able to push yourself up. If they’re too close, you may lose your balance.

Feet: Your feet should be close together behind you, but not necessarily right next to each other. You want some space in between them. Space them out in a way that feels comfortable for you, but keep less than 12 inches between them. You don’t want your feet fanned out or in a “V”.

Keep your body level: You don’t want your back arched or your butt in the air, and you don’t want anything drooping low. Keep your body straight. You’ll feel your abs working by keeping this posture.

Your head should not be straight down: Instead of looking at the floor, try to look towards the wall in front of you. This helps keep your back straight and your body aligned properly.

At the top, once you have pushed up, your arms should be straight as they support your weight. You want to lower yourself down by bending your arms at the elbow and get as close to the floor as you can.

Ideally, your chin should be touching the floor. If you can’t do that right away, don’t worry. You’ll get there.

Looking To Get In Shape?

Proper form when exercising is crucial, but it isn’t always easy to achieve on your own. You may consider hiring a personal trainer to help if you. TalkLocal can also help by connecting you to the health and fitness professionals in your area.

Get Dog Urine Smell Out Of Carpet

Thursday, June 6th, 2013

Get Dog Urine Smell Out Of Carpet - Carpet Cleaners

We love our dogs. They are always excited to see us, they want nothing more than to play with us, and they are the best friend and cuddle-buddy anyone could have.

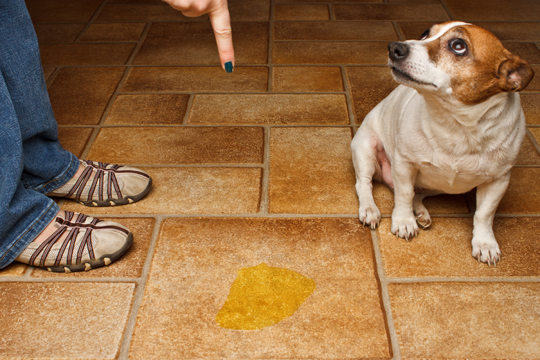
While we do love them, not all of their habits are completely loveable. Sometimes they have accidents. Cleaning up those accidents can be stressful – carpet cleaners are expensive to rent, but store-bought sprays might stain or not work.

Knowing how to get dog urine smell out of carpet insures that you’ll continue loving — and not smelling — your dog.

Quick tips to get dog urine smell out of carpet:

You want to be fast. Try to clean up the urine when it is still wet if at all possible. If it dries, it can stain the carpet. Drying also increases bacterial growth. Clean the wet urine by placing a thick stack of paper towels on top of the spot and walking on that spot. This will absorb a great deal of the urine, helping to eliminate the likeliness of a lingering stench.

Next, mix one half-cup of vinegar with a half-cup of water. The vinegar helps neutralize the stench of the urine without staining the carpet, like some store bought cleaners might do. Slowly pour the vinegar and water mixture over the stain, allowing it to sink in. Let it sit on the spot for about 10 minutes. Then, use another stack of paper towels and stand on the towels with your weight to remove the solution.

Let the spot dry. You could use a vacuum to try to speed up this process, but the best way to let it dry is to wait it out. After the spot is almost completely dried, you can sprinkle some baking soda (a proven odor remover) on the spot. This helps knock out any lingering odors.

Or, Get Your Carpet Professional Cleaned

This quick, three-step home remedy for dog urine stench can make your life as a pet owner much easier. If you feel your carpet needs more help than this, maybe a professional has your answer. TalkLocal can connect you to the professionals in your area who can help you get your carpets looking as good as new again.

Removing Inappropriate Pop Ups In Windows 7

Thursday, June 6th, 2013

Removing Inappropriate Pop Ups In Windows 7 - Computer Repair

Pop ups are very annoying, especially the inappropriate pop ups that appear out of nowhere. They can be very disruptive when you are working on a particular task, and little info-bubbles keep appearing, distracting you from the task at hand. Luckily, removing inappropriate pop ups in Windows 7 is easy, and only takes the tweaking of a few settings on your computer.

How to Remove Pop Ups In Windows 7

You can remove inappropriate pop ups in Windows 7 by adjusting the settings. Follow the steps below to eliminate those pesky pop ups in Windows 7.

1)     From the Start menu, open the Control Panel.

2)     In the search bar in the top right-hand corner of the window, type “Change User Account Control Settings,” and press Enter.

3)     The same phrase should appear as a link in the search results. Click on the link which reads: “Change User Account Control Settings.”

4)     You will see a vertical slide bar in your window. This bar gives you control over which pop ups appear in Windows 7. Sliding the bar all the way to the bottom will remove pop ups in Windows 7 altogether.

The following is a way to remove internet pop ups in Windows 7:

1)     From the Start menu, type “Pop Up Blocker Settings” into the search bar and press Enter. This should immediately open a new window.

2)     Go to the Privacy tab. You will see a vertical slide bar similar to the one used above. Slide the bar all the way to the top, to “High”. This will block all pop ups and cookies while you are browsing the internet.

If you are still having issues with pop ups in Windows 7 even after changing both of the above settings, it is likely that your computer has been infected by a virus or spyware.

Speak To A Qualified Professional

If you would like to find a professional computer repair technician for any computer issues, just use TalkLocal. We will connect you with up to three, high-quality computer repair technicians in your area. Our service is fast, easy, and completely free.

How To Change Your Oil In Your Car

Thursday, June 6th, 2013

How To Change Your Oil In Your Car - Auto Repair

Knowing how to change your oil in your car is an invaluable skill. Being able to perform this routine maintenance on your vehicle can save you a lot of money and also increase the health of your vehicle.

You might be hesitant to try doing it yourself with the fear that you will break something. Changing your own oil can be relatively easy and something that gets easier with time. After all, practice makes perfect.

How To Change Your Oil In Your Car

1. You need to start by draining the existing oil out. Go under your car and find the oil pan. The drain plug is under it. Remove the drain plug and be ready for the oil to come flowing out. Make sure you have something to catch it with, otherwise you will have a huge mess on your hands.

2. While the oil is draining, get out from under the car, and move to under the hood. Find the oil filler hole and unscrew the cap to it. This is where you will eventually be putting the new oil of your choice.

3. This is also the location of the oil filter. Unscrew the filter. Use a wrench if you can’t do it by hand. The filter will also have oil in it. You can discard this oil in the same container you are using under the vehicle. These old oil filters can be recycled.

4. Screw in a new filter where the old one previously was.

5. Once the oil is done draining, put the oil cap back on and screw it tightly.

6. Place a funnel in the oil filler hole and pour in the new oil according to specifications. Once the oil is in, put the cap back on and turn the engine on for up to a minute. This allows the oil to work its way into the oil pan.

7. Turn the engine off and then back on roughly five minutes later.

8. You can then check the oil level by removing the dipstick to ensure you do not have a leak.

Professional Help Is Not Far

Seems easy enough, right? If you do need help with your oil, or with fixing a bigger problem, TalkLocal can get you on the phone with local auto repair technicians immediately. We only track down professionals that can help you with your unique problem, so we don’t waste your time.

Dumpster Rental Sizes

Thursday, June 6th, 2013

Dumpster Rental Sizes - Gargabe Removal

When taking on a home project, one of the many factors to consider is the best way to remove the old to make way for the new. One of the most efficient ways to get rid of the excess waste is through a dumpster.

Dumpster rental sizes vary by company, so it is always important to check with your local dumpster rental company to get exact information. Here is some basic information that you will want to know when considering a dumpster rental for your project.

10 Yard

This dumpster holds 10 cubic yards of waste. They usually run 12 feet long, eight feet wide, and four feet tall. These are ideal for small cleanups such as for a garage or basement. They also work well for small remodeling jobs such as for a bathroom.

20 Yard

This dumpster will hold 20 cubic yards of waste. They generally are 22 feet long, eight feet wide, and four-and-a-half feet tall. These slightly larger dumpsters tend to work well for larger cleanups, such as both the garage and basement, or for the removal of one layer of shingles from a 2,500 square-foot roof.

30 Yard

This dumpster holds 30 cubic yards of waste and generally runs 22 feet long, eight feet wide, and six feet tall. These are generally used for large home additions, construction of  a new home, or demolition of a small building, such as a garage.

40 Yard

This dumpster will hold 40 cubic yards of waste and is usually 22 feet long, eight feet wide, and eight feet tall. These are often used for large home window and siding replacement, commercial facility clean outs, or construction of a large new home.

Find The Right Dumpster For You

To figure out which dumpster rental sizes will suit your specific needs and budget, call an expert. TalkLocal can find a local garbage removal expert for you for absolutely free. Our service is fast and incredibly easy, sparing you the time it takes to search the Internet or phonebook for help.

Seva Call Is Honored to Be An NVTC Hot Ticket Award Nominee

Thursday, June 6th, 2013

Seva Call Is Honored to Be An NVTC Hot Ticket Award Nominee - Seva Call

Photo courtesy of the Northern Virginia Technology Council.

Getting to wake up every morning and realize a dream is reward in itself; but, when peers recognize that dream, it becomes even more satisfying. So, the Seva Call team could not be more pleased to learn that they are a Northern Virginia Technology Council Hot Ticket Award nominee. The award celebrates DC Metro-area businesses  with “great vision, the ability to implement and deliver, an innovative management approach, or star-quality charisma.”

“We’re honored just being nominated,” says founder Gurpreet Singh, quieting his competitive streak.

Of course, Seva Call is in the company of stellar local businesses like Vocus and Infield Health, so perhaps that beauty pageant humility isn’t all for show. Seva Man, however, is a totally different story.

“Ssssssssss,” says Seva Man, pressing an index finger to his apparently sizzling tushy.

Of course, the question that everyone is dying to ask: what will Seva Man wear for this uber-exclusive red carpet soiree? Nixing the stuffy suits in classic start-up style, the event will be held at a pool party: a black swim trunk affair — or blue/orange in Seva Man’s case. At least he  can be confident that he won’t pull a Jennifer Lawrence and trip over his cape.

In advance, everyone at Seva Call would like to thank The Academy, our parents, and our fans; we’re going to Disney Land because they like us, they really like us, and all that jazz. Brushing up on acceptance speeches; here are the Top 10 Funniest.

And, if you want to see what makes Seva Call so hot, check us out and give us a shot.

Mouthwash Versus Toothpicks

Thursday, June 6th, 2013

Mouthwash Versus Toothpicks - Dentists

Keeping your teeth and gums clean is vital to your health. Even though it may seem like an annoying chore, proper dental hygiene actually helps you avoid horrible issues such as gum disease and even some cancers. But when there are so many products available, it’s hard to know what to do. If you’re currently trying to decide between mouthwash versus toothpicks, the information below can help you out.

Mouthwash Versus Toothpicks: Meet the Competitors

Mouthwash

– Usually a minty flavored liquid you swish around your mouth once or twice a day to freshen breath and clean your teeth.

– Although not all of them are, most mouthwashes are alcohol-based.

– Mouthwash leaves behind a tingling sensation, which makes you feel like your mouth is extra clean.

– Commercials and advertising for mouthwash boast that it can get in between your teeth where your toothbrush cannot get and clean out any plaque build-up or residue.

– Contrary to the ideas perpetuated by advertising, mouthwash does not clean off the build-up between your teeth. It can only soften it. Plaque and tartar hold on tight to your teeth once they have formed. This build-up requires more than just a few swishes to knock it off.

Toothpicks

– These are small pieces of wood or plastic with a pointed end that people use to pick out food stuck between their teeth.

– You need to be gentle with toothpicks. Since the pointed ends are a lot bigger than anything else you usually stick between our teeth, they can really hurt your gums.

– Toothpicks are very effective at getting bigger chunks of food particles out of your teeth after eating, but don’t really knock out the smaller pieces or build-up very well.

– Toothpicks don’t immediately freshen your breath.

So, Who Wins?

Both! These two products are used for different things, so you don’t really need to decide between mouthwash versus toothpicks. You can use some mouth wash in the morning, before bed, or when you feel you need a breath-freshening pick-me-up. You can also use a toothpick after a meal when you can feel leftovers lodged between your teeth.

Neither of these replace brushing and flossing, either. Whether you use mouthwash, toothpicks, both, or neither, you need to brush your teeth and floss at least twice per day. Dentists say this is the only way to make sure you’re getting rid of harmful build-up and avoiding gum disease and gingivitis.

Consult A Dentist

When you are in search for a dentist, try using TalkLocal. We let you specify what types of service you require and match you up with professionals that can help.