Archive for the ‘Appliances Repair’ Category


Best Coffee Maker To Buy

Saturday, May 4th, 2013

Best Coffee Maker To Buy - Appliances Repair

When you need a little bit of help waking up in the morning, you might make a beeline to your local coffee shop. However, having your own coffee maker doesn’t just deliver a quicker wake-up call, it also saves you time and a lot of money. Knowing the best coffee maker to buy depends on your needs.

Ask yourself these simple questions to figure out the best coffee maker to buy.

How much coffee do I need to make?

Coffee makers range in the number of cups they produce. If you are a person who needs multiple cups per day, you may want to look into a coffee maker that goes up to 12 cups. If you drink a lot of coffee, but not that much, maybe an eight-cup maker is for you.

If you just enjoy one or two cups in the morning, you might look into a single-serving coffee maker, like the very popular Keurig. Knowing how much you’ll drink will help you avoid spending money on a larger coffee maker if you don’t need it.

What special features do I want on my coffee maker?

What do you need other than just the ability to make coffee? What will make your life easier? Some coffee makers can be programmed to start making coffee automatically. This means you can wake up to fresh, hot coffee already brewed.

Some machines can automatically turn off to avoid danger hazards if you forget. Others can alert you when they need cleaning, helping the machine last longer. Decide what extras you need before you purchase a coffee maker.

How big should my coffee maker be?

Do you have a lot of space for a coffee maker? Or does your kitchen only have room for a smaller one? If you’re looking into a full-sized cappuccino or espresso machine, they take up a lot of space. Make sure you have a safe place to store your coffee maker before you buy it.

If Your Coffee Maker Ever Goes Haywire

Knowing your answers to these questions will help you decide individually the best coffee maker to buy for you. TalkLocal can also connect you with the professionals in your area to help you get set up with your very own coffee maker.

Food Burning In A Toaster Oven

Friday, April 26th, 2013

Food Burning In A Toaster Oven - Appliance Repair

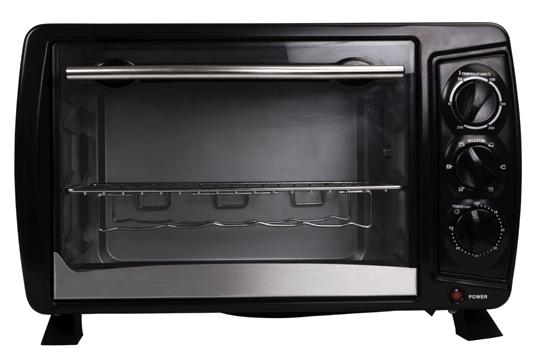
A compact, countertop toaster oven can be a convenient addition to any kitchen. From melting a little cheese to warming a small meal, a toaster oven can save time and energy compared to a regular oven. As with many electrical appliances, shorts and errors can occur, which can lead to food burning in a toaster oven. Here are a few reasons for food burning in a toaster oven:

1. Temperature setting does not translate. If you are operating on a recipe for a regular oven or microwave, you may be cooking at a temperature that is too high for the oven. Toaster ovens are much more efficient than a regular oven and will heat up quicker than a regular one. This means that any heat lost will be quickly replaced and you may be able to cook your food at a lower temperature.

2. Time setting does not translate. As with the temperature, if the recipe you are using is set for an oven or microwave, you may need to cook the food for a shorter period of time. Particularly if translating from a microwave time setting, some toaster ovens need less cooking time. Convection toaster ovens are very efficient and may cook more quickly than a less efficient microwave oven.

3. Malfunction in the thermostat. This can be particularly dangerous. The thermostat controls the temperature and ensures it only reaches as high as the knob setting. If the thermostat malfunctions, the temperature can be unregulated and soar past the intended setting. This can not only cause your food to burn quickly, but can also damage the machine or cause a fire.

Need More Help?

If you have adjusted cooking times and temperatures and are still finding food burning in a toaster oven, you may need to call in an appliance repair professional. Seva Call can put you in touch with a local professional quickly. Our service is free and we will only connect you with qualified individuals in your area.

Best Drinking Water Filter

Tuesday, April 16th, 2013

Best Drinking Water Filter - Appliance Repair

Spending money on bottled water can get ridiculous and prove to be a budget buster. At the same time, picking the best drinking water filter can get confusing and frustrating. There are certain aspects of a drinking water filter you want to make sure you understand before shopping around. Knowing a bit about what they do can make finding the best drinking water filter much easier and save you a lot of money in the long run. We’re here to tell you how to make sure you’re getting what you need from your filter.

Find Out What Is In Your Water First

Knowing what you need to filter out helps you narrow down your choices. You can learn about this through the Consumer Confidence Report that local facilities include in your monthly water bill and have available on demand. Different types of filters are more and less effective at removing different contaminants, so having this information will greatly help you.

Decide Which Filtration System Suits Your Needs 

The current market boasts multiple filtration systems, including:

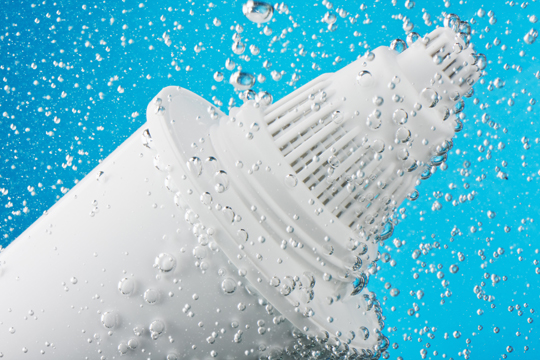
– Pitcher filters: These are pitchers that you can pour water into straight from the tap. The water goes through a removable filter before falling into the pitcher, which means it is already clean to drink when you are ready to pour from the filter. You may want a pitcher filter if you want to refrigerate your drinking water or keep filtered water separate from unfiltered water.

– Sink filters: This type of filter actually attaches to your sink’s nozzle. The water is immediately filtered when you lift the handle. In some designs, the water is only filtered if you press a specific button to send it through the filtration channel. This might suit your needs if you plan to use filtered water very often and don’t want to bother with refilling the pitcher every time.

– Handheld water bottle filters: These are just like typical, reusable water bottles that you can carry with you everywhere, but they have a filter inside that cleans your water before it hits your mouth.

– Figure out the life-span of your filter. Every filter will need to be changed and refreshed to insure that your water is as clean as possible. Some can last one month before requiring a change; others can last up to six months or more. Depending on the filter’s life span, the price may go up.

After answering these questions for yourself, you should be better prepared to shop for the best drinking water filter that suits your needs.

Have A Professional Look At Your Water Issues

If you need professional help picking out a filter or would prefer to have all of your home’s water filtered, TalkLocal can help you get those answers as well. Simply type your request into a form on our website and we’ll have area professionals contact you immediately, ready to help.

Get Rid Of Iron Stain On Clothes

Tuesday, March 19th, 2013

Get Rid Of Iron Stain On Clothes - Appliance Repair

There are few things more disheartening than pulling a white T-shirt out of the wash only to realize it is no longer white. Despite our best efforts, sometimes those troublesome stains can rear their ugly heads. Fortunately, there are some home remedies you can try to get rid of an iron stain on clothes before resorting to burning that bothersome piece of clothing!

Keep in Mind

Heat can worsen a stain. If it has already been dried, your odds of getting rid of the stain decrease — but there may be hope, still! Do not iron clothes once you notice a stain. Treat the stain as soon as you notice it to avoid letting it become further engrained in the fabric.

Treatments

Club Soda

This is probably one of the best known home cleaning remedies out there. Club soda can be found in almost any grocery store and usually can get rid of an iron stain on clothes.

1. Soak the stained portion of clothing in the club soda and let it remain there a bit — five minutes or so. The longer you can wait, the better, but no need to wait to excess.

2. When ready, place an absorbent pad under the clothing. If you have nothing else, an old towel will work, too.

3. Begin blotting the stain from the outer part toward the center. These steps ensure the stain won’t spread while wet. Use an absorbent pad or color fast washcloth to do the blotting. Rinse the clothing in cold water and then, if machine washable, wash in the cold cycle.

Vinegar

You can either treat clothing the same as above if the club soda does not work, or if you have many clothes, try making a solution of one gallon of vinegar, two cups of salt and three gallons of water in a tub or sink. Distilled water may work best if your home water supply contains excessive iron. Let the clothes lay out overnight and wash in the morning with a heavy detergent.

Still Need Help?

Ultimately, if you are having issues with iron stains, there is too much iron in your water, and you will continue to have problems until you fix the source. Your best bet is to find a professional handyman or appliance repair professional in your area by searching through TalkLocal. They’re great at connecting people with the right local professionals for the job.

Coffee Maker vs. French Press

Monday, March 4th, 2013

Coffee Maker vs. French Press - Appliances Repair

If you are in the market for a new gadget to brew your morning coffee with, you do not have to settle for a traditional automatic drip coffee maker. Many coffee lovers opt for a French press. In order to make an informed decision, you must first analyze the benefits of a coffee maker vs. French press.

What is a French Press?

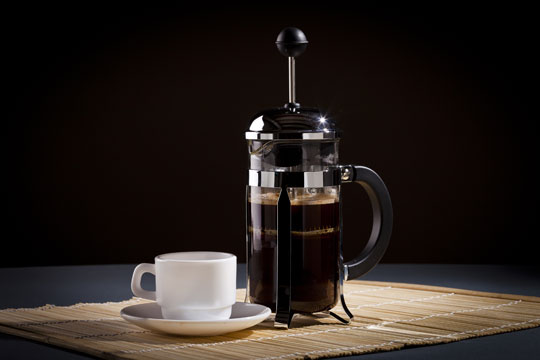
A French press is a glass device in which very coarsely ground coffee beans are placed in the bottom. Water heated to a specific temperature — depending on the type of bean — is then poured over the grounds and allowed to seep for three or four minutes. This is much like the process of brewing tea, but without the bag. When finished brewing, the plunger is pressed down to separate the water from the grounds.

Benefits of a French Press

While an automatic drip machine only allows the water to run through the grounds, the French press requires the grounds to sit in the water much longer. Those who prefer a stronger cup of coffee believe this process makes a more flavorful drink. The reason for this is that coffee beans contain oils that are filtered out with a drip filter.

The Downside

When grinding your own beans, as opposed to buying them that way from the store, your grinder may grind them too fine for the press. The screen slots may let the finely ground beans through, which will get into the coffee. In the battle between coffee maker vs. French press, a coffee maker picks up a point here.

Also, because the coffee is not on a burner with a French press, it will not stay hot as long. In addition, because it is not automated, it requires more time to make your coffee, whereas an automatic machine can be programmed and forgotten as you get ready in the morning or work in the afternoon.

Need more help deciding?

If comparing a traditional coffee maker vs. French press has made you want a new device, or if you have simply broken your coffee brewing device and are looking to repair it, try using TalkLocal to locate a dependable professional in your area. We will connect you with up to three appliance repairmen in your area, who will be available to help  you when you need them.

Kitchen Range Hood Designs

Friday, February 8th, 2013

Kitchen Range Hood Designs - Appliances Repair

You may not think of your range hood as one of the features most noticed in a kitchen’s design, but there are many different types and designs for this appliance that can make your kitchen a must-see.

Kitchen Range Hood Designs

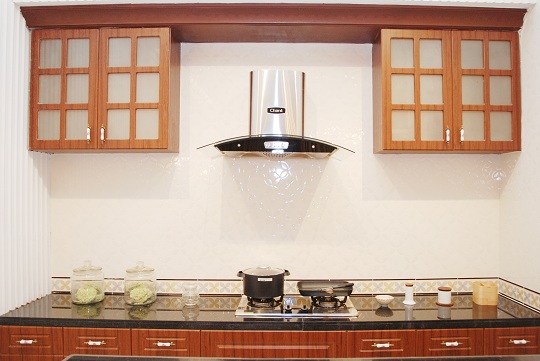
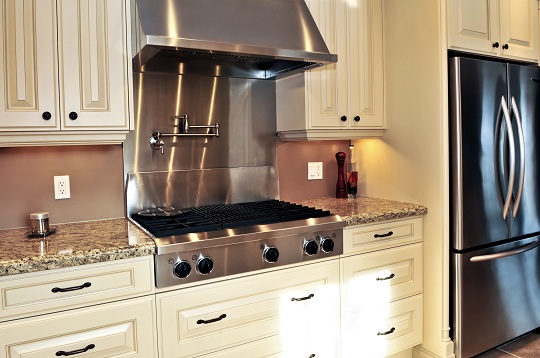
Your kitchen range hood acts as an exhaust fan that clears out the smoke and excess (both delicious and maybe unpleasant) smells that may result from cooking. This appliance feature can either be attached to your cabinets, under your microwave, be mounted as a wall fixture, appear alone on your kitchen’s island or even fit an outside kitchen setup. They can be simple or elegant, stainless steel or plastic, standard or custom, or of a modern or antique design.

Your range hood can be equipped with multi-speed blower motors, illuminating halogen lights and even removable filters that are dishwasher safe. On your quest for the perfect range hood, you can find companies that offer over 60 different range hood models of various styles and sizes, determined to give you the perfect one for your kitchen’s design, ambience and needs.

Based on your requirements and personal preferences, kitchen range hood designs can fluctuate widely on price. The more elaborate, high-quality, customized design you choose, the more expensive the range hood will be.

Additional Help

Whether you need help figuring out which type of kitchen range hood is best for you, or if you’re ready to start the process of repairing, purchasing, and/or installing a range hood, try using TalkLocal to contact an appliance repair company or contractor near you. TalkLocal is a free service that will connect you with top-quality, reputable companies in your neighborhood, within minutes. Simply go to our website, enter in your specific problem, location and availability, and we will contact multiple professionals who will then call YOU directly, ready to help.

Water Smells When Ironing Clothes

Monday, February 4th, 2013

Water Smells When Ironing Clothes - Appliances Repair

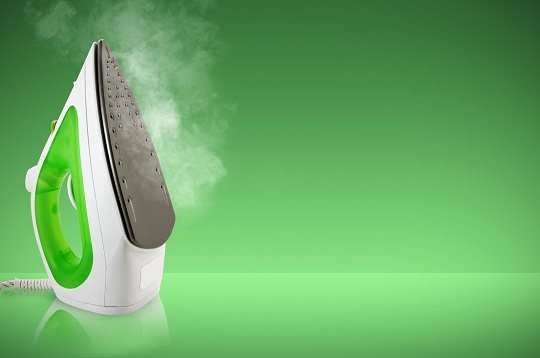
Ironing our clothes makes us want to wear them because they look new. The water in the iron used to spray our clothes helps us achieve the crisp look. However, when that water makes our clothes smell like a sewer, we would rather pick the wrinkly shirt than the putrid one. Keep reading to learn why the water smells when ironing clothes and how to prevent it from happening.

Why Water Smells When Ironing Clothes

Every electric iron has a reservoir for water that is used to spray clothing. It is easy to remember to fill it up when you need to, but we often forget to empty out that water. As a result, the stagnant water smells bad. You will need to clean the water tank in order to remove the stench.

Vinegar is the best item to have in your pantry because of its multipurpose uses, particularly for cleaning. All you will need to clean the fill tank of the iron is vinegar and water.

1. Unplug the iron and empty the water reservoir.

2. Fill the tank with vinegar and let it sit for 10-15 minutes.

3. Plug the iron back in and turn it on to the steam setting.

4. Grab a white cloth and steam it until the tank is empty. This may take a few minutes.

5. Once the tank is empty of vinegar, unplug it and fill it with water.

6. Plug the iron back in and turn it on the to steam setting again. This time you will steam water to remove any remaining vinegar residue. You do not want your clothes smelling like vinegar!

7. You may want to repeat step 6 once the tank if empty of water to ensure that you have completely removed all traces of vinegar.

Additional Help

Do not forget to empty out the reservoir regularly! If you are having more problems with your iron, TalkLocal can help connect you with local appliance repair professionals. We will connect you with up to three high quality repair professionals in your area who will be available to help you when you need them.

Kitchen Exhaust Fan Repair

Sunday, February 3rd, 2013

Kitchen Exhaust Fan Repair - Appliances Repair

The most important appliance in your kitchen is not the blender, or the toaster, or the sink.  In fact the thing you probably need the most is your exhaust fan over the stove.  This device sucks all of the smoke and smells out of the air in the kitchen so that your entire house does not get clogged up.  Cooking on the stove can create various aromas and odors as well as steam and smoke.  If your exhaust fan is broken you should take measures to repair it as soon as possible.

Kitchen Exhaust Fan Repair

Here are some tips on kitchen exhaust fan repair.

1. Make sure that the device is receiving power. Use a voltmeter to make sure that whatever outlet the exhaust is plugged into is live.  This step needs to be done before you turn the power off.  The problem may not be with the actual fan but with the electrical wiring in your home.

2. Now that you have determined if the problem is with the actual fan you can turn the electricity in your kitchen/home off.  Do not touch the fan if it is still on.  Once you switch the power off, unscrew the vents to access the fan. Once you can see the fan, disengage it and remove it completely from the exhaust.

3. With regular use, the exhaust fan will gather dust/grease so it will stop working as efficiently.  You should inspect each part and clean the entire fan.  The gears can get clogged and prevent the blades from spinning. Removing all of the dirt obstructing the fan will help it work more efficiently. If the filter for the kitchen exhaust fan is dirty as well, you can run it through the dishwasher to clean it.

4. If cleaning the exhaust fan does not fix the problem you should check the wires in the appliance.  Visually inspect the connections and use a voltmeter to figure out where the kink is.  The vibrations from the fan can loosen the connections and screws, and the heat from cooking can melt the wiring.  Oil up all of the moving parts in the fan after doing this and reconnect the fan to the exhaust unit.  This should take care of your exhaust fan problem.

Additional Help

If you have more questions about kitchen exhaust fan repair you should try to talk to a professional so that you can get the best help possible.  The easiest, fastest way to get in contact with reliable local appliance service companies is to use TalkLocal. Just put in your problem and availability and let them do all the work.  Within minutes you will be connected to someone who should be able to help you out

Tips on How to Repair a Dryer

Friday, February 1st, 2013

Tips on How to Repair a Dryer - Appliances Repair

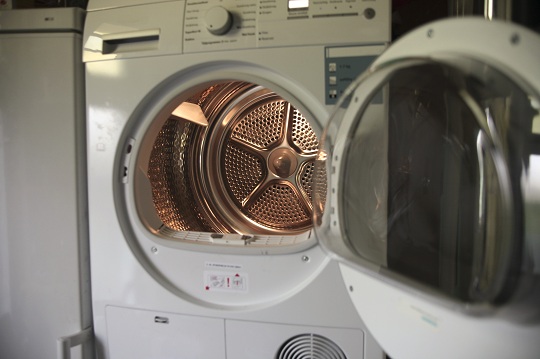
Like many appliances, your clothes dryer may develop problems over its life that cause it to work improperly or not at all. A lot of these problems are preventable with some consistent maintenance, while others can be repaired when caught early. Here are some tips on how to repair a dryer.

No Heat

If the dryer tumbles but won’t heat, there’s likely a problem with the heat source.

1. Make sure the dryer is set properly.

2. If so, make sure that it’s plugged in.

3. If it’s an electric dryer, you may need to replace a fuse or reset the breaker.

4. If it’s a gas dryer, make sure the supply valve is open and the pilot is lit.

Clothes Won’t Dry

The most likely cause of this problem is clogged vents. Although there is a lint trap in your dryer, it won’t catch everything. Over time, lint can build up inside of your dryer vent. Similarly, birds and other critters might make a nest in the vent opening in your home’s exterior, so check on that, too. There’s also the possibility that your dryer’s timer may not be working correctly. Another cause could be that the dryer is pinching the ducting against the wall, restricting airflow. You should never use flexible ducting of any kind. Its inability to support itself and resist crimping can present a fire hazard.

Dryer Won’t Turn On

The main culprit here is usually the power supply.

1. Check the connection with the outlet. If it’s plugged in, inspect the cord to be sure it’s not damaged and test the outlet with another appliance.

2. If all of that checks out, inspect the door switch. It may be stuck or broken. If it fails to make a clicking sound, you might need to have it replaced.

Additional Help

Clothes dryers are among the most convenient modern appliances anyone can own. However, they often fail to work as they’re supposed to. When this happens, if you’re not able to solve the problem yourself, you should check out TalkLocal to find a reputable local handyman. We will connect you with up to three professionals in your area who will be available to help you when you need them.

Different Types of Refrigeration Systems

Tuesday, January 29th, 2013

Different Types of Refrigeration Systems - Appliances Repair

There are many different types of refrigeration systems on the market, and the more you understand about these systems, the more likely you are to make a well-educated and informed choice when it comes to servicing or purchasing a new system. Depending on your style of living and your accessibility needs, you’ll most likely want a certain type of refrigeration system.

Top Mount Refrigerator

The top mount refrigerator is the classic and most common type of refrigerator today; the freezer is at eye level and the fresh food compartment is located at the bottom of the unit. You can find this type of refrigerator in a variety of different colors and sizes, making it the most flexible type of refrigerator you can purchase. You’ll undoubtedly be able to find one that fits the dimensions of your home, as well as your kitchen decor.

Side-by-Side Refrigerator

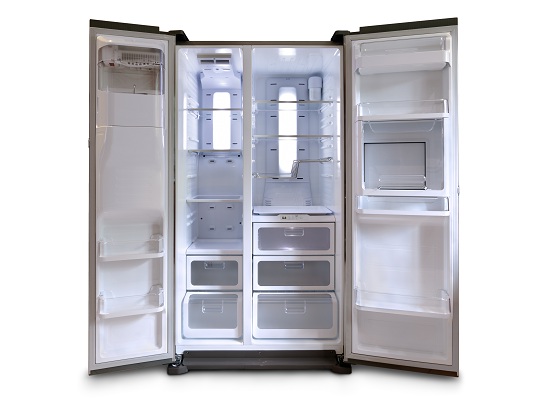
The side-by-side has a refrigerator and a freezer that run from the top to the bottom of the unit. Side-by-side units are notably easier to use for children and people in wheelchairs, because there is equal access to both the freezer and refrigerator. The doors also require less space to open and close, making it more convenient to use in small kitchens. These refrigerators also come with customize-able and adjustable bins on the doors.

Bottom-Mount Refrigerator

If you like having your fresh food at eye level, then you may want to purchase a bottom-mount refrigerator. These models feature a freezer on the bottom. Since most people use the refrigerator more than the freezer, the fact that you must bend over to access the freezer is usually not a concern. However, these refrigerators are very difficult to access from a sitting position or from below since you must lift packages up, making it less child- and wheelchair-accessible.

French Door Refrigerator

This modern design is becoming increasingly popular today, combining a bottom-mount freezer with a side by side refrigerator on top. This style combines all of the positive features of bottom-mount and side-by-side refrigerators.

Additional Help

Ultimately, if you’re looking to purchase a refrigerator, you’ll want to consider how it will fit into your lifestyle. If you’re trying to decide between two different types of refrigeration systems, you may want to discuss your choices with an appliance expert. TalkLocal can connect you with a local high quality appliance expert in just minutes so you can make sure your choice is the right choice for you home!