Archive for the ‘Appliances Repair’ Category


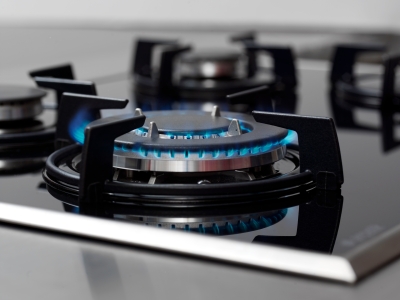
Gas Stove Will Not Heat Up

Friday, August 31st, 2012

Gas Stove will not Heat Up Appliances Repair

Fortunately, gas stoves are extremely easy to repair. So if your gas stove will not heat up, you can most likely fix your gas stove with just a simple cleaning! The following repairs should be able to be completed without shutting off gas to the stove as long as none of the burners are opened.  Make sure that the moment you smell gas, you active the gas shutoff and immediately ventilate the room. Your safety is of the utmost importance.

Clear the Pilot

Most gas range stoves have a hinged lid, so lift up your stove top to access the igniter, which will vary depending on the type of stove you have. If you have a standing pilot light, you can identify it by a small gas tube with a hole at the end of it.  A small flame should be burning at the end of the tube. If you have a spark igniter, you should see a small ceramic nub near the burner. You should hear a click if it is working.

Clean out the burners

You’ll simply need to use a diameter brush to clean your burners. Try to remove all the grime that may be clogging your burner holes, preventing them from lighting. After cleaning out your burners, simply try to light your burners again. If it still doesn’t work and you have a standing pilot stove, you may want to consult your owner’s manual to see how to raise or lower the flame to the appropriate height.  On the other hand, if you have a spark ignition stove, make sure the stove is plugged in and that there is actually power running to your stove.

The majority of gas stove problems can be solved by just giving your stove a simple and thorough cleaning.  However, if you believe your stove is malfunctioning from a mechanical or more severe problem, you may want to call in a service professional to diagnose and repair your gas stove.  TalkLocal can do all the work for you, connecting you to high quality local appliance experts in just minutes.  You’ll have your stove working in no time!

Dryer Timer is Not Working

Tuesday, August 28th, 2012

Dryer Timer is Not Working Appliances Repair

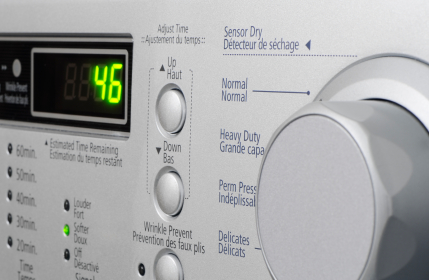
Dryer timers are arguably the most important part of a dryer. A dryer timer calculates the length of each cycle. It also advances the dryer to the next drying setting when the temperature inside the tumbler has reached a certain level. If your timer is broken, the dryer may not advance to the next setting. The dryer will continue tumbling in its first phase until you manually stop the machine. This may ruin, over-dry, or even shrink your clothes. Read below to find out why your dryer timer is not working.

Most of the time when dryer timers break, it is the small electric motor inside of them that has either burnt out or failed. It is best to replace the entire timer. Taking out the electric motor out and replacing it is very difficult. It is also difficult to find and purchase that specific part. Buying a new timer will save a lot of time and it will ease the installation. To replace the timer, you should write down the model number and search for it online. It is easiest to wait until you receive the new timer before replacing it because it will be easier to remember where each wire is supposed to go.

Taking off the broken timer is fairly simple. Locate the timer and look for the screws that are holding it down. Make sure to turn the machine off. Some screws may be located under the knob, so take off the knob as well and look for any screws that may be attached to the timer. After unscrewing, remove the wires and cords that are attached to the old timer. Double check the wire and protective lining to make sure they are working correctly. Do not be surprised if the new timer looks different from the old one as newer model timers may be modified. Attach the wires to the new timer. Double check the instructions to make sure you completed each step.

If you want professional help with installing a new dryer timer, TalkLocal can connect you with a local appliance repair service.

Microwave Sparks when Cooking

Friday, August 17th, 2012

Microwave Sparks when Cooking Appliances Repair

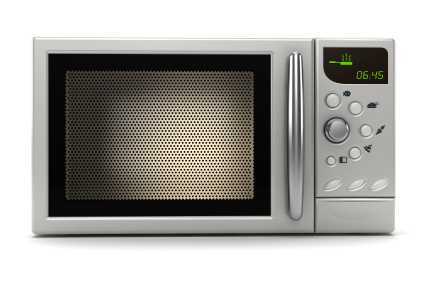
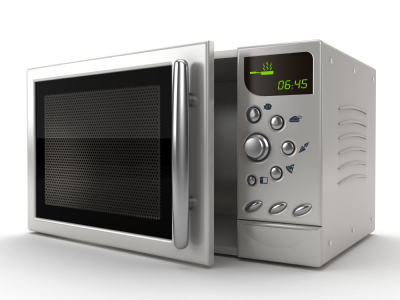
Your microwave is a helpful device that makes cooking a lot easier.  It speeds up the process of defrosting, heating up, etc. When your microwave begins to spark it can seem very scary.  It almost looks like your device is going to blow up.  You should not freak out, but instead stay calm and follow these tips.

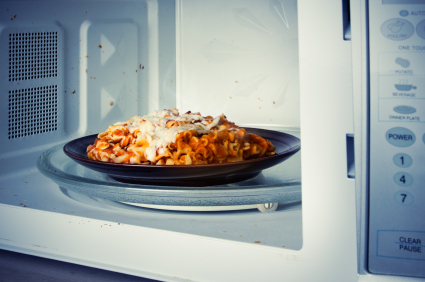
If your microwave sparks when cooking, the first thing you should do is turn the microwave off and unplug the device to prevent further damage. The lightening storm you see with all the sparks and sizzles can electrocute you if you are not careful. There are two possible problems with your microwave: You may need to simply clean out your device or you may be cooking something that has a high mineral content.

Dirty Microwave

In order to clean the device, you should first unplug it. Place the microwave in an area with a lot of light.  Along the side or back of the microwave is a rectangular piece of metal plate. This is called the wave guide cover and it is screwed directly into the microwave wall. This wave guide cover protects the inside of the microwave from stray bits of food or water. You should carefully unscrew the plate and keep the attachments in a safe place while you are working.  Using a soft cloth and clean water scrub off any food or particles stuck to the cover.  The material is fragile so you should be careful and make sure it is completely dry before you reinstall it.  Place the cover back on the microwave.  If the device continues to spark you should maybe consider replacing the part.

Cooking Food with High Mineral Content

Another potential reason your microwave could be sparking is because of the food you are cooking. Anything metal will react in a microwave and cause sparks and lightening.  Dense vegetables such as green beans, carrots, and peppers have a lot of minerals in them.  These high mineral content vegetables contain a lot more metallic substances than other foods. The minerals include iron, magnesium, and selenium. You should be careful and keep a constant eye on the food when it is cooking to avoid overheating.

Continuing Problems

If you continue to have problems with your microwave you should seek professional help. Use TalkLocal to be put in contact with reliable local businesses within minutes.  You don’t have to do any work! Simply input your problem and availability and TalkLocal will do the rest.  Almost immediately you will be connected with someone who can help you out on the phone.

Auto Cook Microwave Buttons do not Work

Tuesday, August 7th, 2012

Auto Cook Microwave Buttons do not Work Appliances Repair

First, try the other buttons on the microwave to see if they work. If it’s only the auto cook buttons that do not respond, you must settle for manually punching in the cook time. If you find that to be annoying, keep reading this guide to figure out why the auto cook microwave buttons do not work.

Technical Problems

Depending on the particular microwave set you use, the interface (the panel with the buttons) and auto cook buttons may work differently under certain conditions. Try resetting your microwave and testing the auto cook button. Simply unplug the microwave and then try the auto cook button.

If that doesn’t work, check the functions of the microwave by referring to the microwave’s manual.  If you don’t own or can’t find the manual, find the microwave’s manufacturer and the model number at the back of the microwave and google the information; there should be a manual available online.

Physical Problems

If the problems described above do not fix your problem/are not an accurate description of your problem, it may be that the microwave doesn’t heat properly when you press the auto cook button. If the food inside the microwave isn’t cooking even though the microwave reacts to the button, lights up, and makes a whirring sound, then the magnetron is failing.

The magnetron creates the microwaves that heat up your food. Needless to say, you will not be able to microwave anything until you fix the magnetron.

It is cheaper to buy a new magnetron than to fix an existing one in the most cases. Unfortunately, magnatrons cost nearly as much as the microwave itself. So it is generally recommended that you buy a new microwave.

Additional Help

If you feel like you need professional help on fixing auto cook buttons on your microwave, TalkLocal can help with finding the correct local experts in this case, saving you time and energy in what may be a stressful situation.

Microwave is Making a Loud Humming Noise

Tuesday, July 31st, 2012

Microwave is Making a Loud Humming Noise Appliances Repair

If your microwave is making a loud humming noise, first check to see if it still heats efficiently. Often, the humming noise is associated with a microwave malfunction. The following tips will help you troubleshoot the problem in either situation.

Replacing your Microwave:

If your microwave is old, it may be more affordable and efficient on your time to purchase a new one rather than trying to repair the existing one. You can purchase a new microwave from Amazon and have it shipped overnight starting at $59.50.

Microwave still heats:

It is likely that grease or food debris is causing the humming sound. Sometimes grease or food becomes stuck behind the stirrer/waveguide cover and creates the noise. Make sure to clean behind the cover to clear away any debris.

Microwave does not heat:

If the microwave does not heat, the humming is likely caused by a malfunction of one of three parts: the power diode, high voltage capacitor, or magnetron.

1) Power Diode — This is an electronic component that readily passes current in one direction only and blocks the flow of current in the opposing direction. If your microwave’s diode has become defective, then your microwave will not heat and you will hear a buzzing noise. Test the diode to determine if this is the cause of your problem. Replace it if it is defective.

2) High Voltage Capacitor — This device stores electricity. Test the capacitor to determine if this is the cause of your problem. A defective capacitor will have to be replaced before your microwave will work again. Make sure you discharge the capacitor before you test it.

3) Magnetron — This is the device that creates the “microwaves” that heat your food. Test the magnetron and replace if necessary.

Caution: Your microwave oven is capable of giving you a serious electrical shock, even when it is unplugged. We strongly suggest you seek the assistance of an appliance repair technician when conducting any microwave oven repair.

You can use TalkLocal to get connected with a reliable appliance repair professional in minutes! TalkLocal will only match you with local businesses that can meet your specific service needs and time restraints.


Ice Maker Dispenser Not Working

Wednesday, July 25th, 2012

Ice Maker Dispenser Not Working Appliance Repair

Ice maker dispensers seem to have a mind of their own sometimes. Fortunately for all of us, there are remedies that can take care of most issues for an ice maker dispenser not working. To be clear, there are many types of ice dispensers, so these directions may not apply to all models.

There are a few reasons for an ice maker dispenser to stop working. The filter may be loaded with too much sediment causing low water pressure. The temperature may not be set properly. Something may be loose. No matter the reason, it can be fixed.

Mechanical or electrical problem?

If you push the switch to get ice and hear a noise but no ice comes out, the problem is mechanical. If mechanical, the problem lies in the ice bin, the ice chute, or the augur housing. If you don’t hear a noise when pushing the button to get ice, the problem is electrical and an electrician will likely have to be called.

Mechanical problem

If it’s mechanical, start off by removing the ice bin and placing that aside. Next, open the freezer door and push the switch to get ice. When everything is working properly, the auger motor (the fork sticking out from behind where the ice bin was) should turn and the solenoid (the device to the right of the auger motor) should jump up. If the solenoid jumps up but the motor doesn’t turn, the motor is frozen. This means there is too much moisture within the freezer, so it will need to be reduced. To reduce the moisture, take out these parts and try pointing a hair dryer on the motor to quicken the process.

If the solenoid works as described, the problem lies in the ice bin or ice shoot. Check the ice bin and make sure there isn’t too much ice in there. If there is, clean it out with hot water. If there is no ice, check and see if the auger motor is broken and if it needs to be replaced. You should also check and see if the ice separator (the divider between the ice storage and the ice dispenser) has a hole in it. This is a common problem so if it does have a hole, it will need to be replaced.

There are also a few things that can go wrong with the ice chute. If the ice cubes are in the ice chute but not coming out, the flapper needs to be fixed. To attempt this, open the door and remove the ice bin, then push the ice switch to open the chute. If it opens but not all the way, check and see if something is blocking it. If not, the problem is more complex and there is an issue with either the flap, spring, crank, or solenoid. You can determine which one is at fault by opening up the front cover of the dispenser, removing any screws and then removing the dispenser control. Once that is done, you should see the flap. Inspect the spring, crank, and flaps and if anything appears broken, they will need to be replaced.

If you have tried all of these and your ice dispenser is still not working or if you want to hire an electrician to fix an electrical problem, consider using TalkLocal, a FREE service that will connect you with top-quality, reputable electricians in your neighborhood, within minutes.

How to Fix a Dishwasher that is not Draining

Monday, July 23rd, 2012

How to Fix a Dishwasher that is not Draining Appliances Repair

You have all these dirty dishes that need to get washed but the dishwasher isn’t working properly because the water is not draining.  Here is steps on how to fix a dishwasher that is not draining.

First, if your dishwasher is connected to your garbage disposal, it is possible that a clog of food or debris is causing both your garbage disposal and dishwasher drain to run less efficiently. If you turn on your disposal and hear that it is not running like it should, try cleaning it out (make sure to turn OFF the disposal before reaching in).

If this doesn’t help, you should try checking for clogs in the dishwasher drain. This can be located under your sink, in the pipe connecting from your sink to your dishwasher. Try cleaning it out by reaching down the drain and pulling out any food or debris (you may want to wear gloves and grab some paper towels for this). You can also try using a stretched out wire hanger to clear out clogs that are further down the drain.

Finally, check the draining hose of the dishwasher to potentially locate the problem. Try pulling out the bottom panel of the dishwashing machine. Then check the hose for any folds, kinks, or clogs. If it is tangled, try to stretch it out; if you see a clog, you may have to replace the hose.

If you find that the dishwasher is still not draining properly, you may need to contact a local plumber. Try using TalkLocal, a FREE service that will connect you with top-quality, reputable plumbers in your neighborhood, within minutes. Simply enter in your problem, location and availability and TalkLocal will contact multiple contractors, who will then call YOU directly, ready to help.

Cutting Energy Costs at Home

Wednesday, July 4th, 2012

Cutting Energy Costs in Your Home Heating & Cooling

Home energy is one of the largest expenses for families every year, yet few people know the basics about getting the most efficiency from their systems. Read below for a few tips and tricks to cutting energy costs at home and save money so you can spend it on your kids and even yourself.

Making some minor changes to your home’s appliances can go a long way in saving money.  This begins with the temperature of your water heater.  Most water heaters are set to operate at a temperature higher than you will actually ever need in your home.  You can save money every month by setting your heater 20° cooler.

Two other appliances that can waste your money without you knowing are the washing machine and the dishwasher.  When doing laundry, most people do not realize how much more it costs to use hot water than warm or cold.  Your clothes will still be cleaned at cooler temperatures of water–only at a cheaper cost.  Additionally, turning the drying cycle off of your dishwasher will cut your energy costs.

Another thing to pay attention to in a central home cooling system is your air filter.  Make sure this gets changed at the recommended intervals.  It takes more energy and money to force air through a dirty filter.  In fact, the money wasted on cooling through a dirty filter would more than cover the cost of replacing the filter!

These tips can significantly reduce the cost to cool your home, but the most fundamental rule for air-conditioning efficiency is refraining from producing excess heat.  When turned on, items such as light bulbs and computer equipment actually produce a great deal of heat, so turn them off when you are not using them.

Not all household energy-saving techniques originate inside the home.  Though it is more of an investment, properly preparing the outside of your house will prevent energy leakage–and an empty wallet–in the long run.  The easiest of these tasks is sealing cracks in your home’s structure.  A little caulk can go a long way to cut your heating and cooling expenses.

Saving money on your home’s energy is all about paying attention to detail.  While these tips and tricks are a great way to begin, heating and cooling companies employ experts in the field that can provide you with even more information.  To learn about the latest energy-efficient appliances or cutting energy costs in your home, contact TalkLocal to easily find a appliance repair, heating and cooling, and even electricians in your area.