Archive for the ‘Auto Repair’ Category


What Causes a Car to Overheat

Tuesday, December 18th, 2012

What Causes a Car to Overheat Auto Repair

There are many possibilities what causes a car to overheat. You can spend a lifetime looking for the solution —or you can check out this list of common causes, which will save you a lot of time.

Causes of an Overheating Car

Low or dirty oil – Make sure the oil in your car is full. If it is already full, you may need to replace the oil. If you have low oil levels or old oil that is constantly being recycled in your car, it will cause various problems in your car. One of these problems may be what you are experiencing – an overheating car.

Coolant – If you are replacing the coolant, make sure that you clear out all the air within the coolant lines. If there is air trapped in the lines, an air pocket can form and this will cause a heat spot that will lead to overheating. In addition, the coolant temperature switch may have gone bad; if so, just replace it.

Radiator – Sometimes the radiator core may be blocked or the filter is filled with dirt and debris. Make sure all the passageways are clear and that there is easy access to the radiator to ensure a cool car. Also, make sure the radiator cap is secure and has no cracks.

Water pump – Make sure the water pump is working correctly and that the water pump belt is in good condition.

Additional Help

If you are still having issues and want to get your car checked out before the situation worsens and damages become more expensive to fix, check out TalkLocal. With this free service, you will be directly connected to high quality professionals within minutes. They will be able to help you with your specific problem during the time that works best for your schedule. Check them out!


How to Remove Cigarette Smell from your Car

Monday, December 17th, 2012

How to Remove Cigarette Smell from your Car Auto Repair

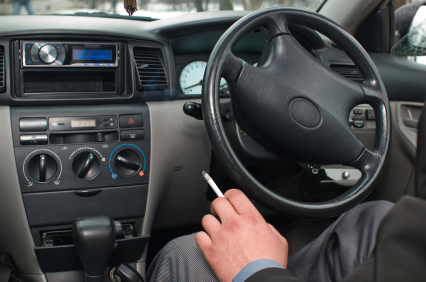
Cigarettes leave a very prominent smell behind.  Whether it be in your hair or clothes, on your belongings, or in your car, it is not very pleasant for yourself or for others.  It may seem impossible to get rid of this disturbing smell but there are a few ways to alleviate it. Here are some tricks for how to remove cigarette smell from your car.

Potential Solutions

1)   Febreeze

One way to get temporary relief is using a deodorizer.  Available at all local supermarkets, Febreeze can cover the smell of cigarettes quickly, but only for short periods of time.  The real problem with cigarette odors and chemicals is that they penetrate all the upholstery and get trapped.  You should take more serious action if you are looking for permanent help.

2)   Atmosclear

You can also buy an industrial strength air freshener.  Many car dealerships and auto parts stores use sprays like Atmosclear to get rid of smells.  This option has no signature smell, but it does permanently kill of unpleasant smells.  These kinds of ozone sprays do not stain and are not noxious.

3)   Dryer Sheets

Another option that will help to reduce the smell of cigarettes in your car is to use dryer sheets.  They can be placed underneath the seats in order to absorb some of the odor.  They will work for a few days but need to be replaced frequently to work well.

4)   Baking Soda

Baking soda is an amazing product with a multitude of uses.  You can leave a cup of the powder sitting in your car in the backseat, as well as front cup holders to drastically improve the smell inside your car.  The baking soda takes in the cigarette smell fast, so you will smell fresher air within hours.

5)   Shampoo

If none of the above work you can try to shampooing the interior of your car.  Using a special odor eliminating shampoo, scrub the carpets, seats, upholstery, and mats.  You should also clean all other surfaces with a damp cloth and vacuum out any remaining ash.

Continuing Problems

If you have problems with the cigarette smell in your car you should seek professional help.  Use TalkLocal to be put in contact with reliable local auto care businesses.  You don’t have to do any work! Simply input your problem and availability and within minutes you should be connected to someone who can help you out.

How to Clean Catalytic Converter

Thursday, December 13th, 2012

How to Clean Catalytic Converter Auto Repair

Catalytic converters

A catalytic converter is a vehicle emissions control device that converts the chemicals created by combustion in the engine into substances that are far less toxic.  The invention of the catalytic converter has mitigated the problems of acid rain and smog, but they still need to be maintained and cleaned before they become clogged.

A catalytic converter is typically used in the exhaust systems of different cars and trucks, but is used in motorcycles, airplanes, forklifts, buses, and other vehicles that are fitted with engines, as well.  A catalytic converter gets rid of hydrocarbons, carbon monoxide, and nitrogen oxide gas.  If you are worried your catalytic converter may be failing, look for signs such as stalling at high temperatures, a sulfuric smell emanating form the tailpipe, and a sluggish throttle response.

There are a few types of contaminants that can affect how your catalytic converter works, as well.  Lead can ruin your converter, as can phosphorous and silicone.  These materials can reach the catalytic converter by means of engine additives, motor oil, and engine leaks.  If your converter has been exposed to these and you are wondering how to clean the catalytic converter, don’t fret – there are ways.

How to clean catalytic converter

There are products out there that claim to clean your catalytic converter, but the ones you want to look for are ones that are long-term fixes rather than temporary fixes.  This means you will probably want to replace your catalytic converter if you have run into problems with it.  Using products simply delays the inevitable and could lead to more severe problems.

If you have read through this and believe you need to get your catalytic converter replaced, consider using TalkLocal to find you an auto repair specialist in your local area.  TalkLocal is a free service that will connect you with top-quality, auto-repair companies in your area within minutes.  Just enter in your specific problem, location and availability, and up to three companies will call you directly, saving you the time and stress of finding one yourself.


Speedometer Not Working in Honda Civic

Wednesday, December 12th, 2012

Speedometer Not Working in Honda Civic Auto Repair

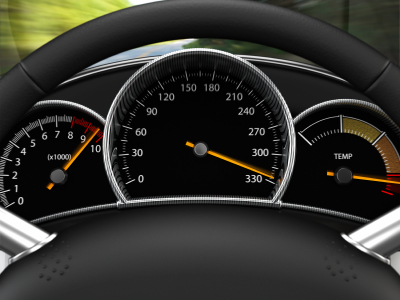
Your speedometer is an important part of your car.  It helps you to gauge how fast you are traveling.  It also helps you understand how long it will take you get to your destination, as well as helps you stay within the speed limit. Read on for some helpful suggestions if the speedometer is not working in your Honda Civic.

Potential problems

–  Variable speed sensor

–  Exhaust gas recirculation system

–  Wire pack at rear of engine

Variable speed sensor

One thing that could be causing your speedometer to malfunction is the variable speed sensor unit.  Located on the transmission, it could stop working because the connection to display the speed is corroded.  You should replace the wire that connects the sensor to the display.  The VSS is the direct communicator between the speedometer and the speed, so this is usually what will cause the display malfunction.

Exhaust gas recirculation system

Another potential issue could be with the exhaust gas recirculation system.  If it is turned on when your vehicle goes over 10 miles per hours, it could be the cause of your speedometer display issues.  It could lead to an incomplete combustion that fries your cars ability to show how fast you are going.

Wire pack at rear of engine

If neither of these seem to be the issue, you should check under your hood.  Near the rear of the engine is a pack of wires.  They sometimes rub on the bottom against a piece of metal and this creates a short circuit.  This will screw up the speedometer as well as turn on the check engine light.  You simply need to crawl under the car and gently turn this pack of wires over and tape them up so that they will stop shorting out.

Continuing problems

If you continue to have problems with the speedometer in your Honda Civic malfunctioning, you should seek professional help.  Use TalkLocal to be put in contact with reliable local businesses almost immediately.  Simply input your problem, location and availability, and TalkLocal will do the rest.  Within minutes, you should be connected to a qualified auto repair professional who is willing to help.

Trunk will not Latch

Monday, December 10th, 2012

Trunk will not Latch Auto Repair

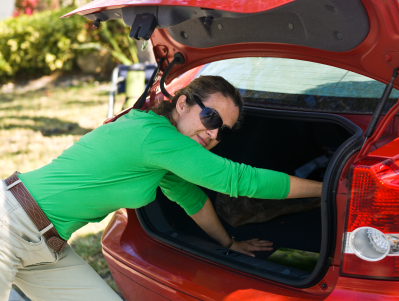
Leaving your trunk open when you are driving is illegal in some states, especially if it is not secured by cables or ropes. An open trunk can obstruct your view and put you and others in danger. Most people do not forget to close their trunk, but rather, are unable to because the latch broken. If the trunk will not latch on your car, try the following solutions before visiting a repair shop.

Clean up

If your car is dirty, debris can prevent the latch from connecting to the chassis correctly. Examine the area around the latch and chassis. Remove any large parts pieces of dirt with your hands. Go back with a vacuum and remove small pieces that you cannot grab.

Apply pressure

You need two people to do this: one inside the trunk and one outside. Have somebody get into the trunk of your car. Once one person is inside, the person on the outside should push down on the trunk at the same time that the person inside releases the release mechanism. The trunk can sometimes get jammed, but applying gentle pressure should fix the problem. Furthermore, you can add some lubricant to the problem area.

Check for trunk damage

If there is a dent in your trunk, the latch my not be able to align properly. You can pop the dent out yourself if you have the right tools. Otherwise, take your car to a repair shop.

Check for latch damage

If the latch is bent out of shape, it may not attach properly to the car. Look for any damages on the latch that would prevent it from fitting. Has something recently hit your car? Have you used a lot of force on your trunk? If you find damages, find a replacement piece for your car from a local garage or your car manufacturer.

Additional Help

If you need help finding a local garage that has your replacement part, use TalkLocal. Fill out a service request online and specify the car part you need. Then TalkLocal will match you with up to three local repair services that have the item in stock and can meet when you are available. Don’t waste time visiting repair shops that can’t help you; let TalkLocal do the searching. After submitting your request, you will recieve a phone call from a local business within minutes!

Learn From the Salesmen Before Buying a Used Car

Friday, December 7th, 2012

Learn From the Salesmen Before Buying a Used Car Auto Repair

As anyone who has ever bought a used car probably knows, it can be a bit of a stressful experience. From trying to figure out what make and model you want and determining if the pre-owned car is in good shape to negotiating the price with a salesman, purchasing a used car can leave even the most level-headed guy or gal feeling overwhelmed. As someone who has worked for years at used car dealerships, I want to share with you some tried and true tips that will help make buying a pre-owned vehicle as easy as possible.

It wasn’t that long ago that people who wanted to buy a used car had two main options: a traditional used car dealership or buy here pay here lots. These days, folks who are in the market for a used vehicle have a lot more buying options to consider. Most traditional car dealerships have plenty of pre-owned vehicles for sale, so it should be pretty easy to find a plethora of places to purchase a car.

To be sure that you are getting a used car that runs well, be sure to take the time to examine the car before you sign any contracts, as Beatthecarsalesman.com suggests. As someone who has seen hundreds of pre-owned vehicles, I can personally vouch for this piece of advice. For example, be sure that the car’s body is straight. Stand at the rear of the car and look to see if the rear wheels are lined up squarely behind the front wheels. Look for mismatched paint on the body, which can be a sign that the car was in an accident.

Even if you don’t know anything about engines, look under the hood. Do you see cracked hoses or torn belts? Is anything dripping from the car? Peek under the vehicle and check for pools or fluid. All of these situations are red flags that something might be wrong with the car.

One thing I cannot emphasize strongly enough is to get a full vehicle report before buying a used car. Once you find a pre-owned car that you like, write down the Vehicle Identification Number (VIN) and arrange to get a car-history report before buying. A history report will give information about what the car has been through, including any accidents and possible problems with the odometer. Believe me, I have seen customers who have fallen in love with a used car only to change their minds after seeing the car report.

Because even pre-owned vehicles can cost a pretty penny, I strongly urge you to do your homework first before even thinking about buying used; this will help make the entire process go as smoothly as possible.

How Often Should you Change your Car Air Filter?

Friday, December 7th, 2012

How Often Should you Change your Car Air Filter? Auto Repair

The car filter makes a car’s engine run more efficiently.  For the engine to run efficient, it needs a clean air supply.  The air filter cleans the air that it takes in for internal combustion, making the engine run.  The air that it intakes is not exactly clean, and as miles or years pass, it begins to deteriorate.  With a dirty air filter, the car’s gas mileage and engine life will decrease.  A dirty air filter will also increase the emissions your car put into the air.  For a car to run efficiently and clean, then the car’s air filter needs to be replaced regularly. How often should you change your car air filter?  Read on for more information.

When?

There are two ways to determine whether a filter needs replaced: mileage and inspection.  In mileage, if the car is driven more than 10,000-12,000 per year, then the car filter probably needs to be replaced every year.  If the car is driven under 6,000 miles a year, then the car filter probably needs to be replaced every two years.  If you are living in a dusty or high air polluted area, make sure to inspect your air filter because these areas could make the filter become dirtier, faster.  To inspect the air filter:

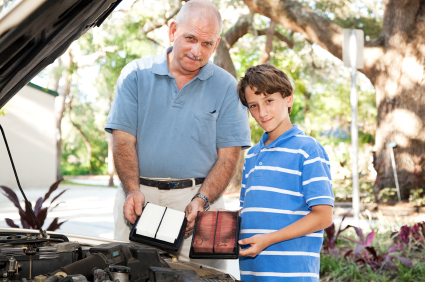
1.      Open hood and locate the black air filter box, (its usually on top or on the side of the engine.)

2.      Unclasp the metal clips and open the box.

3.      Remove the filter and inspect.

If there are is a lot of dirt, then the car’s air filter needs to be replaced.

How?

Replacing an air filter is a very simple process.  Having your air filter replaced by a professional can cost around 20 dollars.  To save money, replace your filter at home with these simple steps:

1.      Repeat instructions for inspecting a car filter.

2.      Throw out the old filter.

3.      Insert new air filter.

4.      Close the box and snap metal clips.

If you are unsure whether or not your filter needs to be replaced, or you would like someone to do it for you, hire a professional.  Use TalkLocal to connect you to the best auto repair technicians in your area today.

How to Remove Tree Sap from my Car

Thursday, December 6th, 2012

How to Remove Tree Sap from my Car Auto Repair

If you park your car under a pine tree, then you may find a sticky tree sap substance on the exterior of your car. Read more to learn how to remove tree sap from your car.

There are several household products than can be used to remove this tree sap. One thing you can do is to use nail polish remover or rubbing alcohol to remove it. Afterwards, make a solution of water and baking soda to make a paste, and then clean the remaining area and apply wax to shine it over.

You can also use a paint brush cleaner made of household findings like bacon grease or leftover lard. This can release the stickiness immediately and make removing the sap a quick fix. Be sure to wash off the grease with a soapy solution, and apply a final wax to the car’s surface.

You can also purchase wax and grease-removing products from your nearest car supply store. Use a soft towel or terry towel, both which can lessen the impact of scratching the paint.

If the tree sap has set in for an extended period of time, it may be a bit more difficult to remove.  You should let these mixtures sit in for longer on the surface, and be sure not to use heavy pressure when rubbing or scrubbing, as to avoid scratching the paint. After wiping the sap away, it is recommended to finish it off again with wax or car polish to remove any signs of scratching.

If the tree sap is too hard to remove, you may want to take your car to an auto repair shop for professional assistance. Try using TalkLocal to locate an auto professional near you. TalkLocal is a free service that will connect you with top-quality, reputable auto repair specialists in your neighborhood, within minutes. Simply enter in your specific problem, location, and availability and TalkLocal will contact multiple pros, who will then call YOU directly, ready to help.

How to Install a Car Radio

Monday, December 3rd, 2012

How to Install a Car Radio Auto Repair

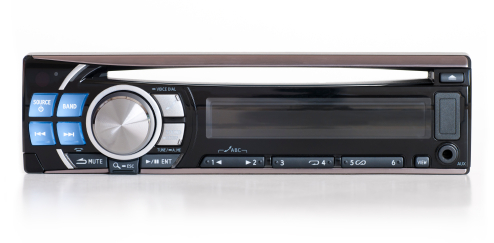
Time to give your old car a makeover? One of simplest things to do is to upgrade the radio. Installing a car radio is an easy do-it-yourself task. Different car makes have slightly different methods to install a car radio, but the general instructions are fairly similar. Read below for detailed instructions on how to install a car radio.

Removing the Car Radio

1. Detach the negative cable from battery to prevent any injuries.

2. Detach radio from panel. The car radio is either attached by screws, a cover, or a panel.  Screws can be removed by a screwdriver and covers can be popped off. Panels are a little more complicated, so refer to the car’s instruction manual.

3. Pull the second panel out slowly until it unsnaps.

4. Remove any screws or bolts that are keeping the radio in place.

5. Gently pull out the radio to access the cable that attaches the radio to the car. Unplug it.

Installing the New Car Radio

1. Plug in the cable of the new radio.

2. Put the radio in place without crushing or mangling the wires. This prevents the radio from becoming damaged.

3. Screw any remaining screws to the radio tightly.

4. Replace the plastic panel and screw it on tightly.

5. Replace the outermost panel and screw on tightly as well.

Installation Issues

If you are having problems installing a new unit, many auto repair companies have car radio installation services. If you are looking for auto repair companies, use TalkLocal. This completely free concierge service is the best at connecting you with high quality auto repair companies in your area. Just go to the TalkLocal website and submit your problem, location, and availability. Within minutes, you will be on the phone with real people who can help with your specific problem at your convenience.

Replacing Catalytic Converter

Thursday, November 29th, 2012

Replacing Catalytic Converter Auto Repair

A catalytic converter is the device that controls vehicle emissions.  It converts the toxic byproducts of combustions in the exhaust of an internal combustion engine.  It turns these byproducts into less toxic substances through chemical reaction.  Sometimes your catalytic converter will break down and you may need to replace it; this is something you can try to do on your own. Read on for instructions for replacing a catalytic converter.

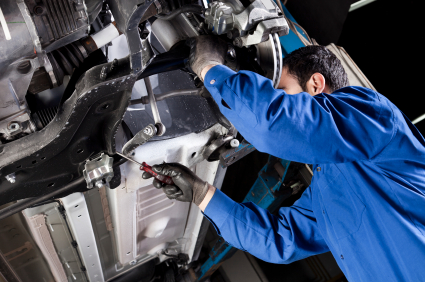
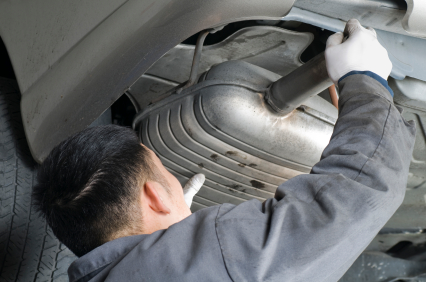
The first thing you need to do is probably the most difficult.  The catalytic converter sits midway on the bottom of the car.  Because of this you need to lift the entire car up.  Lifting only one end will not be helpful because you need to be able to get underneath and do work. You can use a ramp to get the car up in the right position.

You will need to be patient when you are doing work on your car.  The bolts attaching the catalytic converter are hard to remove because they are placed awkwardly and have an unusual size.  Use both a drill and wrench to remove them.  You should buy new bolts, nuts, and seals if you are replacing your catalytic converter because the old ones may break when you are removing them.

Before removing the catalytic converter, find out the exact model and buy a new converter in exactly the same specifications.  If you buy a generic model, you will have to weld it to the car. If you buy specified one, you can use the installation bolts that come with it.

Remove the 02 sensor before unbolting the catalytic converter.  Remove the pipe connecting it to the sensor.  Replace the device with the new one by bolting it directly in the place of the old one.  Reattach all the pipes and sensors you removed and your new catalytic converter should work perfectly.

Continuing Problems

If you have problems with your catalytic converter you should seek professional help.  Use TalkLocal to be put in contact with reliable local auto repair businesses.  You don’t have to do any work! Simply input your problem and availability and within minutes you should be connected to someone who can help you out.