Archive for the ‘Auto Repair’ Category


Emergency Brake Repair

Wednesday, November 28th, 2012

Emergency Brake Repair Auto Repair

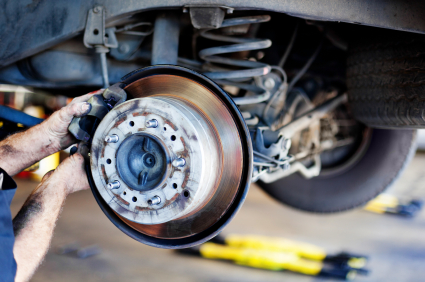
Emergency or parking brake is used in the event of a failure of the regular brakes. However, parking brake is most commonly used when parking on a steep hill to prevent the car from rolling. When emergency brakes fail, the probable cause is that the rubber hose that covers the brake cable has deteriorated. When this happens, the metal cable rusts rapidly and eventually breaks. If notice that your emergency brake cable is broken, replace the brake immediately. The follow simple steps will guide you through an emergency brake repair.

How to Replace Emergency Brake Cable

Materials:

– Screwdriver

– Lug wrench

– Jack

– Socket wrench

– Equalizer bar

– New cable

1. Remove the boot covering with screwdriver. If it is leather, simply unzip it.

2. Remove both of the two cables connected to one of the car’s rear tires.

3. Loosen the lug nuts on the tire with a lug wrench.

4. Jack the car up and remove the nuts to get to the wheel drum.

5. Remove the brake cable on each drum.

6. Loosen the tension nut that is attaching the cable to the brake with a socket wrench.

7. Pull out the cable.

8. Loosen the anchor nut with an equalizer bar.

9. Pull out the other end of the cable.

10. Put the new cable in through tension nut.

11. Screw in the nut tightly.

12. Reattach the brake cover.

Additional Help

If there are still problems or you are not comfortable fixing the problem yourself, TalkLocal can connect you to the best car mechanics in your area. Just go to the TalkLocal website and submit your problem, location, and availability. Within minutes, you will be on the phone with real people who can fix your specific problem at your convenience. Say good-bye to flipping through the yellow pages. TalkLocal does the searching for you, whether you are looking for a car mechanic or a variety of other services.

Car AC Blowing Hot Air Only

Tuesday, November 27th, 2012

Car AC Blowing Hot Air Only Auto Repair

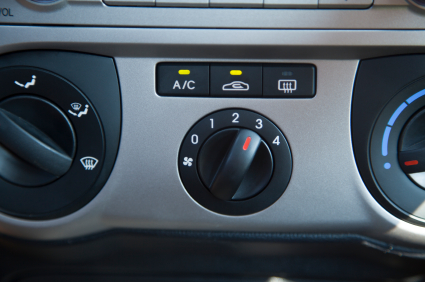
When you get into a hot car in the summer, the first thing you want to do is blast the A/C. It may take a while for the air to get cool, but if your AC continues to blow hot air only, there may be a problem. Driving in the heat can become a miserable and even dangerous task if you don’t have a working A/C. Read below to get reasons why your car AC blowing hot air only.

Lost charge of refrigerant — To see if your car has lost the charge of the refrigerant, you should use an A/C pressure gauge. In the engine, you should connect to the high side of the service port in the high-pressure hose that runs between the compressor and the condenser. This will tell you if there pressure in the system. If there is not enough pressure, your air conditioning may be out or refrigerant or it may have leaked out. You should vacuum out the air and recharge the system with refrigerant. Any extra air will reduce cooling and make the compressor very noisy.

Compressor isn’t engaging — Another potential issue may be with the compressor.  You should see if it is properly engaged when you turn on the air conditioning. If it does, the problem is inside the HVAC unit itself.  If it doesn’t then try to jump the compressor clutch wire directly with the battery.  If this works, then the problem is with the A/C compressor relay or pressure switch. If it doesn’t engage, then the clutch is broken.

Obstruction in system — If both the refrigerant and compressor are working, there may be an obstruction somewhere in the system. The orifice tube is located in the high-pressure hose. A blockage here will stop the refrigerant from getting into the evaporator and circulating. If this tube is blocked, then the high side pressure reading will be lower than normal. You should try to get in and get rid of the obstruction.

Getting Help

If you cannot seem to figure out what the problem is with your air conditioner, you should seek professional help. Use TalkLocal to be put in contact with reliable local businesses almost immediately.  Simply input your problem and availability and TalkLocal will do the rest. Within minutes your should be connected with a qualified HVAC company.

Car Air Conditioner Not Cold Enough

Saturday, November 24th, 2012

Car Air Conditioner Not Cold Enough Auto Repair

Car Air Conditioner Not Cold Enough

Nice, cold air conditioning in your car is definitely a must-have, especially for those 90-degree summer days. Unfortunately, people often complain that their car air conditioner is not as cold as it should be. This summer, if your A/C isn’t up to par, we might be able to help.

Your A/C could be malfunctioning for a number of reasons. The most common problem people encounter is due to an incorrect Freon charge. Freon is the cooling component installed in your car. If the amount of Freon is off by even a couple ounces, this could be your problem. If you’re hearing a clicking noise from inside your car, this could indicate a low Freon charge. If you diagnose this as the problem, be careful trying to fix it on your own; an overcharged Freon level can cause your A/C to malfunction as well.

Another cause to the problem could be that your radiator or condenser is clogged with dust or dirt. Although less common than a Freon problem, this does tend to happen around the beginning of summer. This would cause your A/C temperature to be higher than normal because it would reduce the airflow that passes through the radiator and condenser. This is a problem that gets worse over time, so catching it early is key. To prevent this, try cleaning out your radiator with a pressure washer every so often.

If you’re not very knowledgeable about cars or mechanics, try bringing your car into the dealership you purchased it from. If you no longer have a warranty and your dealer’s rates are too pricey, try using TalkLocal. We can connect you to a highly rated local service professional within minutes of submitting your online request. It is a completely free service that will save you time and money.


Engine Oil Capacity Chart for All Vehicles

Wednesday, November 21st, 2012

Engine Oil Capacity Chart for All Vehicles Auto Repair

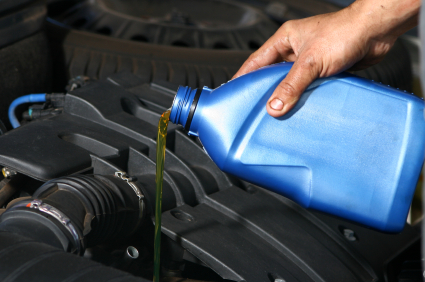
Knowing the engine oil capacity of your vehicle is important for maintenance. There are many types of engine oils out there. You can find the top rated engine oil on Amazon and have it shipped overnight starting at $17.47. You can easily verify the oil capacity of your engine through a few resources. First, the owner’s manual contains all the specifications of the vehicle. In the index, look for “oil” and it should direct you to the page that contains the specs about the car’s engine oil capacity. Second, the manufacturer’s website has all the information you need about your vehicle’s model and everything that comes with it. Navigate the manufacturer site to discover your engine’s capacity. Third, Autozone specializes in cars, and you will be able to find the engine oil capacity chart for all vehicles. Follow these steps to learn how to find your engine’s oil capacity:

1)   Go to Autozone’s website (linked above).

2)   Click “Repair Help.”

3)   Click “Specifications” on the left hand panel.

4)   Choose the year, make, model and engine of your vehicle.

5)   Click “Specifications” from the list that appears underneath your vehicle.

6)   Click “Engine Oil Type/Weight/Capacity.”

7)   The information about your engine oil capacity should be displayed.

If you want to figure out your oil level without the help of a computer, you can use the old-fashioned method that just requires a dipstick. First, make sure your engine has been turned off for at least five minutes. Then, remove the dipstick. Your manual can help you locate it. Wipe the dipstick clean with a rag and reinsert it all the way. Pull it out once more and see where the oil level reaches on dipstick. Based on how much of the dipstick is covered, you can gauge how much oil is in your vehicle and how much of the full capacity it is occupying. Once you know the type of engine oil you need, you can find that type on Amazon and have it shipped overnight.

If you are having difficulties with your vehicle, you should consider taking it to a mechanic. TalkLocal can help connect you with the best local mechanic at your convenience.

The owner of this website is a participant in the Amazon Services LLC Associates Program, an affiliate advertising program designed to provide a means for sites to earn advertising fees by advertising and linking to Amazon properties including, but not limited to, amazon.com, endless.com, myhabit.com, smallparts.com, or amazonwireless.com.

Car Will Not Start Clicking Noise

Tuesday, November 20th, 2012

Car Will Not Start Clicking Noise Auto Repair

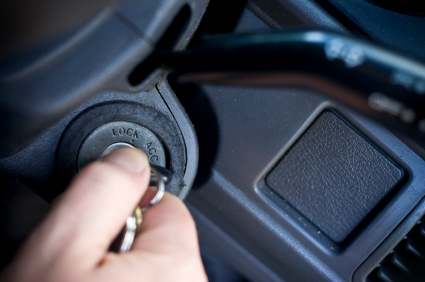
When your car does not start, it can be one of the most aggravating problems.  There are many reasons that can prevent a car from starting.  If you start hearing a clicking noise, there could be major issues.  The usual problem is with the car battery. There are some simple tests and solutions a person can try before the contacting a car mechanic.

Battery Check

When a car makes a clicking noise but does not start, it is usually the sign of a dead battery. To check if the battery is completely dead, check the headlights and to see if they turn on. If the battery is immobile, then you can jump-start the car. To jump-start a car:

1.      Make sure both cars are turned off.

2.      Connect one end of the red jumper cable to the positive terminal of the stalled (bad) battery.

3.      Then connect the other red cable clamp to the positive terminal of the charged (good) battery.

4.      Connect one end of the black jumper cable to the negative terminal of the stalled  battery.

5.      Then connect the other black cable to a clean, unpainted metal surface under the stalled car’s hood. IMPORTANT: Do not connect the negative cable to the negative terminal of the stalled battery.

6.      Start the mobile car and run it for about two to three minutes before starting the immobile car.

7.      Remove cables in reverse order.

8.      Keep the previously immobile car running for at least 30 minutes to let the battery recharge.

Battery Connectors

If the car is silent when turning the key in the ignition, this may be from dirty or corroded connections on the battery’s terminals. Check under the hood. If the connection is corroded badly, push in the tip of a screwdriver between the connector and the terminal post and twist it to make it stay firmly in place. This is only a temporary solution; these connectors need to be cleaned or replaced eventually.

There are many causes for a car to not start, but some are as simple to fix as the car battery. More challenging problem will require a car mechanic. TalkLocal can connect you with one of the best car mechanics in your area for free.

Speedometer Not Working

Monday, November 19th, 2012

Speedometer Not Working Auto Repair

A working speedometer provides the driver with valuable information about the car’s speed.  Modern speedometers use a magnet on the rotating shaft and a magnetic sensor to calculate the car’s speed.  Older cars use an electric current on the rotating shaft and, by measuring the magnetic force produced, one can get a speed reading.  However problems with a cable replacement in older speedometers and speed sensors in newer ones can cause this tool to not function properly.  Is your speedometer not working?  Read on for information on how to fix this problem.

Finding a cable replacement

1.  Remove the engine cover and doghouse from the car in order to remove the cable.

2.  Remove the bolt from the dashboard and access the old cable.

3.  Remove the nut on rotating shaft and pull the cable through the passage.

4.  Remove the clamp from the transmission and engine compartment.

5.  Tighten the nut on the rotating shaft and fix the square end of the new cable in the adapter.

6.  Using the passage we used to remove the old cable, pass the new one through and tighten the bolt at the rear end of the cable.

7.  Put the clamps and engine cover back on you removed in the first step of the process.

Speed sensor replacement: front wheel drive vehicles

You will find the speed sensor behind the engine and above the trans-axle.

1.  Remove the connecting hose, air cleaner and electrical connector.

2.  With 10 mm socket, take out bolts keeping the speed sensor init’s place.

3.  Unscrew the sensor to take it out.

4.  Replace the sensor in place and tighten the bolts we previously removed around it.

5.  Reattach the hose, air cleaner and the electrical connector to the sensor.

Speed sensor replacement: rear wheel drive vehicles

You will find the speed sensor on the driver’s side behind the transmission.

1.  Raise the vehicle up on the drivers side and keep it there using a car jack.

2.  Disconnect electrical connectors present on the sensor and take out bolts keeping the sensor in place, using a socket.

3.  Take out the sensor carefully and fix a new one in its place.

4.  Attach the electrical connector to it and tighten it.

It is necessary however to consult expert opinion and allow the expert to figure out what is wrong.  Many times a replacement of a part may not even be needed and a mechanic can guide you as to what  needs to be done.  TalkLocal can quickly connect you to an auto repair professional in your area in a matter of minutes.

Water Leaking from Under Glove Box

Friday, November 16th, 2012

Water Leaking from Under Glove Box Auto Repair

There are many reasons why there is water leaking from under your glove box.  It is a surprisingly common problem with many possible fixes.  The following is a list to help you sort out the problem.

One of the most common problems is water leaking from a blocked AC hose.  In order to resolve this clog, try the following steps:

1.  Lift the hood and go towards the passenger side of the vehicle.  There you will find the AC drain, an “L” shaped boot directing towards the ground.

2.  Remove the tube from the place where it connects to the rest of the vehicle.

3.  Inspect the tube to see if it is clogged.

4.  Remove any debris or dirt from the tube.

5.  Replace it back into its original position.

If the problem still persists, there are still many places to check.  Give the drain vents located near the fender a look.  There may be dirt or leaves built up creating a block.  In addition, there may be a clog underneath the battery.  This will require some expertise on your part to deal with the problem effectively and safely.  Finally, check out the sunroof and doors to make sure there is no debris making it difficult for these objects to properly seal as they close.

If you are still having difficulty locating the problem, or simply want to make sure everything is done with expertise, hire a professional.  Use TalkLocal to be connected to a highly rated auto repair technician today.  Simply enter a brief description of your service needs along with your location and availability, and TalkLocal will do the rest.

How to Fix Cracks in Exhaust Pipes

Thursday, November 15th, 2012

How to Fix Cracks in Exhaust Pipes Auto Repair

Your exhaust system is made up of many different parts: the piping, the manifold, the catalytic converter, and the muffler. When one or more of these parts breaks down, it can pose as a serious problem. Sometimes the exhaust pipe on your car will crack or malfunction because substances such as salt wear down the metal of the pipe and cause breakage, which could cause dangerous gas leaks and a lot of noise.  If your exhaust pipe does indeed crack, you can patch it up as a temporary solution. However, you should replace it as soon as you can. Read on to learn how to fix cracks in exhaust pipes.

The first step you need to take when repairing the cracks in an exhaust pipe is to clean the area around the crack.  This ensures that you will get a good solid seal around the affected area.  You should turn your car on until the temperature is around 70 degrees Fahrenheit.  At this point, the metal should be warm to the touch.

You will need some special tape to patch up the crack.  Remove the paper or plastic backing from both sides of the tape.  Wrap up the broken area until it is completely covered.  You should try to overlap it until the coverage is about an inch thick. You and secure the tape even further by wrapping a wire around it.

If you do not want to use tape and would prefer putty you should dampen the area around where you want to apply it.  Administer the putty with a knife and press hard.  You can put your car in idle for about 10 minutes to allow the putty to dry.  This should hold you over until you can replace the pipe.

If you are looking for professional help to help with your cracked exhaust pipe, use TalkLocal to be put in contact with reliable local auto repair businesses.  You don’t have to do any work! Simply input your problem and availability and within minutes you should be connected to someone who can help you out.

Check Engine Light and Emissions Testing

Wednesday, November 14th, 2012

Check Engine Light and Emissions Testing Auto Repair

Emissions testing is required in most states in order to make sure that the combustion by-products of a car are under the state level. The by-products contribute to air pollution and may contribute to a large number of diseases in up to a third of the population. Most states require emissions testing annually or every other year, usually in metropolitan areas. Check your state’s website for the emission testing guidelines for your state.

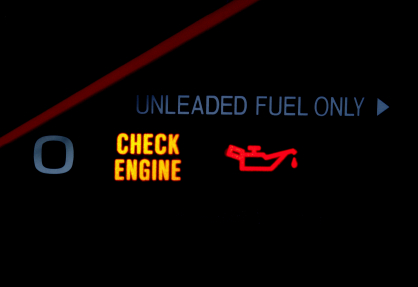
The check engine light comes on when there is a problem with the engine, which could range from something relatively harmless like a loose gas cap to a major issue with an electronic component. While the check engine light is on, your car may be trying to compensate and you may notice a major difference. However, the fuel mileage may worsen as a result and the engine may be releasing large amount of emissions. You do not need to pull over immediately if you are on the road and the light is flashing, but it does mean that you will need to fix your car as soon as possible. Your check engine light and emissions testing go hand in hand.

If the check engine light is on, your car will always fail the emission test. Take it to a mechanic instead to fix the underlying problem, and then go through emissions testing. If your car was made after 1996, then there is no way to trick the system because the onboard diagnostics (OBD) system will keep the error in its system for a few hundred miles. An auto technician would be simply be able to scan for the error code.

If your emissions test is coming up soon and your check engine light is on, use TalkLocal for free to find a qualified mechanic to find and fix the problem with your engine immediately! Don’t risk failing the emissions test; fill out a service request on TalkLocal’s website now!

How to Tell when to Replace Car Tires

Monday, November 12th, 2012

How to Tell when to Replace Car Tires Auto Repair

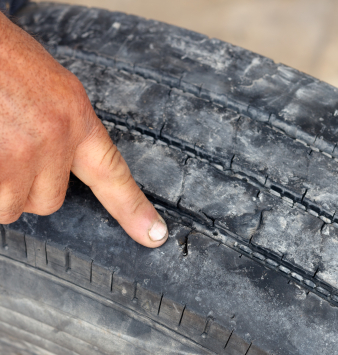
It is extremely important to make sure your car’s tires are functioning properly at all times. This means knowing when it’s time to replace them.  There are many indicators that will give you guidance as to when tires need to be replaced.  Up-to-date tires will not only keep your car running smoothly, but may also save your life by providing the necessary traction for safe driving.  Read on for more information on how to tell when to replace car tires.

Checking the quality of your tires

–  Use the tire’s thread wear bars.  These indicators are installed into most tires and are invisible.  They become visible where the rubber has been worn down to a certain point.  These bars are usually diagonal bars that appear on the tire.

–  Use a penny.  Take a penny and place it upside down in the thread with Lincoln’s head facing you.  If you cannot see any of the hair on the top of Lincoln’s head, you are good to go and you do not need to worry about replacing your tires.  If you can see some of the hair on Lincoln’s head, it is time to look up coupons and shop around for car tires.  If you are to the point where you can see the very top of Lincoln’s head or beyond, your tires are a hazard and you need to replace them immediately.

–  Use a tread depth indicator or gauge.  This is an easy and accurate way to measure you tire treads.  If you have a gauge, you can measure the treads on your own, or you can stop by your local automotive store and they might even check your tire treads for free.  Check out this tire tread gauge for some do-it-yourself guidance.

To get a professional opinion and to have your tires changed, use TalkLocal to connect you for free to a professional in your area today.