Archive for the ‘Auto Repair’ Category


How to Install Fuel Filter

Friday, November 9th, 2012

How to Install Fuel Filter Auto Repair

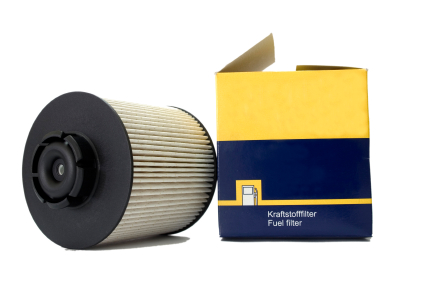
The fuel filter keeps your car moving smoothly by removing any impurities that could clog the fuel injectors.  Some vehicle manufacturers claim that the fuel filter can last for the life of the car, but many professional mechanics recommend changing the filter every 12,000 miles.  Changing the fuel filter on your own can range in difficulty depending on the type of car.  The Car Care Council, an organization focused on helping people properly maintain their vehicles, recommends handing the work off to a licensed professional.  However, if you want to save money and are up to the challenge, you can read the follow to learn how to install a fuel filter on your own.

Tools needed

The specific tools you will need for the job depend on how the fuel filter is connected to the fuel lines.  Examine how the filter is connected to determine whether or not you will need a wrench or pliers.  Other simple tools will come in handy such as a screwdriver, sockets, and a flashlight.

Depending on the type of vehicle you might also need special tools for removing the fuel filters.  Consult your car’s service manual or research details about the vehicle online to determine if any special tools are needed.

Most importantly, you will need to purchase a new fuel filter before you start the job.  These are available at local auto parts stores and typically cost less than $15.  Make sure to know the make, model, and year of your car so that you can purchase the correct filter.

Preparing your vehicle

Changing the fuel filter will release flammable fumes and small amounts of fuel, so safety should be a top priority.  Make sure to work in a well-ventilated area, preferably outdoors, and clean up any fuel spills as quickly as possible.

Protect your skin and eyes by wearing safety goggles and disposable nitrile gloves.  Nitrile gloves offer much better protection from solvents like gasoline then latex gloves.  Of course, don’t smoke or light a flame when working on the car’s fuel system.  It may also be a good idea to keep a fire extinguisher nearby.

You may also need to place your car on a jack before you begin working on the fuel filter.  To do so, apply the car’s parking brake and place blocks against the wheels that will remain in contact with the ground.  This will keep the car from rolling while you are working underneath it.  Follow the instructions in your car’s manual to determine the best way to apply the jacks.  Once the car is high enough off the ground, replace the jacks with jack stands.  This is to prevent the risk of the jack failing while you are working underneath the car.

Removing your old fuel filter

Once you have located the fuel filter, you will need to relieve the pressure in the fuel line.  A common method is to remove the fuse for the fuel pump and run the engine until it dies.  Next, you should disconnect the negative terminal of your car’s battery to minimize the chance of a spark.

Take note of how the fuel filter is connected to the fuel line before removal.  This will come in handy when it’s time to install the new filter.  Before disconnecting the fuel lines, wrap the fuel filter in a towel to catch any spilling fuel.  Then, detach the filter from the mounting bracket and dispose of it.

How to install fuel filter

First, check to see that you are not installing the filter backwards.  Most filters will have an arrow that marks the way fuel should flow through them.  Once you know the correct way to install the filter, secure the filter to the mounting bracket.  Then, attach the fuel lines using any new hardware included with the filter.  Once the filter is in place, replace the fuel pump fuse, reattach the negative battery terminal, and turn on the engine.  Don’t be alarmed if the car does not start right away.  You will probably need to start the car a few times until the pressure in the fuel lines rebuild.  Once the car is running, check for leaks and clean up any spilled fuel.  Then, congratulate yourself for successfully installing a brand new fuel filter!

Need professional help?

No problem!  TalkLocal can connect you to up to three high quality auto-repair professionals in minutes!  Simply enter a brief description of your service needs along with your location and availability, and TalkLocal will do the rest.  Within minutes you will be connected to up to three professionals in your area willing to help.

Steering Wheel will not Return to Center

Wednesday, November 7th, 2012

Steering Wheel will not Return to Center Auto Repair

What do you do if your steering wheel will not return to center position? Having a steering wheel that won’t cooperate is not only annoying, but also dangerous. Check out these helpful tips and explanations so you are informed about how to fix your steering wheel problem.

Weather

The problem may not have anything to do with your car, but rather the weather. If there is cold weather, it may make the steering a bit tighter than normal and that is okay. If the weather is not the problem and you have power steering, check the power steering fluid. If you are experiencing low power steering fluid, fill it to the appropriate level. Remember to maintain the power steering fluid.

Bad Alignment

Another possible explanation is poor alignment. Alignment can be off with your car for several reasons. One reason is the normal wear and tear from using your vehicle. Also, if you hit a curb or go off-roading, your alignment may have shifted. While you are getting your alignment checked out, pay special attention to any ball joints. Sometimes ball joints may be stuck or frozen. This too will result in the steering wheel not returning to the center. If this appears to be a possible problem, lubricate all of the ball joints.

Tires

In addition, rotating your tires may be a simple fix. If your tires are disproportionately worn out, your steering may be faulty. Having worn tires may also cause your steering wheel to vibrate.

Additional Help

If you are having issues with your steering wheel and need help evaluating the situation or doing repairs, check out TalkLocal.  Just tell us your service need, location, and availability and within minutes, you will be directed to professionals right in your neighborhood. Best of all, TalkLocal’s service is completely free!


Child Lock Stuck on Car Door

Tuesday, November 6th, 2012

Child Lock Stuck on Car Door Auto Repair

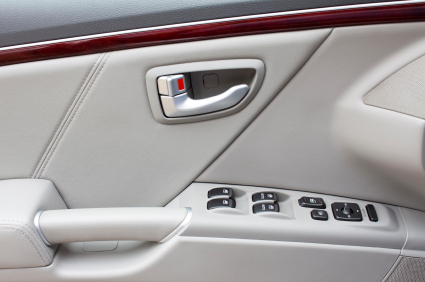
Child safety locks are put in cars in order to keep small children from opening car doors while you are driving.  This is a good safety precaution; however, if you accidentally get the child safety locks stuck, you will not be able to open the door from the inside or outside, which is a little bit of a problem. This article will help you figure out how to fix a child lock stuck on a car door.

One thing you can do is first look at the other door and figure out where the trigger for the child safety lock is. Once you know where it is on the other door, you should be able to figure out where it is on the door that is stuck. Then, take thin piece of stiff plastic (i.e. a ruler) and put it through the space between the body and the door from inside; try to slide it until you trigger the child lock off. This is a little difficult to do and it may take a few tries to succeed.

If you cannot trigger the child safety lock off with a piece of plastic, you may have to try a “slim jim.” Take a flathead screw driver and shimmy it into either side of the slits where the door handle goes into the door. Try to shimmy it up enough so that you can trigger the child safety lock off.

If neither of these methods work, you can try removing your car door, so that you can operate the latch directly. Or, you can contact an auto repair professional to help you out. With the help of TalkLocal, you can receive up to three phone calls in minutes form high quality local auto repair professionals that are available when you are.

How Often to Replace Brake Pads and Rotors

Friday, November 2nd, 2012

How Often to Replace Brake Pads and Rotors Auto Repair

Brake pads and rotors are essential to the functioning of your car, as well as your safety.  Therefore, knowing  how often you should replace these parts of your car is a very important thing to remember.  Take into consideration the following if you’re wondering how often to replace brake pads and rotors.

Brake pads

Brake pads are found inside the brake caliper with their friction sides surfaces facing the rotors.  Their purpose is to convert the kinetic energy of the car’s movement into thermal energy by friction.  When a driver taps the brakes, the two pads are squeezed together, slowing the motion of the vehicle.  Without brake pads, you would not be able to stop your vehicle.

When to change brake pads

Brake pads should be changed depending on the warranted life of the particular pads on your car.  Normally, this would be around every 10,000 miles.  However, if you hear a scraping or grinding noise coming for your wheels, you should get them checked and/or changed, regardless of the mileage.

Rotors

Rotors are the round, flat pieces of steel attached to rods inside the wheels of a car.  When the driver presses the brakes, the brake pads compress around the rotor, ultimately slowing or stopping the vehicle.

When to change rotors

The only time rotors need to be replaced is when the driver ruins them by driving for too long with bad brake pads.  When your brake pads are bad, the screws in the bases will drive into your rotors.  This is where the grinding noise comes from.  New rotors are much more expensive than brake pads, so be sure to stay on top of the functioning of your brake pads to avoid a much pricier repair.

If you are unsure of when to change your brake pads or if you have a problem with your brakes, you should get the help of a trained professional.  Visit www.TalkLocal.com to be connected to a highly rated, local automobile technician in less than 90 seconds.

New Car Battery Still Won’t Start

Wednesday, October 31st, 2012

New Car Battery Still Won't Start Auto Repair

You have a new car battery and your car still won’t start.  Use these helpful tips to save money and get back driving on the road in no time.  You can find the top rated replacement battery for your specific car model and year on Amazon and have it shipped overnight. If your new car battery still won’t start, read the following for a breakdown of the most common reasons this might be happening.

Potential problems:

–  A fuse is blown.

–  The cells are not filled with the proper amount of water.

–  You have a bad starter. Check out common car parts when seeking car part replacements.

–  Dirt or residue may be on the inside of the connectors.

–  The new battery may need to be fully charged before installing it into your car.

–  Make sure there is a solid connection between the cables and the battery.  In addition, check out your connections to make sure they are all connected to their assigned places.

Solutions:

Usually the starter is the problem if you hear just one click when turning the key in the ignition.  However, if you hear no sounds as you turn the key, check to make sure you are well grounded.  If a fuse is blown, this can be an easy $5-8 dollar fix.

If you do not hear any clicks:

–  Check the 120A main fuse in the back left hand corner of the fuse box in the engine compartment.  If the fuse is blown, it is about a $5.00 purchase from your dealer.

–  In addition, check out the ACC 30A fuse.  If the cigarette lighter works, it is not the ACC 30A fuse.

If you can’t seem to diagnose the problem, hire a professional.  Use TalkLocal to get in touch with multiple highly rated auto repair technicians in your area today.

The owner of this website is a participant in the Amazon Services LLC Associates Program, an affiliate advertising program designed to provide a means for sites to earn advertising fees by advertising and linking to Amazon properties including, but not limited to, amazon.com, endless.com, myhabit.com, smallparts.com, or amazonwireless.com.

Car Door Open Light Stays On

Tuesday, October 30th, 2012

Car Door Open Light Stays On Auto Repair

The door-open light staying on is a common problem that happens when the door switch plunger sticks (most likely due to an accumulation of dirt or rust).  Fortunately, this is a simple problem to fix and doesn’t take a lot of automotive expertise to repair. Read more to learn what to do if your car door open light stays on.

You’ll first want to thoroughly clean the door switches on all the doors with a cleaning spray.  This should at the very least loosen up any of the accumulated grime that’s built up within the door switch.  You should then use compressed air to clear all the dirt and grime from those switches, and then apply a spray lubricant to the switches. You then want to lubricate the surface of the switches, which can done with either a dry lubricant or the more commonly found WD-40.  Try to avoid having too much excess lubricant on the switches, as the lubricant may leak into your car or damage other parts in the general area.

If this doesn’t work, you can also take the door panel and do the same treatment from the other side of the door switch to ensure the door switch is completely cleaned and lubricated all around. However, if the door switch light is still on after the entire treatment, there may be some faulty wiring or the switch may need to come out for repair.  It’s highly suggested that you leave this job to an auto-repair professional, since they will have the necessary tools and expertise to properly repair your car. Likewise, if you ever feel uncomfortable or unsure during the process of cleaning your door switches, you may just want to have your car looked at a mechanics.

TalkLocal can help you find a local high-quality repair center who can take care of your car light problem right away.  You’ll be talking to quality mechanics in the area in just minutes!

How to Find a Trustworthy Auto Mechanic

Friday, October 26th, 2012

How to Find a Trustworthy Auto Mechanic Auto Repair

Whether you’ve just moved to a new area or have just purchased a new car, knowing how to find a trustworthy auto mechanic is important for keeping both your vehicle and your wallet in good shape.  Auto mechanics have a notorious reputation for shady dealings, especially when it comes to overcharging you for sub-standard repair work.  Since most people don’t have a clue what their repairs should really cost, having a mechanic you can trust is the only way to be sure that you are not being taken advantage of.  It can be hard to know who to trust, but here are some things to keep in mind and watch out for on your search.

There are basically three different types of mechanic auto shops out there:  dealerships, large national chain shops, and smaller independent repair shops.  Each has its own advantages and disadvantages.  For example, dealership mechanics tend to be extremely expensive, but will be specialized to work on your specific make/model.  High end cars and work that will be covered by your car’s warranty should probably be brought to the dealership in order to get the best quality service.  National chain shops, on the other hand, tend to offer the best prices and the lowest quality service.  These kinds of places are often staffed by entry-level mechanics with little experience.  Chain shops are a good choice for basic repairs like an oil change or new battery, which do not require much expertise.

The third category, smaller independent mechanics, will usually be your best choice for general repairs.  Independent mechanics tend to have prices somewhere in between chain shops and dealerships, but there is a lot of variability.  Because of the wide variation in price, skills, and services, looking at independent mechanics is when you need to put the extra effort in to making sure that the company you go with is trustworthy.  Fortunately there are some signs to look for as indications of the mechanic’s quality including: whether or not the repair shop is certified by an affiliated trade group like the American Automobile Association (AAA) or the Automotive Service Association (ASA), complaints about the company registered with the Better Business Bureau, and any warranty they offer on their work – the longer the better.  If you don’t feel like putting in all the effort researching the mechanics available in your area you can also try using TalkLocal to automatically connect you.  TalkLocal uses an algorithm that takes into consideration ratings, reviews, and past performance when matching you with a service professional, so you can sit back and let them do the work for you.

How to Clean your Headlights on a Car

Tuesday, October 23rd, 2012

How to Clean your Headlights on a Car Auto Repair

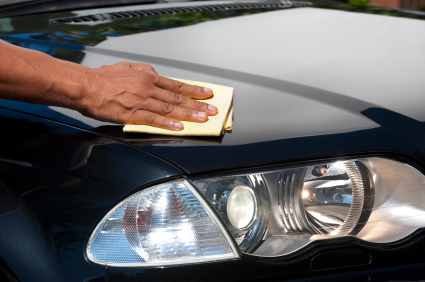
Due to the dirt and the grime accumulated over time, your car headlights may be looking and worn.  Fortunately, there are many cost efficient and easy options for cleaning headlights.  Read on to learn how to clean your headlights on a car.

Toothpaste Method

Using regular white toothpaste works wonders for your headlights.  It’s actually preferable to use regular toothpaste, as whitening toothpastes contain other compounds that may damage your headlights.  All you have to do is apply the toothpaste with a soft rag and then rub in small circles until the grime comes off.  You’re essentially just using toothpaste as an abrasive and rubbing all the dirt and grime off with the rag.  Afterwards, just rinse with water and your headlights should look much cleaner.

Sandpaper Method

You’ll need three different grit sandpapers for this task, probably around 400, 1200, and 1500, respectively.  You’ll first want to clean the lenses with rubbing alcohol and then begin wet sanding with the 400 grit sandpaper.  You may see the factory coating coming off and it would be best to sand the coating off completely.  Then continue to sand out the scratches using the 1200 and the 1500 grit sandpaper, which will make it smooth.  Afterward, you’ll want to take it to a local auto body shop to spray plastic adhesion promoter and automotive clear coat.  This protective coating should last years, rather than the normal months after buffing the headlights.

Polishing Method

If the cause of fogginess is actually oxidization, it will mean that your headlights will need to be polished again.  You’ll first want to wash the headlights to remove as much grime as possible and allow them to dry thoroughly.  Then you’ll want to apply aluminum polishing compound with cloth moving in small circles.  Repeat as much as necessary until the headlights become clear.

The above methods work for most cases, but in the case that your headlights still are extremely foggy or scratched, you may need to take it into a local mechanic or repair shop to have professional work done.  If that’s the case, it’s highly recommended that you use TalkLocal to get into contact with a highly rated local auto repair professional.  It’s fast, easy and free!

Car Leaking Transmission Fluid

Monday, October 22nd, 2012

Car Leaking Transmission Fluid Auto Repair

Transmission leaks, while they may be a fairly common car problem, are incredibly important to fix as soon as possible. If you have a car leaking transmission fluid, you should first check that the liquid is actually transmission fluid, as a correct diagnosis of your problem is the first step toward solving it. Park your car on a level surface after running the engine for a bit. Transmission fluid usually has a red color (or brown, if it’s dirty and ready to be change).  It should be oily to the touch and smells much like petroleum.

Why it matters

Transmission fluid is a critically important fluid for your car’s transmission.  It not only cools and lubricates the transmission, but also helps transfer the power from the engine to the transmission. Without this fluid, there would be insufficient pressure to fully operate the transmission, which would cause overheating—an extremely expensive damage to your transmission.

How to Fix it

Now that you know it is a transmission leak, you should then proceed depending on the severity of the leak.  If the leak is minor (just a few drops on the ground), you can use a high-quality bottle of stop-leak.  Make sure that the stop-leak is appropriate for your make and model, as they can differ significantly. Add the contents of the stop leak into your car’s transmission dip stick tube to return the transmission fluid to the correct level.

If it’s a major leak (more than a few drops), then you should take your car to get serviced at a dealership or an auto-repair/transmission repair center. While a bottle of stop-leak may temporarily help your transmission leak, you’ll ultimately need to bring in your car to get repaired (the sooner the better). Fortunately, TalkLocal can help you in this case. TalkLocal can help you find a high quality auto repair center in just minutes, so you don’t have to worry about finding a quality mechanic to repair your car.  You’ll be back on the road in no time!

Black Smoke Coming Out Muffler

Friday, October 19th, 2012

Black Smoke Coming out Muffler Auto Repair

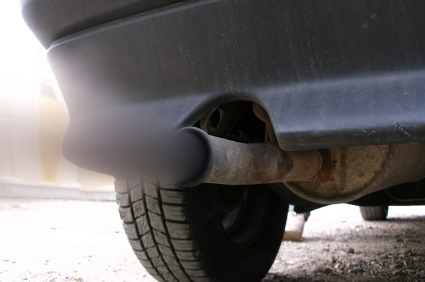
You never want to have to deal with a broken down car, or the inconvenience, the cost, and the stress it entails. Certain signs about your vehicle’s operation and appearance can help signal that it may be time to get a checkup. For example, if you suddenly notice black smoke coming out of your car’s muffler or exhaust pipe, it’s probably time to get your car examined. Read on to see what might be causing the problem.

Black smoke usually means that you are burning oil or fuel, or that you have a very rich fuel mixture in your car. In other words, your engine has a fuel/air mixture that contains too much fuel. This might suggest a problem with your catalytic converter and may be why the converter is no longer flowing efficiently. You may also have a problem with a head gasket in your engine. If you use a diesel engine, the problem may be an issue with the high pressure pump, a broken diesel injector, insufficient air intake, or low fuel pressure. With diesel engines, it is much harder to pinpoint the problem, so it is best to have a car mechanic take a look.

These can be serious problems, so it is take your car to a professional to be on the safe side. Try utilizing TalkLocal to connect with reliable, top-quality car professionals in your area. It’s a free service, and all you need to do is enter your problem, location, and availability, and within minutes, TalkLocal will connect to local automotive businesses, which will then call YOU directly, ready to help.