Archive for the ‘Auto Repair’ Category


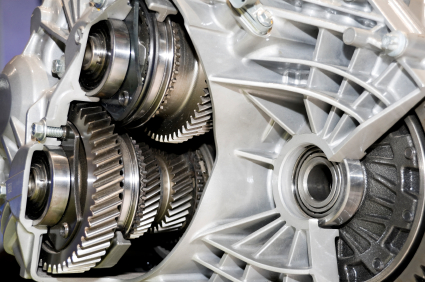
Automatic Transmission Jerks when Downshifting

Friday, September 7th, 2012

Automatic Transmission Jerks when Downshifting Auto Repair

Automatic transmission jerks when downshifting can be extremely annoying as you drive. Slowing down and decelerating becomes a problem when the transmission starts to jerk or clunk. This is not only annoying, but also potentially dangerous if you do not get the problem checked out. Read on to learn the cause and solution for jerky downshifting.

Why my automatic transmission jerks when downshifting?

Extreme weather is a probable cause – particularly hot weather. This may be a problem for people living in the southern and western states. Extremely hot weather can thin out the transmission fluid in your vehicle. The fluid pressure also becomes skewed. This causes the transmission fluid to lose some of its qualities and as a result, it affects the shifting. The following are a couple of tips and tricks to understanding and fixing the problem.

Solutions

Check your transmission fluid level. If it is off, a simple correction would be to make sure that you have an adequate level of transmission fluid. You can also try flushing your system. Replace the old fluid with new transmission fluid. Try to find the high temperature specific fluids in addition to having a quality transmission filter.

If you try flushing the transmission and it doesn’t work, try asking your car dealership. They may have past experiences of other customers with the same problem and may be able to offer more accurate advice specific to your situation.

Additional Help

Sometimes your system simply needs to be upgraded. It is time to get help from a professional, someone who can give you guidance through the process. Want to learn more about your car and have a professional help you out? Check out TalkLocal. You will be connected for free and within minutes to local professionals who can help out with your specific problem! Check them out!

Car Shakes when I Brake at High Speeds

Wednesday, September 5th, 2012

Car Shakes when I Brake at High Speeds Auto Repair

Car shakes when I brake at high speeds

So you’re going for a joy ride and suddenly your car shakes when you hit the brakes.  You are wondering, why the car shakes when I brake at high speeds?  If your car shakes when you brake at a high speed, or just when you drive at a high speed in general, it usually means that your car alignment is off.  Although car services offer to check the entire car alignment for you, the process is made much faster and cheaper if you actually know the specific component that is causing the problem.

Specific aspects to car alignment

Your tires are the four points at which your car touches the ground.  Needless to say, a problem with a tire will upset the balance of the car, possibly causing the car to shake at high speeds.  Check your tires for the correct balance, weight, wear and tear, and broken belts before you start look at the other places of your car.

If there is a problem with your tire and the problem is fixed by simply replacing the tire, you’re in luck – there is probably nothing else wrong with your car.  However, if the problem persists even after replacing the tire, there may be a chance that a wrong alignment is the source of the problem and it is the reason your tires may be damaged.

Problems with brake pads

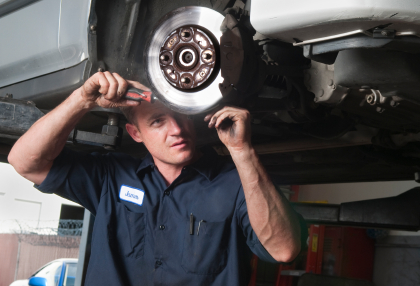
Shaking of the car exclusive to braking at high speeds would probably mean that your break pads have worn out, or that your rotors are in a bad shape (warped).  An unevenness in the rotor will shake your car when the brake pad tries to slam down on it.

Worn brake pads, obviously, have the same effect – the problem is that the rotor itself may become damaged from a prolonged use of worn break pads.  The faster you identify this problem, the less damage will happen to your car.  Do not let it go unnoticed for too long.

More advice

Because a small problem (worn out break pads, unbalanced tires) can turn into a bigger problem (warped rotors, shifted alignment) with time, cars need scheduled checkups.  If you have been experiencing this problem for a long time, bring your car to a professional for a full checkup to avoid problems in the future.

TalkLocal can help you find the correct local professionals for your problem, saving you time and energy in what may be a stressful situation.

Car Airbag Replacement Cost

Tuesday, September 4th, 2012

Car Airbag Replacement Cost Auto Repair

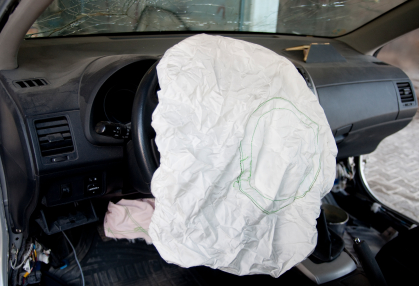
Sadly, car accidents are one of leading cause of death in the United States. Airbags are essential in the frontal protection for car accidents, along with seat belts. When these accidents happen, airbags release and have to be replaced upon repair. Without an airbag, you can run the risk of serious injury if another accident occurs. But the question is how much do car airbag replacements cost? There are several factors that go into car airbag replacement cost.

1.   Type of Car

Type of car is one of the critical factors in determining airbag replacement cost.  The price of the car correlates with the price of the airbag. A Ferrari’s airbag will cost more than a Honda’s airbag.

2.   Type of Airbags

Driver’s airbags are cheaper than passenger side airbags; there is a $200-$600 price difference. Side curtain airbags are the newest airbags to come out on the market and are cheaper than passenger side bags. Used airbags are an option for people on a cheap budget. These are deployed airbags removed vehicles and refurbished. Before buying, check with your car insurance as some companies void coverage if used airbags are installed.

3.   Additional Costs

Along with the airbag itself, there are other pieces in the car that need to be replaced. Sensors are the most important mechanism of airbags as this detects a car accident and releases an airbag. There are clock springs and other items to replace for the airbag to work properly. One of the most expensive costs is the labor costs. Never replace an airbag by yourself as installation is difficult without proper training and could lead to serious injury. Always use a professional car mechanic for installation of an airbag.

In the end, an airbag replacement will cost around $1,000, and even up to $6,000, depending on the type of vehicle. For airbag installation, use TalkLocal. TalkLocal can connect you to the best car mechanics in your area.

How to Fix Broken Car Antenna

Friday, August 31st, 2012

How to Fix Broken Car Antenna Auto Repair

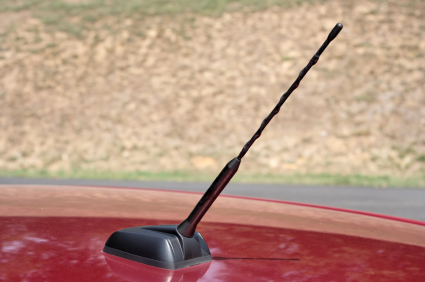
Fixing a broken or malfunctioning car antenna can be done without too much time or effort. Knowing how to fix a broken car antenna can be the difference between driving with music blasting and driving with a bunch of static playing.

Fix or Replace?

First, you need to determine whether your antenna will need to be fixed or replaced. The amount of damage to the antenna will determine which one it will be. If there is any damage to the base of the antenna, it will likely need to be replaced. However, if the antenna is still intact, check the screws at the base of the antenna to make sure it is tightly screwed in. If it is loose, simply tighten the screws until you can’t tighten it any more. Believe it or not, this is one of the top causes for poor reception.

How to Fix Broken Car Antenna

If the problem with your antenna lies in the shaft, it will need to be replaced. You can find replacement antenna shafts at just about any auto part retailer, online or otherwise. The best type of shaft to look for is one that is both flexible so it can bend without breaking, and one that is rubber coated to make it able to absorb more impact. To replace the shaft, you need only to break off what is left of the old shaft from as close to the base as possible. Use a file to taper off anything remaining of the old shaft. With the old one removed, simply attach the new antenna shaft and fasten the retaining screw.

Replacing a Broken Car Antenna

If the damage is more than that, or if this step did not fix your antenna, the next step is to replace it. Replacing the antenna is the best and most effective way of taking care of a broken car antenna. Attempting to fix a broken antenna is often a fruitless labor as the wiring can be unfixable. To replace the entire antenna, you will first have to remove the broken antenna. There will be an antenna cable attached to your stereo beneath the dashboard. Unplug this, then unscrew the antenna nut at the base, then remove the entirety of the antenna. Next, find yourself a pair of wire cutters and cut the old antenna cable. Tape this cable to the new antenna plug and place it into the mounting hole (where the old antenna used to be). Push it in as far as it will go and finally, plug the new antenna cable into the stereo. Your car stereo should now play your favorite radio stations once again!

Following these steps, you should be able to do any antenna repairs yourself, but if you feel more comfortable having a professional take a look at it, consider using TalkLocal. TalkLocal is a free service that will connect you with top-quality, reputable auto repair companies in your neighborhood within minutes. Just enter in your specific problem, location and availability, and up to three companies will call YOU directly, saving you the time and stress of finding one yourself.

Can you Remove Rust from a Car?

Tuesday, August 28th, 2012

Can you Remove Rust from a Car Auto Repair

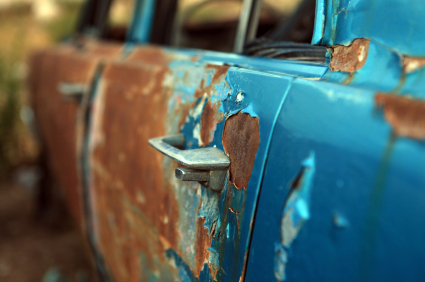
Can you remove rust from a car?  Yes, but you must be very careful and take the necessary precautions.  It is a fairly involved process and the rust and paint dust can be extremely harmful to your health.  Make sure to wear gloves, safety glasses and a dust mask throughout the entire process.

1. Cover up any parts of the car that you don’t want to get dusty.  Make sure you use a tarp with painters tape to cover up any areas that you don’t want affected.  Don’t use newspaper or anything else that’s easily permeable, as paint spray can leak through it and leave specks on your car.

2. When choosing where to partition your car, do not simply just mask out the area the rust is in, as this will cause sharp lines in the middle of the panel.  Instead, mask the car by stopping at panel lines so that the entire panel will be evenly colored.

3. Remove the paint around the rust with a dual-action sander.  You should start at approximately 80 grit and then move upwards to 150 grit to take the paint off and smooth off the area.  It should feel smooth to the touch afterwards.

4. Use a metal grinding wheel to remove the thick rust and any recessed pits that contain rust.  After this entire process, you’ll need to use a rust-removing acid to clean up the microscopic rust particles left on the surface.  You can use a body filler to plug up some of the dents or holes, but make sure to finish the entire job off by sanding it with 120 grit sandpaper.

5. Prime the area with a bare metal primer or auto-spray paint that matches your car’s color.  Follow the instructions on your primer about what you need to do; usually you’ll need to wipe the area with paint thinner or mineral spirits.  You’ll want to spray thin coats of primer evenly (at least 3) and then allow it to dry overnight.

6. Sand the primer with 400 grit wet sandpaper so that the paint and primer coat have areas for the paint to bond.  Then spray as many thin coats of paint as necessary to match the color of the rest of the car.  Finish the paint job by buffing the edges of the paint job so it blends with the old paint.  If necessary, add a clear coat to the paint job.

The paint should be left to cure for 2 days, after which you should wash and polish the car.  Warning: Do not wax paint within 30 days of painting, as it may damage the paint job.  Removing rust is a fairly involved process and depending on the paint job, it may be necessary to call a professional to redo the paint job.  TalkLocal can connect you to a high-quality local auto-repair shop that can help you within minutes.  It’s fast, easy, and free.

Car AC Smells like Burning Plastic

Thursday, August 23rd, 2012

Car AC Smells like Burning Plastic Auto Repair

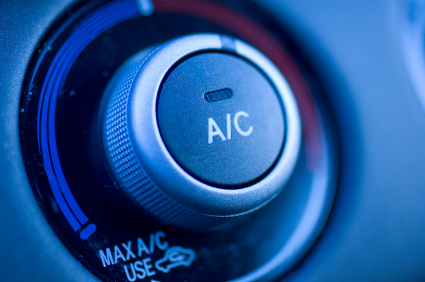
When the air conditioning in your car blows out a burning plastic smell, you should check your car or have it looked it by a mechanic. Before going to the repair shop, though, you can check to see if the following reasons are causing that unnerving scent.

Possible solutions when your car AC smells like burning plastic:

Sometimes plastic bags get stuck underneath the car and melt around the hot exhaust pipes. If you see a plastic bag blowing in the highway, try to avoid it as much as possible because it could damage your car in the long run.

Coolant Leak

The heater core could be leaking coolant onto the heating/air conditioning system. Check to see if your coolant tank has any cracks in it. Though it is usually a minor leak, it may require a major repair.

Electrical Problem

A fuse might have blown or short-circuited, causing a burning plastic smell from your A/C. Check all cable and fusible links to see if any are blown.

A/C Compressor

The car’s A/C compressor could be overheating due to lack of refrigerant and lubricant, which causes a burning smell. Whenever you bring in your car for a maintenance inspection, have the mechanic check the A/C. The mechanic will check to see if the A/C compressor is charged and he will put refrigerant and lubricant in the compressor.

Outside Smells

The burnt plastic smell could be coming from your surroundings and traveling through the A/C vent. To prevent outside smells from infiltrating, select the air conditioning option that only re-circulates air that is already in your car. This closes the vents.

If these tips did not help and you are experiencing more difficulties with your car, see a mechanic immediately. TalkLocal can help connect you with the best auto repair professionals in your area.

How Often to Get an Oil Change

Tuesday, August 14th, 2012

How Often to Get an Oil Change Auto Repair

If you have a passenger car that runs on a gasoline engine, you should get an oil change every year or every 7,500 miles. If you have an automobile that runs on a diesel engine or turbocharged gasoline engine, then you should get an oil change every six months or every 3,000 miles. These intervals are set for cars that are driving under ideal conditions; in other words, this does not account for stop-and-go traffic, unpaved roads, or short trips. Driving in these conditions makes your engine work harder and uses oil up faster.  If you are wondering how often to get an oil change, it is safer to get your oil changed more frequently—every 3,000-5,000 miles. You should change your oil filter every other time you get your oil changed.

If you fail to change your oil regularly, dirty particles in the oil will clog your filter. Since the filter can’t work efficiently, the oil becomes even dirtier. As a result, the engine speed will decrease because of the viscosity of the oil. The oil will also have trouble circulating to lubricate the cylinders and pistons. If metal parts of a car are not adequately lubricated, the parts will scrape against one another and worsen over time. At worst, the parts will become so hot that they melt and damage the engine permanently. An oil change is a fairly inexpensive maintenance procedure that you can even do yourself; don’t take the risk of prolonging waits between checkups.

If it is about that time, TalkLocal can help you schedule a checkup at a local auto repair shop. TalkLocal uses call analytics, social reputation, and online ratings to find the best businesses in your area. Simply fill out a short service request online and talk to someone who can help you—in minutes!

Check Engine Light Flashing Before Starting

Wednesday, August 8th, 2012

Check Engine Light Flashing Before Starting Auto Repair

Check Engine Light Flashing Before Starting

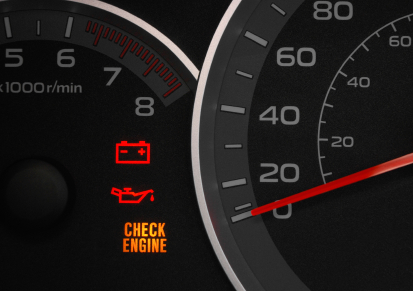
One of the scariest moments is when the Check Engine Light, or CEL, comes on when driving. But what if CEL starts flashing before the engine has even been turned on? CEL is nothing to be “light” about. CEL checks the car engine and informs the driver of problems in the engine. If the CEL comes on before starting the car it’s usually nothing major.  This article will explain what to do when check engine light flashing before starting the car.

CEL On Before Starting

If the CEL is on before turning the key, relax. When the CEL is flashing when the key in and the engine is off, the emission test is running. The emission test is to check the emission control system to reduce the amount of pollution from the CEL. Emission test reads by an oxygen sensor. The sensor reads the air and fuel mixture. You should only worry about it if the engine is running.

CEL during Driving

If the CEL is on when driving, pull over immediately and begin to inspect:

Misfire — A flashing light mean there has been a misfire in the engine which can cause damage to your expensive catalytic converter.  If this is the problem, stop driving and call a car mechanic.

Gas Cap — For a loose gas cap, the CEL is on, but not flashing. Tighten the gas cap and check if the CEL has turned off.

Spark Plugs — If the CEL did not turn on, check the spark plugs. Spark plugs can deteriorate over time and become dangerous. Check the spark plugs if there are any deterioration. If so, replace the spark plug. If the CEL is still on, go to a car mechanic.

If the CEL is red, immediately go to a car mechanic to get a diagnosis. To find car mechanics, use TalkLocal. TalkLocal can connect you to with the high quality mechanics in your area in minutes.

Steering Wheel Shakes When Braking

Monday, July 30th, 2012

Steering Wheel Shakes When Braking Auto Repair

If your steering wheel shakes when braking, you do not want to ignore the problem for too long or else it could result in an expensive mechanic bill or worse—a car accident.

Why does the steering wheel shake when braking?

Warped brake rotors cause the steering wheel to vibrate when braking. The brakes clamp down on these discs, or rotors, in order to slow or stop your car. Rotors wear down over time, which causes the metal to become warped or thinner. They cannot dissipate the heat from heavy braking and can warp until they cool down.These defects cause the brake to vibrate when the brake pads grip the rotor. This rumbling is then relayed to the steering wheel, hence the steering wheel’s shaking when you brake.

The uneven tightening of the rotors is an issue that should be looked at by a professional car mechanic. They will tighten in a star pattern. You can usually feel the rotor imperfections with your hands or you can test it by spinning the wheel. It should rotate without resistance, however if there are bumps, then your rotor is warped.

It is NOT SAFE to Drive When Steering Wheel Shakes

You should get your distorted rotors looked at immediately because the constant shaking and vibrating could lead to more serious car problems. All the quivering in the steering wheel can cause bolts, brake pads, calipers, and other part of the car to loosen or erode. You will be stuck with a very expensive repair bill if you ignore the initial problem.

Furthermore, a vibrating steering wheel can lead to loss of stability and control over your vehicle. Don’t force yourself to clutch a wobbly wheel because this could increase your chances of a car crash.

TalkLocal can help you find the best and most affordable car mechanics in your local area.

How Often Should You Get a Wheel Alignment

Friday, July 27th, 2012

How Often Should You Get a Wheel Alignment Auto Repair

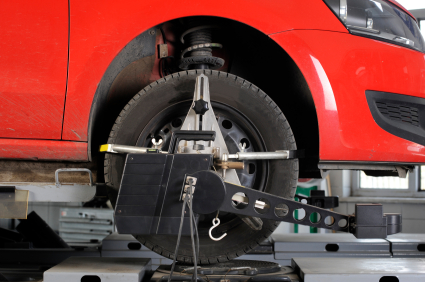
If you are wondering how often should you get a wheel alignment, the first thing you should do is look at your tires. Uneven tire wear—usually more on the outside of the tires—is a prime indicator that your car’s wheels are out of alignment. Here are a few other indicators you should look for:

– Your car seems to drift to one side, even when you are driving straight.

– Your steering wheel vibrates.

– You are driving straight, but your steering wheel is not centered.

Even if you don’t notice any of these indicators, you should have your wheel checked if it has been awhile since your last alignment. Check your owner’s manual to see how often your car manufacturer recommends having this service.

Don’t worry if your car is out of alignment; it is a common result of everyday driving. Normal driving causes your car’s suspension to become worn and the springs to be stretched out. Even a small accident such as bumping a curb can disrupt a car’s suspension, making your wheels sit at improper angles. A proper alignment restores these angles to correct their measurements, making sure your wheel sits straight.

The biggest benefit of an alignment is less tire wear. When tires do wear down, they will do so evenly on a properly aligned suspension. Tires are expensive, they can easily reach over $100 per tire; an alignment costs $50-$100, which makes it a cost effective procedure that should be apart of your regular car maintenance. A proper alignment will make sure that your car drives straight and handles properly, which makes driving safer. Another big benefit is better gas mileage because your tire will be properly aligned with the road, decreasing resistance.

If you still have questions about when you should get a tire realignment, or if you need one done, use Seva Call to get in contact with local tire repair shops immediately.