Archive for the ‘Auto Repair’ Category


Exhaust Popping on Deceleration

Saturday, February 16th, 2013

Exhaust Popping on Deceleration - Auto Repair

Deceleration backfire is caused by fuel burning in the exhaust manifold or header. Something you should understand before going any further is that a motor in perfect tune will exhibit deceleration backfiring. Just because your exhaust is popping, doesn’t mean there’s anything wrong. If you want to get rid of the noise, you will need to de-tune your motor.

Exhaust Popping on Deceleration

When you decelerate, you reduce the amount of throttle. This causes an overrun, that is, the motor’s rpm is turning faster than the fuel provided can support, so the motor begins to spool down. This causes a couple of things to happen.

First, when you close the throttle, you are also closing the throttle plates. This reduces the air and fuel floating into the motor, and increases the vacuum. This results in less air and fuel in the cylinder during the power stroke, which results in a lower pressure in the combustion chamber. When you reduce pressure in this manner, the mix burns slower, which results in two things:

Now you end up with non-burned fuel in the exhaust, and burning fuel being ejected into the exhaust, which results in a backfire.

Eliminating Exhaust Popping on Deceleration

The bottom line is that backfiring is perfectly normal and should actually be expected. It is up to you if you really want to get rid of it. However, if you choose to do so, there are a few ways you can do this:

Additional Help

If you would like more information on your exhaust, or want to get rid of the popping sound, use TalkLocal to get in contact with local professionals immediately. We will connect you with up to three auto repair shops in your area in just minutes!


Replacing Power Window Motor

Sunday, January 27th, 2013

Replacing Power Window Motor - Auto Repair

Up and down. Up and down. Opening and closing windows is now as easy as pushing down or lifting up a button.  Think about the “olden days” when you had to hand crank the window to get it to move at all! So much work just to get a whiff of fresh air.  The power windows in our vehicles are great conveniences, but sometimes there are malfunctions that cause the motor to stop working.  If  you find yourself replacing a power window motor, these tips can help.

Diagnosing the Problem

The first step to replacing a power window motor is to diagnose the problem.

1. Make sure the rest of the car is in working condition. Put the key in the ignition and check that your batteries are charged and power is running throughout the car.

2. Check all the fuses and circuit breakers that could connect to the windows to make sure that you haven’t blown a fuse and that you don’t have an open circuit. Do this by removing the interior door panel.

3. If the fuses and circuits check out, verify that the power window motor is actually defective by checking the voltage.  Connect the plus probe to one of the motor wires and the negative probe to the other.  If the readout is at or above 12 volts then something is definitely wrong.

Replacing Power Window Motor

1. You’ll need to buy a new motor for your window.

2. Remove the defective motor. Secure the window glass with masking tape or a stick before removing the motor. Undo all the rivets and screws holding the motor to the door panel.  The regulator arms should pop out of the bottom and you can take out the whole assembly. Be careful, because the arms will try to rotate in opposite directions and could hurt you.

3. Insert the new motor and reattach it in exactly the same way you removed the old motor.

Additional Help

If you have more questions about replacing your power window motor you should talk to a professional.  The easiest, fastest way to get in contact with reliable local auto service companies is to use TalkLocal. Just put in your problem and availability and let them do all the work.  Within minutes you will be connected to someone who will be able to help you out.

Car Key Replacement

Thursday, January 24th, 2013

Car Key Replacement - Auto Repair

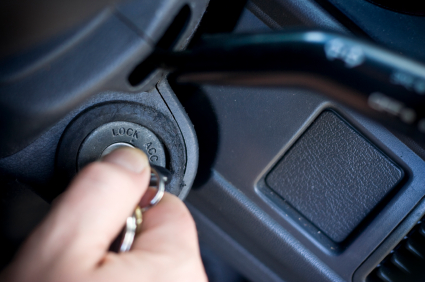
Everybody misplaces car keys from time to time. And if they seem lost for good your car dealership may charge a fortune for a car key replacement. Luckily there are affordable alternatives. Key replacement retailers like https://www.ikeyless.com usually have replacement keys available to cut keys based on your car’s Vehicle Identification Number (VIN). The VIN is a 17 number code usually visible through the driver’s side dashboard.

How to Order a Replacement Car Key

Order your car key replacement by entering your VIN, year, make, and model. Follow the instructions on the retailer’s website to complete the order. You will be able to receive your keys in a few days. Once you receive your key you can program it to your car without the help of a technician. Instructions on how to do so are usually included with the key. By ordering the car key replacement from a retailer and programming ti yourself, you may be able to save money, since a dealership would charge you for the replacement key as well as the service of programming the new key for you.

Additional Help

If you need professional help to replace a lost key or to change a lock, TalkLocal can help you find a high quality technician. TalkLocal will match you with up to three professionals locksmiths or car key replacement retailers in your area, in just a matter of minutes.

How to Replace a Car Air Filter

Monday, January 21st, 2013

How to Replace a Car Filter - Auto Repairf

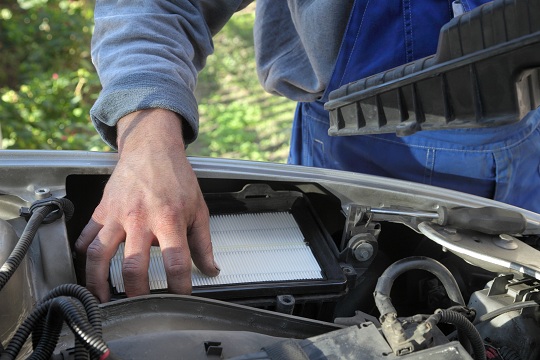
A car filter cleans the air in your vehicle with fibrous materials that remove all of the particles in the air, including dust, mold, bacteria, pollen, and other substances. All cars have air filters that protect their engine. Some cars have air filters that protect the air in the cabin of the car. Regardless of the type of air filter, the filter must be clean to do its job. A dirty air filter will affect the performance of your engine and, if you have a cabin air filter, will affect your health. This article discusses how to replace a car air filter that protects the engine.

When to Replace a Car Ai rFilter

The air filter should be replaced, on average, every six to eight months. However, if you drive in abnormal conditions (for example, in the desert), you may need to replace it more often. Many people replace the filter every two to three oil changes.

If you are looking to replace your car’s air filter, the first thing you will need to do is find a replacement filter of the same size and type as that which came with the car.

How to Replace a Car Air Filter:

Additional Help

If you have more questions about your car’s air filter or feel uneasy about doing the work yourself, use TalkLocal to find a professional near you. Let TalkLocal know what your problem is, when you are available, and within minutes you will be connected to someone in your area who will know how to replace a car air filter.

How to Balance a Motorcycle Wheel

Wednesday, January 16th, 2013

How to Balance a Motorcycle Wheel - Auto Repair

If you want to learn how to balance a motorcycle wheel, this article will show you how.

To balance a motorcycle wheel, you will need:

– two sawhorses/folding stools

– lubricant

– a tire iron

– a marking pen

– tape

– two-sided foam rubber glue

– weights

1. Search the wheel of your motorcycle for a flat spot.

2. After you have found it, put your two sawhorses or folding stools back to back along the flat spot, the length of your motorcycle’s axle.

3. Apply lubricant to the weights of the wheels of your motorcycle.

4. After the weights are thoroughly lubricated, you be able to take them off.

5. Clean the grease on the surface of your motorcycle’s wheel.

6. Place the axle in the wheel, using the sawhorses or folding stools you set up to support it.

7. Level the wheel of your motorcycle and use your marking pen to mark the bottom of it.

8. Turn the wheel until the heavy side of the axle in on the bottom of the wheel.

9. Turn the wheel 180 degrees.

10. Take a small weight and tape it to the mark you made on the bottom of the wheel. Continue to turn the wheel, checking that it is balanced in every possible position of the wheel.

11. After you are sure your motorcycle’s wheel is balanced, use your two-sided foam rubber glue to attach the weights the wheel.

Having troubles balancing your tires?

If you do not wish to balance your motorcycle’s wheel yourself, you can take your motorcycle to an auto repair professional and they will do it for you. With the help of TalkLocal you can be on the phone within minutes with up to three high quality auto repair professionals in your area, that are available when you are. TalkLocal’s service is completely free, so try it out today to save time with your appointment scheduling.

Car Radio Troubleshooting

Tuesday, January 8th, 2013

Car Radio Troubleshooting Auto Repair

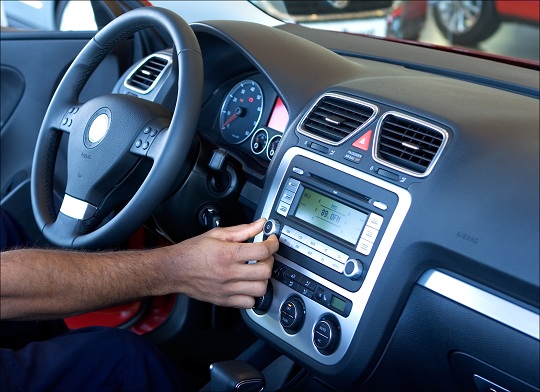
You may find that when you turn your car on, the radio does not turn on with it, does not output any noise, is not playing through all the speakers, or produces distorted, fuzzy sounds when turned on higher volumes. These are all common issues that occur, and with some troubleshooting tips, you may be able to solve them on your own with the steps below. Read on if you are experiencing car radio troubleshooting.

If the radio does not turn on when your car is running, the associated fuse may be blown or broken. You should read the owner’s manual for your car to find the location of the fuse. In most cases, there are two fuses: one of them will be in the car cabin and the other will be in the engine area. In the cabin’s fuse box, it should be fairly simple to locate the correct fuse; they should be clearly marked. Once you find it, remove it and replace with a new one. You should be able to purchase one at your nearest auto parts store.

If you turn your radio on, but it does not produce any noise or is not playing through all the speakers, you need to do an inspection. There could be two possible problem sources: the speakers themselves or the speaker wiring. Experiment with the fader and balance controls on your radio and try to isolate which, if any, particular speaker is not working. If you find it, locate the physical speaker (you may have to remove the interior door panels). Check the speakers for visual damage. If they appear to be intact, check the wiring that comes from the speakers and connects to the radio unit. If you find any damage, you will most likely need to replace the speaker.

Lastly, you may find that when turning your radio’s volume up, the sound is distorted and/or fuzzy. An explanation for this is that the radio’s wattage is not high enough to accommodate the speakers. To solve this, you could do two things. First, you could try purchasing a car amplifier, which would increase the radio’s wattage capacity and lessen the distorted sounds. Second, you could replace the speakers themselves with models that match the output of the radio.

If you are having trouble with any of these suggestions, or are experiencing a problem not listed here, it may be best to take your car to an expert for help. Try using TalkLocal to locate an auto body shop near you. TalkLocal is a free service that will connect you with top-quality, reputable auto repair professionals in your neighborhood, within minutes. Simply enter in your specific problem, location, and availability and TalkLocal will contact multiple auto shops, who will then call YOU directly, ready to help.

How to Install New Headlights

Monday, December 24th, 2012

How to Install New Headlights Auto Repair

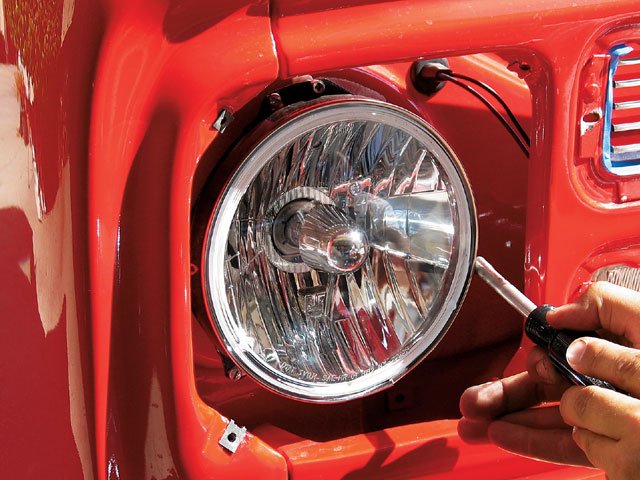
Installing or repairing a new headlight for your car on your own can be a significantly cheaper alternative than taking your car to the nearest auto body shop. All you need to do is go to the nearest auto parts store and to find the right headlight for your vehicle’s specific make and model. From there, with the right tools and this guide, you will know how to install new headlights in no time.

First, to remove the light, you will need to open up the hood of your car. On the side of the broken headlight, you will need to find the plastic connector for the headlight. Remove the electrical connector that gives the headlight its power. Then, find the cover that houses the headlight.

After unscrewing this cover, remove the headlight bulb from the headlight compartment holder. You might need to remove any mounting screws or retainers holding the bulb in place.

After removing the old headlight, take the new headlight and compare to make sure you have the right bulb. Hold it by the plastic casing instead of grabbing the bulb itself. You should be able to set it in place pretty easily. Then take the mounting screws or holdings and re-tighten them. Plug in the headlight to the electrical connector that you removed the old headlight from.

After everything is in place and screwed back in, close the hood and turn on your car for a test run.

If you think you have done something wrong, you have the wrong headlight type, or you would simply prefer the help of a professional, try using TalkLocal to find an auto repair shop near you. TalkLocal is a free service that will connect you with top-quality, reputable auto repair professionals in your neighborhood, within minutes. Just enter in your specific problem, location, and availability and TalkLocal will contact multiple companies, who will then call YOU directly, ready to help.

Car Starter Makes Grinding Noise

Friday, December 21st, 2012

Car Starter Makes Grinding Noise Auto Repair

No one enjoys hearing their car make those awful grinding noises because that’s usually a sign that the car needs a repair. But when it happens, it happens, and knowing how to take care of  a car starter that makes grinding noise can go a long way toward saving you money.

As we are dealing with expensive and potentially dangerous equipment, it is important to be careful and to follow these directions prudently.

Steps to fix car start up grinding noise

1)   Lift the hood and disconnect the battery.

2)   Locate the starter (usually under either the hood or the vehicle). To locate, follow the positive battery cable from the battery and it should lead directly to the starter.

3)   Raise the vehicle with a jack if need be, then remove the positive battery cable from the starter motor.

4)   Remove the solenoid energizer wire. The wire is much smaller than the battery cable, but is still a vital part of the starter motor.

5)   Remove the starter mounting bolts and set aside.

6)   Look within the starter mounting hole and examine the ring gear teeth. When completely normal, the teeth should appear fresh, the edges should be sharp and crisp, and the teeth should be free of chips and discoloration. If the teeth don’t look like this, then unfortunately the transmission must be removed and the flywheel or ring gear flex plate must be replaced. However, if the ring gear doesn’t show any abnormal wear, then the problem lies with the starter and it will have to be replaced.

7)   Test the starter by mounting it in a large vise. With the jumper cables, attach the ground cable from a battery to the starter body and a positive cable to the starter positive post (where the main battery attaches). Now, attach the jumper wire from the solenoid-activator connection. Attach this wire directly to the starter positive post. If done correctly, the starter should start to spin and the starter drive-gear should forcefully extend.

8)   Finally, check on the starter drive gear teeth. These are made of much harder steel and thus should show far less sign of wear than the ring gear. Even so, replace the starter assembly anyways. The problem is that the solenoid is weak and not pushing the gear far enough into the ring gear. This process creates grinding that is forceful enough to start the car, but ultimately it will die and will need to be fixed.

If all this technical jargon seems like too much to handle, use TalkLocal to find a local auto repair professional in just minutes who can assist with any issues.

Catalytic Converter Troubleshooting

Thursday, December 20th, 2012

Catalytic Converter Troubleshooting Auto Repair

Catalytic Converter Troubleshooting

The catalytic converter is a very important device on your vehicle’s emissions control system that reduces harmful nitrogen oxide emissions.  Typically, the device stays working for the entire life of the vehicle, but occasionally the catalytic converter fails. Read on for more information on catalytic converter troubleshooting.

Although malfunction is rare, it is important to know the signs of a defective catalytic converter.  Signs that something is wrong include:

–   Your vehicle does not accelerate when you step on the gas pedal.

–   Your vehicle’s fuel efficiency suddenly drops.

–   Your vehicle des not start.

–   Your vehicle fails an emissions test.

–   The MIL or Check Engine light turns on.

All vehicles sold in the United States after 1996 include an On-board Diagnostic System that tests the catalytic converter.  If too much pollution escapes from the tailpipe, the car illuminates the MIL light and produces a trouble code that can be read by a technician.

Most commonly, the catalytic converter fails in older cars when they become clogged and gas cannot escape out of the car.  This can also cause the engine to die.

If you find that your catalytic converter is clogged you will have to replace the system.  It is more cost effective to replace the defective system then try to repair it, which may cause problems further down the road.  TalkLocal will help solve your problem by connecting you to a certified auto-repair technician in minutes!

Car Radiator Fan Problems

Wednesday, December 19th, 2012

Car Radiator Fan Problems Auto Repair

Car radiator fan problems can lead to other problems with your car because the radiator fan performs a couple of very vital functions.

What does a radiator fan do?

A radiator fan cools the radiator and stops the car from overheating. However, if your car is overheating, the radiator may or may not be the culprit. If your car is overheating, first check out your radiator fan.

Four parts of your radiator fan that are likely problem areas:

Fuses – Most of the time, a blown fuse is the problem. A symptom of a blown fuse is when something electrical is not working. Look around and make sure the fuses are all properly connected. If there is an issue, replace the fuse.

Temperature sensor – If your car is heating up and your fan is not kicking in, you may have an issue with the temperature sensor. If the sensor is not working, the fan will not be able to operate when the car gets too hot. To check the sensor, look under the car thermostat cover. Once there, disconnect the sensor wires and touch them together. If the fan starts, then you will need to replace the sensor because it is an indicator that you have a bad sensor.

Coolant – Look to the coolant level for additional clues. Make sure the coolant level is at the optimal level so your engine can run smoothly and efficiently.

Fan clutch –  The fan clutch holds the fan to the engine. In addition, it makes it turn. If the clutch is faulty – burnt out or simply fails – a replacement part is necessary.

Need professional help?

If you are not sure where to keep looking or are having other issues as well, there is still hope! Check out TalkLocal, a free service that connects you directly to local, high-quality professionals who can help you with your issue at a time that works best for your schedule.