Archive for the ‘Computer Repair’ Category


Install An Operating System Without A CD Drive

Thursday, May 9th, 2013

Install Operating System Without CD Drive - Computer Repair

Essentially all computers come equipped with an operating system. Still, you might need to reinstall. Or, you might want to install an operating system different from the one that came with your machine.

Traditionally, computer users utilize a CD inserted in the CD drive of their machine to install an operating system. This is all fine and well, but can pose a problem for a number of reasons.

First, more and more computers are giving up a CD drive in an effort to shrink their machines down as small as they can go. Secondly, CD drives often break on computers, and users do not see a lot of reason to repair them.

If you fall into one of these categories, do not worry. You are able to install an operating system without a CD drive. Here are some ways.

External CD Drive

When you are looking to install an operating system without a CD drive, one of the quicker solutions is by simply using an external CD drive. These plug into your USB port and then function just like a normal CD drive would.

There are a wide range of external CD drives on the market, so finding one should not be difficult. They are also reasonably priced. This method also requires very few technical demands on behalf of the user, and therefore, is an easy fix.

Flash Drives

The evolution of the flash drive has made this tiny piece of technology all the more useful. Instead of storing just documents or pictures on them, many users use flash drives as a means to install an operating system without a CD drive.

You can transfer an operating system from your flash drive to a computer, or you can simply equip your flash drive with a bootable version of the operating system, so you can plug it in and use the operating system no matter what computer you are on.

Programs like LiveUSB Creator walks you through a step-by-step process so you can load an operating system on your flash drive.

Need Tech Help?

For the less technologically inclined of us, installing an operating system without a CD drive is no easy chore. For that reason, you will want to contact computer repair technicians in your area to lend a hand. TalkLocal is a revolutionary new concierge service that can put you in touch with any type of professional you need in your local area. Try it out to find help with you computer the next time you encounter an issue.

Sync Files Across Multiple Computers

Wednesday, May 8th, 2013

Sync Files Across Multiple Computers - Computer Repair

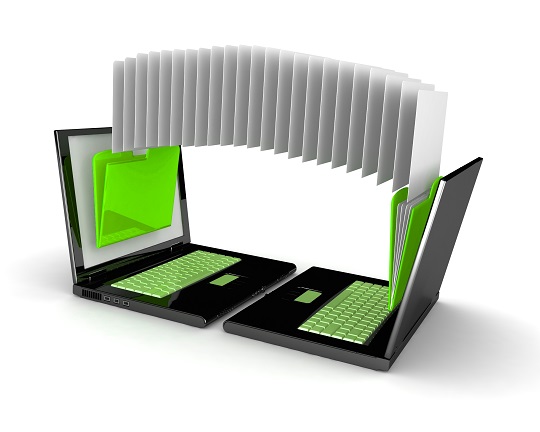
Trying to sync files across multiple computers allows the same information to be accessed by multiple people, or from different devices. As long as all of your devices are connected to the Internet you can have everything at your fingertips.

Why Sync Files Across Multiple Computers?

1)     By syncing files across multiple computers you will be able to access music off of your home desktop, photos and videos off of your notebook, and important documents off of your work computer, all on your laptop.

2)     You can update files and not worry about having to transfer them back or delete old versions from other devices.

3)     The data from multiple devices are available on one.

4)     You don’t have to have to worry about using CD’s, USB’s or email attachments to share data.

How To Sync Files Across Multiple Computers

1. The first thing you should do is download the FolderShare software on each of the devices you would like to sync.

2. You can then select the specific folders that you would prefer to share on the network such as “My Documents” or “Videos”.  The FolderShare software is continuously running in the background and should automatically synchronize all of the files you selected.  If any of the computers you want synced is offline then the documents will by updated when it comes back online.

3. If you would prefer to not download FolderShare you can also synchronize files by downloading an online back-up system such as DropBox. You can put all of the files you want to access in the DropBox folder, and you will be able to access them from any computer — as long as there is Internet — with your personal username and password.  There are many other options just like DropBox that you can choose from.

Questions About Syncing Files?

If you cannot figure out how to set up file syncing across multiple devices or you have problems with the updates, you should seek professional help from an IT technician.  If you don’t know who to contact, use TalkLocal to find local, reliable technicians who can help you out within minutes.

Sharing A Printer Over A Home Wireless Network

Tuesday, May 7th, 2013

Sharing A Printer Over A Home Wireless Network - Computer Repair

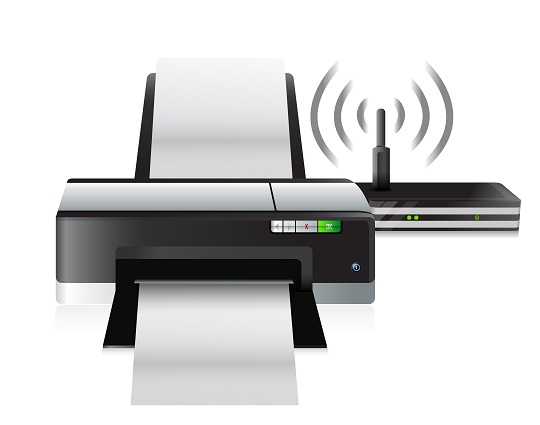
Having a printer at home makes working on your computer convenient and simple.  But it can also be irritating if your printer is only connected to one computer. You’ll frequently find yourself transferring files between computers or hooking your printer up to different computers. So how can you fix this problem? The answer is sharing a printer over a home wireless network!

Benefits Sharing A Printer Over A Home Wireless Network

1.     It’s easy for everyone to use the printer.

2.     A shared printer doesn’t require you to be around every time someone has to print.

3.     You don’t have to buy a separate printer for each computer in your home.

4.     It’s easy to set up!

How To Share A Printer Over A Home Wireless Network

Setting up wireless printer sharing is not as daunting of a task as it seems, and it is definitely worth the time.  Sharing a printer makes it easy for numerous people to print directly from their computers without having to get up, plug in, or email files.

1. Make sure all of the latest drivers are installed on your printer. If you are unsure, you can look on the manufacturer’s website and download the necessary updates.

2. Now that your printer is ready and attached to your computer, you can add it to the wireless network in order to make it available to share. Go to the Start Menu > Control Panel > Devices/Hardware.

3. From there, click on View Installed Printers. When you find your printer, right-click its icon.

4. Select the Sharing tab and choose the Share This Printer option. You should also give the printer a new network name from which it will be easy for others to locate.

Potential Issues

Printing over a wireless network may not be all roses.  It can be frustrating when it doesn’t work properly.  If your computer still won’t print to the shared printer you should try to disable Print Spooling.  This is suggested because there may be incompatibilities between computers, between the printer and the computer, or between operating systems.  By removing the Print Spooling you can print directly by setting the Advanced Shared Printer’s properties to “Print Directly to Printer”.  This should take care of the problem.  If you continue to have issues you should seek the help of an IT service professional.

Go to TalkLocal to be connected with reliable, local IT professionals who can help you.  All you have to do is input the issue you are having along with your availability, and the we will do all the work for you.  Within minutes you will be connected to a ​high-quality professional.

Connecting A Bluetooth Mouse To Mac

Monday, May 6th, 2013

Connecting A Bluetooth Mouse To Mac - Computer Repair

What’s “magic” about the Apple Magic Mouse and the Apple Magic Trackpad?  A big part of it is the fact that they operate wirelessly.  But if you’re having trouble getting these devices connected to your computer, the “magic” may seem more like a mean joke.

Bluetooth technology is what allows devices like the Magic Mouse to work.  Bluetooth is wireless technology that allows data to be exchanged between devices across short distances.  If you are having issues with your Magic Mouse or other wireless mouse device, there is a good chance that it is related to Bluetooth. Here are some tips for connecting a Bluetooth mouse to Mac.

Check for Updates

The first thing you need to do is make sure your Mac has the latest software that it needs to have to support your Bluetooth device.

Here is Apple Support’s Software Update Guide, which can help you figure out which updates are required to use your particular device.

Make Sure Bluetooth is Turned “On”

At the top of your screen, the Bluetooth symbol should appear in your menu bar if you have Bluetooth enabled.  If you do not see the symbol in the navigation bar, go to your “System Preferences” and enable it.

Use the Bluetooth Icon in the Menu Bar as a Troubleshooting Guide

There are a number of things that can be going on with your Bluetooth device, and the icon in the menu bar is a key to decoding this.  The Bluetooth icon changes to indicate different things that are going on with the Bluetooth device.  There are different symbols that appear when Bluetooth is on but not connected, when Bluetooth is connected to at least one device, when one of the connected  Bluetooth devices is low on batteries, when Bluetooth is turned off, and when Bluetooth is offline. Check Apple Support for a Bluetooth Menu Icon Guide for help figuring out the status of your Bluetooth device.

Make Sure that the Wireless Mouse is Turned “On”

If you are using a Magic Mouse, the power switch is on the bottom of the mouse.  If you are successfully connected to the computer, the red indicator light should steadily glow red.  If your mouse is on but it is not connected, it will blink red.  If the red indicator light is not doing anything, your batteries may be dead or they may not be installed properly.

If you are using a mouse that is not manufactured by Apple, consult your user manual if you are not sure about how to turn it on, or how you can tell if it is connected to your computer.

Need More Help? Ask A Professional!

If you need more help connecting a Bluetooth mouse to Mac, or if you need other support with your Mac, TalkLocal will connect you with high-quality computer repair professionals within minutes.

Windows 8 Computer Log

Sunday, May 5th, 2013

Windows 8 Computer Log - Computer Repair

The Windows 8 computer log can be very important to users and help them troubleshoot various problems with their computer. This log records significant events that your computer experiences. Using this information, you might be able to trace the source of any issues that you experience either with Windows or other computer programs.

To access the Windows 8 computer log, you need to know the right commands. The following is an appropriate path to view events that have been recorded in the events log.

Start > Control Panel > System and Maintenance > Administrative Tools > Event Viewer

Once you have reached the event viewer, you will be prompted for your administrative username and password. Make sure you are prepared with this information, otherwise, you will be locked out from viewing this valuable insight.

You can also access the Windows 8 computer log alternatively with the following commands.

Start > Search > type “Event Viewer” > Select Event Viewer

While the information may not look very useful, it is important to know that you can at least access it. It could come in handy if your computer begins to act up. The log records instances of errors, warnings and other issues in the following components of your computer:

– Applications

– Security

– System

– Set-up

It is important, especially for the non-tech-savvy of us, not to stress out over what appears to be an inordinate number of errors or warnings logged in your computer’s events. The truth of the matter is, computers experience errors regularly, and just because you experienced an error, does not mean that your computer is not functioning properly. This is just simply a way for you to monitor your hard drive to ensure that all is well.

Find Help In Your Area

If you are looking for someone who can help you with this, and other tasks, turn to TalkLocal. We have an extensive database of professionals in your local area that you can tap into for free. We will take your inquiry and get you on the phone with someone immediately, completely cutting out the long hours spent trying to find the right help.

Download Pictures From Blackberry To Mac

Saturday, May 4th, 2013

Download Pictures From Blackberry To Mac - Computer Repair

The iPhone-Blackberry rivalry has become a cutthroat competition.  People either argue strongly for their Apple product or fight tooth and nail in support for their Blackberries.  Many think that the two companies’ products are incompatible, but this is far from the truth.  There is always a way to make the two come together, and you can even download pictures from Blackberry to Mac.

Macs and Blackberries

Blackberry devices are compatible with Macs when you want to sync information.  If you need to upgrade the software device on your phone you should do so on a computer with Windows. If you want to download the pictures from your blackberry device straight you your Mac computer you should have no issues.

If you want to sync more than pictures, such as calendar events, contacts, and tasks to Mac applications, you can download the newest version of PocketMac.  This program will allow you to easily synchronize both your phone and computer.

Download Pictures From Blackberry To Mac

There are two ways that you can download pictures from Blackberry to Mac.  You can either use a syncing cable or transfer the photos via Bluetooth.

1. When using the syncing cable, you must first plug the phone into the computer’s USB port.

2. When the computer prompts you to turn on Mass Storage, select “yes”.  After a few moments, a disk drive entitled “Blackberry” will appear.

3. Open the disk drive and go to Pictures.

4. You can drag the pictures onto your desktop or into a folder on your computer. They should be saved onto your computer now.

If you do not want to manually transfer the pictures onto your Mac from your Blackberry you can enable Bluetooth.

1. Go into your Mac and make sure that Bluetooth is turned on and set to “Discoverable”.

2. You can then go to your Blackberry’s menu to manage connections and set up Bluetooth. When you go back to the menu you should choose “add device” and then click “search”.  If your computer is set correctly you should see its name when your phone delivers a list of discovered devices.

3. Select your computer and enter a numeric passcode which you can just make up and continue.  Your computer should show a paring request window.

4. Enter the same code and hit “pair”.

5. On your phone, go to the pictures you want to download and select “send using Bluetooth” and the name of your Mac when asked what device to send to.

6. On the computer, select accept on the incoming file transfer request.  The transfer should be complete and your pictures saved to your computer.

Need Professional Help?

If you have problems setting up the download or cannot seem to get it to work properly, you should seek professional help.  You can go to TalkLocal to be connected with reliable local IT service technicians in a matter of minutes, for free!

The Cursor Is Invisible In Word 2007

Friday, May 3rd, 2013

The Cursor Is Invisible In Word 2007 - Computer Repair

The cursor is the indicator on your screen that lets you know where you’re typing or where your mouse is pointing. If the cursor is invisible in Word 2007, don’t fret, this is actually a common problem. But sources of this problem may vary, so it is first necessary to identify the particular cause for your specific case.

Your Drawing Cursor Might Be Enabled

One of the causes may be that your drawing cursor is enabled. A drawing cursor is a different type of cursor that is not designed for making text edits. To disable the drawing cursor, follow these steps:

1. Go into “View”

2. Go into “Toolbars”

3. Go into “Drawing”

Now a drawing toolbar will appear. If a cursor button in this toolbar shows up as clicked, it means that the drawing cursor is enabled in your computer. Click on the button again to disable the drawing cursor.

Wrong Settings in the Control Panel

Configurations in your computer may make the cursor disappear while typing. In order to check whether this is the problem, follow these steps:

1.Go into your computer’s Control Panel.

2.Go into “Mouse” under the Device Manager.

3.Go into “Pointer Options”

4.Check “Hide Pointer While Typing”

If the “Hide Pointer While Typing” box is checked, it means that this is the cause of your problem. Simply uncheck the box to make your cursor appear while you type.

External Problems

Physical settings outside your computer settings may be causing the problem. If you are using a laptop, your mouse pad may be too sensitive and it is registering your unintended movements (brushing against the mouse pad as you type) as actual intended strokes on the mouse pad. Disable the mouse pad to solve this problem.

Talk To A Professional

If above recommendations do not resolve the issue, it is possible that there may be further complications in your computer system. At this point it is recommended that you call for help from the local experts. TalkLocal can help you find the correct local expert to fix your computer quickly, which saves you time and energy in a stressful situation.

AVG Not Updating

Thursday, May 2nd, 2013

AVG Not Updating - Computer Repair

AVG is seen as one of the best, free internet security programs available, but even the best have their problems.  One of the most common problems is AVG’s updates. Red exclamation marks illuminate the screen of the dashboard, telling you that your AVG is out of date, but every time you click the update it does not work.

Do not fret!  We have some easy ways to end your issues with AVG not updating.

Close Various Applications

Running various applications connected to the internet can interfere with AVG updating the servers.  In closing these applications, AVG can have an easier time connecting to the update servers.

Update Manually

To get the update without using the automatic AVG updater, which could be the problem, the updates can be made manually. The AVG site provides their update files for download. The full instructions for manual download are provided here.

Reinstall AVG

If manual installation of the updates does not work, try reinstalling AVG. Various problems could have gone wrong during the first installation. In reinstalling with the latest version of AVG, these various problems with earlier versions of the software may have been fixed. Be sure to download and install the latest version of AVG.

Check Firewall

Your system’s firewall may be blocking the updater from downloading the update. To check the firewall: Go to the Start Button -> Control Panel -> Security -> Windows Firewall -> Inbound Rules. Look at the list of inbound rules and find the AVG Installer. If it is listed as blocked, switch to allow.

Consult A Professional

These solutions will hopefully correct your AVG update errors. If you are still having trouble with your AVG updater, just use TalkLocal. We will connect you with up to three professionals in your area, who will be able to help you when you need them!

Troubleshooting A Slow Toshiba Laptop

Wednesday, May 1st, 2013

Troubleshooting A Slow Toshiba Laptop - Computer Repair

Few computer issues are more crippling than when your laptop gets bogged down and its speed diminishes. There are a variety of factors that could be causing this troublesome trend. The following is information for a specific demographic of laptop users. This article provides information on troubleshooting a slow Toshiba laptop.

Toshiba laptops are not prone to slowdowns more so than other laptops, thus, these tips will most likely translate to users of most laptops.

End Unnecessary Processes

Toshiba laptops can slow down significantly if the machine is forced to run too many processes at one time. To view which processes are running at a given time, you will want to access the Task Manager.

1. To do so, press Ctrl+Atl+Delete and click “Start Task Manager”.

2. While in the task manager, click on the tab that reads “Processes”.

3. In this tab, it will show you all the processes that are currently running — some of them important to your computer, and others not. For processes that you do not need active, right click on them and select “End Process”. It is likely that the more processes you cancel out of, the faster your computer will run.

Run A Disk Cleanup

If the data on your Toshiba laptop is fragmented, the machine is not able to access the information as quickly as it should. To remedy this issue, you will want to run a disk cleanup. To access this feature, take the following path:

Start > All Programs > Accessories > System Tools > Disk Cleanup

Here, you will be able to compress the files on your Toshiba laptop and make the information easier to access for the machine. Furthermore, if you select the “More Options” tab, you are able to clean up information in the following areas:

– Windows components

– Installed programs

– System restore

– Files to delete

A cleanup like this will more than likely speed up your laptop.

Need Help Troubleshooting A Slow Toshiba Laptop?

These are general solutions that often work in speeding up a Toshiba laptop, but they might not work for everyone. For those who are left to continue troubleshooting a slow Toshiba laptop, consult a computer repair technician. Finding one in your area is easy through TalkLocal. Our service can get you talking with the right professional on the phone in a matter of minutes.

Sound Card Not Recognized

Tuesday, April 30th, 2013

Sound Card Not Recognized - Computer Repair

Is your sound card not recognized by your computer? When the sound card is not recognized by the system, no sound comes from your computer. A few factors can cause the sound card to be unrecognized. Here are some solutions for an unrecognized sound card.

Causes of Unrecognized Sound Card

1. First, make sure the issue is the sound card and not the speakers. Turn the speakers on to test them. If they work on devices other than your malfunctioning computer, then the problem is the sound card. If the speakers do not work on any device, then simply replace your speakers.

2. The sound card might be incompatible with the operating system, causing it to not be recognized. Make sure your sound card matches with the system.

3. A virus could destroy the device driver, which causes your computer to not detect the sound card. Regular virus scans can prevent this issue from occurring.

4. Dust accumulation is one of the worst enemies of your computer, next to viruses. Dust entering the inside of your computer prevents the sound card from being recognized. Clean your computer regularly with a compressed air can to blow dust away.

5. Dislodgement can also cause the computer to not detect the sound card. If you move your computer around a lot or it gets bumped, the internal devices might shift. Keep your computer on a hard level surface at all times to avoid possible sound card dislodgement.

Solutions for Unrecognized Sound Card

1. USB sound cards are available if you do not wish to replace the internal sound card. Purchase a USB sound card and plug it into your computer. You can also get a PCI sound card instead of a USB one. Install any necessary devices or software if needed.

2. When the computer does not recognize the sound card, make sure all of the appropriate drivers that come with the sound card are installed. If the sound card drivers are not installed, the sound card will appear as an unidentified device. You can look for this under Device Manager. If you know the model of the sound card, download the drivers for it from its website.

Take a look at this article and this article for further assistance.

For Professional Help

If you are still having difficulties with your sound card, please contact TalkLocal to help connect you with knowledgeable IT technicians in your local area. We will find and connect you with up to three computer technicians who will be able to help you, when you need them most.