Archive for the ‘Computer Repair’ Category


Spilled Coffee On Laptop

Thursday, March 21st, 2013

Spilled Coffee on Laptop - Computer Repair

So you spilled coffee on your laptop? Open the laptop (lift up the screen), turn off the power, and flip it upside down immediately. This will help the coffee spill out, and minimize damage to your laptop’s circuit board. Keep the laptop in that position for a while to let as much of the coffee as possible spill out. Now, you can try to remedy spilled coffee on laptop, as described below.

What to Do

1. Did you kill the power? The laptop is turned off? To avoid any danger of an electrical shock, wear a pair of rubber gloves. Unplug the computer from any power outlets and the adapter. Take out the battery. Leave it without the battery for around 10 minutes.

2. If you have sugar with your coffee, chances are that your computer will be extremely hard to fix due to the sugary residue/stickiness. Then it is best to just package your computer to a professional and save yourself from further damage and time.

3. Disconnect any electrical devices like headphones or USB memory sticks plugged into the laptop to proceed, and then start popping off the keyboard keys by using a dull knife as leverage between the computer frame and the gap of the keys.

4. Mop up any of the coffee residue you see in the keyboard before proceeding any further. You may also want to dump the keys in water to cleanse them of the coffee for future use. It may help to use compressed air to clean certain parts of the computer.

5. Proceed to clean the lower panels of your computers by unscrewing the frame. Use compressed air to clean the delicate or hard-to-reach parts, and use q-tips to mop up any messes inside. Once you clean up what you can, leave your laptop to dry.

6. After leaving the laptop overnight, or for a sufficient amount of time to let the coffee dry, reassemble the laptop and see if the computer functions. If it does not, package the computer and seek the quickest professional help.

Additional Help

If you feel like you need professional help for spilled coffee on laptop, TalkLocal can not only help you find local professionals, but connect you directly to them, as well!


My Webcam Is Not Working

Wednesday, March 20th, 2013

My Webcam Is Not Working - Computer Repair

“My webcam is not working!” If you are screaming that phrase or something like it, take a deep breath, and read this article to figure out how to fix your webcam. First make sure that the webcam you are using is good by testing it with another computer. Also make sure that the webcam is connected to your computer and the power is on. Check to see that the camera cover is off, if there is one for your webcam. If all of these things check out, there may be any of a number of issues with your webcam.

Webcam Not Detected by the Computer

One of the more common problems people experience is that their webcam is disabled in their computer settings. To check this problem, go into your BIOS setup menu during your computer’s bootup process. Look through all pages of your BIOS setup menu.

Now you want to make sure that the devices are compatible with your computer. Follow these steps:

1. Make sure devices are connected and powered on.

2. Click Start, and access the Run interface..

3. Enter “msinfo32” and Click the “+” sign next to the “Components” to expand the info.

4. Click “Problem Devices”. If anything appears, the information should list the device and the type of the problem experienced. Google or seek help from the experts on solving these specific cases.

Wrong Drivers Installed

Update your drivers to check for this problem. In order to update your drivers, follow these steps:

1. Download the most recent drivers from your computer manufacturer’s website.

2. Open your computer’s device manager.

3. With your device manager, specify the hardware for which you want to update the drivers.

4. Right click the hardware and click on “Properties”.

5. Click the Driver tab inside “Properties”.

6. Click the “Update Driver” button.

7. Locate the downloaded drivers from your computer manufacturer’s website.

For more specific directions explaining this step in regards to Windows 7, Vista, or Xp, click this link: http://pcsupport.about.com/od/driverssupport/f/driverupdate.htm


Bad Hardware

If the above recommendations do not resolve the issue, it is likely that the hardware is damaged. At this point it is recommended that you buy a new webcam or switch the one you have for a new one, provided that the one you bought is still under warranty. You may even want to call for help from the local experts. TalkLocal will connect you with up to three computer technicians in your area who should be able to help you out.

How to Transfer Data from PC to PC

Tuesday, March 19th, 2013

 How to Transfer Data from PC to PC - Computer Repair

Data transfer is one of the most common actions in computer use. There are numerous ways in which you can transfer data between computers. However it is advised to know the risks involved in the different processes of transferring data between computers. Here are some tips on how to transfer data from PC to PC.

Relying on the Internet for Data Transfers

Many websites including Google provide file hosting. File hosting means that the owners of the website will allow you to store files and data up to a certain extent of size on their servers. Google’s Google Drive, for example, lets you store up to 5 GB for free. Any amount above that is premium that you must pay for.

Storing files in an online server gives you flexibility. Since it’s on the internet, you can upload and download the files from any computer that is connected to the internet. But there are also risks involved with this. Viruses present in computers or the servers can penetrate an entire network of computers by attaching itself to a file being uploaded or downloaded in the server.

Exercise caution when downloading a file, even when you had previously uploaded that file. Also make sure that the server or website that is providing the file hosting is credible – there are many websites that plant malware or viruses into the files that you download.

If the file size is small, you may want to consider just emailing the files to yourself. Just set up two email accounts and send the files as attachments from one account to another. You can even send the files to yourself on one email account. Although this process may seem different from uploading a file to an online server, it’s the same thing. Your emails are stored in the server of the email provider.

Relying on Physical Hardware for File Transferring

You can buy and use an external hard drive to store your files and to transfer them between computers. USB drives or  re-writable CDs allow for a constant shift of different files between different computers. But one should be advised that using physical hardware for file transferring has risks as well.

A virus may still attach itself to the data. You may also lose the physical hardware used to transfer and store files, thus losing the files  in the process if you do not have backups made. Sometimes the physical hardware may be damaged due to environmental conditions.

Need Help?

If your physical hardware gets damaged, you may want to call for help from the local experts. Seva Call can help you find a high-quality computer technician in your area when you need it.

DVD Drive Won’t Work After Windows 8 Install

Monday, March 18th, 2013

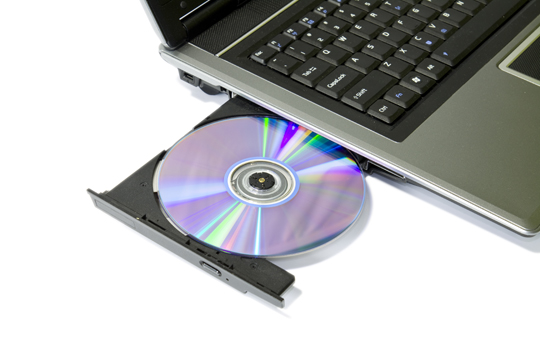
DVD Drive Won't Work After Windows 8 Install - Computer RepairIf you have noticed that your DVD drive won’t work after a Windows 8 install, you are certainly not alone. This is a very common issue that users are running into. Unfortunately, it is somewhat common for Windows not to recognize the CD/DVD drive following a Windows 8 install.

When you insert a CD or DVD into the drive, a window should pop up. If this does not happen, and the drive does not show up in File Explorer, that means that Windows 8 does not recognize the CD/DVD drive.

Here are some steps you can take to resolve the issue.

Check for the drive in BIOS

1. Access the computer’s BIOS to see if the drive is recognized there. To do this, first shut down your computer. When you power the computer back on press F10 right away to access the BIOS screen.

2. For a laptop, take the following path: System Configuration > Boot Options > Boot Order > Press Enter.

3. For a desktop: Storage > Device Configuration > Press Enter.

4. The absence of the CD/DVD drive on the BIOS page would indicate that you likely have an issue with your hardware.

Reset Computer’s Power

Occasionally, the drive’s communication with Windows drops out. You may have tried restarting the computer to no avail. Instead, try resetting the power completely. Shut down the computer, and once it is off, unplug the power cord to stop all power from entering.

Wait for a little bit, and reconnect the power cord (or laptop battery) and see if that resolves the issue.

For Desktop Owners

If you own a tower computer, the issue might lie in the physical connection between the CD/DVD drive and the software. Remove the side panel of your computer tower and locate the drive. Detach and reattach all of the cables to ensure that they are properly connected.

Find And Fix Problems

Windows 8 comes equipped with a program that troublehoots hardware issues. To access it, go to your control panel. There, under ‘System and Security’, click on ‘Find and fix problems’. Now, under ‘Hardware and Sound’ select ‘Configure a device’.

Let the program operate. It will bring to your attention any issues it finds and also provide a step-by-step process on how to resolve them.

Still Not Working?

Unfortunately, you can try seemingly every solution and still not fix the problem. That is when you turn to the computer repair professionals. Try finding help through TalkLocal. We know computer problems can be frustrating, but finding someone to fix them doesn’t have to be.

How to Clean Inside of Computer Tower

Sunday, March 17th, 2013

How to Clean Inside of Computer Tower - Computer Repair

Why Clean Your Computer Tower?

Dust can cause many issues inside your tower that will prevent your computer from functioning properly. Dust clogs the fans, which are crucial for cooling your circuit boards, and you run the risk of overheating. Dust can even slow down your computer. Overall, it decreases the lifespan of your computer tower.

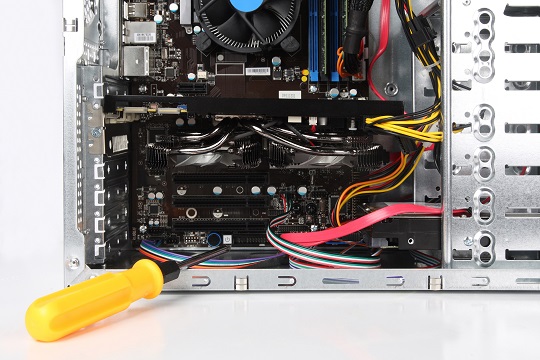
Cleaning your computer tower is very important for its durability and longevity. If you want to know how to clean inside of computer tower, you can do this yourself at home.

Materials Required

You will need:

– A cotton or microfiber cloth

– A compressed air can

– A screwdriver

– A vacuum or a small handheld dust buster

How to Clean the Inside of the Computer Tower

1. Disconnect all of the cables connecting your computer with your computer tower.

2. Remove the screws on the back of the computer tower that hold the side panel in place. If you have one, disconnect the side fan that is plugged into the computer tower. Put the side panel aside.

3. Slightly dampen the cloth and wipe down the inside of the side panel. This will remove any dust. If you have a side fan, blow the dust away with the compressed air can.

4. You will need a vacuum hose or a small handheld dust buster in conjunction with a can of compressed air. You may need to place your computer tower on its side to thoroughly clean the inside easily. Aim the end of the compressed air pipe at the fan inside the computer tower. While you are blowing the dust out of the fan, use the vacuum to immediately suck up the dust so that it does not settle back into the computer tower.

5. Using the compressed air and vacuum, spray the heatsink, cable tray, fans, and motherboard until dust no longer comes off of them. Remember to spray and vacuum together so that no dust remains.

6. Use the damp cloth again to wipe dust from the bottom of the tower.

7. You are now ready to reassemble your computer tower. Re-tighten the screws that hold the side panel and computer tower together. Reconnect your computer and tower.

Further Assistance

Cleaning the inside of your computer’s tower is a fairly easy process, but if you would like professional assistance, just use TalkLocal. We will connect you with up to three, high-quality, computer repair technicians in your area, so you can find the help you need.

No Wireless Connection Icon

Saturday, March 16th, 2013

No Wireless Connection Icon - Computer Repair

Does no wireless connection icon appear on your computer screen? There are three common problems to that can cause the wireless connection icon to disappear. This can be extremely frustrating when you’re trying to troubleshoot your networking problem.  The majority of these problems are easily solved and require only minimal effort on your end.

Incorrect Installation

You first must ensure that your computer can actually use a wireless connection.  Therefore, you need to ensure that your wireless card was installed correctly.  If you installed the wireless card yourself, you’ll need to ensure that you installed the card properly and that the card is not faulty (bent pins and connectors can indicate a bad card).  Furthermore, check that your wireless card is compatible with your computer and that it is the right size for the slot.

Out Of Date or Incorrect Drivers

Another common problem is that you may have out-of-date or incorrect drivers for your wireless card or connection.

1. Go to your Device Manager and then open up the Network Adapter subheading.

2. Click on the wireless card or device and click “Update Driver.”  Windows will automatically check for working driver for your wireless device from the manufacturer.

Zero Wireless Configuration Problem

The Zero wireless configuration service coordinates all of your wireless connections and networks.

1. Make sure that the service is running by going to the Start menu and clicking on the “Run” option.

2. Type in “services.msc,” which will bring up a list of running services, and look for Wireless Zero Configuration.

3. Check to see if it’s running. If it isn’t, start up the service.

Let Us Find the Right Help for You

If you have tried all of these steps and you still have no wireless connection icon, then it’s time to call in a professional to diagnose your computer troubles.  TalkLocal can connect you with up to three, high-quality computer repair technicians in just minutes!

Chromebook vs. Macbook

Wednesday, March 13th, 2013

Chromebook vs. Macbook - Computer RepairIf you are a fan of Apple and its many products, you likely believe that the technology juggernaut’s Macbook is the standard for all laptops. However, Google, which has proven to be a formidable foe for Apple, provides a similar offering with their Chromebook.

Pitting the Chromebook vs. Macbook can highlight which laptop computer best suits your needs. Here are a number of characteristics to consider, and which laptop might be better.

Price — Advantage: Chromebook

Simply stated, Apple products are not cheap. The company has become a trusted brand among technological consumers, and those consumers remain loyal to their brand. Whether this contributes to Apple’s pricey products, that’s up for speculation, but Chromebooks are far cheaper than a Macbook. Some might argue that you must pay more for a superior product. Let’s see if a Macbook is truly superior.

Heavy computing — Advantage: Macbook

If you are looking to do more than surf the Internet, check e-mail and utilize applications, you will want a Macbook. A Chromebook is an unpowered notebook, meaning it is essentially a more scaled back version of a full fledge lap top. For this reason, Chromebooks have their limitations.

Creative pursuits, such as graphic design, video editing and recording, and mixing audio should be saved for a Macbook. Chromebooks are ideal for the more generic tasks, so don’t plan on doing much gaming.

Data storage — Advantage: Draw

Some might suggest that Chromebook’s method of storing information is the wave of the future, but it will take some getting used to. Instead of saving information to a hard drive, Chromebooks save everything to the virtual cloud. This simply means that the information is stored in cyberspace where it can be accessed from any machine.

Macbooks, on the other hand, contain a hard drive so you can store information locally. Both are perfectly fine methods of storing information, so it just depends on which one you prefer.

Keyboard/Typing — Advantage: Macbook

Have you ever had a laptop where the keyboard was scaled down slightly from a traditional keyboard. That makes typing a nightmare. Luckily, with both a Chromebook and Macbook, the keyboards are intuitively designed, which allows for smooth typing.

The only reason the Macbook would get the edge in this category is because, on most new models, the keys are backlit, which makes typing in the dark a cinch.

Always Have Savvy Support on Hand

When you declare a winner in the battle of Chromebook vs. Macbook, it is still important to properly maintain your computer of choice. Computer issues can be a huge headache. Some issues can only be remedied by computer repair technicians. One of these helpful professionals is never very far away with TalkLocal! We’ll connect you with up to three computer technicians in your area in just minutes.

How to Connect A MacBook Pro to an HDMI TV

Sunday, March 10th, 2013

How to Connect A MacBook Pro to an HDMI TV - Computer Repair

You have a MacBook Pro. You have an HDMI TV. What better way to use them then together? Connecting these two electronics is really quite simple. This article will tell you how to connect a MacBook Pro to an HDMI TV.

Connecting to an HDMI TV with a Newer MacBook Pro

Newer models of the MacBook Pro (April 2010 and beyond) have a Mini DisplayPort connection, which makes it much easier to connect your MacBook Pro to your HDMI TV. Simply go to the Apple Store and purchase a Kanex Mini DisplayPort to HDMI cable and you should be able to use it to connect to your TV.

Connecting to an HDMI TV with an Older MacBook Pro

Older versions of the MacBook Pro may have a variety of connections, so you will have to buy a different adapter to connect to your TV depending on which model you have. The Apple Store sells adapters for virtually every model they have ever made. You can go online and compare the different connections to your MacBook Pro to determine which adapter you need to buy.

Additional Help

If you are still confused, you may want to seek the help of a computer professional to help you figure out which adapter to buy and how to set it up. With the help of TalkLocal you can receive calls in minutes from high quality computer professionals in you area that are available when you are.

Windows XP Printer Connection Cannot Be Removed

Saturday, March 9th, 2013

Windows XP Printer Connection Cannot Be Removed - Computer Repair

A common problem that seems to be popping up for people running computers on the Windows XP operating system is that the printer connection cannot be removed their from the network.  People try to remove their printers for multiple reasons.  They may need to add a different printer, the printer may be malfunctioning or broken, or they may just want to change the printers set on the network.  Whatever the issue may be its quite frustrating when you cannot get it to react the right way.

Error

When a printer connection cannot be removed from a Windows XP computer, you may get an error that says “Printer connection cannot be removed.  Operation could not be completed.”  A lot of people try to remove the printer driver, restart the spooler, disable the sharing ability from the computer, among other things, but none of these processes seem to do the trick.

Solution

There is one fail-safe way to fix this issue that takes almost no time at all.  If you disconnect the network cable and delete the printer, then the printer should be disconnected or removed after you restart the computer. However, if the error you receive says “access denied” instead of “operation cannot be completed” you are in a domain environment and it is the default policies of this domain that may be causing the issues.

Further Assistance

If your printer connection cannot be removed after attempting all of the above solutions, please try to get in contact with someone with IT experience who can help you.  If you are looking for a reliable local service or business use TalkLocal to be put in contact with a professional within minutes.  All you have to do is input your problem and availability and TalkLocal will do the rest.  We will connect you with up to three computer technicians who will be available to help when you need them.

Ethernet Connection Won’t Work

Thursday, March 7th, 2013

Ethernet Connection Won't Work - Computer Repair

While wireless internet seems to be the standard in today’s age, many computer users still opt for wired ethernet connections. A wireless internet connection is generally considered more convenient, but a wired connection via an ethernet cable proves to be faster and more reliable.

— that is, unless your ethernet connection won’t work.

If you have plugged your computer’s ethernet cable in, but still cannot connect to the internet, here are a few things to check for.

Malfunctioning Or Damaged Modem

For the sake of thoroughness, search for the source of the issue by starting at the beginning, which is the modem. The modem may be damaged or installed incorrectly, which is cutting you off from making a connection.

Make sure the modem is plugged into the wall and that all the appropriate lights on the front are illuminated. If everything appears to be working, try locating the reset button and pressing it. Often, simply resetting the modem will resolve the issue.

Also, make sure that the ethernet cable is plugged into the correct port on the modem. With so many ports for ethernet cords, it is easy to accidentally plug your cord into the output instead of one of the inputs.

Damaged Ethernet Cable

If everything checks out with the modem, but your ethernet connection won’t work, move on to the cord. Damaged ethernet cords can stop you from properly connecting to the internet. Inspect the cord to see if anything appears damaged.

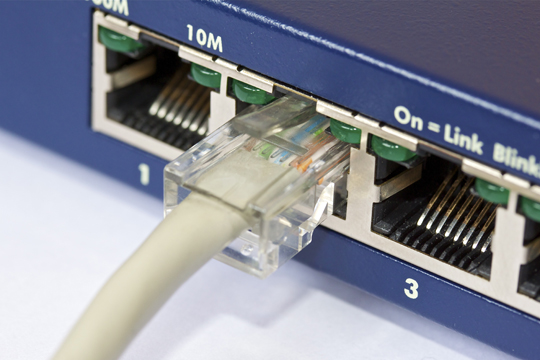
The most common damage to ethernet cables occurs at the jack. The small plastic prong that fits the cord into the port can often break off. The jack no longer fits snuggly into the port when this happens. Ethernet cables can also fray, which is very noticeable.

Computer Port Not Working

If the modem and ethernet cord are both functioning normally, perhaps your computer’s ethernet port is not working. You can troubleshoot this issue by visiting your computer’s control panel and device manager. Unfortunately, if you have not diagnosed the problem at this point, the issue could be traced back to issues with your computer’s hardware.

Seeking Professional Help

Computer issues of any kind can be incredibly frustrating. Computer repair technicians have worked through just about every possible issue and are a great ally to have in these situations.

Try using TalkLocal for to find a computer repair technician near you. Our service is fast, free and yields results that fit your specific criteria.