Archive for the ‘Computer Repair’ Category


Recover Lost Network Password

Sunday, March 3rd, 2013

Recover Lost Network Password - Computer Repair

We all had a time when we have forgotten passwords. Forgetting a network password is worse, as this gives you access to the Internet, the place you want to go the most on your computer. Recovery of a password is an easy and simple process. All you have to do is access your wireless router. Below are the steps to recover lost network password.

Connect to the Router​​

1.     Start the command prompt.

2.     Run “ipconfig”.

3.     Find “Default Gateway”- the number specified is the router IP address.

4.     Copy & Paste the router IP address into an Internet browser. This will prompt a username and password for access to the router.

5.     Type the default password and username, provided in the router’s manual, or put your configured password and username for the router into the prompt. After this you should have access to your router’s password.

6.     If you have forgotten your password or username to the wireless router, reset your router as specified by the manufacturer and then use the default password and username to access the router.

Suggestions for network passwords

1.     Do not store your passwords anywhere on your computer.

2.     If you can’t memorize the password, write it down and store it in a secure location.

3.     Make the password hard for others to guess but easy to remember. Try using a combination of capitalized and lower-case letter, numbers, and symbols. Also avoid family birthdays or names, as these can be easy to discover.

Additional Help

Passwords can be easily forgotten, but always try to make them accessible and memorable for yourself. If you would like a computer technician to help you find a lost password, or if you have any other computer trouble, use TalkLocal. We will connect you with up to three high quality computer technicians in your area, who will be available to help you when you need them.


How to Completely Erase a Hard Drive

Saturday, March 2nd, 2013

How to Completely Erase a Hard Drive - Computer Repair

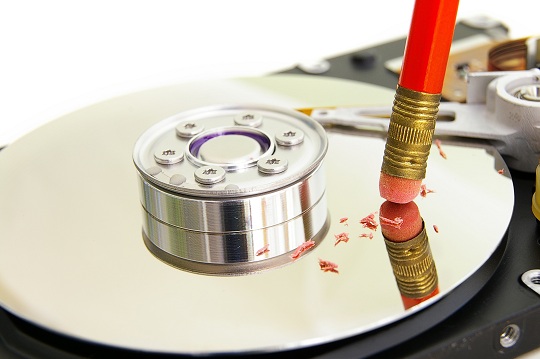
Completely erasing a hard-drive is not easy, and there are various misconceptions. We have some tips to let you know how to completely erase a hard drive.

Deleting Files Manually

Completely erasing a hard drive is not easy, as manually deleting files does not do the trick. In deleting files,  the files are not actually erased. Their locations have become invisible to the computer’s operating system. With a simple file retrieval program, deleted files can be recovered and your sensitive information that you deleted can be used for malicious purposes.

Formatting 

Formatting can make it more difficult to recover files than deleting them from your recycle bin, but not it does not completely erase your files. Formatting erases all bookkeeping information and checks for good and bad sector (ones that are scratched). Then it creates local internal address tables for the location of information. Formatting does not delete files, so a computer specialist or downloadable programs can recover most or all the files. Again, this can leave your data open to misuse. The only way to completely erase a hard drive is by wiping it.

Wiping

Wiping or disk scrubbing is the only way to completely erase a hard drive. Wiping overwrites your hard-drive with data several times until it is impossible to recover any files that existed before the wipe. Most programs overwrite the data with numbers, and do some formatting. There is free software available that can let you perform a disk wipe. One of most popular is Darik’s Boot and Nuke. Here is how you can use Darik’s Boot and Nuke to wipe your system.

1.     Download Darik’s Boot and Nuke from the website.

2.     Boot Darik’s Boot and Nuke CD ROM before your hard drive boots. Darik’s Boot and Nuke Screen will appear.

3.     Type in autonuke to automatically disk wipe or enter to start a  customizable disk wipe. ​

4.     For customizable disk wipe press “M” for methods, these will show you various methods the program can use to wipe your hard drive, and select one.

5.     Select a drive for wiping and press the spacebar to start the wipe

Additional Help

In using disk wiping, a hard drive can be completely erased and can be now to safely donated, sold, etc. For professional help in completely erasing your hard drive, just use Seva Call. We will connect you with up to three high quality computer technicians in your area, in just minutes.

Mac OSX Lion: Issues

Friday, March 1st, 2013

Mac OSX Lion: Issues - Computer Repair

The Mac OSX Lion stated its purpose as simplifying the existing operating system and combining it with an iOS experience. What Lion was supposed to deliver was the simple and easy to use interface that the iPhone and iPad held and bring it to the desktop experience. This doesn’t seem like such a bad thing when put like that but what Lion has brought to the users is a new version of an operating system where even though the user experience has been simplified in some areas and oddly complicated it in other areas, the fact remains that there are performance issues with Lion.

Mac OSX Lion: Issues

– The memory management is broken. Lion has slowed down the user experience for many users because it is very memory-greedy.

– Lion has been known to randomly crash, resulting in a totally black screen and the recovery time is very high.

– The Wi-Fi connection seems to be dropping at fairly regular intervals, and the only way to get it back up is turning the adapter off and on again.

– Running Lion causes a significant drop in the MacBook Pro battery life

– There have been known to be video crashes which cause freezes.

– Rosetta is Apple’s Power PC emulation software and Lion does not support it.

– There are several other such apps which work fine on Snow Leopard but appear to be broken when run on Lion.

– The auto-light feature is known not to work very accurately.

Additional Help

These are just some of the issues that users have been facing as they use Lion. Even though it has attempted to simplify the user experience many users seem to think that they’d still rather stick with Snow Leopard. If you are having these or similar issues with Mac OSX Lion, use TalkLocal. We can connect you with up to the computer repair technicians in your area in just minutes.

Data Backup and Restore in Windows XP

Thursday, February 28th, 2013

Data Backup and Restore in Windows XP - Computer Repair

Every computer user’s worst fear is losing valuable data to a crashed computer. Don’t let these files disappear forever! Using the built-in backup program in Windows XP will save your files and allow you to restore your computer after an emergency. Use this guide to data backup and restore in Windows XP so that your files can be restored.

Data Backup and Restore in Windows XP

If you have Windows XP Professional, then the restore program is already installed in the system. For Home Edition users, the backup utility must first be installed. The utility is available on the operating disk acquired when you purchased the system.

1. Insert the disk. When the welcome screen appears, click “Perform additional tasks.”

2. The system will then ask, “What do you want to do?” Click “Browse this CD.”

3. A menu will appear. Click on the “VALUEADD” folder. Inside this folder is the “MSFT” folder. Open this folder.

4. From there, open the “NTBACKUP” folder. This folder contains the backup utility installation packages.

5. Click on the “NTBACKUP” file and let it install.

6. After installation, close out of the window. The backup utility can now be found in “Accessories” > “System Tools.”

Using the Backup Utility

1. Open “Backup or Restore Wizard”.

2. Check “Back up files and settings” and click “Next”.

3. It will ask, “What do you want to back up?” Read over the options and choose the one that works best for you and click “Next.”

4. The program will then prompt you for the A disk. Click “No.”

5. Next it will ask you to “Choose a place to save your backup.” Click “Browse” to view possible storage spaces. For the most secure backup it is recommended that you save your information to an external drive. After the drive is connected to the computer, click on its icon to save your data.

6. Name your backup file and click “Next.”

7. The prompt will now say, “Completing the Backup or Restore Wizard.” Click “Finish” to compress the file and save it to the external drive. Make sure you back up your computer regularly to ensure no important data is lost.

Restoring Backed Up Data

1. Open the Backup program located under “System Tools” in the “Accessories” folder

2. ​Click “Next” on the Welcome Page and check “Restore files and settings.”

3. The prompt will now ask, “What to Restore.” If your missing files are located on an external drive, then click “Browse” which will open a new prompt. Click “Browse” again to find your external drive.

4. Click on the appropriate back up set and click “OK.”

5. After a few seconds, the file should appear in the “Backup Identification Label” window

6. Double click on the backup set to view its files

7. The backup set will appear under “Items to Restore.” By double clicking on the file you can view all of its backed up items. Check the files you would like to restore and click “Next.”

8. The files will automatically restore to their original locations unless this is changed under the “Advanced” settings. Click “Next.”

9. It will then ask if you would like to “Leave existing files.” It is recommended that you leave this checked. Click “Next” and then “Next” again to keep the default options selected. Click “Finish.” After the program runs your files should be restored!

Additional Help

If you ever have a complete computer disaster, feel free to use TalkLocal to find a high quality computer professional to help you in minutes!

Computer Keeps Restarting at Startup

Wednesday, February 27th, 2013

Computer Keeps Restarting at Startup - Computer Repair

A PC that keeps rebooting and fails to load is one of the most common failures in Windows, and there can be a variety of issues behind it. Potential problems range from virus infections, improper shutdown, or corrupted registry, to CPU overheating. However, assuming your computer does not have a virus, registry, or hardware issue the following guide can help you if your computer keeps restarting at startup.

Computer Keeps Restarting at Startup

1. Switch on your computer and press the appropriate key (Usually it’s F1, F2, F12, or Delete) to enter the BIOS setup. Change your first boot device priority to CD-ROM.

2. Insert the Windows installation disc into the CD-ROM drive. Hit the F10 key from your keyboard to save the BIOS settings and exit.

3. Your computer should now restart and will try to boot from CD-ROM.

4. When you see the Professional Setup screen press R to initiate ‘Recovery Console’

5. If asked which Windows installation you would like to log onto, type 1 and hit the Enter key. (Assuming Windows is installed on the C: drive). Type in the administrator password and press Enter.

6. You should now get a command prompt, C:\Windows>. Type ‘chkdsk /p’ command and press Enter. It may take a few minutes to complete the process.

7. Once it is finished, type ‘exit’ and press the Enter key to restart your computer. Hopefully your computer will now be able to boot into Windows without any problems.

Additional Help

If the above guide fails to fix the issue, you may want to consult a professional computer technician. Use TalkLocal to connect you to a qualified PC professional in minutes! We will put you in contact with up to three local professionals in just minutes!

Custom Built Computer Freezing

Tuesday, February 26th, 2013

Custom Built Computer Freezing - Computer Repair

When you take on the task of building your own computer, or making modifications to better suit your needs, you want to make sure that it will last and serve you well.  But is your custom built computer freezing? There could be a few things wrong with it, but fear not!  If you could custom build your own computer you can surely fix this problem.

Potential Problems

There could be a few things wrong with your custom built computer that will result in freezing:

1) Overheating

2) Faulty RAM

3) Faulty programs

Solutions

If overheating is the problem you should identify the problem and work to fix it.  Listen to your computer.  If the fan sounds like it is working too hard or making too much noise then the CPU could be getting too hot for the computer to handle.  Check to make sure that there is not too much thermal paste and then see if you can add another fan or an additional cooling option.  The computer should return to normal function if overheating is the only issue.

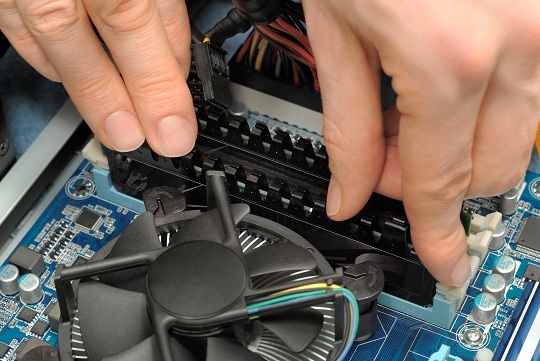
Another possible reason that your computer is freezing is that you have a faulty RAM.  You should consider doing a MEM test.  To do this you would have to find some re-writable CD’s in order to run the test when you start your computer up again.  A great tool to check the stability of your computer is MEMtest86 but it will immediately pop up with errors if you do have a bad RAM.  If this is the case you can simply replace the RAM card to rectify the situation.

If neither of these solutions help to stop your computer from freezing, you may have a faulty program or installation in your computer.  You can systematically delete and replace programs until you find the one that is causing you problems.  If you do not want to do all that work, try to completely clear the computer and re-install updated, clean versions of everything you need.

When you are using a custom built computer and something like this happens you should troubleshoot immediately.  Every time your system freezes you have to improperly shut down which puts you at risk for file corruption.  You may not find out that you are damaging your own work until further down the road when it may be to late.

Additional Help

If you cannot seem to fix the issues with your custom built computer by yourself you may want to seek professional help.  Use TalkLocal to be put in contact with reliable local businesses within minutes.  Simply input your problem and availability and TalkLocal will do the rest! You will be connected with up to three IT service technicians who will be able to help you.

USB Flash Drive Not Working

Monday, February 25th, 2013

USB Flash Drive Not Working - Computer Repair

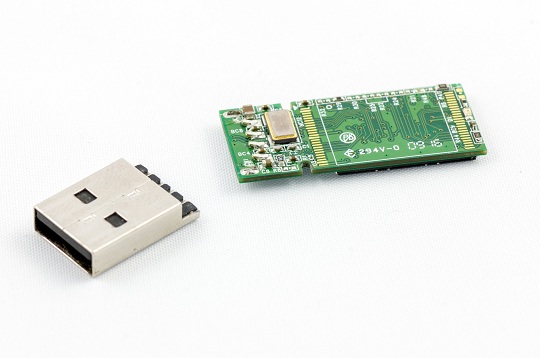
USB flash drives are an amazingly easy way to  transfer data from your computer and take it with you.  But when your flash drive begins to malfunction it can be incredibly annoying and unhelpful.  You should consider a couple of different things that could be the cause of your USB flash drive not working.

Possible Problems

1)     It’s at the end of it’s life expectancy.

2)     The files are corrupt.

3)     The files were not copied properly.

4)     Driver problems.

5)     General compatibility issues.

Solutions

Generally a USB flash drive has a life expectancy of approximately ten years. Now, this should not be an issue since flash drives are typically not used for that long. However, if the drive has reached its life expectancy, you simply need to replace the drive and you’ll be good to go.

A file that has become corrupt will not be allowed to open on your computer.  You need to delete the file, save it again, and then open it.  Your computer will not allow the file to open in order to save itself, the USB, and other files from becoming corrupt.  It may seem like your USB has stopped working, but in fact your computer is simply protecting itself.

Your USB will also not work correctly if your files have not been copied properly.  In this case you will read an error, but don’t worry;  simply copy the file onto the flash drive again.  You should remember to properly remove your flash drive from your computer.  On your desktop’s toolbar, look for an icon called “Safely Remove Hardware from Your Desktop.” Click the icon, click on your device, and click Eject. Your computer will prompt you in a few seconds, when it is safe to remove the drive. Removing the drive improperly will lead to files becoming corrupted or not copied properly.

Many people who upgrade their operating system to Windows 7 frequently complain that they are having issues with using their USB flash drives.  This is a problem because the upgrade can cause a driver problem.  There is a missing driver or the driver needed to read the USB is currently being used.  You should go to the Microsoft website to get this issue resolved.

Continuing Problems

If the USB continues to malfunction it may be a more serious issue with the computer or the device.  You should try to talk to a professional so that you can get the best help possible.  The easiest, fastest way to get in contact with reliable local IT service technicians is to use TalkLocal. We will connect you with up to three reliable technicians in your area, so you can get the help you need.

How to Delete iPod Backups on Computer

Sunday, February 24th, 2013

How to Delete iPod Backups on Computer - Computer Repair

Your iPod is the device where you can store and listen to every song you love, watch every video you want, and store any information you need.  Having an iPod is such an easy and convenient thing.  This device is a great way to improve your life.  But what happens when you can’t update your iPod because there is an old backup already stored on your computer?  You should attempt to rectify this problem immediately so that you can use your iPod to its maximum potential.

How to Delete iPod Backups on Computer

1. First, you’ll want to open iTunes. You need to change your device’s preferences so that you don’t have to keep deleting backups in the future.

2. In iTunes, go to Preferences, and click the Devices tab at the top of the window.

3. You should see a list of all of the different iPods synced to your computer.

4. Select the one you wish to delete, and click Delete Backups.

5. After this has been completed, you can go back to the main iTunes window, click on your device and choose the Back Up Now option.  Everything should work from here.

Delete iPod Backups from Different Operating Systems

There are a couple different ways to delete iPod backups if you have different operating systems.

Mac OS


1. When using a Mac you can go into your iTunes library and then application support.

2. From there go into Mobilesync and click on Backup.

3. If you see any old backups saved from previous occasions you can delete them.

Windows XP

1. You will have to go into your Documents, then Settings.

2. Enter your username and enter application data.

3. Click on Apple > Mobilesync > Backup, and delete any old backups in a similar fashion.

Windows Vista or Windows 7

1. Go to Users, enter your username and click on Appdata.

2. Go to Roaming, click on Apple, and enter Mobilesync’s backup.  Delete from here.

If none of the above solutions work for you, you may want to delete iTunes and completely and re-install it.  This will cause you to lose your music but at least you will be able to start backing up your iPod.

Additional Help

If you are having problems deleting old backups of your iPod from your computer, you should seek professional help.  Use TalkLocal to be connected with up to three reliable, local IT service technicians within minutes.

Folder Sync Windows 7 over Network

Saturday, February 23rd, 2013

Folder Sync Windows 7 over Network - Computer Repair

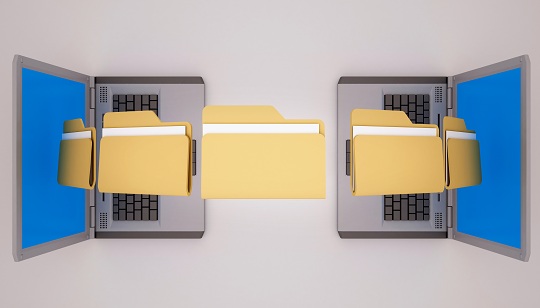
Are you tired of having to email documents to colleagues or classmates in order share them?  Are you annoyed with having to sign into GoogleDocs to access shared files? Does it bother you that your colleagues or classmates can edit and save over the files you share through your Dropbox? Windows 7 has the solution built right in! Here are some tips for file sharing with ease.

Windows 7 Homegroups

Create or Join Homegroups and Workgroups:  Homegroups and Workgroups are groups of computers that share folders.  Using Windows 7, you can easily define which of your folders are shared and which are private and then customize how you share files with people on your network.  For more information on which one of these groups will best suit your need, check out the Microsoft Help Page that explains the differences between the different types of file sharing groups.

Folder Sync Windows 7 over Network

When you are inside of a folder in Windows 7, there is a dropdown menu across the top that says “Share with.” Clicking the dropdown will give you a series of options of who you share the folder with. These options are:

Another more basic option for file sharing is the Public Folder option.  Files you place in this folder are instantly available to other people in the network.  You have ​public folders located inside every one of your document libraries.  Although these are easy and quick, be aware that you cannot edit permissions within your public folders.  Everything you put in these folders is available to everyone in your network.

Additional Help

If you are have having difficulties getting your files to sync with other computers in your network, or if you are having other computer-related problems, visit TalkLocal. We will connect you with up to three local computer technicians who will be able to help you when you need it.

Restoring Lost Favorites in Outlook 2010

Friday, February 22nd, 2013

lost favorites outlook

“Favorites” are shortcuts in Outlook 2010 that refer to your most used folders, such as your Inbox and Sent items. These are likely the folders that you use the most often in Outlook 2010. Losing your favorites can be a slight inconvenience, if not a big hassle. But don’t fret; restoring lost favorites in Outlook 2010 is a quick and easy process.

Restoring Lost Favorites in Outlook 2010

The “Favorites” tab in Outlook 2010 is found in the Outlook Navigation Pane. If your favorites are disappearing and reappearing between Outlook sessions, try resetting the Navigation panel by using the following command line:

1. Click Start > Run

2. Enter the following text. Be sure to include the quotation marks. If necessary, you can just copy the code from here and paste it directly into the text box.

“C:\Program Files\Microsoft Office\Office14\outlook.exe”/resestnavpane

3. This command will reset the Navigation pane and restore your missing favorites.

Additional Help

If the above command does not work, or if you seem to be losing your Outlook 2010 favorites a little too often, it may be time to speak with a professional. Use TalkLocal to help you find one! We will connect you with up to three computer repair technicians in your area who will be able to help you when you need it most!