Archive for the ‘Computer Repair’ Category


​Can’t Change the Volume on Mac

Thursday, February 21st, 2013

​Can’t Change the Volume on Mac - Computer Repair

Sometimes you can’t change the volume on Mac. This frustrating issue can have a few different causes, but don’t worry, there are easy solutions.

Possible Reasons You Can’t Change the Volume on Mac

– If a red light appears in the headphone jack, the Mac is trying to output sound to the headphone jack because it thinks there is something plugged in, even though it is empty.

– The volume keys on your computer might not be functioning properly, so make sure there is contact between the key and the keyboard. Your keyboard could be dirty with crumbs, dust, or dirt, all of which can intercept a proper connection between the key and the keyboard.

– You may be experiencing software problems. Keep reading to learn how to fix your settings.

Solutions

Headphone Jack: Plug a headphone in and out of the headphone jack. Sometimes the Mac does not recognize that you removed a device. You may also try blowing air into it with a compressed air can as dust can block the sensor and make your computer think there is a device plugged in. Also, try poking the sensor with a toothpick or the rubber end of a bobby pin. Additionally, Under System Preferences, open up Sound and make sure “Digital Out” is selected, instead of “Internal Speakers.” Also, make sure the “Output Volume” is NOT on mute.

Volume Keys: Make sure your keyboard is clean. Use a compressed air can to blow away any particles that accumulate between and under the keys.

Software Problems: If it is a problem with the software, try resetting the PRAM and NVRAM.

1. Shut down your Mac and then turn it back on.

2. Press and hold the command, option, P, and R keys before the gray screen appears. Hold these keys until the computer restarts and you hear the start-up sound for the second time.

3. After you hear the sound, you can release the keys.

Additional Help

If you are having further difficulties, you can use TalkLocal to help connect you with the best IT professionals in your local area. We will connect you with up to three computer technicians who will be available to help you when you need them.


Seagate External Hard Drive Not Recognized

Wednesday, February 20th, 2013

Seagate External Hard Drive Not Recognized - Computer Repair

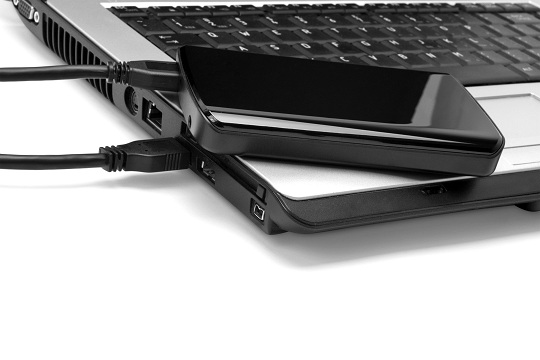
Is your Seagate external hard drive not recognized by your computer? Having an external hard drive that is not recognized by your computer can be frustrating, especially if you need to transfer something to or from the device.  This issue could be the result of a malfunctioning product or a simple power problem.  Whatever your need be hopefully you find help through this article.

Steps to Take

1. Look at is the LED light. The LED light behavior can tell you a lot about what is going on with your external hard drive.  Please refer to your handbook/instruction manual to see what each behavior means.  If your light is green and indicates that the device is ready the issue lays elsewhere.  If the light is completely off then the hard drive may not be attached to a power source.

2. Check to make sure that adapter is properly plugged in and functioning.

3. Also check to see that the hard drive is turned on.

4.  If your device isn’t working in a certain port try to plug it into a different port.

5. If your hard drive still does not become recognized it may be locked.  You should check and see if you need to put in a password or enable it.

6. Furthermore your device will not be recognized if it is formatted to a different type of computer like Mac versus PC.  You may have to reformat the external hard drive.  There are a lot of possible issues that could be going on with your device so you should definitely consider them all.

Addressing Issues

You should be sure to try and look at every possible issue so that you do not seek professional help unnecessarily. If you do find yourself in need of more in depth assistance you should look to TalkLocal to help you get in contact with reliable local businesses.  TalkLocal will do all the work for you.  Simply input your problem and availability and we will connect you with a local IT service company within minutes.

Homepage Changes Automatically

Tuesday, February 19th, 2013

Homepage Changes Automatically - Computer Repair

If your browser’s homepage changes automatically, your computer most likely has spyware or a virus on it. You may have noticed other telltale signs of this as well, such as your Internet being slower than usual. You don’t need fancy antivirus software like Norton or McAfee. There are much easier ways to check and get rid of spyware.

Check to see if the problem is adware or just your own programs lagging your computer.

1. Open the task manager by pressing CTRL + ALT + DELETE and find any processes that are using an abnormally high amount of memory.

2. Go to google.com.

3. Type in the name of the suspicious looking files and research whether or not they are malicious.

4. Go to My Computer and search your C:\ drive.

5. Delete the malicious files ONLY IF YOU ARE SURE that they are malicious. If an error message pops up saying it is in use, stop the process with Task Manager and try again.

In the future

– Don’t download any browser toolbars or any third party software from suspicious sites.

– Use a browser such as Mozilla Firefox, which blocks most ads.

– Use Microsoft Windows Defender to protect your PC.

Other Tips

– Not all anti-virus programs offer anti-adware or spyware protection.

– Spyware is defined as “Software that sends information about your web surfing habits to its web site.”

– Adware is considered “to go beyond the reasonable advertising that one might expect from freeware or shareware.”

– If you really want to avoid adware, then consider switching to a Linux or BSD operating system.

Additional Help

If the issue persists after trying all of these things, then you should use TalkLocal to get the best help you can get quickly from local IT service professionals. We will connect you with up to three professional computer technicians in just minutes.

Computer Restarts Randomly

Monday, February 18th, 2013

Computer Restarts Randomly - Computer Repair

Restarting your computer helps solve many minor errors such as a bad internet connection or a slow program. But when your computer restarts itself, it can be annoying. Here are a few common reasons for why your computer restarts randomly.

Power Supply Overwhelmed​

If too many USB devices are connected to your computer, the power supply may not be able to handle it, causing it to shut down. Try disconnecting some of the devices and seeing if the problem persists.

Bad Outlet or Cord 

A faulty outlet or power cord can also cause a computer to randomly restart. Try plugging your computer into a different outlet. If that doesn’t work, try using a different power cord. Sometimes, unplugging and replugging the same power cord into the same outlet will fix the problem. Make sure all connections are tight and secure.

Outdated Drivers

Updating the driver is a common solution for many users. It can solve a variety of minor computer problems, including random restarts. To update a driver for Windows 7:

1.     Find the latest driver for your computer by visiting your manufacturer’s website, or simply searching “Latest Windows 7 Drivers” in Google. The first link provides updated drivers for 21 major manufacturers.

2.     Open Device Manager on the Control Panel.

3.     Right click the hardware whose driver you want to update.

4.     Click the Driver tab in the Properties window.

5.     Click Update Driver.

6.     Click Browse my computer for driver software in the How do you want to search for driver software? window.

7.     Click Let me pick from a list of devices on my computer at the bottom of the Browse for driver software on your computer window.

8.     Click Have Disk under the text box.

9.     Click Browse in the Install From Disk box.

10.     Click any INF file.

11.     Click Open.

12.     Click OK in the Install From Disk box.

13.     Click the hardware you just opened in the text box.

14.     Click Next >.

If a message appears, warning that the device driver and hardware may not be compatible:

15.     Follow any instructions to finish the driver update. The INF file should instruct the Update Driver Software wizard to install the drivers.

Additional Help

If the problem persists, leave the sleuthing to TalkLocal. TalkLocal can connect you to local computer technicians to diagnose your problem. A fast, reliable solution is just a few clicks away. Hurry and fill out a request for service online–before your computer restarts.

HP Desktop Not Powering On

Monday, February 18th, 2013

HP Desktop Not Powering On - Computer Repair

Is you HP desktop not powering on? There can be one of several issues with your computer, but there are ways for you to figure out what exactly is wrong with your computer.

Power supply issues are often mistaken for start-up problems. Before you begin troubleshooting, it is important to first isolate the problem and determine its source. Push the power button on the PC and wait for the green light to come on. The green light on the front of the PC indicates that the PC has power. If you see an amber or orange light it means the processor board has failed. You will need to purchase a replacement directly from HP or an HP authorized service center.

After you push the power button, listen for any beeps. If you do not hear anything, it is an indication that your PC is not receiving any electrical power. Refer to your HP user guide to determine the meaning of the beeps. These beeps are known as POST (power on self test) codes, so different beeps have different meanings.

Test the electrical outlet used by the PC. To determine if you have a faulty outlet, plug your PC into an outlet in a different environment. If the outlet is good, continue your troubleshooting.

Remove the case of the computer to determine whether or not you have a faulty power supply. Locate the power supply inside the case. The power supply is the large metal box mounted in your computer that connects with the AC power cord. Push the power button and listen for the noise of the cooling fan. If the fan does not spin then there is no power getting to the PC. You will have to order a new power supply from HP. Make sure the wattage on your replacement equals or exceeds the wattage on the faulty power source before ordering.

Additional Help

If you prefer to consult a professional, use TalkLocal the get the help you need. We will connect you to a high quality computer repair professional in your area in minutes!

Antivirus Software Slows Down Computer

Sunday, February 17th, 2013

Antivirus Software Slows Down Computer - Computer Repair

Antivirus Software Slows Down Computer?

Virus protection software that slows down a computer seems counter-intuitive. The point of virus protection is to keep our computers running quickly and efficiently, yet often times, the same antivirus software that is helping our computers is also hindering performance.

Why does antivirus software slow down computers?

In order to perform virus sweeps throughout your computer, the program has to scan each and every file in your system. This not only takes time but it also takes power and space. Because we want a virus protection to spot each and every bug, there is a price to pay – that is, it slows down our computer.

I want a safe computer, but I also want a fast computer. What do I do?

There are a few things that you can do. One is to make sure you do not have unnecessary files or programs opening up when your computer first turns on. Delete any unnecessary programs or documents that you have floating around your computer.

Spend the extra money and buy a high quality virus protection program. If you spend the extra money now, it will save you a possible headache in the future. You will be less likely to experience a computer crash because your computer got infected if you invest in high quality antivirus software. Furthermore, your computer programs will not randomly shut down due to viruses and you can be sure that your information is safe if you properly equip your computer before the attack happens. In addition, you will be more productive and have more time to do your work if you are not struggling with a slow computer.

Additional Help

If you are having trouble with your computer and feel as if it is not running as efficiently as it should be, check out TalkLocal. This local service search engine will direct you to high quality professionals right in your area who can help with your computer at a time that fits your schedule. Try it out!

Make Laptop Faster for Gaming

Saturday, February 16th, 2013

Make Laptop Faster for Gaming - Computer Repair

Gaming is a great way to just sit back, relax, and have some fun…or maybe you enjoy to competition. Either way, you’ll want your laptop to be able to handle any game you play. Even if you have an older model or you did not buy a laptop built specifically for gaming, there are ways to make your laptop faster for gaming.

Make Laptop Faster for Gaming

One of the easiest ways to make your laptop run faster for gaming is simply to upgrade your graphics card.  While it may be expensive at first, if you have the money and you plan on spending a considerable amount of time gaming, it will definitely be worth the investment. Upgrading from a 512MB dedicated graphics card to a 1GB graphics card make a huge difference in gaming quality.

Another possibility is to increase the amount of RAM in your computer.  If you open up the task manager while gaming and you see that you’re currently using close to 100% of your physical memory, then you’ll need to install additional RAM to speed up your computer.  Laptop RAM is a little more complicated to install than desktop RAM, so make sure that you purchase the correct type of RAM for you laptop.  After purchasing it, only install it if you are comfortable with disassembling and reassembling your laptop.

Make sure your system is optimized to run as fast as possible.  That means while playing games, make sure to turn off unused programs and clear up as much memory as possible (using Task Manager to end services that won’t be utilized while gaming).  Check your power management options, and use the Best Performance or Maximum option (you may want to be plugged in to a wall outlet, as this may drain your battery quickly).  Furthermore, make sure to defragment your computer, and use the disk cleanup utility on a regular basis, so that your laptop is running in optimal conditions.

Additional Help

If your computer is still running slow after all these steps, then you may want to use TalkLocal to contact a highly-rated local computer professional to evaluate your computer and see how you can improve your gameplay experience.

How to Remove Torrent Trackers

Friday, February 15th, 2013

How to Remove Torrent Trackers - Computer Repair

You often hear of people downloading torrent music or movies. A torrent is a file that allows you to access data from other computers. When you remove the tracker for that torrent, you can no longer share that torrent. Think of a tracker as a bridge between users that allows traffic from one computer to another. People remove torrent trackers to hide their online footprints and protect their identities. Other times, people remove trackers to increase their torrent download speed; some trackers are slow to respond or dead and can slow down your client. A client is a program that reads torrent files; Microtorrent is one such popular client. Think of the client as a tollbooth for torrent files to pass through before becoming accessible to the user. Clients rely on trackers to transfer data and share torrents. Learn how to remove torrent trackers from Microtorrent by following these steps:​

1)    Open Microtorrent. Let the torrents download fully to ensure that the data stays intact.

2)    Click the torrent whose tracker you want to delete to highlight it. The selected torrent should turn blue.

3)    Click “Trackers” in the window below the one from step 2.

4)    Click the website URL for the tracker you want to delete. The website URLs are located on the bottom half of the window.

5)    Right click the URL. A menu should pop up.

6)    Click “Remove Tracker” in the menu.

7)    Repeat steps 4 through 6 for every URL/tracker you want to delete. Keep in mind that a deleted torrent can be restored, but until then, the torrent cannot be shared.

Additional Help

For additional help, contact Seva Call to talk with local IT support professionals. Seva Call uses a combination of social reputation, online rankings and reviews, and call analytics to select the best service providers for you. Just fill out a short online service request to talk with up to three high quality service professionals in your area.

Computer Freezes When Trying to Print

Thursday, February 14th, 2013

Computer Freezes When Trying to Print - Computer Repair

It’s very important to be able to print something from your computer when you need to.  But if there is something wrong with either the computer or the printing device it can be extremely frustrating. Many people can easily fix computer problems, but when it comes to printers and scanners, the problem becomes exponentially more complicated.

Computer Freezes when trying to Print

When your computer freezes because you are trying to print, it could be the result of a couple different reasons. The following are a few possible causes:

1) Too many programs running

2) Improperly installed printer

3) Drivers are not up to date

4) The file is very large

5) A dirty spool directory

The Solution

If there are too many programs running on your computer it may take your laptop a few minutes to catch up and load properly.  The screen freeze will go away as soon as the computer properly loads.  If the printer is improperly installed this could be why your computer freezes when you try to print.  You should uninstall it and re-install the printer in an attempt to rectify the problem.

You could also have out of date drivers.  You should check with your computer and printer manufacturers to see if you can download the newest versions.  If this is the issue it should be solved once the new programs are installed.

If the file you are trying to print is extremely large your computer screen will freeze while it loads and tries to catch up.  Simply give your laptop a few minutes to load and react correctly.

Furthermore you could have an overloaded spool directory so you should clear them and make sure that your computer is only running necessary programs. If none of these steps help you with your issue you may want to run a clean boot to see what is causing the problem.  A clean boot will start your operating system and use a minimal set of drivers/programs so that you can troubleshoot any issues or error messages.

Continuing Issues

If you are still having problems and nothing seems to help you should seek professional help.  When looking for assistance use TalkLocal to be put in contact with reliable local businesses within a matter of minutes.  Simply input your issue and availability and TalkLocal will automatically connect you with high quality local professionals.

Lost favorites in IE7

Wednesday, February 13th, 2013

Lost favorites in IE7 - Computer Repair

Lost favorites in IE7

After upgrading to a newer version of Internet Explorer, did you find that you lost your prized list of favorites? This is a scary thing, but there’s a good chance you can recover them.

Import Your Favorites

First, it’s possible that after upgrading, your favorites didn’t move over into your newest browser’s version. You can try importing them by following these steps:

1. In an open IE window, click on the Favorites icon or open the Favorites folder.

2. Next to “Add to Favorites” you should see a drop-down arrow. Click on the arrow for the drop-down menu.

3. Click “Import and Export.”

4. Click “Import from another browser.”

5. Follow the steps to finish importing your old bookmarks.

You could also try uninstalling your current version of IE to get back to your older version:

1. Go to Control Panel > Add/Remove Programs.

2. Remove the updated browser.

3. Once you return to your older version, copy your favorites folder to a different location on your computer, such as your desktop.

4. Change the name of the folder.  You can also save all of your Favorites to a CD or external USB.

5. Reinstall the most recent version of IE.

6. Change the name of the folder back to “Favorites.”

7. Move it to its correct location.

If you saved the file to a CD/USB, simply move it back to the location above. You should have your Favorites back in IE.

Additional Help

If you are still experiencing problems, contact a local professional to help with your problem. Try TalkLocal, a free service that will connect you with local computer specialists in minutes. Just enter in your location, availability, and problem, and TalkLocal will locate professionals who are willing to help you and will call you directly.