Archive for the ‘Computer Repair’ Category


Dell Laptop Overheating and Shutting Down

Sunday, February 3rd, 2013

Dell Laptop Overheating and Shutting Down - Computer Repair

Dell Laptop Overheating and Shutting Down?

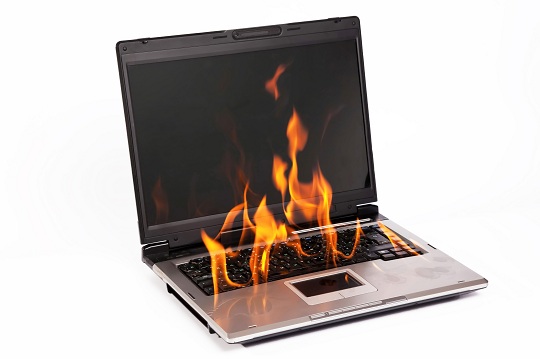
Overheating is a very common problem for laptop owners.  When too much heat builds up inside your computer or the computer’s battery it will often shut itself down in order to avoid permanent damage.  This can be very frustrating, especially if it is happening regularly.  Luckily, there are some simple steps that you can take in order to fix overheating problems.

Clean Out Your Laptop’s Fan and Vents

You might have noticed that your computer’s fan was spinning very fast and making a lot of noise as your laptop got hotter.  This is the sound of the fan working as hard as it can to cool down the computer. Most of the time, overheating in a laptop is caused by a blockage of the airflow in the vents of its cooling fan.  When these vents get clogged, hot air is unable to escape and your fan is unable to keep the laptop from overheating.  The most common cause of clogged vents is dust, hair, or fluff that gets sucked in and builds up around the exhaust vents.  In order to fix the problem, this dust buildup must be removed.  The easiest way to do this is to buy a can of compressed air and spray all the holes and vents in your laptop, particularly where the fan is located.  If you are unable to get everything cleared you may need to open up your laptop’s case in order to get the vents completely clean.  Once the dust is gone your laptop’s overheating problems should be cured.

Use a Cooling Pad

If your laptop is dust free but still overheating, you may want to consider purchasing a cooling pad. These are flat metal stands that have built in cooling systems to keep your computer from getting too hot.  There are some great deals on cooling pads at Newegg.  Another possible cause of laptop overheating is using the laptop on an uneven surface that might be physically blocking the airflow of the vents.  This is especially common when using laptops right on your lap or on a bed.  Having a cooling pad will fix this issue, or if you don’t want to invest in one you can try simply using your laptop on a flat, even surface that allows for unrestricted venting.

Additional Help

Are you still having issues with your Dell laptop overheating and shutting down?  If your laptop is still overheating and shutting itself down, there may be a malfunction with the actual hardware.  It might be time to call in professional help.  You can use TalkLocal to get in contact with a reliable local computer technician within minutes.  Just enter a description of your problem, availability and location and TalkLocal will connect you directly to someone who can help.

Upgrade Memory in Tablet

Saturday, February 2nd, 2013

Upgrade Memory in Tablet

How to Upgrade Memory in Tablet

Tablet PCs have been around for a while, but the tablet format has surged into public popularity in the last few years with the launch of the iPad.  There are many different brands and models available, with multiple different hardware options and operating systems.  If you currently own a tablet and are looking to upgrade its memory there are a couple things you must take into consideration.

Types of Tablets

First we must make the distinction between tablets and tablet PCs.  Tablet PCs are more similar to a standard laptop and really only differ from them in their “tablet” form factor.  They typically will run standard operating systems like Windows 7 or Linux.  Tablet PCs come in as much variety as laptops and are usually relatively easy to upgrade.  If you want to add more RAM to your tablet PC there are some great step by step instructions here.  Be sure to purchase the correct type of RAM that will be compatible with your specific system.  Removing and replacing the hard drive in a Tablet PC is sometimes possible depending on the model, but much more difficult.

The newer generations of tablets tend to run on their own unique operating systems.  The big brand names like the iPad2, Kindle Fire, Nook Color, and Samsung Galaxy, and other Android tablets all fall under this second category.  Unfortunately, these types of tablets are not really designed to be upgraded and are limited to memory card slots for adding a bit of extra storage. There is no way to add RAM or switch out the hard drives in these systems (most don’t actually even have hard drives and rely instead on flash memory).  If your particular model does have a slot for a memory card then adding some extra storage space is as simple as buying and inserting the card. Otherwise there is nothing you can do besides buying a new tablet with a larger memory capacity.

Additional Help

If you are not very tech savvy you might want to use TalkLocal to find a computer technician in your area to ask about upgrading the memory in your tablet for you. TalkLocal will connect you with up to three professionals in your area who will be available to help you when you need them.

Computer Stuck in Installing Updates

Friday, February 1st, 2013

Computer Stuck in Installing Updates - Computer Repair

Computer Stuck in Installing Updates?

Updates can be annoying when they become stuck. If the update download has not raised a percentage in thirty minutes and hard drive light is not constantly flitting, the updater is stuck. The updater being stuck does not stem from major problems in the computer and can be easily fixed by some simple solutions.

Problem

There can be various problems to make the updater become stuck. These can be simple with the updater conflicting with software on a computer. For example, Windows Vista had a problem with updating before the update, SP1, was installed in the computer. There could also be a problem that has not come to light until the updater started.

Solutions

Restart

The problem can be easily fixed with a simple restart of the computer. In the restart, the software conflict can be resolved so that the updater is in working order. If the updater is downloading files and is stuck:

1.      Go to the Start Button.

2.      Find either the power button or shut down with an arrow point right.

3.      Click the right arrow.

4.      Click on restart.

Safe Mode

Safe Mode loads the minimum drivers and services, and any software that is conflicting with an update is not loaded. Safe Mode can fix the problem easily and fast. To go into Safe Mode:

1.      On the boot-up screen, select the boot options menu.

2.      In the boot options menu select Safe Mode.

3.      If installation of the update is successful restart the computer so, the computer boots normally.

System Recovery

There is a way to go back to before the update started, if some of the update files were downloaded. To go to system recovery:

1.      Go into Safe Mode.

​2.      Click on the Start Button.

3.      Click on All Programs.

4.      Click on the folder named Accessories.

5.      Click on folder named System Tools.

6.      Click on System Restore.

Additional Help

These easy solutions should help with the simple problem of a stuck updater. If these solutions do not work, a professional should be contacted. TalkLocal will connect you with high quality professionals in your are who will be able to help you when you need it.

Play Music From Computer to Stereo

Thursday, January 31st, 2013

Play Music From Computer to Stereo - Computer Repair

When you’re in the mood to start jamming out whether it be at a party, alone in your room, or just chilling out, how do you play your music?  From your computer? But sometimes this just isn’t loud enough! Connecting your computer to a stereo system is one of the easiest and best ways to increase the volume of your tunes.

Ways to Play Music from Computer to Stereo

1)     Directly plugging the stereo system into your computer

2)     Wireless connection through network media bridge

3)     Wi-fi free digital receiver system

How to Play Music from Computer to Stereo

Directly plug the stereo system into your computer: If you want to directly connect your computer and stereo you can buy a simple headphone jack type cord.  This will transfer the music from the headphone jack to be played by the stereo speakers.

Wireless network media bridge: You also have the option of adding a media bridge/receiver device to the wireless Internet network.  This is a very common method to bring music to your stereo from your computer.  You can buy any type of device that you want; they all perform the same function.  You simply connect one part to the computer and the other into the stereo so that they will work in tandem to send music form your computer’s soundcard to the stereo’s amp/speakers.  These types of devices usually run for under $100 but are slightly difficult to add onto a password protected network.

Wi-fi free digital receiver: The third option you have is to use a digital receiver that works with your operating system to create its wireless connection to the stereo transmitter.  These types of devices can enhance the sound of the music and is probably one of the best choices even if it is a little more expensive.

You may have to play around with each of these options to see what works best for your specific needs and for what your computer and stereo system require individually.

Additional Help

If you continue to have problems setting up a connection between your stereo speakers and your computer you should seek professional help.  Use TalkLocal to be put in contact with reliable local IT businesses within minutes.  You don’t have to do any work! Simply input your problem and availability and TalkLocal will do the rest! Almost immediately you will be connected to someone who can help.

Windows 7 No Internet Access but Connected Network

Thursday, January 31st, 2013

Windows 7 No Internet Access but Connected Network - Computer Repair

Windows 7 No Internet Access but Connected Network

One of the most frustrating network errors that you might experience is when your computer seems to be connected to the network, but still has no internet access. For Windows 7 computers, there are fortunately a couple of quick and easy fixes that don’t take a long time to try out.

Power cycle your devices

1. Power off your modem, router, and computer all together.

2. Activate the modem, router, and computer in that order, leaving approximately a minute between each device activation. This will allow them time to boot up correctly and accept connections before moving on to the next device.

Update the network driver

1. Click the windows menu and enter the Control Panel.

2. Click Hardware and Sound on the left side.

3. On the top of this page click Device Manager.

4. Click the network adapter that you are currently using and right-click it to choose properties.

5. In the properties window, there should be a Driver tab. Within that tab, click the Update Driver button. The rest of the process is automated. Be sure to restart your computer after the updates have been installed.

Fix the TCP/IP stack 

Fortunately, Microsoft has created a simple way to fix the TCP/IP stack. All you have to do is follow this link and click the “Fix it for me” button. This will download an automated fix to run, but you can always follow the manual steps below if you prefer.

Additional Help

If none of the above steps worked for you, then you should either contact your internet service provider (ISP) about how to solve the issue or use TalkLocal to instantly contact a quality computer repair professional in your area. Either way will help solve your problem efficiently and get you back on the internet as soon as possible!

Can’t Print from Internet Explorer

Wednesday, January 30th, 2013

Can't Print from Internet Explorer

Is your printer not responding to commands from your web browser? It can be incredibly frustrating when you can’t print from internet explorer. Typically, these issues occur because outdated servers have difficulty printing from Internet Explorer. If your printer works with other programs but you cannot print or print preview with Internet Explorer, try the steps below.

What to Do If You Can’t Print from Internet Explorer

In order to be able to print from Internet Explorer, you must disable Protected Mode in Internet Explorer.

1)     Open “Tools” in Internet Explorer.

2)     Click on “Internet Options”

3)     Click on the “Security” tab

4)     Uncheck “Enable Protected Mode”

5)     Click OK and then exit Internet Explorer

6)     Reopen Internet Explorer and print your selection

If this method does not work, try opening Internet Explorer as an administrator so that you have permission to print:

1)     Open the “Start” menu and find Internet Explorer.

2)     Right click on Internet Explorer and select “Run as Administrator.” You may or may not be prompted to fill in the administrator credentials.

3)     Open Internet Explorer again and try to print preview the page and then print.

Additional Help

If you can’t print from Internet Explorer after disabling Protected Mode, or even when signed in as an “administrator,” you may want to seek professional help. TalkLocal will connect you with up to three high quality computer technicians in your area, who will be available to help you when you need them.

What if I Forgot my Router Password?

Tuesday, January 29th, 2013

What if I Forgot my Router Password? - Computer Repair

What if I Forgot my Router Password?

Losing or forgetting your router password can present a big problem, as routers do not have password recovery systems like websites do. If you did not follow proper security practices when you set up your router and left the factory default password on, you will need to check your router’s factory default. You can find the factory defaults for all major companies here. If you have changed your password from the factory default, consult the manual that came with your router to find out how to change the password. If you have lost your manual, you can try these general instructions for how to change the password on most routers.

1. You will need to get onto the console of the router. Most routers from major companies will come with something that you can plug directly into a router with a serial cable.

2. Once you have done this, you will be able to change the settings. If this requires a password, try the above site to look for the default password. If you are able to get in, you will need to get an output or dump of the configuration.

3. Follow the steps to change the password.

4. Make sure the password is complex, but not so complex that you will forget it easily. Try incorporating capital letters, number, and symbols into your password so that it will be harder for someone else to guess.

Additional Help

If you are not able to change your password, you may need to contact a computer repair professional to help you access your router. With the help of TalkLocal, you can be on the phone within minutes with up to three high quality computer repair professionals in your area, that are available when you are.

How to Deal with a Defective Hard Drive

Tuesday, January 29th, 2013

How to Deal with a Defective Hard Drive - Computer Repair

Some of us store our important life photos, receipts, and time-sensitive files in our hard drive. So accessing your hard drive may be an issue of utmost importance to you personally or professionally.

This article will guide you through the possible causes and fixes for a defective hard drive, as well as listing the ways in which you can avoid this problem in the future.

Data Corruption in Your Hard Drive from Internal Sources

The ways in which you may handle your hard drive may lead to data corruption of the files being stored in the drive and of the drive itself, causing this problem.

Data corruption may occur when the hard drive is suddenly disconnected while its files are being used. Typical operations include, but are not limited to transferring a file between the drive and the computer.

Typically the file that was being used is the one that usually gets corrupted, but occasionally the files for the sustainment of the hard drive itself may become corrupted.

Data Corruption in Your Hard Drive from External Sources

The physical environment in which you store you hard drive may also lead to data corruption by damaging the hardware itself. Dangerous environments include, but are not limited to:

These environments pose a danger to the hard drive itself as well as the files stored in it. The next section of this guide will outline the ways in which you can fix the damage from both internal and external sources, as well as showing you the ways to prevent it.

Preventing and Fixing Data Corruption

The following are viable ways in which you can prevent this situation in the future:

1. Always make a backup of the files you know you will need in the future.

2. Consider using a web-based hard drive. Services like GoogleDrive let you store files in an online server, and it is less likely to fail than your hard drive system. Many of these systems also include data back-up services.

Fixing the data corruption caused by either internal or external sources can be very complicated, and a help from an expert is strongly advised to prevent further damage.

At this point it is recommended that you call for help from the local experts. TalkLocal can help you find quality local experts to fix your hard drive quickly, which saves you time and energy in a stressful situation.

How to Fix a Corrupt iTunes Library

Monday, January 28th, 2013

How to Fix a Corrupt iTunes Library - Computer Repair

Every problem seems distant and unlikely to happen until the moment it actually happens. iTunes library has been known to be unstable among its users – so learn how to fix a corrupt iTunes library when necessary by reading this guide.

How iTunes Library Can Become Corrupted

iTunes simply won’t start up, or  the files won’t open once the library (the files – music, videos, etc) inside it are corrupted. But you should still be able to “see” all your files – as in, you should still be able to see the names and locations of your files.

Files become corrupted because the files’ “index” structure (the structure that tells iTunes where the files are located in your computer) goes wrong due to a flaw in processing or coding, so that the files are assigned to the wrong index and become inaccessible or “corrupt”.

How to Fix a Corrupt iTunes Library

One way to fix this problem is to redo the indexing of all your files in order to fix any errors in the system. Follow these steps in iTunes in order to fix your corrupted library.

1. If you have iTunes open, close it and make sure it is closed. Use the Task Manager to ensure the iTunes program is shut down. The reason for this is that you will be making changes to the index itself – the index constantly changes while you are using iTunes.  If more than one change is made to a file at a time, the file could become unstable and corrupted.

2. Locate the iTunes folder in your computer. Although it varies depending on the operating system you are using, it is typically found under Users\(your username of your computer)\Music.

3. Drag (move) the iTunes folder and find the file called “iTunes Library.xml” or “iTunes Music Library.xml” to your desktop.

4. Delete the file called “iTunes Library.itl”.

5. Open iTunes without making any changes to your library through purchases, etc.

6. Go to File -> Library-> Import Playlist and choose the iTunes Library on the desktop.

The files in your iTunes Library should no longer be corrupt, and you should now be able to open and use iTunes.

Additional Help

If you feel like you need a professional help you fix your corrupted library files, TalkLocal will connect you with up to three local technicians who will be available to help you when you need them.

My Netbook Screen is Flickering

Monday, January 28th, 2013

My Netbook Screen is Flickering - Computer Repair

Netbook screens use LCD displays and are extremely sensitive to developing problems.  This display can be affected by nearby electronics such as speakers or lights, or even software such as the video driver, the inverter, or in a worst-case scenario, the screen itself. If your netbook screen is flickering, there are a few ways you can try to diagnose what exactly is causing the issue.

Try the following approaches to figure out why your netbook screen is flickering:

Additional Help

Identifying what causes the Netbook Display Flicker can be simple, but fixing the problem is not always as easy. Once you figure out why your netbook screen is flickering, use TalkLocal to contact a reputable local computer repair professional. We will connect you with up to three professionals in your area who can help you at your convenience.