Archive for the ‘Computer Repair’ Category


Parts of A Computer You Shouldn’t Repair Yourself

Tuesday, January 15th, 2013

Parts of A Computer You Shouldn't Repair Yourself - Computer Repair


Parts of A Computer You Shouldn’t Repair Yourself

1. The Motherboard

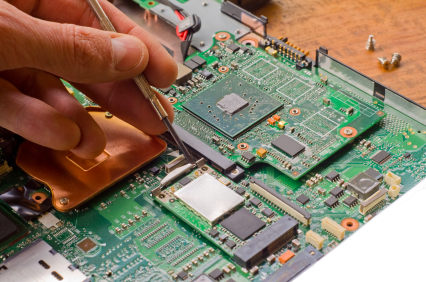
This slab of delicate technology is exactly as important as it sounds. Serving as the main port that every piece of computer hardware connects to, the motherboard is the piece that brings your whole PC together. To top it off, it’s also probably the easiest to break. A small scratch could mean disaster for your PC, so if you don’t have the technical expertise to handle a motherboard with finesse, you should definitely have a professional come check out your problem.

2. The CPU

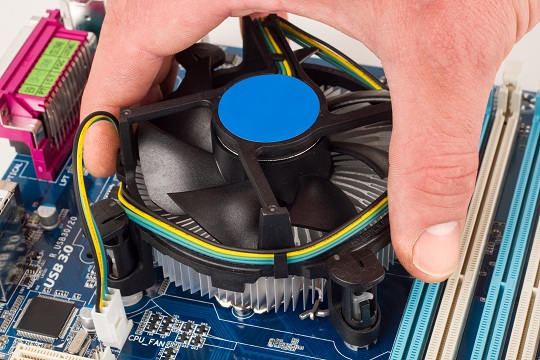
The CPU is a delicate issue for several reasons. One, it is inserted directly into the motherboard and locked in place, meaning that removing it might cause you to accidentally harm your motherboard. Two, it is covered by a heatsink, a weird metal object that keeps it cool. There is nothing inherently wrong with this, but there are so many heatsink designs that removing the heatsink might be a challenge if you don’t have a lot of experience with them. Three, your CPU is often the single most expensive part of your machine. It acts as your computer’s “brain” and it can often cost north of 200 dollars to replace one. For all these reasons, if your CPU is acting up, don’t go experimenting by yourself.

3. The Power Supply

This simple looking box can also seem very intimidating, with the wattage written in large bright letters around the outside and cords spewing from it that will eventually connect to the motherboard. The power supply is the life blood of your computer, and pumping that blood requires a lot of electricity. 500 watts or more is quite normal for PCs these days, so consider the damage that some unleashed electricity could do. Not only may you be hurt (although it is highly unlikely), but your motherboard could experience an overload of electricity when you tamper with a connected power supply.

4. The Video Card

For anyone who enjoys graphic intensive applications such as Photoshop, video editing, and games, the video card is an indispensable part of your PC. For more expensive cards it will often be a 10-inch long behemoth, complete with it’s own cooling system. This object could cost you anywhere from under 100 dollars to over 500. Simply put, when your video card is damaged, do you really want to risk further damage to this very important object by trying to fix it yourself? There really is not much you can do to repair a video card unless you are a computer hardware expert.

5. The Monitor

This seems obvious, but there’s really nothing you can do to help a damaged monitor. If pixels have burned out, opening up the monitor is only guaranteed to cause more problems. Computer experts generally struggle with repairing a monitor problem, so replacing the monitor often ends up being the only option. Regardless, when things go awry with your monitor, you should avoid tampering in any way that could implicate you for insurance or replacement purposes and instead let an expert check it out.

Use TalkLocal to find a computer technician in your area. We’ll connect you with up to three quality professionals in minutes who will repair your computer when you need it.

How to Become a YouTube Star

Tuesday, January 15th, 2013

How to Become a YouTube Star - Computer Repair

One of the great things about YouTube is that it provides a platform for anyone in the world to showcase their talent.  But one of the drawbacks is that it’s actually pretty difficult for new content to get discovered.  As a matter of fact, there are probably hours and hours of great content on YouTube that don’t even have 100 views.  And (unfortunately) there is no easy trick to getting thousands of views.  But there are general rules you can follow that—coupled with some luck and elbow grease—can help you become a YouTube star.

Create Quality Content

First, you really do need to produce good, creative content on a regular basis.  It’s true that stupid things sometimes get views on Youtube, but by-in-large the people who have reliable audiences got there by making consistently good videos.  You should find your niche; make videos about something you know.  There are successful YouTubers who do videos about just about everything—from celebrity impersonations to beauty tutorials to discovering the most calorific food in the world—so find something you’re interested in and stick to it.

Be Active on YouTube

You should also upload regularly, that way people who like your videos will subscribe so that they’ll be informed every time you make a new video.  You should also be sure not to upload too much—say several times a day—because people may feel like they’re being spammed.  Once every few days is great, and at the very least you should try to have a new video up once a week.

You also should try to connect to the YouTube community.  Find other Youtubers who make videos like yours, or who are interested in the type of videos you make, and talk to them. You can find these Youtubers by going through the comments of popular videos that relate to yours. Then you can write on the channels of the people who commented.  You might also go through the list of the people who subscribe to channels similar to yours and talk to them.

Connect with Other Users

You can do “sub for sub”—trading subscriptions to up your subscriber count—if you want. This may be a good way to get your first hundred or so subscribers, because having subscribers may give your channel a certain level of credibility; people like to subscribe to channels that other people are subscribed to.  But ultimately you want views and repeat viewers, not a high number of subscribers that never check your channel.

It’s a good idea to “friend” a lot of people, especially if they seem to be interested in the type of videos you make.  That way—even if they’re not subscribed to you—your videos will still come up on their homepage.  It’s like free advertising.

If someone “friends” or subscribes to your channel check out they’re channel, too.  It’s a good idea to comment on their page or videos (if they have them).  And you may want to say more than just “thanks for subscribing;” take an interest in what they do, as well.  People are more likely to continue following your channel if they feel personally connected to you.  So it’s a good idea to also keep up those relationships.

Also be sure to post your video to your Facebook and Twitter, so your friends can check it out that way.

Finally, just keep at it.  It may be discouraging to work so hard and not see an immediate pay off, but despite the well publicized outliers—like Susan Boyle—Youtube success generally does not come overnight.  For any other issues or questions with computer usage, you can use TalkLocal to find computer technicians in your area. Good Luck!

My Computer Fan Turns On and Off

Monday, January 14th, 2013

My Computer Fan Turns On and Off - Computer Repair

The computer fan serves the purpose of keeping the motherboard and the other components inside your computer from overheating. You may be more used to hearing your computer fan go off when your computer use is prolonged or the computer is engaged in an extensive operation requiring significant power, such as running an anti-virus scan. Here is some useful information on why your computer fan turns on and off, and what you can do about it.

The Problems, The Solutions, and The Possible Misdiagnose

You may notice that your computer fan is making abnormal noises while it is in operation. This is mainly because of the “Worn out” components of the fan. The following are the two components that get easily worn out.

1. The Fan Blades

Dust builds up inside the computer through time – although the computer fan tries to prevent this natural consequence, not all of the dust is expelled from your system. Some of the dust sticks to the blades itself, creating an imbalance between the blades. Unbalanced blades contribute to uneven rotation of the blades, creating the unsightly noise that you may find disturbing.

To counteract this problem try to use Q-tips to wipe off some of the dust buildup on your fan. Do not bang your computer in order to shake the dust out, as it may dislodge some crucial hardware inside your computer and cause permanent problems.

2. The Bearings

The bearings eventually wear out due to the friction in the rotation of the blades. However this “wearing out” process can be accelerated by various environmental factors influencing your computer.

Operating a computer in a dusty area, hot area, areas exposed to the sun directly, or a smoking area attracts dust to stick to your fan blades. Imbalance in your fan blades caused by the dust buildup exacerbates the rotation and increases the friction experienced by the bearings. Avoid these environments to preserve your bearing for a longer time.

Possible misdiagnoses may occur from a noisy hard drive instead of the fan. In order to check if this is the problem, unplug the cables from the hard drive and power up the computer, and check if the unsightly sound still exists.

Additional Help

If the above recommendations do not resolve the issue, it is possible that there may be further complications in your computer system. At this point it is recommended that you call for help from the local experts. TalkLocal can help with finding the correct local expert to fix your computer quickly, which can save you time and energy in a stressful situation.

Recover Lost Data on a Flash Drive

Monday, January 14th, 2013

Recover Lost Data on a Flash Drive - Computer Repair

It can be a horrifying thing to lose all important data on a flash drive. Hopefully you have your files backed up, but if you don’t, this article will help you recover lost data on a flash drive. 

If you accidentally deleted your lost files off of your flash drive:

Another possibility is that your lost data is hidden:

If neither of these two options worked to recover your lost data and you are using a windows computer you can try this method:

If none of these methods have worked for you, it still may be possible for you to recover your lost data. If you contact a computer professional they may be able to recover the data on your flash drive. You can use TalkLocal to request a computer professional in your area and receive a call within minutes.

Setting up Three Monitors on One Computer

Friday, January 11th, 2013

Setting up Three Monitors on One Computer - Computer Repair

Having one monitor is okay, having two monitors is good, but having three is amazing! If you have multiple computer screens to work off of you can multitask and be more productive because you wont have to switch windows in one screen.  But setting up multiple monitors can be kind of a headache.  Adding one monitor is easy but the more you add the more of a headache it becomes. Here are some tips to help you set up three monitors on one computer.

How to:

In order to configure three monitors on one computer you can buy either video cards or VGA cables.  When trying to do something like this there are couple things you should consider and do.

The first and probably the most important thing is to buy your monitors.  You should try to get the same model, size, and build so that you don’t have to strain when looking at them all.   You should then install graphics cards into the computer.  Before you do this make sure you aren’t violating your warranty. Inside should be 5-8 PCI slots on the side facing the back of the computer box.  You can just insert the video cards and close the computer back up.  After the cards are installed you can set up the monitors.  You should just connect them with the cables to the back of your computer.  You computer should recognize them and detect them immediately.  Once recognized you can configure them.  Just click on the desktop, go to properties, settings, and then click on the secondary monitor.  You can arrange them however you want. Then to add the next one you can click on a new monitor, and then on “extend my window desktop onto this monitor”.  Apply these settings and you should be good to go.

To add the third monitor you should buy a PCMCIA video card to go into the side of you computer.  As soon as you insert it you should be good to go.  Many people also buy Ultramon which allows you to have a taskbar in each computer.  This program will help you when using three monitors by making your life easier

Continuing Problems

If you are having issues trying to install three monitors even after reading this you should seek professional help.  Use TalkLocal to be put in contact with a reliable local IT service company within minutes.  Simply input the problem you are helping and your availability and TalkLocal will do all the work.  You will be connected to a professional almost immediately.

Export Internet Explorer Favorites to Google Chrome

Friday, January 11th, 2013

Export Internet Explorer Favorites to Google Chrome - Computer Repair

If you’re like us here at TalkLocal, you have numerous web pages in your web browser’s favorites folders. You have spent ages compiling an archive of your favorite news sources, blogs, personal accounts, work pages, and entertainment and music websites. Switching web browsers should not reset that online personality. It is surprisingly easy to import your favorites from one web browser into another. Here is how to export Internet Explorer favorites to Google Chrome:

You can follow steps 1 through 3 to import favorites from other web browsers as well; it’s all the sites you love in all the browsers you use. These steps are easy to follow, but there can be other issues with using multiple browsers, or newer browsers with older software and hardware. If you are having any issues with your web browser, TalkLocal can connect you with up to three computer technicians in minutes, with just a phone call.

Toshiba Laptop Microphone Problem

Thursday, January 10th, 2013

Toshiba Laptop Microphone Problem Computer Repair

A Toshiba laptop Microphone problem can often be a cause for frustration. A dysfunctional microphone could have a variety of causes, and this article will give you an overview of the most common causes and how to fix them.

Check volume of microphone

First, make sure that the volume of the microphone is turned up to an audible volume. Open up theControl Panel, and from there go to Hardware and Sound. From there, click on Sound, and then select the Recording tab. There should be your microphone in the list of devices, and it should have a check mark on the picture.  Now, select the microphone and click on the Properties button, then select theLevels tab. Drag the slider to the right to increase the microphone level, and try speaking into the microphone to test it out. If you’ve maxed out your microphone volume, then it might be another problem that’s causing your microphone to not work.

Driver issue

The next option you should try is uninstalling your microphone driver and letting Windows pick the correct driver automatically. Click on your microphone under the Recording tab and click on Properties. Under the box for Controller Information, click on Properties again and then the Driver tab. Uninstall your current driver, and then click on Update Driver… Choose the Automatically update the driver to search for updates through the Internet option, and then go through the steps above to check the volume of the microphone.

Hardware issue

Since the microphone is built into the Toshiba laptop, it’s best to not try and fix it yourself. If you still have a warranty on your Toshiba laptop, you could always send it back to Toshiba to get it fixed. However, make you back up all your important files, since they will re-install your system and wipe your hard drive.

If you don’t have warranty, or you want to save all the files on your computer, you could always use TalkLocal for free to find a computer technician to fix your microphone for you right now, on your own schedule.

Replacing a Computer Screen for Laptop

Thursday, January 10th, 2013

Replacing a Computer Screen for Laptop Computer Repair

When your computer screen is not powering up, don’t worry! It might not be your computer itself but a faulty screen.  Before throwing out the entire laptop, you should assess the damage, take action, and try to salvage what you can.  Your problem may just be a faulty screen, and not the computer itself. Here are some directions on replacing a computer screen for your laptop.

Assessing the Problem

Your first step should be to determine whether or not it’s just the screen that has lost power or whether the entire computer has been affected.  For example, you could have dropped your computer and fractured the screen.  Try plugging into an external computer monitor through the VGA port.

If all you see is gibberish, lines, or maybe even nothing at all, the problem is severe. However, if everything pops up on the screen, it’s good news! Your hard drive and computer are intact and you will be able to access all your data. If it is possible, you can replace the screen (details below). If you cannot replace the screen yourself, take your laptop to a professional to find out if he or she will be able to replace the screen. If not, get the professional to extract your data and input it to a new computer.

Replacing the Screen

When replacing a computer screen, first turn the computer off, remove the battery and power cord and then unscrew the screen from the computer using a small Phillips screwdriver. These screws hold the screen and bezel together. Once the screws are out, you can gently pull the bezel away from the LCD screen. It should not break because it’s generally pliable. Once the bezel is removed, gently take the screen off.  Look for the part number on the screen and order the same type from the manufacturer. Be sure to keep the screws and bezel in a safe place while you await the replacement screen. Once you receive the new screen, attach it to the computer with the bezel and the screws, replace the battery and power cord, and power up the computer. You should be able to see everything and be able to use your laptop normally.

Continuing Problems

If you feel nervous about removing the screen, or if you cannot locate another monitor to check for screen damage, or if it appears that the computer itself is damaged, you should seek professional help.  Use TalkLocal to be put in contact with a reliable local business. All you have to do is input your problem and availability and within minutes TalkLocal will do the rest: you will be connected with an IT service company almost immediately.

Stop Programs from Automatically Starting Up

Tuesday, January 8th, 2013

Stop Programs from Automatically Starting Up Computer Repair

The following are the quick and easy steps for PC and Windows users to stop programs from automatically starting up:

1. Click Start >> Run.

2. When the Run text box opens up, type “msconfig” into the word box.

3. Select the Startup tab. Uncheck all the programs that you do not want to start when your computer boots up. Then, select Apply.

Following these steps will allow your computer to turn on and load faster because all the programs will not attempt to run at once. Beware that some of the programs that are running are necessary for your computer to function and must keep running. Use your own discretion when turning off or deleting programs if you are unsure of their functions.

For Mac users, take the following steps to stop programs from automatically starting up:

1. Open up the System Preferences on your Mac by clicking the Apple icon located in the upper left hand corner of your home screen. There you will find the System Preferences selection.

2. From there, select “Accounts” or “Users and Groups” based on which Mac model you have.

3. If you selected “Users and Groups” button on your Mac, move on to step four. If you have the other model of Mac and selected the “Accounts,” then select the programs you want to stop from automatically starting by checking the boxes next to the specific programs and then hitting the subtraction button.

4. In the center right of the next screen that comes up, select “Login Items.”

5. Select the programs you wish to stop from automatically starting. Then, hit the subtraction button.

Additional Help

If you have carried out the above steps and are still having issues with your computer, feel free to contact a computer specialist. Check out TalkLocal! You will be connected directly to professionals right in your neighborhood who can help you out with your problem at a time that works for you.

How to Change Icons on Windows 7

Tuesday, January 8th, 2013

How to Change Icons on Windows 7 Computer Repair

One of the easiest and most unique ways you can personalize your Windows 7 computer is to change your icons.  You can choose from a variety of different icons that Windows has built into the system, or you can even create your own icons from scratch! Read on to learn how to change icons on Windows 7.

To change your desktop icons:

1. Right click an empty area of the desktop and click Personalize.
2. There should be a “Change desktop icons” link in the upper left corner.
3. Select the icon that you want to change and click Change Icon.
4. Select a new icon or you can hit “Browse” to select something you’ve made from scratch. Remember that if you choose to make or use your own icon, it will need to be in a 256×256 pixel .ico file so that it will display correctly at different resolutions.
* Remember that you can also restore the default icon by clicking the “Restore Default” button in the middle pane of the icon selection screen.

To change a library icon:

1. Open up Notepad or your favorite text editor and drag the icon over from Explorer.
2. You’ll see (or need to add) the iconReference line that should look like this:

<iconReference>C:\Windows\System32\shell32.dll</iconReference>

The path to the icon file (.ico) should go between the two iconReference tags.

Additional help

If you’re still confused about how to change your icons, or if the above instructions didn’t work for you, you can always contact a local IT professional to change your icons for you!  TalkLocal can instantly connect you to three high quality local computer repair professionals. Best of all, the three companies will be able to accommodate your busy time schedule and cater to your specific location. You’ll be personalizing your desktop to your heart’s content very soon because TalkLocal finds you help in just minutes!