Archive for the ‘Computer Repair’ Category


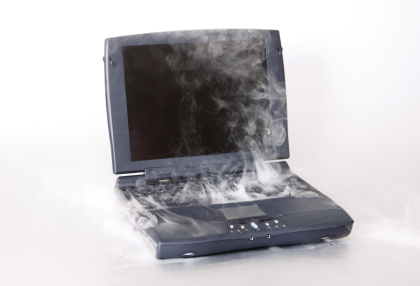
Smoke Coming Out Of Computer

Monday, December 24th, 2012

Smoke Coming Out Of Computer Computer Repair

Smoke Coming Out Of Computer

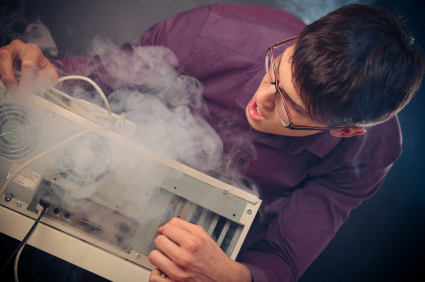
Smoke is never a good sign, especially when it is coming from your computer. This critical problem is more severe than any issue tech support can handle. Due to its dangerous nature, you should address this problem immediately. Stop what you are doing instantly and unplug the computer. Do not breathe in the smoke. Give your computer some time to cool off, about 5-10 minutes, before trying to turn it on again. Read on to learn more if there is smoke coming out of your computer.

Potential cause of the problem

Overheating is the cause of smoke coming out of your computer. It is detrimental to the lifespan of your computer, so make sure to regularly clean your computer, fansand the CPU tower, and keep your computer in a cool place.

Check to make sure your fans are all working and effectively cooling your computer. They must be spinning quickly and they must be clean of dust. A failed fan or a clogged fan contributes to overheating.

It could also be caused by a bad capacitor in the motherboard. Examine the motherboard for any signs of damage.

Another possible cause of smoke coming out of your computer is improper voltage. Too little voltage will cause your computer to not work. A higher voltage that necessary can short circuit your computer. The wrong power supply can fry your computer, so make sure it matches.

If Smoke is Coming Out of Your Computer…

You will probably need to replace the device that was smoking, so contact TalkLocal to help connect you with the right professional at your convenience. A local computer repair company will be able to diagnose your problem as well as help you find the necessary parts to repair your computer. Just go to the TalkLocal website and provide your location, problem, and location. You will be on the phone with help in minutes.

Uninstalling Antivirus Software

Friday, December 21st, 2012

Uninstalling Antivirus Software Computer Repair

You installed antivirus software to combat those pesky viruses, but for whatever reason, you no longer want it on your computer. What steps should you take uninstalling antivirus software?

Rest assured, there is a middleman for these types of complicated instillations and his name is Revo Uninstaller Freeware. Revo Uninstaller Freeware works with Windows to remove files left behind by a program’s uninstaller — at no cost to you! Go to their website and download this useful tool.

Manually installation

If you are skeptical about downloading software, you can also uninstall the software on your own. It is a lengthy process, but not a difficult one.

If you are removing Symantec’s Norton Antivirus from a PC:

1. Click Start >> Control Panel >> Add/Remove Programs.

2. Go to the Norton program.

3. Restart your computer when instructed.

4. Click Change >> Remove All.

5. Click Start >> My Computer >> Program Files.

6. Right click on all the Symantec folders and click delete.

7. Under Program Files, click the Common Files folder.

8. Delete all Symantec folders.

9. Restart your computer again.

10. Click Start >> Search >> All Files and Folders >> More Advanced Options.

11. Select every option except “case sensitive.”

12. Search “Norton.”

13. Delete all Norton folders from the results.

14. Restart your computer again.

15. Repeat everything on from step 10, using “Symantec” instead of “Norton.”

Some precautionary steps are necessary because uninstalled security software may interfere with newly installed security software, which would cause the system to freeze. To prevent this:

1. Go to the Registry.

2. Click Start >> Run.

3. Type “regedit.”

4. On the top of the Regedit window, click + next to HKEY_CURRENT_USER.

5. Click Software.

5. Right click Symantec >> Delete.

6. Go to HKEY_CURRENT_USER.

7. Repeat step 4 through 6.

8. Restart your computer.

9. Repeat steps 2 through 5.

10. Click + next to Microsoft >> + next to Windows >> + next to CurrentVersion.

11. Click the Run folder.

12. Right click Symantec folders >> Delete.

13. Right click Norton Antivirus if present.

14. Repeat step 13 in HKEY_LOCAL_MACHINE.

15. Restart your computer.

If you need additional help with uninstalling stubborn software, TalkLocal can connect you with technical support services in your area.

Monitor Suddenly Died

Friday, December 21st, 2012

Monitor Suddenly Died Computer Repair

Have you ever been in the middle of a project when your monitor suddenly died? There are a variety of reasons why you would be blindsided by a blank screen. Before you find out why, first try inspecting the basics:

– Is the power cable plugged in?
– Does the power cable connected to a working power strip?
– Is the power cable (or power strip) connected to a working outlet?
– Is the switch for that outlet turned on?
– Are both the monitor and computer turned on?

If you are still faced with a dead monitor, try plugging a different monitor into your computer. If the new monitor works, then this narrows the scope of your problem to your old monitor.

Two common causes of a dead monitor are a broken backlight or inverter.

It is tough to distinguish between the two causes, but here is a general diagnosis:

– If your screen went to black suddenly, it is probably a problem with the inverter. The inverter supplies the power for the screen’s backlight.

– If your screen gradually became dimmer, then it would probably be a backlight issue.

You can also use a multi-meter to detect whether you have a broken inverter.

Hold the ends of the multi-meter up to the inverter board. A good inverter should have a reading of 25 to 90 hertz.

For the economically inclined (and the technologically confused), keep in mind that an inverter replacement is usually cheaper than a backlight replacement.

But why risk emptying your wallet for equipment you may not need? The safest solution is to have your monitor examined by a professional. Use TalkLocal for a fast connection to your local tech support. Just enter your problem, location, and service need and you will be connected to help within minutes. Best of all, TalkLocal’s service is completely free.

Common Computer Problems Related to Power Outages

Tuesday, December 18th, 2012

Common Computer Problems Related to Power Outages Computer Repair

A variety of computer problems can occur due to a power outage, from data loss and operating system corruption to hardware failure of all kinds. It’s best to protect your computer with a UPS (Uninterruptible Power Supply) in the case of a surge. A UPS gives you time to save all your files and shut down your computer properly to prevent data loss. However, if it’s too late for that and damage has already been done to the computer, here are some common computer problems related to power outages.

Hardware issues

If your computer won’t turn on after an outage, there’s a good chance that the power supply is fried. Even if your fans turn on and you can hear sounds from the computer tower, your power supply may not be fully working. Replace the power supply with a part from your computer manufacturer, and see if that fixes the problem. Sometimes after replacing the power supply, none of the USB ports will work, including the monitor. Try removing all but one RAM chip, and restart your computer. Swap another RAM chip in if your computer still does not turn on. If you’ve cycled through all the RAM chips and the USB ports still do not work, then there’s a chance that your motherboard is also fried, which is a major problem.

Data loss

Computers will often be extremely slow or buggy after a power surge, similar to the way they act when infected by malware. This is because your operating system, in addition to your personal files, can be corrupted on your hard drive. If starting your computer up in safe mode fixes most of your problems, then try these steps:

1. Click on Start.

2. Search for Run.

3. In the Run dialog box, type “sfc /scanonce” and press enter.

4. Restart your computer.

If your computer is still slow/buggy, try using Microsoft’s check disk utility:

1. Click on Start.

2. Search for cmd.

3. In the command prompt window, type “chkdsk c: /f /r“.

4. Restart your computer.

There’s another option that you can try if your computer is still not working:

1. Boot up in normal mode.

2. Click on Start.

3. Search for Run.

4. In the Run dialog box, type “sfc /scannow” and press enter.

5. Restart your computer.

Since power outages can cause a myriad of complicated problems, it’s best to consult a professional. Changing certain parts of your computer can be complicated and might cause damage to the other parts of a computer if you’re unfamiliar with its interior structure. The operation system of the computer is also very sensitive, and recovering corrupt system files should also be left to an expert. Use TalkLocal for free to find a qualified computer technician to fix these common computer problems!

How Can You Tell if Your RAM is Going Bad

Thursday, December 13th, 2012

How Can You Tell if Your RAM is Going Bad Computer Repair

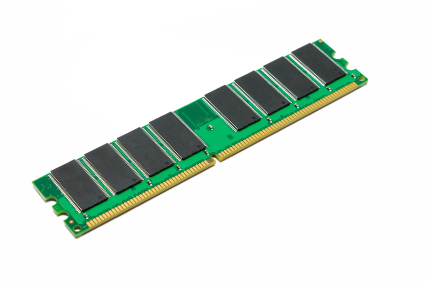
A RAM stands for “Random Access Memory,” and is physically the computer memory chip that is handled for calculations, not storing data like the hard drive. Because the flow of memory on the chip is so volatile (constant shifting of data as the computer operates), the current modern technology cannot produce drives with higher RAM capacity as equal to the hard drives.   Sometimes RAM can go back inside the computer.  You might be thinking to yourself, how can you tell if your RAM is going bad?  This article should help answer this.

Signs That You Should Be Replacing RAM

1. Computer slowing down drastically whenever you do an extensive action, such as playing a high-graphics game or using/downloading a large file.

2. Computer crashing whenever you do extensive actions.

3. Large fan noise coming from a computer whenever you do extensive actions.

These are the basic signs that you should be replacing your RAM. To actually verify that your RAM needs an upgrade/replacement, run a test on each of the RAM modules installed on your computer.

You can do this buy borrowing a RAM chip from another similar computer (there are only certain types of RAM chips that a specific model can use), replacing that with the one you already have, and doing the usual processes that made your previous settings crash (extensive actions).

Assuming that the computer that you took the RAM chip from was previously able to perform those same extensive actions, you can tell if the RAM chip is the problem by seeing whether you experience the same symptoms after replacing the RAM chip.

If the computer still has problems with the extensive processes even with the new RAM chip, the problem is most likely with the computer, not the RAM chip. However if the computer works fine with the new RAM chip, then the RAM chip was the problem.

Consult a professional or conduct an online search to see which RAM chips work for your computer model. You may also wish to upgrade your current RAM chip (as in, upgrade the capacity to a higher memory) or completely replace it.

Additional Help

If you feel like you need professional help on how to replace your RAM, TalkLocal can help with finding the correct local experts, saving you time and energy in what may be a stressful situation.

How to Invert Colors in Windows 7

Friday, December 7th, 2012

How to Invert Colors in Windows 7 Computer Repair

An optimized color scheme in Windows can put less strain on your eye, which is very efficient for the speed of comprehending what’s on your screen as well as your optical vision. To improve your experience, read below to learn how to invert colors in Windows 7.

What to Do

Click on the Start button on the bottom left of your screen. A search bar should come up directly above the button once your click it. Click on the search bar and type, “magnifier”. Click on the magnifier and it should come up.

When the magnifier comes up, your computer’s screen will zoom itself in. Repeatedly click on the (-) icon until the zoom is normal. Then click on the gray gear on the magnifier application to open up the preferences screen.

On top, there is a scale for adjusting the zoom. Below that is an option for the color inversion. Click on it.

Click on the option and press “OK”. Your colors should be now inverted. If you want to change your settings back, simply access the magnifier again and uncheck the option/move the zoom bar around to your satisfaction.

You can also right click the magnifier application to pin it to the task bar (the bar on the bottom of your screen that shows up what applications you are using) to access it easily on the future. Right clicking the application should bring out the option “Pin to taskbar” that will allow for this.

Benefits

Using inverted color may not only be softer for your eyes but may be saving computer battery. Although it’s minimal, the computer uses less power to represent a black pixel than a white pixel. For a more direct way to save battery, adjust the brightness of your screen.

Additional Help

If you feel like you need professional help on how to invert colors in Windows 7, TalkLocal can help with finding the correct local experts in this case, saving you time and energy in what may be a stressful situation.

Is JailBreaking your iPhone Legal?

Thursday, December 6th, 2012

Is Jailbreaking your iPhone Legal? Computer Repair

Jailbreaking is when you hack the operating system of an iPhone to allow any and all applications to run.  This includes applications that may not necessarily be authorized by Apple. Jailbreaking your phone is technically legal, but it will expose you to a wider range of threats and void your warranties.

Is jailbreaking your iPhone legal? Federal regulators have recently declared that jailbreaking your iphone is legal. But while it won’t get you thrown in jail, it will make your life a lot more difficult.  Both your phone service provider and phone manufacturer offer warranties with your iPhone, but both Verizon/AT&T and Apple’s warranties are declared void if you jailbreak your phone. When your iPhone is open to all those viral threats, no one is willing to touch it.

Apple maintains that the iPhone has succeeded so well in the marketplace because it a safe product to use.  The stringent vetting process that each application goes through ensures that only legitimate clean apps make it through.  By jailbreaking your iPhone you leave your device open to suffer from potentially catastrophic cyber attacks.

Most phone manufacturers, including Apple, claim that jailbreaking violates the Digital Millennium Copyright Act (DMCA). On the other hand, the Electronic Frontier Foundation adamantly opposes making jailbreaking a crime because it limits the potential of the phone. If you are stuck trying to decide whether or not you want to jailbreak your iPhone you have two options: You can either jailbreak the iPhone and void your warranties or you can opt to use a non-Apple product like a Droid, LG, or Samsung phone.  If you are not accident-prone and like the user interface of Apple, you should go with the first option. If you would prefer to keep your warranties, you can use other — less safe, but still reliable — options your service provider offers.

Continuing Problems

If you continue to have problems deciding what to do you should seek professional help.  Use TalkLocal to be put in contact with reliable phone businesses.  You don’t have to do any work! Simply input your problem and availability and within minutes you should be connected to someone who can help you out.

Laptop Battery will not Charge

Monday, December 3rd, 2012

 Laptop Battery will not Charge Computer Repair

If you are plugging your laptop computer into charger, but it does not appear to be charging there are a number of problems you could be having. This article will help you to figure out why your laptop battery will not charge.

Not Plugged In

This may seem simple, but before you try to figure out if there is a problem with your computer or battery, make sure that you are actually plugging your computer in. Check that the cord is all the way pushed in to both your computer and the outlet. Check that any detachable parts of your cord are attached all the way. If you are plugging your computer into a power strip or extension cord, make sure that the power strip/extension cord is plugged into the wall. If there is a switch, make sure it is turned on. Also, make sure that your battery is properly seated inside your computer. If everything is plugged in, you should also try plugging your computer into a different outlet to see if there is a problem with your outlet.

Battery not Working

To check whether or not your battery is working, remove it from your computer and then plug your computer into an outlet. If it turns on and works correctly, then the problem is your battery and you will probably have to get a new one. If it is a new computer, contact wherever you bought it and let them know they sold you a defective battery.

Problems With Your Charger

Inspect your power cord. Are there any kinks or breaks? Have any parts been chewed by a pet or caught in a vacuum cleaner? Is the brick discolored, warped, or expanded? Does it smell like burnt plastic? If you said yes to any of these questions, you will likely need to replace your charger. If there are detachable parts, you may only have to replace the part that is broken.

Laptop Overheating

Overheating can cause the battery not to charge until it has cooled down, especially if you are using an older laptop with outdated cooling technology. Your laptop may also overheat if you have it on a blanket, your lap, a couch, or a bed. If your laptop feels hot, turn it off, unplug it, and rest it on a flat, fully ventilated surface until it cools down. After it has cooled down, check to see if it will charge properly.

Update Your Drivers (Windows)/SMC (Mac)

If none the above things are working, the problem is most likely coming from inside your computer. If you are using a Windows computer, you can try updating your drivers.

1. Open the Control Panel.
2. Click on Device Manager.
3. Open each option under Batteries (battery, charger, and “Microsoft ACPI Compliant Control Method Battery”), bringing up a Properties window for each.
4. In each Properties window, go to the Driver tab and click Update Driver.
5. When you have updated the driver in all three, restart your laptop and try plugging it in again.

If you are using a Mac computer, you can try restarting your System Management Controller (SMC).

1. Shut down your computer.
2. Unplug your charger from your computer, if it’s still connected.
3. Remove the battery.
4. Press and hold the power button for five seconds.
5. Release the power button.
6. Reconnect the battery and charger.
7. Press the power button to turn on the computer.

Contact a Computer Repair Professional

If you have tried everything above and your laptop is still not charging when you are plugging it in, you may have to contact a computer repair professional. With the help of TalkLocal, you can receive phones calls within minutes from up to three high quality computer repair professionals in your area that are available when you are.

Can I Upgrade from Leopard to Lion

Friday, November 30th, 2012

Can I Upgrade from Leopard to Lion Computer Repair

It’s time for an upgrade, and you’re wondering “can I upgrade from Leopard to Lion?” Before upgrading to a Lion, make sure that your Mac can run Lion. Legally, if you only have Leopard, you need to upgrade to Snow Leopard first before you upgrade to Lion. This means that you will need to purchase Snow Leopard as well.

How to Upgrade

The latest version of the OS X system is currently Mountain Lion. Read on to learn how to upgrade to this latest version of Lion. Your Mac must be one of the following models in order to run Lion, according to the apple website:

– iMac (Mid 2007 or newer)

– MacBook (Late 2008 Aluminum, or Early 2009 or newer)

– MacBook Pro (Mid/Late 2007 or newer)

– MacBook Air (Late 2008 or newer)

– Mac mini (Early 2009 or newer)

– Mac Pro (Early 2008 or newer)

– Xserve (Early 2009)

1. Once you confirm that your computer can run Lion, make sure that your version of Snow Leopard is updated.

2. Click on the apple icon on your Mac located on the top left corner of the your screen. A menu will come up.

3. Click on the second option, marked as “Software Update…” This should update your Snow Leopard to the latest version, v10.6.8.

4. Go to your Mac App Store.

5. Download the OS X Mountain Lion.

6. Follow the onscreen instruction on how to install the software. The OS X Mountain Lion is scheduled to be available in July 2012.

Additional Help

If you are having a problem with downloading, visit a local apple store for direct help. If you have a different problem that was not addressed by this guide, then contact professional help for upgrading your system. TalkLocal can help with finding the correct local experts in this case, saving you time and energy in what may be a stressful situation.

Network Connection not Working after Power Outage

Wednesday, November 28th, 2012

Network Connection not Working after Power Outage Computer Repair

Routers and modems are already fickle pieces of hardware in the first place, and when hit by a power outage, practically anything can happen to your network connection. However, try these basic solutions if you find your network connection not working after a power outages. Chances are your connection will magically start working again.

Reset your router

This renews your IP address and restarts your router, which gets rid of most system errors within the router. Since the router is like a mini-computer, restarting it will solve data corruption and memory leak problems just like how restarting your computer solves many common system errors. This is a quick catch-all method that usually solves most networking problems.

Connect directly to your modem

Wireless connections in general are unstable, and your problems may be fixed by simply connecting directly to the modem through an Ethernet cable. Even if using an Ethernet cable may not be plausible in the future, use this method to determine the location of the problem. If your internet works when connected to the modem but not to your router, the problem lies within your router.

Reinstall your network adapter drivers

Go to the drivers and devices page of your computer manufacturer and find the newest network adaptor driver for your computer model. You may have to provide the serial number of your computer in order to download the driver. If your computer does not have internet, download the driver from a computer that does and transfer the file to the problem computer through a USB drive. Double click on the driver and install.

Buy an external network adapter

There’s a chance that the power surge blew the internal network adapter, but you’ll still be able to access the internet through an external network adapter. They’re relatively cheap, starting from around $15 online.

Networking issues are common even without a power outage thrown into the mix, so they can be very complicated. It’s best to consult a professional technician if you find your network connection not working. Use TalkLocal for no additional charge to find one now!