Archive for the ‘Computer Repair’ Category


Can you Transfer Data from One PS3 to Another

Tuesday, November 27th, 2012

Can you Transfer Data from One PS3 to Another Computer Repair

Have you bought a new slim PS3 to replace your old and clunky PS3? If you have, then you probably you are probably wondering, can you transfer data from one PS3 to another.  The answer is: yes you can.  Without transferring you will lose all of your data from the previous PS3. PS3 has two simple ways of transferring your files—Ethernet Cable or USB.

Ethernet Cable Transfer

1. Update the system software of both PS3s to their latest version.

2. Prepare PS3 to send the data or source system. If there are multiple users on the source PS3, create PlayStation Network account.

3. Connect two PS3s with an Ethernet Cable.

4. Connect both PS3s to a separate TV inputs on the TV.

5. Turn on the PS3s.

6. Go to TV input of the source PS3 (the one that is transferring the files).

7. Check the source PS3 is connected to the Internet. If not, go to “Network Connections” > options > system options > “Data Transfer Utility.”

8. Follow instructions on online data transfer and trophy syncing. Trophies must be synced or you cannot transfer trophy information.

9. Switch the TV to the PS3 getting the files.

10. Go to options > system options > “Data Transfer Utility” > “Transfer Data from the other PS3 System to This System.”

USB Transfer

1. Choose the content to be transferred.

2. Insert USB flash drive into the source PS3.

3. Click the triangle button on the chosen content.

4. Click “Copy” to have the content be automatically copied to the USB flash drive.

5. Turn off the PS3.

6. Insert the USB.

7. Turn on PS3 and XMB bar will appear.

8. Click the triangle button and the “Display all” option.

9. Click the triangle button on the data you want to transfer.

10. Click “Copy.” The data will begin transferring.

These two ways will get your files easily transferred and and you can resume playing Uncharted 3 in no time. If you have difficulties transferring files or would like some professional help, contact TalkLocal. TalkLocal will connect you with the best professionals in your area for free.


Lost Favorites in IE9

Saturday, November 24th, 2012

If you use Internet Explorer as your web browser and recently upgraded to the new IE9, you will want to be able to access the favorites window in order to visit all of your bookmarked sites.  Your favorites should have been automatically imported from IE8 when the new version was installed.  If you switched to IE9 from a different browser like Google Chrome or Mozilla Firefox, you will need to manually import your bookmarks if you want to keep all of the same favorite websites. Most browsers provide an option to export your bookmarks to a file that you can use for this purpose.  This is a relatively simple process; you can find a great short step-by-step guide on this tech blog. Read on for more help on recovering lost favorites in IE9.

Once your favorites have been added, you may have some trouble actually finding them in the IE9 browser.  Microsoft has made some layout changes in this newest version of Internet Explorer that can be confusing, especially if you are used to the older IE8.  In previous versions, the favorites button was on the top left corner of the browser screen, but it has been moved across to the top right corner in the new one.  Clicking this button will display the familiar favorites panel, which should contain all of the pages that were imported either automatically or manually.

You might also be wondering what happened to the Favorites toolbar that used to be at the top of your browser page in IE8.  This toolbar provides quick access to all of your favorites and can be very useful for navigating to sites that you visit frequently.  Fortunately, the favorites bar is still around in the new version of Internet Explorer; it just isn’t visible when you first start using IE9 because the browser default sets all toolbars as hidden.  Enabling the favorites bar is simple; just right click the top of your browser window to the right of the “New tab” button. Then, click the check box next the toolbar you want to view.  If you are having trouble, Microsoft has created a cool instructional video detailing the steps you need to take that is available to watch here.

If you are unable to import your bookmarks on your own, or encounter a bug or error, you may want to get in touch with a professional computer repair service.  The best way to find a quality technician in your area is with TalkLocal.  All you have to do is enter your basic info and a short description of your problem and TalkLocal will automatically connect you with someone who can help!

Outlook 2007 Cannot Send Email with Attachment

Tuesday, November 20th, 2012

Microsoft Outlook 2007 users: Are you experiencing frequent problems with email? If so, you’re fortunately not alone. Many users have reported problems with various aspects of Outlook 2007—one in particular being sending email attachments. While there is not one proven solution to the problem, many people have tried the following to successfully send email attachments without trouble:

– Try using a smaller image—while Outlook does not restrict the size of emails or email attachments, most Internet Service Providers (ISPs) do. If the total size of the email—including all attachments and actual message content—is over the limit of your particular ISP, this could be your problem. Try reducing the size of your file or image, and then re-attaching.

– If you receive the “Microsoft Office Outlook is synchronizing folder” message, try clicking on Tools > Folder options > Offline folders. Once you are here, you have the option to “disable offline folders.” After you’ve disabled offline folders, reboot and try again. This could solve your “synchronizing” problem.

– Back-up and uninstall—if neither of these suggestions solve your problem, try simply backing up your files, uninstalling Microsoft Office 2007, and reinstalling.

Many users experience a variety of other problems in addition to sending email attachments. If this is the case for you, there are some suggestions that are useful for solving general problems as well. For example, try reducing the size of your users’ mailboxes. While this can be inconvenient for all, it may help solve your problem. You may also want to try using Outlook in Regular Online Mode as opposed to Cached Mode. To do so, go to Tools > Account settings > Exchange. Then click Change > More Settings. In the “Advanced” tab, click on Offline Folder Settings > Compact Now.

While these solutions may not solve every issue you’re experiencing with Outlook, they can help to increase performance and make the process somewhat less aggravating. If you feel you’ve exhausted all at-home repair options, you can contact customer service or have a trained professional investigate the problems. For a no-hassle matchup with a local business eager to help, fill out a service request on TalkLocal’s website and talk to someone within minutes.

How to Restart Windows 8

Monday, November 19th, 2012

How to Restart Windows 8 Computer Repair

Windows 8 is the newest operating system from Microsoft and is designed primarily for use with tablet computers. Unfortunately, even experienced users of previous Windows versions will feel as though they’ve been violently and unexpectedly thrust into alien terrain.

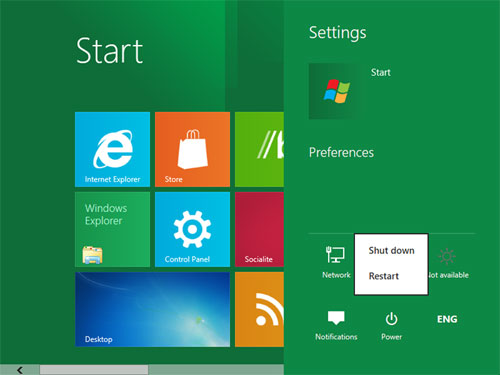
Many users have reported finding this operating system’s Shut Down, Restart, Sleep and Log Off features to be an exercise in frustration. Unlike Windows XP, Vista and 7, which conveniently and sensibly placed these options in the Start Menu, Windows 8 seems determined to get you to jump through hoops just to do something as basic as rebooting your computer. Fortunately, this guide will teach you how to restart Windows 8 with relative ease.

If you’re looking for the shut down and restart options in your Metro Start Menu, you’ll be sorely disappointed. All that you’ll find there are the options for logging off of your Windows account or locking the machine to prevent unwanted access. There are two ways that you can go about restarting or shutting down your computer in Windows 8.

1. The first way is to open up your Charms box by pressing the Windows+C keyboard shortcut combo. This will bring up a dialog box that contains additional PC options. Once you’ve opened the box, click on the Power button to display a list of more options. Pick the action you wish to perform.

2. The second and simplest way is to use the classic keyboard shortcut combo, Alt+F4, from the desktop. This will bring up another dialog box, but it will look much more similar to a Windows XP-style box. It will contain a drop down menu with options for switching users, logging off, shutting down or rebooting. Before rebooting using this method, it’s strongly recommended that you save any open work and close all of your open or active applications.

If you’re still having trouble rebooting your computer, you may need to call in a professional who is familiar with this operating system. Fortunately, TalkLocal makes it easy to find one in your area.

How to transfer contacts between Android and Blackberry

Friday, November 16th, 2012

How to Transfer Between Android and Blackberry Computer Repair

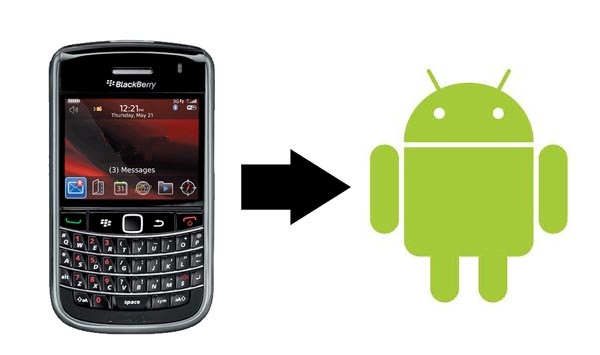
Congratulations on your new phone. Whether you simply needed a newer phone or wanted more control over your device, you’re sure to be happy. Of course, you don’t want to leave everything behind with your old device. Fortunately, both Android and BlackBerry work with Google Sync, which allows you to transfer contacts between an old and new phone regardless of which operating system you’re moving to. You don’t need to worry about losing essential phone numbers or email addresses if you follow these step-by-step directions that will teach you how to transfer contacts between Android and Blackberry.

Contacts to BlackBerry

1. Open your contacts app on your Google smartphone.
2. Touch the “Menu” button. Tap “Manage Contact.” Choose “Copy Contacts.”
3. Pick “Phone” as the cop source. Choose “Google” as the destination. Your contacts will copy to your Google sync account.
4. Launch Google Sync from your Downloads app on your BlackBerry. If you do not already have to app, go to “m.google.com/sync” to download Google Sync. Touch “Install Now” to install.
5. Type in your Google account username and password.
6. Choose which information to sync and when to sync it on the screen that appears. For instance, you can choose to manually or automatically sync contacts. You will also be able to sync reminders to your phone. If you choose to sync your calendar as well, it will ask how far in advance you wish you to sync your calendar.
7. Choose “Save” to begin syncing. This process may take some time if you have many contacts.

Contact Syncing From BlackBerry 

Moving from BlackBerry to Android is an easy process, too.
1. Open Google Sync on your BlackBerry.
2. Choose “Sync Now” to make sure the most current contact information is added to your Google account.
3. Open the “Accounts & Sync” app on your Android phone from the gear icon.
4. Touch “Google.” Touch to add a checkmark to “Sync Contacts.”
5. Touch “Sync Now” to sync.
6. Open your contacts app. Touch the arrow next to “Phonebook” to open the drop down menu. Make sure “Google” is checked. You will now see all your synced contacts.

A similar process lets you sync contacts between your iPhone 5 and a smartphone with a different operating system. If you find it difficult to transfer contacts or run into errors during the process, TalkLocal is here to help. Schedule an appointment to move your contacts today!

Can you Change the Processor in a Macbook Pro

Thursday, November 15th, 2012

Can you Change the Processor in a Macbook Pro Computer Repair

Everyone loves speed — fast cars, fast food, fast computers, etc. Computers can be made quicker by upgrading the processor or increasing the RAM on the computer. At this point you may be thinking, can you change the processor in a MacBook Pro? The quick answer is yes, but it is extremely unadvisable because doing so voids your warranty and risks the condition of your laptop. Not all computers can have upgraded processors and the MacBook Pro is a part of that list.

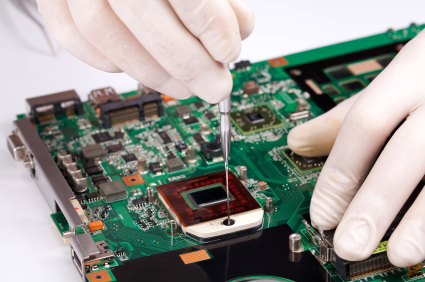
Upgrading your MacBook Pro’s processor is a very complex process that the typical person (and even more seasoned techies) will not be able to follow. Apple chooses to solder their CPUs in their laptops rather than including a socket that would allow you to upgrade your processor (like most laptops have). This means that to upgrade your MacBook Pro’s CPU, you will have to open up your laptop. If you’re wondering why Apple does this, you won’t need to wonder much longer. Apple does this because not only does it force users to purchase a new machine rather than upgrading, but it also allows Apple to make their laptops slightly thinner.

In any case, the MacBook Pro’s processor is soldered onto the logic board and cannot be replaced, so unless you are in a destructive mood, we would not advise you to change the processor. Doing so will void your warranty instantly, meaning you will be held responsible for anything that may go wrong.

Of course, that’s not to say that changing the processor in a MacBook Pro is impossible, only very difficult. If you really wanted your MacBook Pro to have an upgraded processor, you could ask a computer repairman to take a look at it. If you’re searching for a capable and reputable computer repairman, consider using TalkLocal to find a capable and reputable computer repairman for you. TalkLocal is a free service that will connect you with top-quality, computer repair companies in your neighborhood within minutes. Just enter in your specific problem, location, and availability, and up to three companies will call YOU directly.

Flash Video will not Work after Installing Plug-in

Wednesday, November 14th, 2012

Flash Video will not Work after Installing Plug-in Computer Repair

Adobe flash player is the plug-in that is needed in all web browsers. This is the only way to watch most videos online. Without it, you wouldn’t be able to browse videos on YouTube. If your flash video will not work even after installing the plug-in, here are some ways to fix the problem.

Reinstallation

Sometimes the solution is as easy as reinstallation.  When installing initially, problems may arise and cause the flash player not to work. To reinstall:

1. Go the internet browser and remove all the adobe flash player plug-ins. To remove adobe flash player completely go to Adobe site and download flash player uninstaller.

2. Run the uninstaller.

3. Restart your computer. This should completely remove adobe flash player from the computer.

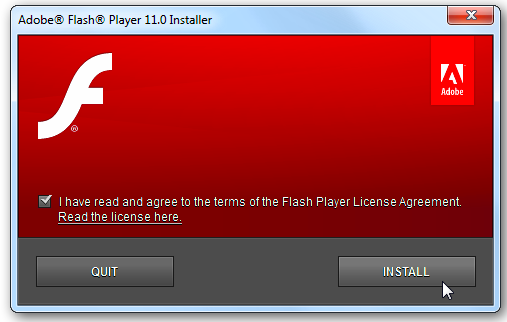
4. Reinstall the latest version of flash player.

IE

Internet explorer has specific problems specific to its browser that may stop from flash player from working. The most common problem is in security options. If Internet Explorer’s security is high, then plug-ins will be disabled. To fix this problem:

1. Click the “Cog” icon and click “Internet Option.”

2. Click the Security Tab.

3. On the security level bar, move the notch from high to medium.

4. If you want customer settings, click on “Custom Level” under security level bar.

5. Under “Active-X controls and plug-ins,” find “Run Active-X controls and plug-ins.”

6. Click “Enable.”

Also, check to see if Google Chrome or Mozilla Firefox has the flash player enabled.

Remove Flash Player Cache

The flash player cache may conflict with flash player when watching a video. To remove the flash player cache:

1. Run %appdata%\Adobe.

2. Delete flash player folder.

3. Run %appdata%\Macromedia.

4. Delete flash player folder.

If these troubleshooting steps do not work, contact a computer repair professional through TalkLocal. TalkLocal is the best in connecting you to high quality service providers in your area for free.

Dell Tablet PC Touch Screen Not Working

Monday, November 12th, 2012

Dell Tablet PC Touch Screen Not Working Computer Repair

Having a Dell tablet PC is like having a million possibilities are the end of your fingertips.  Tablets offer a wide array of things to do from staying connected, to being productive, to having fun.  You won’t ever be bored with your Dell tablet.  But what happens when your dell tablet PC touch screen is not working?  This certainly impairs the functionality of your tablet.  Continue reading for some possible problems and solutions to this particular issue.

Potential problems

–  Bad installation

–  Drivers missing

–  Missing software

–  Corrupt update

Solutions

If you are having problems using the touch screen on your dell tablet pc you should try to fix it as soon as possible.  The first thing you need to do is power the device off and turn it on again to see if it is a simple glitch with the tablet.  If this doesn’t work you can try to hard reset it as well.  If your problem persists, you may have a bad installation.  You should wipe the entire device clean and try to re-install the hardware.  This is a lengthy process, but worth it if it takes care of your problem.

Sometimes when you are using a device or running a certain program the drivers you need on your tablet may go missing/get deleted.  In this case you should re-download the correct updates on your computer for the drivers.

Another common problem is that the software or system does not have all the updates it needs to function properly.  You should check to make sure that everything is up to date and that you have the latest versions of all programs and applications.  Many times incorrectly installed software will cause your tablet to malfunction.

Many people have complained that the most recent windows update has caused more problems than it solved.  These corrupt updates are known to cause transient and long term problems especially with the touchscreen.  You should uninstall the update and return to the old version until Windows fixes the problem.

Continuing problems

If you continue to have problems with your Dell tablet PC touch screen, you should seek professional help.  Use TalkLocal to be connected with reliable local IT service companies.  Simply input your problem, location and availability, and TalkLocal will do the rest.  Within minutes you should be connected to a local computer repair technician who is willing to help.


Mac AirDrop Not Working

Thursday, November 8th, 2012

Mac AirDrop Not Working Computer Repair

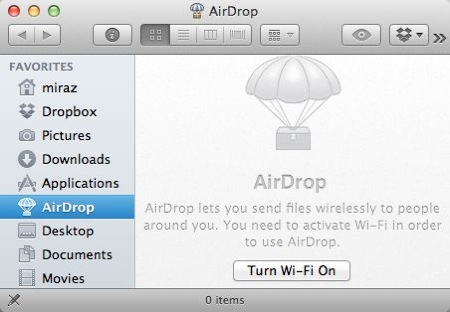
Mac AirDrop was released with OS X Lion. It is a convenient way of transferring files between other Macs without a WiFi network. However, all Macs with Lion do not support AirDrop, only Macs equipped with certain hardware support AirDrop. If your Mac AirDrop is not working, read the following about which Macs are able to support AirDrop, when Lion is installed:

* The MacBook Pro (17-Inch Late 2008) and the white MacBook (Late 2008) do not support AirDrop.

If your Mac is older than these, you will not be able to use AirDrop because your computer does not have the right hardware. Any Mac that does support AirDrop should have it installed automatically when you install Lion. To access it, open finder and pull down the Go drop down menu. If you see AirDrop, your Mac supports it, if you do not it does not and you will not be able to use it.

Once you click AirDrop, it will open in a Finder window and appear under your Favorites list. To transfer files, the computer your are transferring your files to (which must also have AirDrop capabilities and be in range) must open AirDrop as well and you should see that computer in your AirDrop window. Simply drag the file onto the computer that you want to transfer it to in your AirDrop window and the file will transfer.

If your computer is one of those listed above, but you are still unable to use AirDrop, there may be a problem with your Lion install and you may want to contact a computer repair professional. With the help of TalkLocal, you can be on the phone within minutes with up to three high quality computer repair professionals in your area that are available when you are.

Computer Screen is Hurting my Eyes

Tuesday, November 6th, 2012

Computer Screen is Hurting my Eyes Computer Repair

Many of us spend our time at work in front of screens and computers, only to return home to watch television and movies on screens as well.  As a result, we complain to others that a “computer screen is hurting my eyes”, we’re constantly straining our eyes and it’s quite common to develop blurry vision and sore eyes.  Fortunately, there are many things you can do to minimize the strain on your eyes, protecting your eyesight and preventing damage to your eyes.

Frequent Breaks

This is the simplest and most effective way to decrease eye strain while using electronics.  All you have to do is follow the “20-20-20″ rule. Every 20 minutes, focus on something 20 feet away for 20 seconds.  This should immediately refresh your eyes and allow the muscles to relax.  Frequent breaks will keep you feeling a lot better at the end of the day, so just remember “20-20-20!”

Eye Drops

When people use the computer, they actually end up blinking about 60% less than normal, leading to dry and strained eyes.  You may want to invest some eye drops to help refresh your eyes whenever they feel strained, or simply remember to blink more.

Computer Settings

Your computer monitor settings may also have a significant effect on your eye strain.  On the older CRT monitors, you need to make sure that your screen refresh rate is higher than 60Hz, or else you risk severe eye strain.  You may also want to decrease the screen resolution so that everything appears bigger; you won’t need to squint or strain to find the small icons.  Lastly, you can always use filters that help decrease eye strain such as F.lux (http://stereopsis.com/flux/). F.lux changes the color your computer display based on the time of day, so if you’re up late working, it tones it down to a more natural tone to decrease eye strain.

Remember that it’s easy to prevent eye strain; make sure to take breaks, blink often, and change your computer settings to protect your eyes.