Archive for the ‘Computer Repair’ Category


Acer Crashed: How to Fix

Friday, September 21st, 2012

Acer Crashed: How to Fix Computer Repair

Acer Crashed: How to Fix

Acer laptop crashes could be a result of many different problems with your computer, and depending on the cause of the crash, it may be feasible to repair your computer.  Understanding the cause of the crash should be your first priority, since that will give you the most information about how to specifically address your problem.  Potential causes could be loose RAM, corrupted system files, new hardware, or even overheating.

New Hardware

If you recently installed new hardware, you should try to remove the hardware and then see if this fixes your problem.  Often times, new hardware isn’t compatible with the system and may cause a system crash.

Overheating Laptops

This is also another very common cause of crashes, so make sure that the fan ducts are clear and the fan is spinning while your laptop is working.  Place the laptop on a flat tabletop surface so that the air can flow unobstructed around and below the laptop.  You may also need to purchase a laptop cooling pad to lower your laptop’s temperature if all else fails.

If these previous two reasons did not cause the crash, then the easiest next step to take would be to use the Windows Start-up Repair.  Insert the Windows installation disk, boot the system, and click “Repair  your computer”.  Simply click the correct option for “Operating System” and click on the “Registry” or “Startup” option in the recovery menu.  This tool will automatically repair your system and then restart.

For most cases, the Startup Windows repair tool should fix the problem.  In the rare case it does not, TalkLocal can help you find a high quality local computer repair professional to help you in just minutes.  It’s fast and free, and you’ll a computer professional working with you almost instantly.

When to Change a Laptop Battery

Friday, September 21st, 2012

When to Change a Laptop Battery Computer Repair

You just got a new laptop, and you do everything in your power to keep the laptop like new for as long as possible. However, with all your careful efforts, there’s going to be one component of the laptop that will degrade no matter how much you baby it: the battery. Even by following all the recommended ways to drag out your battery’s max capacity, you’ll have to replace it eventually. Typical lithium batteries will have anywhere between 300-1200 charge cycles, but usually 500 charge cycles is the lifetime of a typical battery. In human time, this usually equals out to around 1.5-2 years. So if you want to know when to change a laptop battery, the estimated date is after two years. Your new battery should be the same model as your old battery, and can probably be found on your laptop manufacturer’s website if your laptop isn’t too old.

Switching in the new battery itself is surprisingly easy. First, make sure your computer is turned off and disconnected from the power source. Flip your laptop over, and there should be release latches somewhere on the back to keep the battery in place. If you can’t find them, consult your manual. Open these latches, and pop the battery out from the back of the laptop. Insert the new battery in the same position as the old battery, and then lock the battery in place. Plug in your laptop, and wait for the battery to charge.

If you switch in the new battery, and it either doesn’t work or your computer is eating up too much power, it probably means there’s something wrong with your computer. Take it to a professional computer repair technician to get it checked out, and there’s no better service to find you one for free than TalkLocal!

Mac vs PC Laptop Pros and Cons 2012

Thursday, September 20th, 2012

Mac vs PC Laptop Pros and Cons 2012 Computer Repair

The battle between Macintosh and PC users has been going on pretty much since the beginning of time. Now that Apple’s market share is growing, the battle is stronger than ever. Users are usually extremely attached to their choice in computers, which can make for some ugly online arguments. However, both choices have their merits, and it really all depends on your personal needs. Here we’ll list the features of both Macs and PCs and leave the decision making up to you.

Mac vs PC Laptop Pros and Cons 2012

Macs:

Pros

– Stylish and attractive. Macs have been consistently voted the most attractive computers on the market, having slick hardware and user interface designs.

– Rarely get viruses due to their closed OS and relatively small share of the market, which results in less Mac viruses being created.

– High quality software that is bundled with Macs, as compared to most bloatware that comes with PCs.

– Higher resolution than most PCs, and are widely used by creative professionals due to the better software and monitor.

– Less poorly written programs that can cause conflicts and crash your computer, since Apple monitors the app for Macs closely.

– Macs generally have a faster boot up and shut down time.

Cons

– Overheating in their unibody Macbooks, since they tend to be built very compactly.

– Hard to upgrade your Mac, since parts tend to be Mac specific and owned by Apple. Scarcity equals an increase in price, which means Mac parts can be very expensive.

– For the same reason, it’s difficult to replace parts in your Mac by yourself. Even the iMac is hard to open and replace since the parts are packed in tightly in comparison to replacing PC parts.

– Smaller range of software. However, you could use Bootcamp to run a Windows OS on your Mac along with the original Mac OS.

– Most newer games don’t do well on a Mac, as many do not have a Mac version available and the Mac graphics card cannot be updated.

– Hard to customize due to their closed operating system.

PCs:

Pros

– Wide variety available, from budget computers that cost around $300 to heavy duty custom machines that cost a couple of thousand.

– A lot of customization available on the market.

– Much easier to replace and upgrade parts on your own. Desktop towers tend to be quite roomy, and it’s not too hard to determine the function of each part.

– More computer repair places fix PCs. PC parts also tend to be much cheaper than Mac parts, and also come in greater varieties.

– All Mac software works on PCs, but not nearly as many PC software work on Macs.

– Easier to fix PC problems yourself, since it’s easier to access the operating system.

Cons

– Because Windows has very little control over the software, low quality software tends to be more common and can crash your computer.

– The quality of Windows computers have a wide range, and tend to be hit or miss. For someone who doesn’t know much about computers, looking at PC specifications can be confusing.

– PCs tend to get more viruses since PCs make up a greater part of the market. However, anti-virus software tends to be very comprehensive nowadays.

– PCs require more maintenance than Macs, and you’ll have to fix computer problems more often than on a Mac.

No matter what kind of computer you decide to get, you’ll probably have problems somewhere down the road. Mac repair technicians are especially hard to find, so why not use TalkLocal to find one that definitely repairs Macs instead of looking up numbers in a phone book?

How to Increase the Maximum Volume on your Computer

Thursday, September 20th, 2012

How to Increase the Maximum Volume on your Computer Computer Repair

Sometimes we just want our music “blasting” on our computer for a house party, to relax, or even just to annoy. However, maximum volume on a computer can sometimes be too quiet for these situations so you might be wondering how to increase the maximum volume on your computer. There are several simple ways to do this to achieve the sound you want.

VLC Media Player

VLC media player is a media player that can be downloaded for free. It can play virtually any audio or video file imaginable. The player can also increase the volume of the computer tremendously. To increase volume on a VLC media player:

1. After selecting a media file, use the scroll wheel to increase the volume to your liking. It can go up to 400%.

2. If 400% is not enough for you, click on “Tools” on the menu bar.

3. Click Effects and Filters and check Enable.

4. Use the first slide bar to increase the volume to your liking.

Windows 7

Windows 7 has a way to increase the max volume of a computer called loudness equalization. This makes the sound have increased bass and treble for louder and richer sound. This is optimal for soft sound to become louder. To turn on loudness equalization:

1. Click on the volume icon.

2.Click on the icon above the volume bar.

3. Select the  Enchantment tab.

4. Check loudness equalization.

Speakers

If the internal speakers are the ones that are not loud enough, the best way to increase volume is to purchase speakers. Music studio quality speakers can be expensive, but more modest speakers can be pretty cheap. One of the best speakers that don’t kill your wallet is Logitech speakers. They sell for around $20-$30.

If you need to consult with a computer repair technician, use TalkLocal to find a high quality repair professional near you.

HDMI Cable Troubleshooting Sound

Wednesday, September 19th, 2012

HDMI Cable Troubleshooting Sound Computer Repair

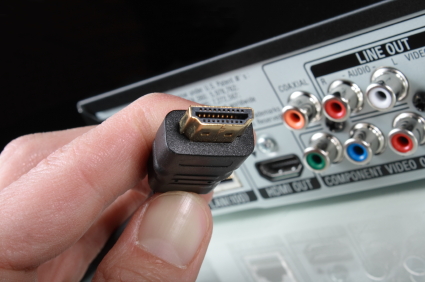
In order to hook up a laptop to a TV, most HD TVs nowadays use HDMI cables as their standard inputs, offering both a crisp graphic quality and a high quality sound.  If you’re having sound issues with your HDMI set up, there are a couple of standard troubleshooting actions that you can take to make sure it isn’t anything minute.

Check the Sound Mixer

You’ll want to make sure that your sound outputs for your laptop and your TV are functioning correctly.  Verify that nothing is muted and that you’ve selected the correct sound output (the TV speakers).  Set the HDMI connection as the default output device.

Check the HDMI Cable

It’s possible that you may have a faulty HDMI cable.  Since HDMI cables carry a digital signal, there  usually won’t be a loss of sound quality if your video is working, unless you actually have a damaged cable.  Make sure that the HDMI connection is secure on both ends and that the sound input is same as the video input for your TV.  The TV should also be configured to view via HDMI ,which is usually done through the TV set-up menu.

Some HDTVs also require that the computer is connected specifically to a PC HDMI port, rather than a standard HDMI port.  Check your TV for a PC HDMI input, and connect if possible.  You may also want to switch between a couple of HDMI ports to make sure that the input is working.

If none of the above steps solved your problem, you most likely have a problem with your graphics card or a problem with your input or output ports on your computer.  In this case, it’s highly recommended that you talk with a computer repair professional to discuss how to repair your HDMI connection.  TalkLocal can save you the trouble of finding a high quality professional.  You’ll have three highly rated IT professionals calling you within minutes!

How to Fix a Loose Laptop Lid

Wednesday, September 19th, 2012

How to Fix a Loose Laptop Lid Computer Repair

A laptop is one of the most frequently used electronic devices and such intense use can cause your laptop lid to loosen up a little bit.  This is issue is not serious can be fixed on your own. While the task is not too difficult, you should still be careful because laptops are delicate devices that need careful attention. Read on to learn how to fix a loose laptop lid.

1. Shut down the computer.  Once the computer has powered down entirely you need to pull the power cable out and unplug it from the electrical outlet. Now that the laptop is turned off and has no way to turn on while you are trying to fix it, you can start examining the lid.

2. Locate the rubber stoppers that are located around the edge of the screen.  Gently pry them off.

3. Find the screws holding the computer together underneath and use a screwdriver to take them out.

4. Pull off the plastic rimming around the computer screen.

5. You should be able to see the hinges connected the lid of the device to the main chassis.  Using the screwdriver, tighten each of these hinges individually and check to see if the looseness issue has been solved.  Look for any other screws that need to be tightened while you have the rim off.

6. Replace the plastic screen rim and fasten the screws to attach it again.

7. Put the rubber stoppers back onto the screw holes and finish up the job.  This should take care of your loose laptop lid problem.

Continuing Problems

If you continue to have problems with a loose laptop lid you should seek professional help.  Use TalkLocal to be put in contact with reliable local IT businesses.  Simply input your problem and availability in the online service request and, within minutes, you should be connected to someone who can help you out.

Wireless Mouse not Working

Tuesday, September 18th, 2012

Wireless Mouse not Working Computer Repair

A wireless mouse allows you to use the device from anywhere within range and reduces the clutter of wires around your desktop or laptop. If you find your wireless mouse not working including  where it is causing the cursor to move sporadically around the screen or is completely unresponsive, the cause can be one of many problems. Try the following troubleshooting techniques to get your wireless mouse working again!

1. Try a different port or environment. By connecting the receiver to a different USB port, you can eliminate any problems with the actual port. You can also connect the receiver to a USB port, specifically to the back of the computer because there is usually more bandwidth available there.

2. Replace the batteries. Issues may occur with your wireless mouse when battery power is low. Try using batteries that are recommended for use with electronic equipment. Make sure the batteries are inserted correctly before testing out the device. If you insert new batteries, you may need to resync the device with your computer.

3. Test the device on a different computer. If you can replicate the problem on a different computer, you may have a defective device. If the mouse works on another computer, there may be conflicts with other software causing the problem.

4. Uninstall any conflicting mouse software. If you have any other mouse software installed, it may cause problems with your current mouse software. Try uninstalling the other mouse software and restart your computer.

5. Remove and reinstall your current mouse software. Your mouse software may not recognize the wireless mouse. To fix the problem, try uninstalling the current software and reinstalling it again. Restart your computer after reinstalling the software.

If none of the steps seem to help, you may need to purchase a new wireless mouse. Need a professional opinion? TalkLocal can connect you to reliable computer repair professionals in minutes!

How can I tell if my USB Port is 2.0 or 3.0

Tuesday, September 18th, 2012

How can I tell if my USB Port is 2.0 or 3.0 Computer Repair

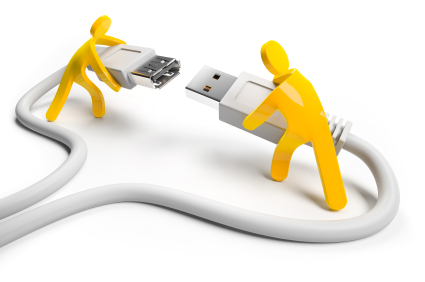
Your computer has 5 USB ports on it but you are unsure if they will support your devices.  It could be because of the the type of USB port your computer has or the type of USB port your device will need.  If you are wondering, how can I tell if my USB port is 2.0 or 3.0 then you have come to the right place.   This article is here to provide you with answers.

Do 2.0 and 3.0 ports look different?

Yes, 2.0 and 3.0 ports look different. Check out this link to see a great picture demonstrating the different connectors. As you can see from the picture, the 3.0 USB port has what almost appears to be an additional section to it.

If I am using Windows, how can I check to see if I have a USB port 1.1, 2.0 or 3.0?

First, right click on My Computer. Find your way to the Hardware tab and then click on Device Manager. Device Manager will lead you to an option called Universal Serial Bus Controllers. By expanding this option, you will see the different USB names.

What do the different names mean?

– If you see “Universal Host,” then you have a USB port version 1.1.

– If you see a port name with both “Universal Host” and “Enhanced Host,” then you have a USB port version 2.0.

– If you see “USB 3.0,” then you have a USB port version 3.0.

If you don’t want to browse through your computer to determine your version, you can also use the model number for your computer to look up your USB port information in Google.

To learn more about your computer and your USB ports, check out TalkLocal, a free service that helps you find professional help that accommodates your schedule. You will be connected within minutes to professionals right in your neighborhood! It is easy and quick to use. Simply enter your service need, location, and availability onto TalkLocal’s website. You will have all of your computer questions answered!

Pros and Cons of Solid State Drives

Monday, September 17th, 2012

Pros and Cons of Solid State Drives Computer Repair

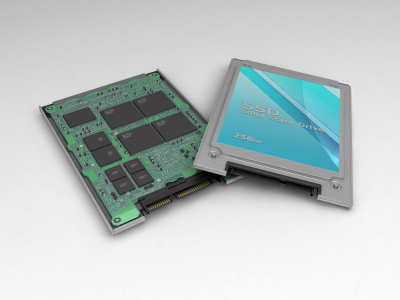
What are solid state drives? They are drives similar to the workings of the hard drive, but differing in a few ways. It is up to you to decide to use them instead of using a hard drive, if the need exists. Read this guide for more information about the pros and cons of solid state drives.

Pros

On the whole picture, solid state drives feature a consistent speed (little lag) once the data has already been prescribed and stored. So they are more reliable on the processing side as well as the hardware side (less likely to break down due to the factors in design). However the current technology has not yet made the storage space for the solid state drives to catch up with the hard drives. But in terms of MB/$ ratio, hard drives are by far cheaper and more compact (in terms of storage volume – bytes).

Another good thing about them is that they store data without moving, meaning that the device in itself is more durable and stable. It is less likely to break down because the internal components aren’t supposed to move around anyway.

Because there is no movement in internal components involved, there is no noise in operating a solid state drive as opposed to hard drives. Solid state drives have a higher tolerance for impact and humidity.

Cons

The downside to owning and operating a solid state drive is that they eventually wear out. The bits (information data storage units) inside a solid state drive are limited to a certain number of overwrites. Although the data is essentially recordable (can be erased and written), it has an expiration date.

Also, the flash/MLC based solid drives are said to be generally weaker (has a slower processing power) than the hard drives. Due to the slow speed it is generally not recommended for an active use. However, they do make good storage drives because already written files are easily retrieved.

Additional Help

If you feel like you need professional help on evaluating pros and cons of solid state drives, TalkLocal can help with finding the correct local experts in this case, saving you time and energy in what may be a stressful situation.

How to Clean Out a Laptop Fan

Monday, September 17th, 2012

How to Clean Out a Laptop Fan Computer Repair

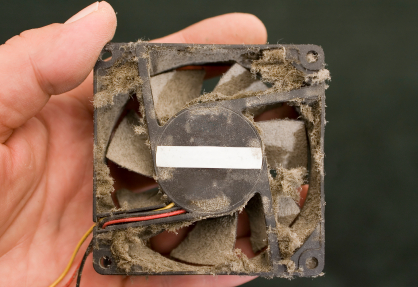
Have you been trying to figure out how to clean out a laptop fan? Perhaps you know that a dirty, dusty fan makes your laptop run inefficiently and heat up. As your computer heats up, it runs even slower. But what are you supposed to do? The following was written to provide you with information and tips when it comes to cleaning out a laptop fan.

Beware that if you take apart your computer to perform repairs and maintenance of your own, you may be voiding your warranty. Check your paperwork and warranty information online. Also, take your time and use caution as your operate on your computer. Before you begin, turn the computer off and unplug it from its power source.

Use a compressed air can as your primary tool in this repair. First, remove the screws from the back of your computer in order to access the fan. Once the cover is off, locate the fan. Use cotton tips and cotton balls to remove the dust and dirt from the fan blade.

After you have removed the main particles from the fan and surrounding area, get ready to use the compressed air can. The compressed air can is a great tool for clearing out very small particles that you may not see or that are in hard to reach places. Point the nozzle into the area you would like to clean and press to get the compressed air flowing. After you are finished, turn the computer upside down to release any loose particles. Return the computer cover to its original place and replace the screws.

A bit wary to try this on your own because you do not want to mess up your computer? Or think there is something else wrong with you computer? There is hope! Check out TalkLocal. You will be connected within minutes (for free!) to professionals right in your neighborhood that can help you with your problem!