Archive for the ‘Computer Repair’ Category


How to Connect 3 Monitors in Windows 7

Friday, September 7th, 2012

How to Connect 3 Monitors in Windows 7 Computer Repair

Using a multiple monitor display with your laptop or desktop can provide several advantages. More space, less flipping back and forth through different tabs and windows, easier multitasking ability, better gaming experiences, etc. Having a dual monitor setup is great, but having a third monitor can make you even more productive. If you’re using Windows 7, figuring out this setup can be a little tricky. It’s likely that you are already using/already know how to set up one external monitor if you’re reading this article, so read on to find out how to connect 3 monitors in Windows 7:

If you are currently using your HDMI port for a second screen, you will likely have to purchase a new graphics video card that has a dual port for your third screen. If your computer has a DVI and/or VGI port but not a DisplayPort feature, you will also have to purchase an active DisplayPort adaptor for this.

You can add two monitors in addition to your laptop or desktop screen, and even a third additional one (for a total of four screens). To do this, you need to purchase a new graphics card with a triple output feature. This can be an expensive but fast solution. Try Matrox’s TripleHead2Go DisplayPort.

Still have questions? Check out TalkLocal, a service that will match you with a local computer expert/IT specialist to help you with all your needs. All you need to do is enter in your specific problem and location and–within minutes–you’ll be connected to someone who can help you out, on your schedule.


Why Do I Have Limited or No Connectivity with My Wireless Connection

Friday, September 7th, 2012

Why do I have Limited or No Connectivity with my Wireless Connection Computer Repair

You’re annoyed.  You’re on the internet and suddenly you see a pop-up that says Limited Connectivity.  You’re wondering, why do I have Limited or No Connectivity with my wireless connection.  Wireless Internet is one of the greatest inventions in the modern world. Because of it, we have come to expect instant results at the touch of our fingertips. But when you have limited connectivity, the Internet can be very slow and hard to use. It’s frustrating when you can’t do what you need quickly, or at all.  Continue reading to find out potential problems for the bad connection.

Invalid IP address

If you are using a wireless internet connection on your laptop and are receiving the signal from a public internet host, then your limited connectivity is probably a result of an invalid IP address.  The DHCP server that is hosting the connection is not giving you the right address. To fix this:

1. Right click on the wireless connection > Click properties > Click configure.

2. Click the driver tab on the top.

3. Uninstall at the bottom.

4. Reboot your computer. The wireless connection should automatically reinstall and work properly.

Router messed up

The best way to fix a bad router is to restart it.  You should disable the connection and unplug all the connectors.  Wait ten minutes and then replug everything and start up the router.  The wireless Internet connection should return to normal from limited connectivity.

Password changed

It is also possible that the password setting on the HP wireless has changed.  In this case, you should look into the setting from your computer and change it back or log in properly to connect fully to the Internet.

Continuing Problems

If you continue to have problems with the limited connectivity on your wireless Internet you should seek professional help.  Use TalkLocal to be put in contact with reliable IT businesses.  You don’t have to do any work! Simply input your problem and availability and within minutes your should be connected to someone who can help you out.


Can Spyware Affect iPhones

Thursday, September 6th, 2012

Can Spyware Affect iPhones Computer Repair

Spyware, malicious software, and viruses are all scary stuff that you never want to see taking over your computer and gaining access to your personal information. Now with the advent of smart phones and the especially popular iPhone, mobile devices can do almost anything a desktop computer can do.  You might be wondering, can spyware affect iPhones since they gaining popularity.  That being said, smart phones are also susceptible to many of the same risks as computers. So unfortunately, spyware can affect iPhones.

There are signs that may suggest your phone has been infected with spyware:

– Your battery drains very quickly after charging.

– You begin to see SMS/text messages or receive phone calls from unknown & unusual numbers.

– There is an increase in charges on your monthly phone bill.

– Your phone flashes or vibrates when it is not in use or when it is not ringing.

– You have a jailbroken phone, which allows for easy downloading of programs and apps (in this case, spyware) outside of what’s available in Apple’s App Store.

– Your phone randomly shuts off or you are having problems when trying to turn it off.

If you think your iPhone has fallen victim to spyware, it is likely that someone has physically taken your phone and downloaded the malicious content. This content is also called spy software. Here’s what you can do to get rid of it:

– You can try resetting your phone and its operating system.

– If that doesn’t work, you should contact your cell phone provider to fix the problem or to replace your phone.

If you’ve tried any or all of these solutions and are still having problems, check out TalkLocal and connect to a local service provider who can help you with your phone issues! Within minutes of entering your problem, location, and availability, a reliable business will contact you to serve your needs.

Types of Computer Power Supply Connectors

Thursday, September 6th, 2012

Types of Computer Power Supply Connectors Computer Repair

The computer industry has changed and evolved over the past few decades.  Not only have they become more compact and easier to carry around but they have also become more efficient and powerful.  The power supply connections on these computers have also transformed greatly.

The power supply unit is the part of the computer that converts electricity in order to charge your computer/laptop.  It changes mainstream electricity to the low voltage regulation power that the internal components of the computer needs. There are two types of computer power supply connectors.  Most computers use a switched mode power supply–older versions have a manual selector and newer laptops have automatic adaption to the supply voltage.

There are a lot of precautions taken with computer power supplies.  They have protection against short circuits, overpowering, overvoltage, undervoltage, overcurrent, and temperature.  Power supplies are very important to keep your computer working in tiptop shape.

The differentiating factor between different power supply connectors is the number of pins in each.  There is a PC Main power connector which goes straight into the motherboard and has around 20-24 pins in it.  The next size down is a 12V only power connector which  contrary to the name has 16 pins.  There are also two types of 4-pin connectors.  Both the peripheral and Molex versions have 8 pins each (many power supply connectors are made by Molex in the United States).  Finally, there is a 6-pin with 6 pins and 6+2-pin with 8 pins.  You can also get auxiliary power connectors to increase the amount of power supply.

A module power supply connector has a permanent multiwire cable that connects to some of the previously mentioned ones; however, a module power supply also has some cables directly mounted to allow unused cables to be organized and systematically laid out.  The point of this power supply connector is to reduce clutter and remove the risk that comes with extra cables.

If you need help with your power supply cable, you may want to seek professional assistance.  Use TalkLocal to be find reliable local businesses within minutes.  Simply input your problem and availability into the online request form and TalkLocal will do the rest! Shortly after, you should be connected with a qualified IT service company who can help you out.

How to Copy Entire iPhoto Library to External Hard Drive

Wednesday, September 5th, 2012

How to Copy Entire iPhoto Library to External Hard Drive Computer Repair

It’s always a good idea to secure a backup of your files.  However, make sure that the device to which you back up your files (a flash drive, etc) is secure.  Losing the physical copy would make the entire process pointless.  You can also make use of server-sided storage such as google drive and dropbox.

How to copy entire iPhoto library to external hard drive

1.  Secure the hard drive to which you will download the data.

2.  Connect it to your computer – you can just plug in a flash drive.  If you have an actual hard drive, you will need a usb-to-usb cable.

3.  Close iPhoto before attempting to move any files.  This is necessary because files in operation cannot be changed.  After closing iPhoto, locate your pictures folder.

4.  Find the hard drive you want to transfer the files to through your computer menu.

5.  Open up the hard drive.

6.  Choose the iPhoto library from the pictures folder by clicking on the icon once.

7.  Drag the icon to the hard drive screen.

There should be a bar that pops up, showing you the progress of transferring the files and an estimation of how long the entire process should take.  Feel free to go do something else while the process completes.

After the process completes, you should receive a notification screen.  Click OK.  You may now disconnect the hard drive from your computer since no files are being transferred between your computer and the drive.  Make sure that you store the drive in a safe place – losing the hard drive, as mentioned before, defeats the whole purpose of downloading your photo library.

If you feel like you need professional help, TalkLocal can help you find the right local computer repair company, saving you time and energy in what may be a stressful situation.

Cloud Storage Backup Solutions for Home

Wednesday, September 5th, 2012

Cloud Storage Backup Solutions for Home Computer Repair

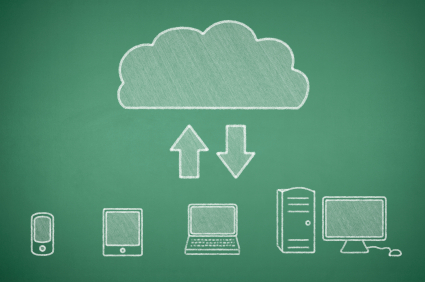
Cloud storage, previously used mostly by large businesses, is becoming more and more popular as a form of data storage and backup for ordinary users.  Previously, users had to manually upload files individually by hand, making backups a hassle.  Now, most backup programs will automatically sync any files in your designated folders to the cloud, making cloud storage much more accessible to the average user.  There are a variety of options for backing up your files in cloud storage for your home, each with its own advantages and disadvantages.  However, most of these either offer a free trial or a storage size limit before you have to switch to the paid plan or buy more space.  Most of these also have monthly fees that you must pay to continue to store your data.

Cloud storage backup solutions for home:

Mozy

Mozy offers 2GB of free storage, $5.99/month to upgrade to a 50GB limit.  Plans cap at 125GB for home users, with a price of $9.99/month.  The 50GB plan limits you to only one PC, and the 125GB plan lets you backup up to three PCs.  You’re able to schedule regular backups and choose specific files outside of the sync folder for backup.

Dropbox

Dropbox offers 2GB of free storage and $9.99/month to upgrade to a 50GB limit.  The more expensive plan is $19.99/month for 100GB of storage space.  The plans may be more expensive, but you will be able to sync to an unlimited number of computers from the same account.  Files in the Dropbox folder will automatically sync, but you can’t sync individual files outside of the folder.

SugarSync

SugarSync is Dropbox’s direct competitor, and prices start at $4.99/month for 30GB of space.  However, you can go up to 500GBs+ for $399.99 a month if you need it.  SugarSync also offer features that DropBox does not have, such as sending files of any size and syncing a file through email.  SugarSync also allows you to sync files from any location on your company.  However, Dropbox also works on Linux systems, and tends to be a bit faster.

IDrive

IDrive offers 5GB of free storage and starts at $4.95/month for 150GB of space.  However, IDrive does not allow syncing to unlimited computers, and is purely a backup service.  They do offer a family service that allows syncing for up to 5 computers for 500GB, and IDrive also keeps up to 30 backed up versions of the same file at no extra charge.

These are only a few cloud storage solutions for your home.  If you want to find out more about cloud storage in general, use TalkLocal to find a computer technician that will be able to tell you more about the different types of cloud storage and the one that is most suited for you.

Uninstall Program on Macbook

Tuesday, September 4th, 2012

Uninstall Program on Macbook Computer Repair

Apple products are notoriously easy to use and simple to figure out when installing programs.  Macbook computers have one of the most user friendly systems.  When it comes to uninstalling programs, the same applies.  Compared to PC laptops, deleting files from a Mac is easy and hassle-free.  This article will explain how to a uninstall a program on a Macbook.

Possible Solutions

You have two options when trying to uninstall programs from your Macbook.  You can download another application to remove the files or you can do it manually.  You should be careful when using a third party device to delete programs though.  There are some disreputable programs that portray themselves as a trustworthy source, but in actuality may damage your Macbook.

Uninstall using a third party application

Some good third party applications that will remove all traces of installed programs are AppZapper or CleanApp.  These types of packages work when you drag the program you want to uninstall into their folder.  The application will recognize all the other files associated with this program and delete them.  This way all parts of the program you wish to uninstall will be taken care of at once.  One program you should stay away from is CleanMyMac.  This is a dangerous program that implants cookies and monitoring software into your computer.

Uninstall manually

If you would prefer to do this process manually it will take a little longer, but is still much easier than if you were to do so on a PC.  You can go into your computer finder and search for the program you wish to uninstall.  The first thing you should do is drag it into the trash and empty it.  You should also run a spotlight search for that same program and see if there are any remaining folders in which it was installed.  You can also hit “Control+” on the icon to see what files the program has.  The beauty of Mac applications is that it packs all of the files the program needs into one icon/place.

Many applications will leave behind preference files, which save your settings for that program.  These files can be safely deleted. While they may run in the background and take up negligible disk space, but you should still get rid of them if you do not plan to reinstall the program.

Continuing Problems

If you cannot figure out how to delete the program, try consulting with a professional so that you can get the best help possible.  The easiest way to get in contact with reliable IT supports services in your area is TalkLocal. Just submit a service request on the website, stating your problem and availability and let them do all the work.  Within minutes you will be connected to someone who should be able to help you.

Can I Sync my iPod to my iPad

Tuesday, September 4th, 2012

Can I Sync my iPod to my iPad Computer Repair

Can I Sync my iPod to my iPad?  The answer is yes. The people at Apple know that you want to be able to transfer your music from one device to the next, so the steps to do so are straightforward and can be done quickly. You can sync your iPod to your iPad through iTunes on your computer by following the steps below. Syncing your iPod to your iPad is just a few clicks away!

1. Connect your iPod to your computer.

2. Sync the device.

3. Click on “Devices” on the left hand panel of your iTunes; you will see different tabs such as “Music,” “Apps” and other choices.

4. Go through the tabs and click what you want synced to your computer from your iPod. All the data on your iPod will be synced onto your computer.

5. After your iPod has fully synced, disconnect it from your computer.

6. Now plug your iPad into your computer.

7. Sync the device.

8. Once again, if you click “Devices” on the left hand panel, you will see the same tabs.

9. Go to the desired tab and choose what you want synced onto your iPad.

10. Click “Apply” > “Sync.”

11. After properly syncing your iPad, disconnect it.

 iCloud

You may also save data to iCloud, which will allow you to access your information from any device. It is Apple’s online storage device, where you can make certain files available online from other computers or mobile devices. For example, you can save your music from your iPod into iCloud and access it from your iPad.

Your content can also be transferred between your iPod and iPad through iTunes or by syncing data to iCloud. If you are having further difficulties with your Apple devices, TalkLocal can help connect you to highly trained IT professionals in your area. Just go to the TalkLocal website and fill out a short service request.

Turbotax has Stopped Working Windows 7

Monday, September 3rd, 2012

Turbotax has Stopped Working Windows 7 Computer Repair

If your TurboTax software is showing a “Turbo Tax has stopped working” message on your Windows 7 computer, this may be due to a couple of reasons. The most common reasons why TurboxTax has stopped working on Windows 7 are  are listed below along with possible solutions.

Unsupported TurboTax Version

This error message may be due to the fact that some TurboTax versions are not supported on Windows 7. Windows 7 only currently supports TurboTax 2009 or higher. Using any older versions can often lead to TurboTax crashes.  You may need to purchase a more recent version of TurboTax if this is the case.

System is outdated

Make sure that your computer is up to date with the most recent hardware drivers as well as oeprating system updates. This involves using Windows Update to check if there are any updates you’ve missed as well as checking your hardware manufacturer sites to see whether or not your hardware drivers are up to date as well.

.NET Incompatibility

Since TurboTax runs on Microsoft’s .NET framework, an incompatibility could be the cause of your TurboTax crashes and issues. In order to check whether or not your current .NET framework is damaged, you should follow the Method 2 steps here to repair the .NET framework.

Antivirus Programs

Internet security software and antivirus programs may also be triggering with TurboTax’s operation.  While every antivirus installation will be different, you should try to disable these programs temporarily or on startup so that nothing can interfere with TurboTax while it is running.

If none of the above reasons solved the TurboTax crashing issues, then it is highly suggested that you use TalkLocal to get in contact with a high-quality local professional so that you can get this problem resolved as soon as possible.  You’ll be on the line with a computer repairman within minutes of submitting your request!

Restore System Windows XP

Monday, September 3rd, 2012

Restore System Windows XP Computer Repair

If you are a Windows XP user, you should perform a system restore if you are experiencing frequent problems with the system but do not want to initiate a complete re-installation. This will restore your system to complete functionality without erasing any of your data files. Remember: With a system restore, you cannot pick and choose which files to restore; it automatically restores the entire system for you. A system restore can be completed in several fairly simple steps.

When preparing to complete a system restore, first make sure you have at least 200MB of free disk space. This space will be used to create a date store. The next step would be to pick a restore point. Windows XP helps you out with this by automatically creating restore points where you would typically need them most. However, if you would like to create your own point at a specific place, click on Start > All Programs > Accessories > System Tools > System Restore, and enter where you want to create a restore point.

Next, you can begin your restore. Open the program, and choose “Restore my computer to an earlier time.” You will then be prompted to choose your restore point on a calendar they will provide for you. Make sure to choose the right point because the wrong point could result in a loss of data files. Look for the restore points that are called “System Checkpoint,” these are the points that system restore created for you.

Once you select your restore point, click “Next” and the program will prompt you to confirm the point. If you are sure this is where you would like to restore the system, proceed with the restore. If successful, your computer will reboot and turn back on with a screen confirming the success of the system restore.

 If, however, your problems still occur post-system restore, the program gives you an opportunity to choose a new point and try again. This is helpful because it gives you a chance to correct any mistakes you might have made the first time around. If after multiple tries you’re still experiencing significant problems, contact your manufacturer or call a local professional to assist you. Visit TalkLocal’s website to be connected to highly rated businesses in your area, eager to help solve your problem.