Archive for the ‘Computer Repair’ Category


How to Transfer Data from One PS3 to Another

Friday, August 24th, 2012

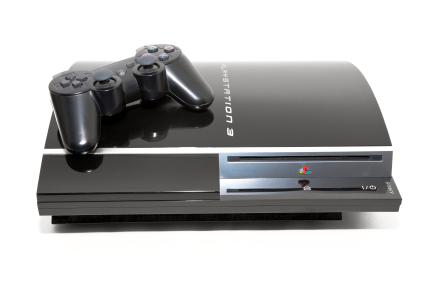
It is now possible to transfer data that is saved on your PS3’s hard disk to another PS3’s hard disk using an Ethernet cable. Read below to learn how to transfer data from one PS3 to another.

Things to know

When you do this, all data that is stored on the PS3 that will receive the data will be deleted. Deleted data cannot be restored, so be careful not to accidentally delete vital data. Also not that some types of data are not transferable.

Before transferring data

1. Update the system software on both PS3s to the latest version.

2. Prepare the PS3 that will send the data.

Transferring data

1. Use an Ethernet cable to make a direct connection between both PS3s (both an Ethernet straight-through cable or an Ethernet crossover cable will work.

2. Connect the PS3s to different video input connectors on the TV.

3. Turn on the TV and PS3s.

4. On the source PS3, go to Data Transfer Utility.

5. Choose ‘Transfer Data from this system to the other PS3 system.”

6. When the PS3 is on standby to begin the data transfer, use the TV remote to switch the video input to display the screen on the destination PS3.

7. On the destination PS3, choose Data Transfer Utility.

8. Follow the onscreen instructions to complete the operation.

Limitations

Some types of data cannot be transferred using the data transfer utility, some of these include:

– Video content that was downloaded as a rental from the PlayStation store

– Copyright-protected video files

– Video files that are compatible with the DivX VOD service

If you are still having problems with transferring data between PS3s after trying these steps, use TalkLocal to get the best help you can get quickly from local technical service professionals. Just submit an online service request stating your problem, location, and availability to get in touch with a professional in minutes!

Stop your Infrared Mouse from Jumping

Friday, August 24th, 2012

Stop your Infrared Mouse from Jumping Computer Repair

Experiencing mouse trouble?  One of the most annoying things is trying to click on something and not being able to because your cursor is all over the place.  Continue reading to learn how to stop your infrared mouse from jumping.  The following is a list of helpful tips and tricks to solve this annoying problem.

Replace the batteries

Sometimes your cursor will act unusually if the batteries are low.  Either replace the batteries or charge the mouse if it has a base.  This is a quick, easy fix that might help solve the problem.

Use a higher quality mouse pad

If you are using a surface that is not optimal for a mouse, this could be the source of your problem.  Use a mouse-friendly pad or a smooth, hard surface to fix the problem.  Using a glass surface may cause issues for optical or laser mice because they use the surface to reflect light back into the mouse to serve as a guide.

Check your surroundings

Keep clear other wireless or radio units from the proximity of your computer to avoid interference.  In addition, try shifting rooms or location in your building.  Sometimes, especially with wireless mice, interference can be a secret culprit.  Removing unrelated hubs and electronics from the area near your computer can be quite an easy fix.

Try another computer

If you have made it this far down the list and are still not able to resolve the problem, try your mouse with another computer.  This will help you determine if the issue is with the mouse or with the computer.

Hopefully by now your mouse is working perfectly.  If not, hire a professional to diagnose the problem.  Use TalkLocal to connect you to a highly rated, local computer repair professional.  Within minutes, you should be connected to someone willing to help.

Windows Malware Virus Removal

Thursday, August 23rd, 2012

Windows Malware Virus Removal Computer Repair

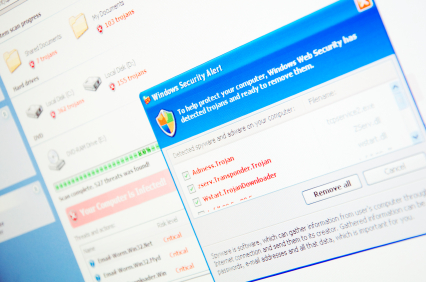
Malware is a broad term for malicious software.  Malware can range from spyware to Trojans. Malware removal can be difficult and challenging, but don’t worry, we have some simple solutions for you to combat these nasty programs.

If you suspect malware on the computer but can still start up the computer normally, then use the following instructions. If you cannot access the computer normally, skip to the next set of instructions titled “Malware Virus Removal – If your computer can’t start normally.”

Windows Malware Virus Removal – If your computer can start normally

1. Delete temporary files. This can be accessed by going to Start > All programs > Accessories > System tools > Disk cleanup.

2. Run the Malicious Software Removal Tool. This can be started by typing in “MRT” in the run dialogue box.

3. If malware is found, remove using Windows OneCare. The Windows OneCare can be accessed online. Internet Explorer and Mozilla Firefox are compatible with Windows OneCare.

4. If Windows OneCare does not remove the malware completely, use third-party software. There are various forms of free antivirus software available. AVG and Avria are some examples of free antivirus software available for download.

Malware Virus Removal – If your computer can’t start normally

1. On the first boot up screen, push  F8 for “Advanced Boot Options.”

2. Choose Safe Mode.

3. Delete temporary files as instructed above.

4. Run the third-party antivirus software’s scan and malware removal system.

5. Rename the setup to go around the malware block.

If the malware has made Windows unbootable, you can use CD/DVD and USB to boot an antivirus scanner. There are various antivirus programs that can be downloaded when the computer is unbootable. If this does not work, the last option is to do a clean reinstall Windows. Use Windows OS CD and boot the CD.

If the reinstall still does not work, contact a computer professional. TalkLocal can connect you with a high quality computer professional for free.

Best Wireless Network Adapters

Thursday, August 23rd, 2012

Best Wireless Network Adapters Computer Repair

Are you frustrated with your wireless Internet service? Are you experiencing frequent problems when trying to connect or stay connected to the network? If so, you might want to consider switching your wireless network adapter.

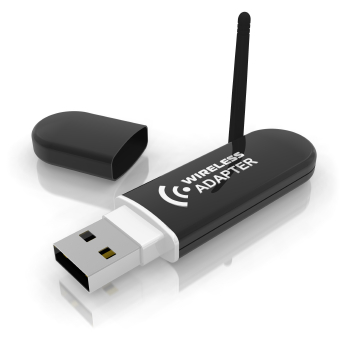
The function of a wireless network adapter is to allow a device (laptop, phone, etc.) to join a Wi-Fi network. Within each wireless network adapter is a built-in radio transmitter and receiver, and each adapter is able to supper at least one of the three most common Wi-Fi standards (802.11a, 802.11b, or 802.11g).  According to ratings and costumer ratings, the following wireless network adapters have earned the highest performance reviews.

Best Wireless Network Adapters:

When choosing the right wireless network adapter, be aware that they typically come in one of three forms: PCI cards, USB adapters, and PC cards. Most of your local electronics stores will carry these products, or you could order one online from the manufacturer’s website. PCI cards must be installed when the computer is powered down, whereas other adapters can be installed when the computer is running normally. The installation process is simple; some modern systems even complete the installation automatically. In addition, most new laptops are manufactured with built-in wireless networking. If you ever need to stop a network adapter (usually because of security reasons), you can simply disable it instead of uninstalling it and then reinstalling it.

If you need additional help with your wireless network, use TalkLocal to get in touch with IT support services in your area. The process is easy. Just fill out a form online stating your availability, location, and service need. Within minutes, you will receive a phone call from someone who can help!

Numbers Not Working on Mac Keyboard

Wednesday, August 22nd, 2012

Numbers Not Working on Mac Keyboard Computer Repair

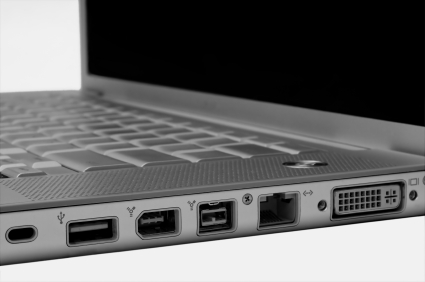
Have you been typing away on your Mac keyboard as usual, only to find that a number doesn’t shows up on your screen when you press it? No matter how many times you hit it, do you still get no response? Unresponsive keyboards are quite the nuisance, and there are a few potential causes for numbers not working on Mac keybord:

– Your keyboard is not fully connected into your computer’s USB port.

– The USB port through which your keyboard is connected is unresponsive.

– Your ‘Mouse Keys’ feature is turned on.

– There is a frayed wire or other part of your keyboard that needs to be replaced.

Possible Solutions:

– Try unplugging and reconnecting the keyboard to the USB port. Sometimes, the wire is not fully seated in the port.

– Try moving your keyboard connector to a different USB port.

– If the Mouse Keys function is turned on, you can disable in two ways. The fastest way is to press the alt/option key five times. If that doesn’t work, follow these steps:

1. Go to System Preferences.

2. Select Universal Access.

3. Switch to mouse view.

4. Turn the Mouse Keys off.

– If it is something that cannot be solved, you may need to contact an Apple Store retailer to replace your keyboard.

If you have tried any or all of these solutions and are still having problems, check out TalkLocal and connect to a local service provider who can help you with your keyboard issues! Within minutes of entering your problem, location, and availability, a reliable business will contact you to serve your needs.

Data Transfer Problems

Wednesday, August 22nd, 2012

Data Transfer Problems Computer Repair

If you are experiencing data transfer problems between two computers, there are usually a couple common issues that are to blame.  The causes and solutions of the most common problems are outlined below.

Data Transfer Stops before Completing

If the transfer is stopping at some point during the transfer, you most likely have a network issue. If the computers lose connectivity to the network anytime during the transfer, the computer usually automatically pauses or stops the data transfer. In order to check whether or not you have network connectivity, you should check your network adapter settings and your network connection; after confirming, start the transfer again.

Browsing Data Transfer Issues

If the browser is having issues downloading and transferring data, you should first restart your computer and then check whether you’re connected to the network.  Internet and network connectivity is necessary for this type of data transfer. You should then reset your browser settings.

No Data Transfer

There are two potential issues when there is no data transfer whatsoever, the first one being a firewall issue. Your firewall, which is there to protect you from unwanted outside intruders, could be preventing another device from accessing and transferring data with your computer. To check whether this is the issue, you can temporarily turn off your firewall and then initiate a data transfer. If this turns out to be the issue, you’ll want to change the firewall settings to accept that particular computer or program.

The other potential problem is a TCP-IP problem. To test for this issue, you should open up the command prompt by typing in “cmd” in the search bar and hitting “OK.”  You should then type in “ping 127.0.0.1” and messages should pop up saying “reply from 127.0.0.1” with a time.  If it is unsuccessful, you have found your problem—you’ll need to reset your internet protocol. If you’re using a Windows computer, you can go here and click on the “Fix it for me” button which will automatically solve the issue.

If none of the above steps solved your problem or you still don’t have any clear idea of what is causing the data transfer problems, then you should contact a local IT professional to diagnose and repair your computer.  TalkLocal can connect you to high-quality computer repair businesses in your area to get your computer back and running as soon as possible!

SATA Port is not Being Recognized

Tuesday, August 21st, 2012

SATA Port is not Being Recognized Computer Repair

Your computer may contain a SATA port, which is a computer bus interface that allows for you to connect mass storage devices to your machine, such as hard disk drives and optical drives. If you notice that the device plugged into your SATA port is not being recognized, there could be a few explanations for this problem:

Windows XP users

If your computer is running Windows XP, it’s possible that XP is too old and won’t recognize the SATA port. Try reading this article to find some quick solutions.

Floppy disk drive

If your computer doesn’t have a floppy disk drive, this article may also be helpful.

If you’re still experiencing problems, it may be helpful to contact a computer specialist. Try using TalkLocal, a free service that will connect you with top-quality, reputable computer repair specialists in your neighborhood within minutes. Just enter in your specific problem, location and availability, and TalkLocal will contact multiple companies, who will then call you directly. Save time searching for a repair specialist on your own, and let TalkLocal do it all for you!

How to Duplicate Tabs in Google Chrome

Tuesday, August 21st, 2012

How to Duplicate Tabs in Google Chrome Computer Repair

How to Duplicate Tabs in Google Chrome

If you need to duplicate tabs frequently, there is an easy way to do so with shortcuts. In Google Chrome, it’s actually possible to duplicate a tab by simply right clicking on the tab and clicking “Duplicate” on the menu. If you want to use your keyboard on a PC, an easy  shortcut that works for both Chrome and Firefox is to press Alt+D, which brings the selection to the address bar, highlighting the URL. With the Alt key still held down, press Enter to open up a new tab with the highlighted URL. Note that this loads the same page in the new tab, so the page will be essentially refreshed. If you have unsaved information on the original page, it will not carry over to the new tab! If you are using a Mac, try the same thing but with Command+D instead of Alt+D.

Here is a list of other shortcuts if you are using Chrome on a Mac:

Command+T opens a new tab.

Command+N opens a new window.

Command+Shift+T opens the last tab you closed. Chrome can remember up to 10 closed tabs.

Command+W closes your current tab.

Command+H hides Chrome.

Command+Q closes Chrome completely.

Here are most of the same commands for using Chrome on a Mac:

Ctrl+T opens a new tab.

Ctrl+N opens a new window.

Ctrl+Shift+T opens the last tab you closed. Chrome can remember up to 10 closed tabs.

Ctrl+W or Ctrl+F4 closes your current tab.

Alt+F4 closes your current window.

Ctrl+H shows the history page.

Ctrl+J shows the download page.

F5 reloads the page.

Additional Help

Looking for more little computer tips that can make your day easier? Ask a qualified computer technician through TalkLocal. TalkLocal can help you find local professionals to help you with your computer problems.

How to Convert Favorites to Bookmarks

Monday, August 20th, 2012

For all browsers, favorites and bookmarks have the same function: They acts as shortcuts to websites that a user visits often. In some browsers, such as Internet Explorer, there are two separate entities for favorites and browsers. In other browsers, such as Google Chrome, favorites and bookmarks are treated as one entity and all sites are compiled in one place. This makes it simple to search for sites you have saved. However, if you are using a browser, such as Internet Explorer, and you want all your sites in one place, you will need to convert your favorites to bookmarks manually.

Here is how to convert favorites to bookmarks:

1. In Internet Explorer you can export your favorites as bookmarks by exporting them as a folder in .htm format. Then, you can switch to your new browser and upload that file in your bookmarks folder. Check out this article for the easy step-by-step instructions.

2. If you’re trying to move them to a different computer, you could simply copy all the files in your favorites folder to a removable media storage device, such as a USB flash drive. Paste them into your new bookmarks folder on the new computer.

3. You can transfer your favorites to you bookmarks using this article. Follow the instruction in the hyperlink and you should be able to convert them successfully within minutes.

If you’re still having trouble, or are unsure of how to follow any of these steps, you could try contacting a computer specialist for additional help. TalkLocal is a free, easy, quick service that will connect you to a high rated, reliable computer expert in your area. Just visit the website to submit a service request listing your problem, location, and availability, and TalkLocal will contact professionals who will then call YOU directly within a few minutes.

How to Kill a Process in Windows 7

Monday, August 20th, 2012

Have you ever experienced a stalled program on your computer that just refuses to close no matter how many time you click the X? This is a common problem that can be extremely frustrating, especially when the program is using a large amount of your computer’s processing power. Stalled programs are usually caused by a glitch or bug in the program that you are running when it encounters an error. Fortunately, there are some tools in the Windows 7 operating system that you can use to fix this annoying problem.  Here is how to kill a process in Windows 7:

The main tool used for handling stalled programs is the Windows Task Manager. To open the Task Manager, right click on the Windows Taskbar, which is the bar at the bottom of your screen with the Start button on it. Click “Task Manager.” The task manager should open up with a display of all the applications currently running on your computer.  Choose the malfunctioning program from this list and click the “End Task” button. When you do this, Windows will attempt to close the program automatically.

If ending the task doesn’t work or takes a long time to process, the program might have crashed too much for Windows to close it properly. Don’t worry though; there are still some steps you can try. Go to the “Processes” tab in Task Manager, which displays a list of all the processes running on your computer. Scroll down until you find the process with the same name as the program you want to close. Once you have found it, click it and then click the “End Process” button. Be careful not to end any process that has “SYSTEM” listed as its user name, unless you really know what you are doing, as these are vital systems processes that could cause you computer to crash if you mess with them.

Once you have tried both of these steps, the program should be terminated. If it is still running, you should try restarting your computer and running the program again. If it keeps giving you problems after restarting, then have a computer technician look to see what’s wrong. You can use TalkLocal to find a quality local professional; all you need to do is enter a description of your problem, your location, and availability, and you will be automatically connected in minutes.