Archive for the ‘Computer Repair’ Category


Finding Computer Drivers

Friday, August 10th, 2012

Finding Computer Drivers Computer Repair

Every device on the computer requires a driver so that the operating system knows how to communicate with a new piece of hardware. However, often times, finding computer drivers is difficult and it feels like they cause more headaches than actually help out. Fortunately, there are usually only a couple of a places you need to look if you want to find a driver for a device.  Knowing where and how to download drivers will save you a lot of time and frustration.

Manufacturer Website

The most consistently helpful place to download drivers is the manufacturer’s website.  Since they developed the device, they have a vested interest in making sure that the device actually works with your computer system.  So if you purchased a computer, look on the computer manufacturer’s website; likewise, if you purchased an individual hardware component, you should look on that manufacturer’s website.

Driver Download Website

Driver download websites are large organized repositories where you should be able to find the specific driver you need. For example, Download.com or DriverGuide.com are two of the most popular driver download sites where they organize the drivers by device and hardware type. Other driver sites may also simply link to different manufacturer websites, which can be just as effective.

Windows Update

If you’re running a Windows system, this should be one of your last resources since driver availability is usually slim and outdated. Usually, if Windows detects that one of your drivers is out of date, it will automatically update and install the necessary driver as part of the update process. However, if you can’t find the driver on the manufacturer’s website, you’ll have even less of a chance finding it using Windows Update.

Drivers are usually pretty easy to find using these three resources. However, if you are still experiencing problems finding a driver for you device, it’s highly suggested that you find a computer repair professional to create a solution for you. TalkLocal can help you find that high-quality local IT professional in just minutes–so that you can find a solution as soon as possible.

Why Do I Need Java Updates on my Computer

Friday, August 10th, 2012

Why Do I Need Java Updates on my Computer Computer Repair

You might get those annoying pop-ups to update Java on your computer.  When you get these, you probably wonder, why do I need Java updates on my computer?  Java is one of the most common programming languages today.  It’s used in a huge variety of devices and technologies, ranging from applications to printers.  So when you get that nagging notification that says you need to update Java to its newest environment (formally known as Java Runtime Environment), most of the time, you should agree and click yes.

Why does Java update?

Java needs to check whether there are newer versions of Java released so that it can bring new features and bug fixes to your JRE.  Most importantly, the newer versions of Java address security vulnerabilities that help keep your computer safe from outside threats.  Furthermore, if you don’t have the most current version of Java, many websites and other applications will stop working and loading.

What happens if I don’t update it?

If you don’t update Java, you are leaving a major security risk to your computer since many malicious viruses and malware utilize these security holes in older versions of Java to attack your computer.  You’ll also not be able to run Java-based applications because they will require the most recent version of Java for security reasons.

Therefore, it’s better to either have the most updated version of Java or to completely uninstall it, so that your computer’s JRE won’t be exploited and used to infect your computer.  Java, however, is not actually related to Javascript, so Javascript will still continue to run if you choose to remove Java rather than updating it.

What if I my computer may be at risk?

If you’ve had an outdated version of Java and are concerned the security of your computer, you can always use TalkLocal to contact a high-rated, local computer professional who can look at your computer and give you personalized recommendations and solutions.

How to Connect Mac to Projector Wirelessly

Thursday, August 9th, 2012

How to Connect Mac to Projector Wirelessly Computer Repair

There are a few reasons to connect to a projector wirelessly: You may be using applications with a low bandwidth or you may not have the proper cables. If you do choose to connect your Mac wirelessly, keep in mind that the video quality will not be as good as with a hard wired connection. If video quality is important to you, connect your Mac to the projector with an HDMI or DVI cable. Otherwise, follow these steps to connect your Mac to a projector wirelessly.

How to Connect Mac to Projector Wirelessly:

1. Press either EASYMP or LAN on the remote control for the project. It will depend on the type of remote.

2. Install Epson Connection V2.51 software. You can find it on the Epson website.

3. Launch the software.

4. You may be prompted by a dialog box asking you to disable a firewall. If so:

a. Check the box by “Create an exception for the program in Windows Firewall.”

b. Click “No.”

5. Click “Advanced Connection” in the next dialog box.

6. Click “Done.”

7. Click “OK” in the dialog box that confirms the projector was found.

8. Click “Manual Search” at the top of the dialog box.

9. Type the IP address shown on the projector screen into the text box. Be sure to omit all zeros that precede a number. For example, “020.003.641.09” would be typed as 20.3.641.9.”

10. Check the box by the projector name when its status is “Standby.”

11. Click “Save in profile.”

12. Type the room number in the box by “Profile name.”

13. Click “Add.”

14. Click “Connect.”

When you are done with the projector, click the disconnect button on the bottom right toolbar. The next time you connect to the projector wirelessly, there will be fewer steps. Only follow steps 1, 2, and 7 from above (in that order), and then continue with these instructions:

1. Click “Profile.”

2. Click the projector you want to use.

3. Check the box by the projector name when its status is “Standby.”

4. Click “Connect.”

Disconnect as you did before. If you are having trouble setting up your projector, use TalkLocal to contact local IT support services. TalkLocal will match you with a reputable service provider within minutes of submitting your request.

Reviews of free antivirus software

Thursday, August 9th, 2012

Reviews of free antivirus software Computer Repair

Reviews of free antivirus software: AVG, Avira, Avast, Microsoft Security Essentials, Immunet

Finding reliable free antivirus software is a daunting task, so below is a table that compares the features of the five top rated antivirus programs:

If you cannot make up your mind or want professional help, use TalkLocal to be put in contact with a reliable local IT businesses almost immediately.  Simply input you problem and availability and within minutes you will be talking to someone who can help you out!

Restore Bookmarks in Chrome

Wednesday, August 8th, 2012

People use bookmarks to save time when they are visiting the same websites repeatedly. Bookmarks are simple way to keep your favorite sites at your fingertips in one location, so your destination is just a click away. Chrome has a hidden bookmark backup file that stores your bookmarks, so you are in luck if you accidentally delete bookmarks in Chrome. Chrome will perform these backups automatically on a regular basis, so your bookmarks should be safe. To restore bookmarks in Chrome, follow these steps:

1)     Do not open and close Chrome because it only saves one version of your backed bookmarks file. If Chrome is closed, leave it closed. The bookmarks file will be overwritten each time you open up Chrome.

2)     Put this code into the Windows Explorer address bar:

C:\Users\NAME\AppData\Local\Google\Chrome\User Data\Default

Make sure that you change “NAME” to your Windows user account name.

3)     Look for “Bookmarks.bak,” which is the backup of Chrome bookmarks. You will also see “Bookmarks” file.

4)     Restore the backup of the Chrome bookmarks by closing all open Chrome browser windows.

5)     Rename “Bookmarks.bak” to “Bookmarks.” If a window warns you that the file may become unusable, just click yes.

6)     Delete the original “Bookmarks” file. You can also perform this step after step 7 if you want to play it safe.

7)     Open Chrome. Your deleted bookmarks should be back to normal.

To prevent this issue from happening, regularly export your Chrome bookmarks into a file. Recovering deleted bookmarks in Chrome will be much easier!

If you need additional computer help, you should contact a local IT support service. TalkLocal can connect you to high rated local businesses to help you with all your computer problems. Just go to TalkLocal’s website and state your specific problem, availability, and location. You will be on the phone with help just minutes after submitting your request.

Ways to Back Up Your Files

Wednesday, August 8th, 2012

Ways to Back Up Your Files Computer Repair

It is a good habit to regularly back up your files from your computer. Even if your hard drive has never crashed before, it is better to take a few precautions to prevent losing irreplaceable data like family photos. Take a look at the following ways to back up your files. Their pros and cons are listed as well to help you find the storage device best suited for your needs.  Here are ways to back up your files:

External Hard Drive

Pros: External hard drives are small and portable. When you take them with you, it ensures that no one else can access your files. External hard drives work for multiple operating systems and are generally a reliable, simple method of backing up your files.

Cons: You must replace your external hard drive after a while because their average lifetime–or Mean Time Between Failure (MTBF)–is about three years. Since they are small, external hard drives are more susceptible to theft.

 Online Storage

Pros: With services like DropBox and Mozy, you don’t need to purchase additional hardware. Files are stored online through a third party where they are distant from your computer, so local damage—such as a fire—will not affect them. Online storage is convenient because files are accessible from multiple computers.

Cons: If the online storage company shuts down, it may be hard to retrieve your information. Hackers may also be able to retrieve your information if they break into the system.

USB Flash Drive

Pros: Flash drives are portable, easy to use, and can back multiple computers on the same drive.

Cons: Flash drives have a smaller capacity for storage and are not recommended as a complete backup solution. Because flash drives are so small, they are easy to lose.

DVD/CD/Blu-ray

Pros: Optical storage is very cheap. Many computers have CD burners, so no additional hardware is necessary.

Cons: Rewritable discs are becoming less common, and therefore, harder to buy. If you don’t use rewritable discs, you will have to continue to purchase new disks to back your files. Optical storage also takes up space if you end up using many discs.

Redundant Array of Inexpensive Disks

Pros: RAID makes data access faster and more reliable.

Cons: RAID is not recommended as a complete backup solution, but rather a way to lessen the chance of losing your data. It is also difficult to set up, so a less advanced computer user may need assistance.

Built-in Solutions

Some operating systems have built in back up solutions such as Time Machine for Mac and System Restore for Windows.

Pros: These programs are already in your computer and are simple to use. Time Machine saves backups every hour…

Cons: …which can fill up your backup drive. As for Windows, system restore can wipe out new accounts if they were created after the last restore point. System restore does not work in Safe Mode.

If you need assistance in backing your files, contact Seva Call to find local IT support services.

Headphones Not Working Macbook Air

Tuesday, August 7th, 2012

Headphones Not Working Macbook Air Computer Repair

Being able to listen to music, videos, and audio clips on your computer is a fantastic ability, but what happens when there are other people around and you don’t want to disturb them?  This is when you should use headphones. Unfortunately, your headphones may not always work properly when you need them. Many people with Macbook air computers seem to have a few common issues with their listening devices. Read on to learn the solutions for these problems that involve headphones not working macbook air.

Problem: The output sound is muted.

Solution: If the output sound is muted for some reason, you will not be able to hear the sound when your headphones are plugged in. You can change this by going to Sound > Output. Another way to adjust the output volume is to go to System Preferences. Click on Hardware > Sound > Output > headphone port > Output Volume and un-stick the mute button from there.

Problem: The wire in headphone jack is malfunctioning.

Solution: When the wire in your headphone jack isn’t working, use a needle or paperclip to probe the jack and bend the little copper connection. You should also try to apply some pressure to the wire itself to see if it helps the computer connect better.

Problem: The updated operating system is missing a driver.

Solution: There is a possibility that when you update your operating system, your headphones will stop working properly.  Sometimes the new versions of the systems will be missing the driver needed for the headphones to work.  You should go to the website and download the older version or see if the specific driver is available.

Problem: The headphone jack does not work.

Solution: Your entire headphone jack could be broken, in which case, you will need to change the logic board from your computer. This costs a lot of money and you should consult a professional to help you instead of attempting to do this yourself.

Continuing Problems

If you continue to have problems with using your headphones with your Macbook air, you should ask a professional before taking any action.  Use Seva Call to be put in contact with a reliable local business within minutes. Simply input your problem and availability and Seva Call will do the rest! You will receive a call almost immediately from a qualified IT service company who can help you.

Discretion with Twitter

Tuesday, August 7th, 2012

Discretion With Twitter Computer Repair

Discretion with Twitter

Twitter has exploded in popularity in recent years–to no surprise, as instant information is on high demand in today’s fast-paced culture.  Celebrities, politicians, and likely your own friends have tapped into this online world, sharing tweets at a click.

While Twitter has its advantages in quick, large-scale networking, there are some things to watch out for while using it.  First of all, it is important to simply stay smart in content.  Steer clear of revealing too much information, approaching dangerous topics, or going on highly emotive rants (look to some celebrities as prime example of this).

Like any other social networking website, Twitter also has some problems with spamming.  Since you do not need a valid email address to launch a Twitter account, spammers can easily create multiple accounts and set up automatic activities that occur on your page as spam (Twitter is working to correct this problem).  Most spam is annoying, but watch out for links to malicious websites.  This is where viruses and malware have opportunities to enter your system.

Twitter’s prominence online has also beckoned a flood of advertising.  Large corporations are creating profiles in order to tweet news of promotions and links to their retail websites.  Again, this is more bothersome than dangerous, but beware of entering sites where a click could be a purchase!

Twitter’s popularity has unfortunately put it at the mercy of hackers.  Even large corporations, celebrities, and politicians have been known to be victims of these break-ins. There are people and programs out there designed to access your information, so it is important to choose a password wisely.  Generic strings of numbers, letters, or words should always be avoided.  Choosing diverse characters in a password is a good policy to follow.

If you think you are the victim of a hacker or have acquired a virus from Twitter, you may want to contact a computer repair service to see how to remedy the situation. TalkLocal can easily connect you with a company near you.

Macbook Pro Battery Calibration

Monday, August 6th, 2012

Macbook Pro Battery Calibration Computer Repair

Why Calibrate Your Macbook Pro Battery

The purpose of calibrating the battery on your Apple Macbook Pro is to keep your battery running functionally. Calibrating your battery ensures that the onscreen estimate of how much time/percentage you have left to run your computer on battery power is accurate. You should calibrate the battery of you Macbook Pro every few months, and even more often if you rarely run your Macbook on battery power. Read also to learn why macbook pro battery calibration is important.

How to Calibrate Your Macbook Pro Battery

1. Plug in your Macbook Pro and charge the battery until it is full.

2. Leave your computer plugged in for at least two hours after it is fully charged. You can use the computer during this time, but do not unplug it.

3. Unplug the computer and use it on battery power.

4. Leave the computer on until the battery power is very low.

5. At this time, save anything you are working on and close all applications.

6. Let the computer go to sleep and leave it asleep for at least five hours.

7. Reconnect your battery and charge it until it is at full capacity again.

You can find more information on Mac batteries here. You can set a reminder on you computer to alert you every few months to recalibrate your batter. If you are having problems with the battery in your Macbook Pro and calibrating it isn’t working, you may want to visit a Genius Bar at your Apple store or get in contact with a computer repair professional. If you are not near an Apple store, you can use TalkLocal to receive phones call within minutes from up to three high quality computer repair professionals in your area that are available when you are. Simply visit TalkLocal’s website and submit your computer problem, location, and availability.

Connect Laptop to HDTV with HDMI Cable

Monday, August 6th, 2012

Connect Laptop to HDTV with HDMI Cable Computer Repair

When watching a video on your laptop, sometimes you just want the big screen in high definition on your HDTV. It can be an annoying process when you burn DVDs and load them, only to find out the DVD does not work. If you want to do it the easy way, just use the HDMI port on the TV to watch your laptop on the big screen.  Here is what you can do to connect laptop to HDTV with HDMI cable.

HDMI Cable

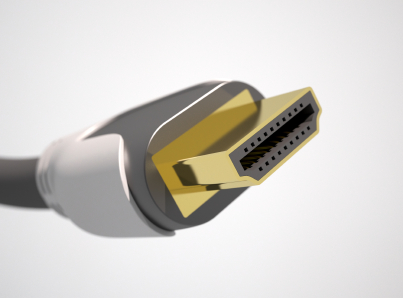
For a computer and HDTV to connect, you need a HDMI cable. HDMI cable is an abbreviation for “High Definition Multimedia Interface.” There are two types of HDMI cables: one with a fat cable and one with a skinny cable. There is no difference between the two except the skinny one is easier to travel with. HDMI cables are usually under $20 at your local computer supply outlets.

Before Connecting

1. Turn off the TV and the computer.

2. Check the label for the input name of the HDMI input. This will make it easier to find the HDMI input on the TV.

Connect

1. Connect one end of the cable to the USB-type HDMI port. There is no specific end designated for the computer.

2. Connect the other end of the cable to the HDMI Port on the HDTV.

3. Turn on the TV.

4. Toggle the “Input” button until the input name for the HDMI Input comes up.

5. Turn on the computer. After sign-in, the Windows should detect the HDTV and duplicate the screen on the computer and the HDTV.

6. Press “Windows” and “P” at the same time. The multi-monitor display window comes up.

7. Click the “Extend” icon. The laptop screen will only appear on the HDTV.

8. If the Windows does not detect the HDTV automatically, configure the computer to recognize the HDTV.

a. To do this go to Start > Control Panel > Adjust Screen Resolution.

b. Click on Monitor 2 > Extend onto this Monitor > Apply.

A relaxing and exciting time will now commence as the HDTV can be used to watch movies. If an error occurs with the HDTV or computer with the HDMI connection, call TalkLocal for all your electronic repair needs.