Archive for the ‘Computer Repair’ Category


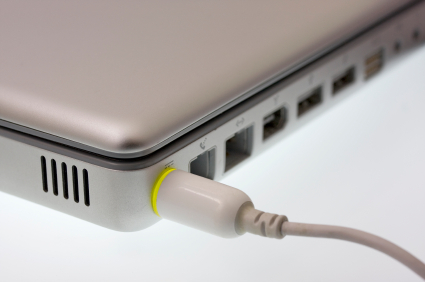
Laptop Plugged in but not Charging

Friday, August 3rd, 2012

If you have your laptop computer plugged in, but it does not appear to be charging, there are a number of problems you could be having. This article will help you with the problem of  laptop plugged in but not charging and how to fix it.

Make Sure You Are Actually Plugged In

Check that the cord is pushed in all the way to both your computer and the outlet. Then, check that any detachable parts, including power strips and extension cords are attached all the way. Make sure the power switch for the outlet is turned on. If everything is plugged in, you should also try plugging your computer into a different outlet to see if there is a problem with the outlet.

Make Sure Your Battery is Working
To check if it’s working, remove the battery from your computer and plug your computer into an outlet. If it turns on and works correctly, then the problem is most likely your battery and you will probably have to get a new one. If it is a new computer, contact wherever you bought it from and let them know they sold you a defective battery.

Check For Problems With Your Charger
Inspect your power cord. Are there any kinks or breaks? Have any parts been chewed by a pet or caught in a vacuum cleaner? Is the brick discolored, warped, or expanded? Does it smell like burnt plastic? If you said yes to any of these questions, it is likely that you have a problem with your charger and you will probably have to replace it. If there are detachable parts, you may only have to replace the part that is broken.

Your Laptop May Be Overheating
If your laptop is overheating, it can cause the battery not to charge until it has cooled down. This can worsen if you are using an older laptop with outdated cooling technology or are resting your laptop on a soft surface, like a blanket. If your laptop feels very hot, turn it off, unplug it, and rest it on a flat, fully ventilated surface until it cools down. After it has cooled down, check to see if it will charge properly.

Update Your Drivers (Windows)/Do an SMC Reset (Mac)
Update Drivers for Windows

1. Open the Control Panel.

2. Click Device Manager.

3. Open each option under Batteries (battery, charger, and “Microsoft ACPI Compliant Control Method Battery”).

4. In each Properties window, click Update Driver in the Driver tab.

5. Restart your laptop.

 SMC Reset for Mac

1. Shut down your computer.

2. Unplug your charger from your computer, if it’s still connected.

3. Remove the battery.

4. Press and hold the power button for five seconds.

5. Release the power button.

6. Reconnect the battery and charger.

7. Press the power button to turn on the computer.

Contact a Computer Repair Professional
If your computer is still not charging, contact a computer repair professional.  With the help of TalkLocal, you can receive phones calls within minutes from up to three high quality computer repair professionals in your area that are available when you are.

How to Check Overheating Laptop

Friday, August 3rd, 2012

If you’ve ever been writing a paper or browsing the Internet on your laptop and your legs have started to burn, you’re not alone. Overheating laptops are unfortunately a fairly common problem that many users experience.  This article will explain how to check overheating laptop.

A laptop can overheat for a number of reasons, ranging from a clogged fan to an incorrect electrical voltage. Whatever the reason, continued use of an overheated laptop could result in a complete system fail, or even a small fire.

When your laptop feels like it is beginning to overheat, there are a few things you can do yourself to check things out. First and foremost, check to make sure that nothing is blocking the air vents. When you’re checking for this, also make sure that no dust or other particles are clogging the vent. Also check your laptop’s operating manual to see what the normal temperature and humidity ranges for operation are; you might just be sitting in too hot of a room. If none of those issues seem to be causing the problem, then your problem is stemming from one of these three sources: power, firmware, or hardware.

Power

Power issues are caused by incorrect voltage from the power supply, frayed cables or broken power bricks, or a problem with the battery. First, check your electrical outlet. If this seems to be the problem, try plugging your charger into a surge protector. If this doesn’t change anything, make sure the heat isn’t coming from the place on your laptop where the power cord plugs in. Lastly, unplug your laptop to test the battery. If it happens to feel particularly hot, this might be your problem. Try powering down, replacing the battery, and working from there.

Firmware

Your firmware is the software that’s installed on a memory chip inside your laptop’s hardware. If your firmware is what’s causing the problem, it will most likely be because the BIOS firmware version is not up to date. Follow your manufacturer’s directions to open up the BIOS set-up. From here, check to make sure the settings for the laptop temperature match the settings listed in your manual.

Hardware

Hardware issues can be harder to identify on your own, so calling a service professional might help. If you think you are up to diagnosing it on your own, follow the instructions in your manufacturer’s manual to open up the casing. Once inside, there are a few things to check out. Make sure the RAM isn’t too hot, check the internal fans to make sure they haven’t accumulated any dust or dirt, make sure the thermal grease isn’t dried, and look for any obvious signs of burning or any unusual smells.

If none of these tips helped your problem, try contacting TalkLocal to be connected to a trained local professional within minutes.

How to Network Computers on Windows 7

Thursday, August 2nd, 2012

How to Network Computers on Windows 7 Computer Repair

Are you tired of having to e-mail documents to colleagues or classmates in order share them? Are you annoyed with having to sign into GoogleDocs to access shared files? Does it bother you that your colleagues or classmates can edit and save over the files you share through your Dropbox? Windows 7 has the solution built right in! Here are some tips  on how to network computers on Windows 7.

Create or Join Homegroups and Workgroups — Homegroups and Workgroups are groups of computers that share folders. Using Windows 7, you can easily define which of your folders are shared and which are private and then customize how you share files with people on your network. For more information on which one of these groups will best suit your needs, check out the Microsoft Help Page that explains the nuances in different types of file sharing groups.

When you are inside of a folder in Windows 7, there is a dropdown menu across the top that says “Share with.” Clicking the dropdown will give you a series of options of whom you share the folder with. These options are:

– Nobody: You are the only person with access to the files in this folder.

– Home/Workgroup – Read: The files in this folder are visible to everyone in your group but you are the only one who can edit them.

Home/Workgroup – Read  and Write: The files in this folder are fully available to all people in your group. They can both view and edit the files. 

– Specific People: This option allows you to make this folder available to specific people in your network.  When you click this option, you will be prompted with a File Sharing Wizard that will help you further.

Use your Public Folder: Another more basic option for file sharing is the Public Folder option. Files you place in this folder are instantly available to other people in the network. You have public folders located inside every one of your document libraries. Although these are easy and quick, be aware that you cannot edit permissions within your public folders. Everything you put in these folders is available to everyone in your network.

If you have having difficulties getting your files to sync with other computers in your network, or if you are having other computer-related problems, visit TalkLocal, a service that will find you local computer repair professionals and have them call you back within minutes.

What is Disk Defragmentation Used For

Thursday, August 2nd, 2012

What is Disk Defragmentation Used For Computer Repair

So what is disk defragmentation used for?  Disk defragmentation is for Windows only and it is supposed to help speed up your computer. When hard drives get old and filled with files, the files become fragmented. Deleted files are also scattered and take up space in an inefficient way. When new files are stored, they must fill the space around these fragments. As you can see, the files become scrambled and harder to access. The computer tends to get slower because it must search for files in many locations. A disk defragmentation rearranges and consolidates your files so that they can be located easier, making your computer run more efficiently. Disk Defragmenter is a tool in Windows that performs this task; it runs on a regular schedule and automatically keeps your computer files organized, though you can also make manual adjustments.

Is disk defragmentation necessary?

Disk defragmentation is not required, though it can help your computer run faster. Disk defragmentation rarely occurs today because newer operating systems do not need to be defragmented. Disk storage capacity and speed has increased substantially so the advantages of a defragmentation don’t offer much of an incentive.

Necessity also depends on the age of your computer. If you have an older Windows computer, then you can perform a disk defragmentation, but this process can only do so much to speed up an old system. There is almost no need for manual defragmentation because most tools have an automatic setting. Unless your computer is in an extreme condition, the automatic setting should be enough to maintain the good state of your files.

If your computer is extremely slow, contact an IT technician. Seva Call can put you in touch with the best professionals in your local area. Fill out a short service request on Seva Call’s website and talk to someone who can help within minutes!

System Restore Windows Vista

Wednesday, August 1st, 2012

system restore windows vista computer repair

System Restore Windows Vista

Windows Vista has a feature called System Restore that automatically backs up the registry and system files whenever new software or drivers are installed. System restore is useful when you accidentally install malicious software that can make your computer run slowly.

There are two places from which you can use System Restore. In Windows, you can just type “restore” into the Start menu search box and System Restore will immediately pop up at the top of the Start menu. Alternatively, you can type “rstrui” into the search box and hit enter. This will bring up a screen where you can choose to roll back the system to the last restore point you set up. You can click “Recommended restore” and click next, or you can choose a different restore point.

If you choose a different restore point, there will be a list of restore points that you can choose from. If there are any problems or errors while restoring, then try booting up in Safe Mode. For best results, you should always run System Restore from Safe Mode.

If your system won’t boot

If for some reason you can’t even get into Windows, then follow these instructions:

1. Boot off the installation DVD.

2. Choose the “Repair your computer” option on the lower left hand side. If you don’t have an installation disc, you can look up how to make one online.

3. Click next again.

4. Choose System Restore from the System Recovery dialog. It will take a few seconds to load

5. Click next.

6. Choose the drive that your copy that Vista is installed on.

7. Click finish. Windows will restore itself back to its previous restore point.

If you tried all these options and none of them worked, use TalkLocal to quickly get in contact with local IT professionals who can help you.

Wiping a Flash Drive Completely

Wednesday, August 1st, 2012

USB flash drives are an easy way to transfer files from computer to computer. After your USB becomes full from storing many files, you may want to clear all of its contents when they are no longer needed. There are three ways to handle wiping a flash drive completely. You can format the drive, manually delete all files, or use a secure data-wipe program.

For all three methods, first insert your USB drive into the port. Then, follow the corresponding steps for your preferred method of data removal.

Format the Drive

1. Click the Windows Start button > Computer.

2. Right click the flash drive.

3. Click “Format” on the menu.

4. Click the check box that says “Quick Format” if you want to erase the flash drive completely. Leave the box unchecked if you want to go through files and clear the content yourself.

6. Click the “Start” button to begin formatting. You will see a pop-up message when the process is done.

Manually Deleting All Files

1. Click the Windows Start button > Computer.

2. Click Organize > Folder and Search Options.

3. Click the “View” tab.

4. Click the radio dial next to “Show Hidden Files an Folders.”

5. Click “OK.”

6. Open your USB file. For Macs, click on “Finder” to access it.

7. Click in the blank area of the USB window.

8. Hold Ctrl+A (Command+A for Macs) to highlight all files.

11. Press the “Delete” key and wait for the files to delete.

12. Right click the “Recycle Bin” (“Trash” for Macs) and choose “Empty Recycle Bin.”

Using a Data-Wipe Program

With the first two methods, your USB drive will be cleared, but you can still access files with data recovery software. You can completely erase these files using a data-wipe program such as Roadkil’s Disk Wipe.

1. Download Roadkil’s Disk Wipe, available from http://www.roadkil.net (This program can be run from a Windows desktop).

2. Extract the contents of the compressed file.

3. Open Disk Wipe.

4. Right click the program icon.

5. Click “Run as Administrator.”

6. Click the drive you want to wipe.

7. Click the type of wipe you want to perform: zero-fill the disk or write random data.

8. Enter the number of passes.

9. Click “Erase” to start the process.

10. Once the process finishes, close the program. Your flash drive is now completely cleared.

If you need additional assistance with your USB drive or computer problems in general, TalkLocal can connect you with local IT support and computer repair technicians.


Efficient Internet Search

Tuesday, July 31st, 2012

Efficient Internet Search Computer Repair

The skill of efficient internet search is a must-have in a world where everything you could possibly want to know can be found online. Efficient internet searching is not as easy as it may seem–at times, it can even be a frustrating, time consuming process.  With a few tips and tricks, however, you can learn to eliminate the stress of the search.

First, the basics:  a search term that is too general is futile.  You know what you are looking for, so type it!  Specificity is the key to a quick search. If you want to find a solution to a removing a stain, typing “wine stain in satin” is obviously a better choice than simply “stain removal”  Also, if it is a specific term or phrase you are looking for, put your words inside quotation marks.  This will only return hits with the words exactly as you gave them and not sites merely containing the words at various locations.

Another way to narrow search results is to include extra commands in your search.  The easiest of these to use is called Boolean operators (don’t worry, this is a fancy name for a simple concept).  The use of words like “and,” “or,” and “not” restricts the word combinations.  Read what each term will do for your search below:

And:  This operator will only return pages containing all the words or phrases you have given. A general search may return pages related to only part of your query.

Example:  Treasure Island AND Robert Louis Stevenson

Or:  This operator will only return pages containing either of the words or phrases you have indicated. This is a way to conduct multiple, related searches at once.

Example:  public transportation OR subway transit

Not:  This operator will narrow down your results by excluding pages that contain the second phrase you have indicated. With this term you are able to proactively ignore information you do not want.

Example:  Australian Outback NOT steakhouse

Another manner of using extra commands in Internet search is the “+/– ” approach.  By including either of these symbols right before a word or phrase, you specify your intended results.  The “+” sign works like the term “and,” and the “–” sign functions as a “not” (see above explanations).

It is important to remember that not all search engines are the same.  They use different formulas for returning results and may use variant lists of websites from the start.  Therefore, if you are experiencing difficulty with one engine, try another.  You will likely get a new set of results and find what you are looking for.  An even faster way to perform this process is through the use of metasearch engines.  Sites falling under this category pull results from multiple search engines at once, getting you to the information you need faster.

How to Network Two Mac Computers Wirelessly

Tuesday, July 31st, 2012

How to Network Two Mac Computers Wirelessly Computer Repair

Macs are seen as one of the most user-friendly computers in the world. The user interface has made for simple ways to perform actions that can be complex on a Windows system. Connecting a Mac computer to another is simple and can be done in minutes without the need of Ethernet cables. Macs can create an Ad-Hoc network which connects the macs wirelessly.  Here we explain how to network two mac computers wirelessly:

Materials

– Airport Base Station ($99.99 at the Apple Store)

– Cable Modem

– BNC Cable (Installed by cable company)

– Cat5 Ethernet cable

– Two Macs computers that are AirPort enabled.

How To Connect Airport Base Station

1. Put the cable modem beside your Airport and connect to BNC cable (if there is only one connection to the TV, use a splitter to split the connection in two).

2. Connect the cable modem to the AirPort by using the cat5 Ethernet cable (the connecting port on the Airport is the one with the circle above it).

3. Turn on the cable modem.

4. Turn on the Airport Base Station.

Connecting the Macs

1. Turn on both Macs.

2. On the Mac that is creating the connection, click the Airport Icon on the finder Bar menu.

3. Click “Create a Network” in the drop down menu. A “Create-to-computer network” dialogue box will appear.

4. Create a name for network in the name box.

5. Below the name box, choose a channel from the “Channel” pull down menu.

6. Check the “Require Password” box if you want a secure connection. You will have to enter and verify the password.

7. Click the blue “Ok” button.

8. On the Mac whose is connecting to the network, click the Airport icon.

9. Click “Computer-to-Computer network.”

10. If a password was made, enter the password.

11. Open a new finder window.

12. Click the “Shared” arrow on the sidebar of the window and choose the network you created.

13. Click “Connect” to log into remote Mac.

14. Disconnect through “Airport Icon.”

In using these simple instructions, the Macs should successfully connect with each other and be able to share files, printers, etc. If there are problems with your wireless connection after troubleshooting, you should contact a computer professional. TalkLocal can connect you with the best computer professionals in your area for free.

Mouse Keeps Jumping

Monday, July 30th, 2012

Mouse Keeps Jumping Computer Repair

Your mouse keeps jumping and its getting incredibly annoying and frustrating. In order to fix this problem, we must first identify the source. The following are common causes for why your mouse keeps jumping:

Optic mouse is reflecting off a glossy surface

If you are using your optic mouse on a glossy surface, such as glass, metal, or even a varnished table, the cursor will have a tendency to jump sporadically. Place your mouse upon a mouse pad or a non-reflective surface instead. If you’re already using a mouse pad, try changing it.

Mouse ball is dirty

If you are using a ball mouse, try cleaning either the ball or the wheels that come into contact with the ball. Oftentimes, debris such as hair and dust get stuck in the wheels and prevent the ball from rotating around. Cleaning the small wheels inside the mouse, in addition to the mouse ball itself, should solve a dirty mouse problem.

Wireless mouse is low on batteries

If you are using a wireless mouse, you might be running low on batteries. Erratic behavior often occurs when batteries are dying, so an easy solution is to change the batteries.

Driver conflict

Newly installed hardware and their associated drivers may conflict with the driver for your mouse. If there is a driver update for your new hardware, try installing it.

Virus infection

Viruses that affect mice are becoming more common nowadays; your best line of defense is virus protection software. There is plenty of free virus protection software out there, such as Avast! and AVG.

Running low on RAM

When the system is low on RAM, many system functions may behave strangely, including the mouse. You can install additional RAM, or perform a defragmentation on your hard drive.

Mouse is broken

The mouse may simply be broken, as wires in the cord can fray and small pieces inside the mouse can fall apart–especially if it’s an old mouse. At this point, it’s probably easiest to replace the mouse with a new one.

TalkLocal is a free service that can connect you to a computer repair technician immediately!

How to Setup Pop Email on iPad

Monday, July 30th, 2012

How to Setup Pop Email on iPad Computer Repair

An email is made up of two parts.  One half is Post Office Protocol 3 (POP3) and the other half is Simple Mail Transfer Protocol (SMTP).  Both of these aspects are important for sending and receiving emails.  Installing/configuring your POP3 or SMTP account is very important but many people don’t know how to do this. Follow the steps below that explain how to setup pop email on iPad.

What is it?

POP3 is the protocol language used to download your email from internet service provider (ISP) and SMTP is the protocol used to send mail. POP serves a communications purpose in connecting your email, a POP client, and your ISP server.  The 3 in POP3 simply stands for third version.

How to Configure

There are three things you need to configure your POP account.  You will need the name of your ISP’s mail server such as something.mail.com, the name of the account you are using (probably same as your email name), and  the password for your account.

Installing a POP3 account on your iPad is similar to setting up a normal account. Follow these steps to install a POP3 account on your iPad:

Problems

If the iPad cannot verify the server, it will show an error.

If you continue to get errors or have problems when installing POP3, you should consult with a professional.  While the apple store Genius bar can help, it may be expensive.  If you’re looking for an alternative, use TalkLocal to get the help you need from local professionals. TalkLocal will connect you with a reliable IT service professional within minutes.