Archive for the ‘Computer Repair’ Category


Windows Vista Slow Startup

Thursday, September 26th, 2013

Windows Vista Slow Startup - Computer Repair

Are you finding yourself frustrated at the slow start-up speed for your Windows Vista computer?  Are you waiting for ages before you can finally begin to use your computer?  There are many simple fixes to optimize Windows Vista to run faster at start-up so that you don’t have to wait for long at all!  This article will cover some of the major fixes to Windows Vista slow startup.

Limit the number of programs loading at start-up:

This usually is one of the major causes of slow computer start-ups.  A lot of programs are designed to automatically load after Windows loads, so that you can instantly load them when you need them.  However, for the programs that you never end up using, these programs only slow down the start-up process by taking up memory and processing cycles.

The solution would be then to only allow the programs that you use consistently to load on start-up.

1. In order to do this, you should use Software Explorer in Windows Defender to see which programs are currently automatically starting up when you load Windows Vista.

2. You can then select a specific program and then click Disable, which will prevent it from running at start-up, saving you time and your computer memory at start-up

Defragment the Hard Drive:

As you constantly use the data on your hard drive, it slowly becomes fragmented, which forces your hard disk to do extra work to allocate memory, which in turn slows down your computer.  While disk fragmentation is already usually set on a weekly schedule, you may still want to manually defragment your hard drive.

1. If you click on the Windows button and then click All Programs, click Accessories, and then System Tools, there should be a Disk Defragmenter tool.

2. All you have to do is click Defragment Now and, depending on the size or degree of defragmentation, it may take from several minutes to a couple of hours to finish.

Free up space by deleting programs you never use:

Uninstalling programs (especially manufacturer programs that come pre-loaded) that you never plan on using will free up precious memory and disk space. To uninstall programs, all you have to do is access the Control Panel, click on Program and Features, and click Uninstall while selecting the specific program you don’t need anymore.

Another easy fix to free up more space would be to use the built-in Disk Cleanup utility, which is located in System Tools like the Disk Defragmenter tool.  All you have to do is select whether to clean up personal files or all the files on the computer, and then press OK.  The Disk cleaner utility will detect which files are unnecessary and free up space accordingly.

Need More Help?

If none of these tips helped speed up your Windows Vista start-up time, it might be best to get a personalized assessment on your computer.  Just use TalkLocal as a free, fast, and easy way to connect to highly-rated local computer professionals!


iPhone is Not Recognized by Computer

Monday, September 23rd, 2013

iPhone is Not Recognized by Computer - Computer Repair

Typically, your iPhone should be recognized by iTunes when you plug it into your computer via the USB port. If your phone does not immediately show up in iTunes there may be a variety of reasons why your iOS device is not being recognized by the computer.

Use the following tips to troubleshoot your iPhone-computer connection.

1. Update iTunes

Check iTunes to see if any updates are available. For a Mac, go to iTunes > Check for Update.

For Windows, go to Help > Check for Updates.

Make sure your operating system is updated and compatible with the iTunes update.

2. Restart your iPhone

Turn off your iPhone by holding down the sleep/wake button at the top of the phone until a red slider appears. Slide your finger across the “slide to power off” icon. The phone should turn off after a few seconds. Then, turn the phone back on by pressing the sleep/wake button until the Apple logo screen appears.

3. Recharge your iPhone

If your phone is low on power, try charging it with the iPhone charger or by connecting it to a charged computer through a USB connecter.

4. Check USB Connections

First try disconnecting and reconnecting the USB cord. If possible, connect the iPhone to the computer via a built-in computer USB port and not a port on a keyboard or USB hub. Try a different USB port if the port you are using continues to fail.

5. Restart Your Computer

With a Mac, restart your computer by clicking on the Apple logo in the top left corner of the screen and selecting “Restart…” from the drop down menu.

In Windows, click the Start button in the bottom left corner > Turn Off Computer > Restart. After restarting, plug your iPhone back into the computer.

6. Reinstall iTunes (Windows)

For Windows users, you may have to reinstall iTunes to get the latest update.

7. Resolve Software Conflicts

Some third-party security software may prevent iTunes from recognizing your phone. To fix the problem you may have to update your software, adjust software settings, or temporarily disable the software.

8. Check USB Cord

It is possible that the USB connector is damaged. Try using a different connector if available to see if this is the case.

Still Need Help?

If these problems continue, you may want to seek professional help. TalkLocal can find the help you need quickly and easily. Just type in what, when, and where you need help and Talk Local will connect you to a computer repair professional in minutes!

Recover Corrupted Word Documents

Wednesday, September 18th, 2013

Recover Corrupted Word Documents - Computer Repair

One of the worst feelings in the world is when a Word document that is due tomorrow has become corrupted. Corrupted Word files happen for various reasons, such as a corrupt printer driver or interruptions during the Word file save. Before retyping the whole document, there is something that you should know. Corrupted word files can be usually recovered. Here are some of the various ways to recover corrupted Word documents.

Computer Switch

Before wasting time trying any other option, try to open the Word file on another computer. Computers act differently and corrupted Word files may work on another computer.

You can do this by copying the document to a flash drive or external hard drive, then opening it on a different computer.

Microsoft Word “Open and Repair”

Microsoft Word has an “Open and Repair” feature that can repair corrupted word files. To use this feature:

1. Go to “File”.

2. Select “Open”.

3. Locate and select the corrupted Word file document without opening the file.

4. Click “Open and Repair” on the  “Open” drop down menu on the bottom right of the box.

5. If the document is recovered, save the document.

Change File Type

Changing the file type of the Word documents may recover the content from the document. However, the style or font of the document may appear differently.  To covert the word documents file type:

1. Open the corrupted Word document.

2. Select “Save As” from the “File” Drop down menu.

3. Select “Rich Text Format” from the “Save as Type” drop down menu.

4. Rename the corrupted Word file.

5. Click “Save”.

6. Open the new “Rich Text Format” of the corrupted Word file.

7. If the document is still corrupt change the type to “Plain Text” and try to open it.

Still Need Help?

If none of these methods work, and the document is too vital, there are programs such as Office Recovery that can recover files, but can’t guarantee their recovery. If only a computer repair service is the only option, use TalkLocal. We will connect you directly with up to three computer repair companies in your area for free.

Why Isn’t My Monitor Turning On?

Tuesday, September 17th, 2013

Why Isn't My Monitor Turning On? - Computer Repair

Why Isn’t My Monitor Turning On?

If your monitor is not turning on, there are few different things that you can do to test to see what the problem with your monitor is.

Diagnose your monitor issues

1. Make sure that your monitor is actually on. Check if your monitor has multiple power switches or buttons, and ensure that all switches and buttons are turned on.

2. If you are confident that your monitor is turned on, check that it is plugged in. Follow all cable lines and check that they are all plugged into an outlet on one end and your monitor on the other.

3. If your monitor is definitely plugged in and turned on, check the brightness. Turn the brightness up all the way; it’s possible that your monitor only appears to not be turning on because the brightness was turned down completely, making your screen appear black.

4. If your monitor is plugged in , turned on, and has it’s brightness all the way up, but you are still not seeing anything, you most likely have a problem.

Is the problem with your monitor, your computer, the cable connecting them, or the outlet?

1. First check your outlet by plugging something else into the outlet, where you can immediately see if it is working, such as a light bulb. If nothing is working in the outlet than the problem is with your outlet. You should contact an electrician to fix your outlet.

2. If other things are working in the outlet, then try plugging another monitor into your computer or plugging the monitor into a different computer. If another monitor is also not working with your computer or your monitor is working in another computer, then the problem is likely with your computer. You can contact a computer repair professional to help find out why your computer is no accepting monitors.

3. If the monitor is not working in a different computer and/or another monitor is working in your computer, then the problem is likely with either your monitor or the cable. Test both the monitor with a different cable and the cable with a different monitor to see which is the problem. You will have to replace the one that is causing the issue.

Still Need Help?

With the help of TalkLocal, you can receive up to three phone calls in minutes from high quality local computer repair professionals, who are available when you are.

iPhone Repair Water Damage

Friday, September 13th, 2013

iPhone Repair Water Damage - Computer Repair

Did you drop your phone and crack the screen? Well, that will probably happen too. But there’s another catastrophic event on the horizon: water damage. If the inevitable water spill or puddle-drop occurs, don’t fret! You still have a chance to save your phone.

First of all, don’t turn on your phone! This can cause further damage. If you were smart enough to purchase insurance (which you should for an iPhone) you may want to take it in for . However, if you don’t have insurance and don’t want to spend a ton of money on a new phone, there’s a chance to save your waterlogged phone. There’s no guarantee of a permanent fix, but the following steps can help salvage a water-damaged iPhone.

iPhone Repair Water Damage

Note: These steps involve taking apart your phone. If you have a warranty, opening the phone will make the agreement null and void. Make sure you know how to put the phone back together and take it apart at your own risk.

1. Remove the SIM tray. Insert the SIM card removal tool or a paper clip into the hole on the bottom of the phone. The SIM card should pop right out.

2. Remove the back bottom case using a case opener. Remove the case carefully by running the tool along the bottom of the back part of the iPhone. Using a Phillips head screwdriver, remove the three screws under the case.

3. Remove the back base from the frame. Run the case opener tool along both edges of the iPhone. Carefully remove the ribbon attached to both pieces.

4. Carefully remove three antenna cables held on by glue.

5. Remove the 10 screws on the outside of the case and one screw underneath a piece of tape. Pull up the piece of tape to unscrew.

6. Remove the screws holding the motherboard together. Carefully pull apart the motherboard. Be careful not to damage the four cables underneath. One of the cables is a latch that you will have to move upright in order to remove it.

7. Pull the motherboard and battery out together. Do not separate the two.

8. Remove the metal frame from the front of the phone.

9. Remove the LCD and Digitizer. Remove them by prying open the tiny clips on each side. Separate them by prying one side and then the other. This part can be difficult, so take your time.

10. Once you take apart the phone, set it out to dry. You can either set it out by a window or you can place the pieces in a bowl of rice to dry.

11. After about 24 hours, put the phone back together. It may help to take pictures as you take apart the phone to remember how to put it back together.

Need More Help?

Keep in mind that this is a last chance option to repair you phone when there is no warranty or insurance available. In this situation, it is best to consult a professional to evaluate the damage and repair the phone. Just tell us what, where, and when you need help, and Sll will connect you to a certified professional in minutes!

How Are Internet Cookies Used?

Thursday, September 12th, 2013

How Are Internet Cookies Used? - Computer Repair

A cookie is a simple string of text-only information. It is sent by a Web server to a Web browser and is primarily used to identify Internet users. When you go to a website that uses cookies, chances are that you will be requested to provide your personal information, such as your name or e-mail address, in order to create an account at the site or to send a message in the site’s “contact us” form. Whenever you’re filling out such forms, the information you provide is put in a cookie and delivered to your Web browser, which then keeps the cookie for later use.

How Are Internet Cookies Used to Remember You?

When you visit the same website again, the browser will retrieve the cookie and transmit it to the Web server. The message on the cookie allows the Web server to remember you and your login information, as well as provide customized content according to your preferences.

This could mean a website is able to welcome you by name on your next visit or keep you logged in to the site without having to ask you repeatedly to log in. Cookies also make e-commerce possible by keeping track of items added to an online shopping cart. Simply put, cookies make the Internet browsing experience faster, and therefore, more enjoyable.

Are Internet Cookies Used for Other Purposes?

Internet cookies can also be used to analyze the surfing behavior of Internet users within a particular website in order to determine the site’s performance. These types of cookies are used to find out the number of visitors to the site, the most-visited Web pages, and how long users spend on certain Web pages.

Although cookies cannot harm a computer system, they can sometimes be used for malicious purposes, particularly for tracking the online activity of users. These are the types of cookies you don’t want on your computer. Once these tracking cookies have gathered enough information about a user’s surfing habits, the data may be sold to advertisers who would target consumers with ads specific to their interests.

Cookies and Your Privacy

Cookies cannot access and read data from your hard drive to gather information about you. They will, however, store personal information that you freely provide to a website, unless you’ve turned off your browser’s cookie feature.

If you’d like to know more about Internet cookies and how they are used, or if you need any help with computer troubleshooting and repair, you can count on TalkLocal to get you in touch with a qualified computer technician in no time. Save time when you use our service today.

Transfer Data from Mac to Mac

Wednesday, September 11th, 2013

Transfer Data from Mac to Mac - Computer Repair

Have you just bought a shiny, new Mac? Want to transfer the data from your old computer onto your new one? It’s not too complicated to transfer data from Mac to Mac, and we have some steps to help you do it.

Streamlined File Transferring Between Mac Systems

Mac processors have a built-in design to make a file transfer between Mac computers simple. Commonly referred to as the Migration Assistant, this streamlined process is often used to transfer accounts, files, user and network settings, and other important information through the use of a FireWire cable or over a wired/wireless network. Using the FireWire cable is the easiest way to do the transfer.

Just Follow These Simple Steps

1. Connect both Macs through a FireWire cable.

* Mac A is the Computer you want to move files from.

* Mac B is the Computer you want to move files to.

2. Once Macs A and B are connected, restart Mac A while pressing and holding the “T” Key. (Once it has finished restarting, there is no point in holding the key further).

3. On Mac B, open the Migration Assistant located in Applications > Utilities.

4. Click Continue to continue with the process.

5. Type your administrator password as prompted.

6. The Mac will now ask you for a file transfer method between computers.

7. Select “From another Mac” and click continue.

8. Select “Use FireWire”.

9. Start the file transfer by choosing files from Mac A to transfer to Mac B.

Transferring without Using the Built-in Mac System

Many websites including Google provide file hosting. File hosting means that the owners of the website will allow you to store files up to a certain extent of size on their servers. Google’s Google Drive, for example, lets you store up to 5 GB for free. Any amount above that is premium that you must pay for.

Storing files in an online server gives you flexibility. Since it’s up on the internet, you can upload and download the files from any computer that is connected to the internet. And if the files are small and few, you may want to consider just emailing the files to yourself.

You can also buy and use an external drive to store your file and to transfer them between computers. USB drives or recordable CDs allow for a constant shift of different files between different computers.

Need Computer Help?

If you need additional help on transferring your files, TalkLocal can help with finding the correct local expert to fix your issue quickly, which saves you time and energy in a stressful situation.

Problems with YouTube

Monday, September 9th, 2013

Problems with YouTube - Computer Repair

Youtube is the biggest source for videos, music, and becoming the next big viral celebrity for its members.  But it is not a flawless site, and users sometimes have issues with their videos.  These can be frustrating, because in today’s technologically advanced age, we expect things to be ready at the click of a button.  But there is definitely a way to make your YouTube use easier and more efficient. Here are some tips for dealing with some common problems with YouTube.

Common Problems with YouTube and their Solutions

The video is not loading.

Solution: If your video is not loading properly, pause and let it buffer for a few minutes in order to let the streaming catch up.  If this doesn’t solve the problem, try changing the video quality to a lower quality, which may help the video load faster.

The video will not play.

Solution: Try deleting the version of adobe you have and update it.  You can also disable the pop up blocker and ensure that adobe is the default streaming application through settings.  If Windows Media Player is the default, this may explain your problem.

The audio and video are out of sync.

Solution: When your audio and video are out of sync, you have to change the settings of each on your computer.  Try many different combinations of the two to see what best plays the video.  If the problem persists it may be a faulty upload and you should just try to find a new video.

You can’t get the video to play on the TV.

Solution: When you can get a video to play on your computer but not on your TV, it’s probably not in the right format.  You should make sure that it is in .dat or .mp4, because your computer is compatible with a lot more video formats than a TV is.

You receive an error.

Solution: If you receive the error saying “404 not found” you should not worry.  This is a standard HTTP response code that is telling you that your computer can communicate with a server from which the video was asked, but the server cannot find what you want.

Need Computer Help?

If you have other problems you can go to YouTube’s help site or find a professional.  Use TalkLocal to be connected with reliable local businesses within minutes.  You don’t have to do any work! Simply input your problem and availability and Talk Local will do the rest! Almost immediately you will receive a call from a qualified IT service professional.

Signs of Broken Motherboards

Friday, September 6th, 2013

Signs of Broken Motherboards - Computer Repair

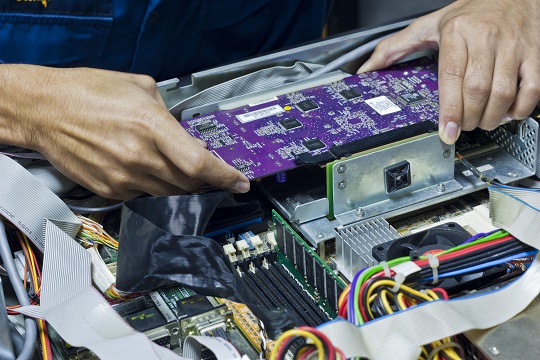
In personal computers, the motherboard is the central circuit board that holds many of the crucial components of the system. It essentially provides the electrical connections needed for the different parts of the computer to communicate.  Motherboards have no moving parts, so failure is rare. Physical damage to the motherboard is the biggest cause of failure, so it is important to know whether or not damage has been done to the computer. Motherboard failure is rare. It is more likely that your computer problems are coming from a defective power supply, hard drive, or memory. However, it is important to know the signs of broken motherboards.

Key Signs of a Broken Motherboard

1. The computer does nothing when you push the power button. This is more likely to be a power supply problem, but a defective motherboard is also a possibility.

2. The computer goes to a screen that says something is wrong with the motherboard. For example, it may say “BIOS failure” or show random numbers that do not match your processor or system temperature.

3. A certain computer component that is known to be working (such as an HD or memory chip) shows failure when you hook it up. The motherboard is the source of all internal computer communication, so this failure may be related to a defective motherboard.

Signs that the Issue is NOT with the Motherboard

1. You see an error message to the effect of: operating system not found

2. There is any kind of screen prompt.

3. The power supply fan turns on, but nothing else happens. This is likely to be a processor failure.

4. Everything seems fine with the computer, but you cannot see anything on the monitor. This is probably a display or video problem.

Find A Computer Professional

If you do have a broken motherboard, it may need to be replaced. Consult with a computer repair professional to determine whether the broken motherboard is salvageable. TalkLocal is a great tool to connect you with high quality computer repair professionals in your area. Use Talk Local to be connected with the right professionals in just minutes, for free.

Improve Computer Bootup Speed

Wednesday, September 4th, 2013

Improve Computer Bootup Speed - Computer Repair

Many people dread restarting their computers because it just seems to take so long.  Most people think that this slow bootup time is just something they have to deal with.  But take heart! You can improve computer bootup speed by following this simple guide.

Stop unnecessary programs from running when you start your computer:

1. Under the start menu, if you type “msconfig” into the search bar, you will find a number of settings that you can tweak to help your performance.

2. Under the “startup” tab, you can check and uncheck programs that automatically start.  Many programs like iTunes, QuickTime, and Skype default to starting up every time you turn the computer on.

3. Uncheck all programs that you don’t need running to start your computer.  Just be careful not to uncheck things that you really need!

Postpone the Windows Services that automatically run when you start your computer:

Windows has a lot of services that run automatically as soon as you start your computer.  These services are good.  They make sure that your computer is running well and that it has the latest updates.

However, when all of these tasks run when you start your computer, they can seriously delay your boot-up speed.  Within “msconfig” you can set these programs so they still run automatically, but on a delay.  This will keep your computer safe, but it will still keep you updated.

Make sure your antivirus software is running and updated:

Some people get annoyed when their antivirus software opens and prompts them with scans when they start the computer.  However, antivirus software is really important.  Your computer will run much more slowly if you disable antivirus software, and you could end up getting a virus.

That being said, if you hate being bombarded with a million prompts for antivirus scans and antivirus updates every time you turn your computer on, just run these scans regularly.  Then they won’t have to harass you at bootup, and your computer will be safe.

There are other things you can invest in to boost your boot-up speed as well.  Look into upgrading your RAM or getting a Solid State Drive.  These items give your computer more memory to work with, and thus drastically improve bootup and overall speed.

Still Need Help?

If you try these tips and your computer is still running slowly, or if you have any other computer problems, visit TalkLocal to be connected with high-quality computer repair experts in your area in seconds!