Archive for the ‘Computer Repair’ Category


Newly Installed Driver is Crashing Computer

Tuesday, September 3rd, 2013

Newly Installed Driver is Crashing Computer - Computer Repair

Having a computer that crashes frequently can be one of the most frustrating things to deal with. Getting help can be difficult too, with so many different operating systems and types of computers. So, if your newly installed driver is crashing computer, just read below. We have some helpful hints for you, focusing on Windows computers.

Newly Installed Driver is Crashing Computer

1. Make sure your computer can’t be fixed by a simple reboot. Many times, a simple restart of your computer can help resolve any temporary issues, so if you haven’t already, restart your computer and see what happens.

2. Windows XP and Windows Vista systems provide the user with utilities for discovering the root of the cause of computer crashes. Use the Problem Reports and Windows Event Viewer to do this. To get here, go to the Control Panel, select ‘System and Maintenance’, and then proceed to Administrative tools. Finally, select ‘Event Viewer’ to launch the troubleshooting process.

3. Once you get to the Event Viewer, click on the ‘System’ tab under the Windows logo. Scan the list for any red error icons, which indicate software problems. If there are errors present, you can resolve this by clicking the ‘Problem and Reports’ option under ‘System and Maintenance’. View the problem history to check for any possible solutions.

4. If the problem seems to be a newly installed driver that is crashing your computer, you can try fixing this by going back to the Control Panel and selecting the ‘System’ option.

5. Click the ‘Hardware’ tab and go to ‘Device Manager’ to see a list of drivers installed on your computer. The driver with an exclamation point may be the one causing problems, so right-click that one and click on ‘Update Driver’ to search for an updated driver.

6. If this doesn’t work, you can try simply uninstalling a driver that you believe may be the cause of the issue. To do this, go to your command prompt (found by going to ‘Run’ from the ‘Start’ menu and entering in “cmd”), and enter in ‘devmgmt.msc’.

7. In the Device Manager, right click on the device or driver you want to remove and select Uninstall.

This step will allow you to delete any driver or device you believe may be the root of the problem.

Find Computer Help

If this article didn’t help solve your problem, you may want to think about finding professional help. If you’re searching for a capable and reputable computer repairman, consider using Sel to be connected with one directly. Just enter in your specific problem, location, and availability, and up to three companies will call YOU directly, saving you the time and stress of finding one yourself.

Norton Antivirus Not Scanning

Thursday, August 29th, 2013

Norton Antivirus Not Scanning - Computer Repair

Is your Norton antivirus not scanning? Norton Antivirus is one of the best and most widely used antivirus programs available, but even Norton has its problems. Ability to scan is the most critical need of the antivirus program, especially in times when you know a virus has infected your program. In times of need, this could be the time when Norton cannot scan. Without Norton’s antivirus scanner, your computer is vulnerable.

Problems

Problems that occur with Norton’s antivirus scanner are with installation and malware.  In installation or in use, program files could have been improperly changed which have made Norton scanner unable to work correctly. Malware are viruses, worms, and Trojan horses using popular communication techniques to infect. Norton is not the best in detecting malware. In a malware infection, its scanning program can be blocked.

The Solution

Reinstallation

To do a clean reinstallation of the system, use Norton Removal Tool. This can be downloaded from the Symantec website.  The Norton Removal Tool will completely remove the program from the system. Reinstall the program with the most updated version, as this version will have removed problems with the previous versions. Earlier versions of Norton may have had problems with their scanner not working.

Malware Removal

1.       Boot your computer in safe mode, and see if the Norton scanner works and detects the malware infection on your computer.

2.       If that does not work, find and download a malware removal program. Malware Bytes is one of the best in finding and removing malware, and you can download it for free.

Need Computer Help?

Hopefully, this helps you solve your Norton antivirus scanner issues.  If not, it may be a good idea to seek professional help. Use TalkLocal to be connected with high-quality computer repair technicians in your area in just minutes, for free.

Malware Infection Removal

Monday, August 26th, 2013

Malware Infection Removal - Computer Repair

Once installed on your computer, malware can defend itself. This means that malware can hide itself from being detected by antivirus programs installed on your computer or even attempt to damage any security programs you have.

With that being said, it is advised that you try running a malware infection removal program. Virus scanners hosted on an online website are free from the reach of the virus infecting your computer, which means that it can provide an objective result.

Online scanners, however, may not detect all of the threats on your computer. For a better result, it is generally advised to try multiple reputable scanners and use the methods listed below.

Run Anti-Virus Software in Safe Mode

The Safe Mode is a mode of computer operation that boots up only the core components required for the computer to function. That means that any downloaded programs in your computer will have no effect, since they are not put into operation. The safe mode is generally used to remove or undo poorly configured software that might have messed up the operating system or to remove viruses infecting your computer.

To boot up your computer using the Safe Mode and run a scan, follow these steps.

1. During the computer bootup, enter the Safe Mode by pressing the F8 Key.

2. As the computer starts up, select the option “Safe Mode With Networking”.

3. Successfully boot into Safe Mode.

4. Run another scan using your anti-virus scanners once you are logged into the system.

Running a scan while in Safe Mode provides an objective result of the scan, much like the online scanners. Some existing anti-virus programs already have a setting to run a scan during bootup built into their own system — AVAST is a popular example.

So What If a Virus Has Been Detected?

Regarding computer security, it’s always better to be safe then sorry. Consider changing your passwords once a threat has been identified. It’s also important to prevent threats from happening in the future – download and run highly maintained anti-virus programs and avoid downloading suspicious files.

If there is a bigger problem that requires the help of a professional, TalkLocal can connect you with the right local expert to fix your issue. You’ll be on the phone with the right professional in just minutes.

How to Install iTunes on Chromebook

Tuesday, August 20th, 2013

How to Install iTunes on Chromebook - Computer Repair

If you’re using the new Chromebook OS, then you’re probably a little worried about being able to install and synchronize your iTunes with it. There’s a lot of buzz going around on the Internet, claiming that you absolutely cannot install iTunes on Chromebook. While there is some truth to that, the good news is that there is still hope after all. If you need guidance, you can order books that provide tutorials and guidance on how to use your Chromebook and its capabilities and have it shipped overnight from Amazon starting at $6.99

Regardless of what you’ve read on the Internet, it is still very much possible to use iTunes with Chromebook. However, in order to do so, two things must happen. First, you must have a way to get your iTunes music from your PC or MAC and into the cloud. And second, you must have a way to access that music on your Chromebook. The Google team themselves have created a video explaining exactly how to do this. Just in case you’re wondering, no, you will not install iTunes on Chromebook. Here are the steps that Google has laid out in order to help you access your iTunes from Chromebook.

1. The first thing you’ll need to do is locate and install an application on your Windows PC or MAC that you can use to upload your iTunes music to the cloud. To do this, simply navigate to http://www.google.com/music. From there, you will download the Google Play Music Manager app onto your PC or MAC.

2. Once downloaded, you can then open the Music Manager app from your computer. You’ll be prompted to sign in to your Google account. At that point, you’ll be asked to select the location of where you keep your music collection. Go ahead and select iTunes and click “Continue.”

3. This is where you’ll be able to either upload all songs located in your iTunes folder or you can manually select which music songs you wish to upload. Click “Continue” and follow the rest of the prompts until all of your desired music has been uploaded.

4. Once your music has been uploaded, you’ll be able to access it from Chromebook. Simply locate and open the Google Play Music app via Chromebook. Once opened, you should be able to see and listen to all of the iTunes music that you chose to upload. That’s all there is to it.

Not a Techie?

That’s okay. TalkLocal can connect you with a professional techie that can walk you through this and many other types of technical issues.

Microphone Jack Not Working Windows 7

Friday, August 16th, 2013

Microphone Jack Not Working Windows 7 - Computer Repair

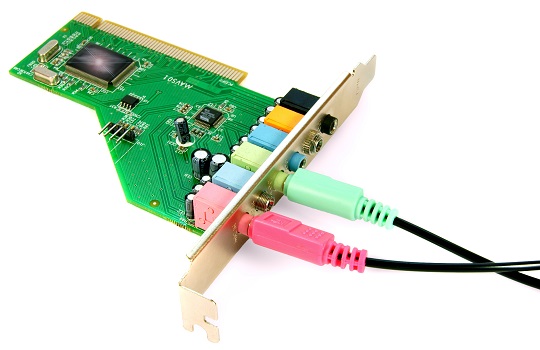
Is your microphone jack not working Windows 7? One of the most common errors people get while trying to use a microphone or while recording in Windows 7 is that the microphone jack doesn’t work.  This error can be the result of two different conditions: the audio drivers need to be updated, or there is a physical hardware problem.  While the drivers can be easily updated, the motherboard jack itself should only be changed by trained IT professionals.  You should always try to update the drivers before assuming an underlying hardware issue.  Make sure that after each step you check to see whether or not the microphone issue had been solved.

To Update the Drivers:

1. Access the Control Panel and open up the Device Manager.

2. Under the subheading of sound, you should find something labeled as HD audio (many of them will say RealTek High Definition Audio, but it will vary by manufacturer and the specific make of your motherboard).

3. Double-click on the Drivers tab and record the current version.  You should then click on the “Update Drivers” button.

4. Right-click on the device, uninstall the device, and reboot your computer.  Once you reboot your computer, the computer will automatically rebuild the driver from scratch.

5. Go to the manufacturer’s website and install the latest sound drivers and reboot the computer. Afterwards, make sure that the sound driver actually matches the version you installed (if not, it may take more than one installation attempt to do so).

Checking for Other Errors:

1. Check your recording devices by right-clicking the sound icon next to the time, and check Show Disconnected Devices and Show Disabled Devices.  Make sure the proper mic is enabled and the other settings are corrected (for instance, ensure that Mute is unchecked and the levels are high enough).

2. In the Control Panel, check for an Audio Manager (most likely named after the sound driver maker) and check to see the mic is correctly activated.

Need More Help?

If none of these steps worked, the next best step would be to use TalkLocal to instantly be connected with a highly rated, local IT professional to help you repair your microphone jack.  It’s fast, easy, and free to use!

McAfee Antivirus Not Installing

Wednesday, August 14th, 2013

McAfee Antivirus Not Installing - Computer Repair

Is your McAfee antivirus not installing the software?  Getting virus protection for your desktop or laptop is critical in order to keep your computer functioning well and your private information safe.  There are a few things that could be going wrong with your McAfee installation. If you are having trouble installing McAfee antivirus, here are some tips to try get it working.

What to Do If McAfee Antivirus Is Not Installing

1. Make sure that your system meets the minimum requirements for McAfee products.  The minimum requirements information can be found on McAfee’s website.  Your system must meet these requirements in order to successfully install and run any McAfee software.

2.  McAfee provides a pre-installation tool that gets your computer ready for McAfee software to be installed.  Download and run this tool.

3. Once it has completed, restart your computer in order for the changes to take effect.  Your computer should now be ready and able to successfully install McAfee antivirus.

4. Did you receive a message saying that you have incompatible security software already installed on your system?  If so, you will need to remove the incompatible software before McAfee can be successfully installed.  Check out this page for a list of incompatible programs that you may have on your computer.  Most of them are other anti-virus programs that would cause conflicts with McAfee if they were both installed on a computer at the same time.

Still having issues?

If you are still unable to install McAfee antivirus after trying these steps, it may be time to get some professional help.  Use TalkLocal to get in contact with a reliable local computer technician within minutes.  Just enter a description of your problem, your availability, and your location, and Talk Local will connect you directly to someone who can help.

Chromebook Microsoft Word Issues

Monday, August 12th, 2013

Chromebook Microsoft Word Issues - Computer Repair

If you are in business for yourself or currently enrolled in college, then chances are, you probably use Microsoft Word. However, if you’re thinking about buying a Chromebook, then you may be wondering if you can still download and use Microsoft Word or other Office programs with it? The answer to this question is both No and Yes. Let’s explain.

If you have a Chromebook, Microsoft Word will not be as accessible as it has been for you in the past. So to answer the question, yes, you can use it to some extent, but no you cannot download it on the Chromebook. Here’s how you can get your Chromebook to work along with your Microsoft Office programs.

Use Google Docs

First and foremost, you can use Google Docs to open and edit your office documents. If you’re already using Google Docs, then this will not be such a challenge for you. However, if you’ve never or rarely used Google Docs, then you’ll need to learn more about how to do so.

Google Docs, simply put, is Google Chrome’s version of a word processor. It is 100% free and most importantly, it has the ability to read Microsoft Word documents. Which versions of Word can it read? So far, it can read them all. Unfortunately, though, it’s not always perfect. If you have any special formatting in your Word document, then the Google Docs word processor may not translate it correctly, resulting in a distorted-looking document. This does not always happen. But oftentimes, it may.

Use Office Online

With that being said, you can also create and edit Microsoft Word documents via Microsoft’s www.office.com website. They have developed an online version of their office suite so that anyone can access and edit documents directly from the Internet. Of course, nothing is perfect. This version will require an investment. And although you can easily create new documents from your office.com account, you will still need to use a virtual storage program, such as Microsoft’s SkyDrive in order to open and edit existing office documents.

So if you choose to buy a Chromebook, this is what you’ll run into with Chromebook Microsoft Word. In fact, this will be the case for all of your Microsoft Office programs. However, for every negative, there’s a positive. And the positive here is that you can, in fact, still use Microsoft Word with Chromebook. You just can’t download it onto Chromebook, and you have to take alternative measures in order to make it work for you. Can it be frustrating? Sure, it can. But is it doable for now? You bet!

Are You in Need of Further Instruction Regarding the Use of Microsoft Word with Chromebook?

Well search no further. We can help! TalkLocal will reach out to the high-quality pros you need based on their customer ratings. No need for you to keep searching and calling around. We’ll do all the legwork for you. In only a matter of minutes, we can connect you with professional help.

Wiping Computer Clean

Friday, August 9th, 2013

Wiping Computer Clean - Computer Repair

If your computer is loaded with viruses or is running extremely slowly, the best way to deal with it may be to completely wipe your hard drive clean by reformatting it and installing a new operating system on top of the old one. You will need your recovery disk that came with your computer and product key (for Windows) in order to format your hard drive. Before wiping computer clean, make sure that you back up anything important, because formatting your hard drive will delete everything on your computer.

Wiping Computer Clean on Windows

1. First, put the Windows recovery CD in your computer and restart it. When the computer starts up again, it will start up from the CD. Press any key when prompted.

2. Enter your language and set any preferences that you would like on the computer.

3. Read the licensing terms and click “I Accept the Licensing Terms.”

4. When asked what type of installation you would like, choose “Custom.”

5. When asked where you would like to install Windows, select Drive Options (Advanced), then select your drive.

6. For the option “type of file system to apply when formatting,” select NTFS.

7. When your computer has finished formatting, click “Next” and follow the on screen instructions that follow.

Wiping Computer Clean on Mac

1. First, put the OS X system CD in your computer and restart, hold down the C key on your keyboard while it is booting up.

2. Select your language.

3. On the “Installer Menu Bar,” click on “Open Disk Utility.”

4. On the left side of the “Disk Utility” window, select the drive you want to erase.

5. On the right side of the “Disk Utility window,” select the “Erase” tab.

6. Click on the “Volume Format” drop-down menu and select “Mac OS Extended (Journaled).”

7. In the “Name” text box, delete the text that is already there and type what the name of the hard drive is to be called after it is formatted.

8. Select the “7-Pass Erase” option

9. Click “Ok” and then “Erase.”

10. Confirm that you want to erase.

After You Wipe You Computer Hard Drive Clean

If, after wiping your computer hard drive, you realize that you still need something that was wiped, it may be possible to retrieve it with the help of a computer professional. By using TalkLocal, you can receive phone calls from computer professionals in your area, that are available when you are, within minutes.

You should also keep in mind that data deleted in a format can be retrievable if you are planning on donating your computer. If you have any sensitive personal or business information on your computer, you may want to either purchase a program or hire a computer professional to more securely wipe your computer.

Cloud Storage Costs

Thursday, August 8th, 2013

Cloud Storage Costs - Computer Repair

Cloud storage happens to be one of the best things that have happened to the IT industry in the recent years. While most providers give you a certain amount of cloud storage for free, companies and businesses can buy a lot more of it for an annual, monthly, or one-time fee. If you wish to store a huge amount of data on a cloud service, it would be ideal that you compare prices of the leading services before coming to a conclusion.

Prices of the Leading Cloud Storage Providers

You may come across significant confusion when trying to select a particular home cloud data storage provider. However, you must understand that price isn’t the only factor that’s important here. You must consider a lot of other features as well, such as reliability, security, file type support, etc. Try to find a balance between price and features when trying to compare cloud storage costs.

Dropbox

Dropbox happens to be, undoubtedly, one of the most popular cloud storage options today that many of us use every single day. It gives you 2 GB of storage free, and a lot more can be added on payment. You can add 100 GB for $9.99 a month or for an annual fee of $99 a year. 200 GB could be had for the price of $19.99 per month or $199 per year, and 500 GB could be had for $49.99 per month or $499 per year. If you don’t need as much as 100 GB but still need more than 2 GB, Dropbox has a great way of letting you do that through referrals, which could get you up to 18 GB of free storage.

Google Drive

Another popular favorite among the masses, Google Drive offers 5 GB of free storage that can be upgraded to 25 GB for just $ 2.49 per month. A number of price bands are available thereafter, giving you 100 GB for $4.99, 200 GB for $9.99, 400 GB for $19.99, 1 TB for $49.99, and the list goes on up to 16 TB for $799.99 a month. The interesting feature here is that the upgraded storage you buy also applies to Picasa and gives you an additional 25 GB in Gmail as well.

SkyDrive

One of the highly preferred services is SkyDrive, which offers you 7 GB of free storage. Most people find this ample for their personal use. However, you could always upgrade it to 27 GB for just $10 per year, 57 GB for $25 per year, or 107 GB for $50 per year.

Apple iCloud

Apple’s iCloud storage is something Apple users live by. While you can store plenty of data for free in the 5 GB you get, you can buy an additional 10 GB for $20 per year, 20 GB for $40 per year, and 50 GB for $100 per year.

Other providers such as Huddle and FolderShare also offer you plenty of storage and let you sync files on different devices at competitive prices. So choose wisely and store as many e-mails, music, books, movies, and apps as you like with effective cloud storage costs.

Get Expert Help

If you’d like a professional to answer your questions or set you up on a cloud storage plan, meet the best professionals with the help of TalkLocal. We find the best professionals and connect you with them, so they can address all of your concerns efficiently.

Chromebook vs iPad

Tuesday, August 6th, 2013

Chromebook vs iPad - Computer Repair

Have you been wondering whether or not to get the Chromebook or the iPad? Not sure which computer offers the most benefit for what you’re looking for? While there are various versions of each device, the differences between them are still very similar. By the time you’ve finished reading this article, you should have enough basic information in order to make an informed decision.

The Physical Comparison

Physically, there are many differences in the Chromebook vs iPad. They vary in size, appearance, storage space, and more. Based on what you’re looking to use your device for – school, business, personal, etc. – might be a big determining factor for which one of these devices will be best for you when it comes to physical characteristics. Let’s take a quick peek at a few of the physical differences of the two.

For starters, the Chromebook is much bigger in size than the iPad. Depending on the versions that you’re comparing, the Chromebook display screens can be up to 2 or 3 inches bigger than the iPad’s display screen. It’s heavier as well. You’ll find that the Chromebook can be up to two times as heavy as the iPad.

In addition to this, the iPad uses a touchscreen while the Chromebook uses a full-size keyboard. So when it comes to the physical characteristics – size and weight – then you might want to go with the iPad if you’re looking for something more sleek and lightweight to use for more personal or minor business tasks. But if you’re really not into touchscreens, then you might want to go with the Chromebook.

Feature Comparison

Now let’s look at some of the feature comparisons of the Chromebook vs iPad. For example, the Chromebook can hold up to 100GB of storage, whereas the iPad can only hold up to about 64GB. On the other hand, you might be able to use your iPad for a much longer period of time with its estimated 10-hour battery life. The Chromebook’s battery life is only an estimated 6 hours.

In addition, the webcam on the iPad features a 2-way camera, allowing you to take both front and rear pictures. It also works well with mobile phones such as the iPhone. The Chromebook does not. The Chromebook, however, can access flash media but the iPad cannot. Also, the iPad offers more than 150,000 applications that you can download to it, while the Chromebook offers only a limited selection.

Which One to Choose?

In deciding whether to buy the Chromebook vs iPad, you will need to weigh all of the options mentioned in this article. Overall, it will depend on what, exactly, you need to be able to accomplish with your device.

Do You Need Assistance With Your Chromebook or iPad?

TalkLocal specializes in connecting consumers and/or businesses with high-quality professionals for nearly any need they might have. We can put you in touch with the right professional in only a few short minutes.