Archive for the ‘Computer Repair’ Category


Understanding the Different Types of Cloud Data Storage

Sunday, August 4th, 2013

Understanding the Different Types of Cloud Data Storage - Computer Repair

Cloud data storage allows companies and people to back up and store all of their information on a Web-based interface through which it can be accessed from any device with an Internet connection. Today, there are many different types of cloud data storage providers you can choose from. There are paid as well as free services, and knowing which to choose can be an important decision.

What Are the Types of Cloud Data Storage?

There are three basic types of cloud data storage: personal, public, and hybrid cloud storage. Some of the most popular names you frequently hear when it comes to cloud storage are Dropbox, Google Drive, FolderShare, Huddle, and of course, Apple iCloud. These are all fairly successful and big names, and to choose your preferred provider out of these can be a little tricky.

Comparing the Different Types of Cloud Data Storage

If you are wondering how you can measure the efficiency and reliability of a cloud data storage provider, there are a few key parameters you can judge them on. Storage space is undoubtedly the most important factor here, followed by the kind of supporting platforms available, security, supported file types, and file upload limit. For your convenience, we have listed the comparisons of some of the key players in the cloud data storage world.

Google Drive

It is one of the most commonly used Data storage services, providing 5 GB storage and supporting Windows, Android, Mac OS, and iOS. It is an extremely secure service with two-step verification and supports the widest range of file types, from Adobe Illustrator to video and image files.

Dropbox

Dropbox provides 2 GB of storage and supports all of the major operating systems, including Linux and Blackberry in addition to Windows, Android, and iOS. It supports most of the crucial file types, though not all, and offers 2-step verification as well as a passcode for security.

Apple iCloud

Extremely popular among most Apple users, iCloud backs up all of the data on your Mac OS and iOS devices, allowing you to synchronize a great deal of data. However, it still remains more of an app and doesn’t let you upload certain kinds of files.

FolderShare

FolderShare is a service that allows you to sync files and information between multiple devices. So a file that you created on the computer in your office can easily be viewed on your notebook at home. You could make changes to the file from anywhere. You are, of course, going to need an Internet connection to have your files and view them on different devices.

Huddle

Huddle is a content management software that is extremely secure and increasingly used by many different companies and businesses. It provides a great way to manage teams and tasks. It also syncs documents and files across the network, allowing you to access them from anywhere.

The Verdict

You must make sure you have a clear idea of exactly what you need from one of the different types of cloud data storage. Based on your needs, you can choose the service you’d like to use.

Need Help with Data Storage?

If you are still feeling confused about whom to choose or wish to know more about how to get started using data storage, simply get in touch with us at TalkLocal. We will help you find the best professional out there who can answer all of your questions and set you up on a cloud storage within no time.

Install OS On SSD

Saturday, August 3rd, 2013

Install OS On SSD - Computer Repair

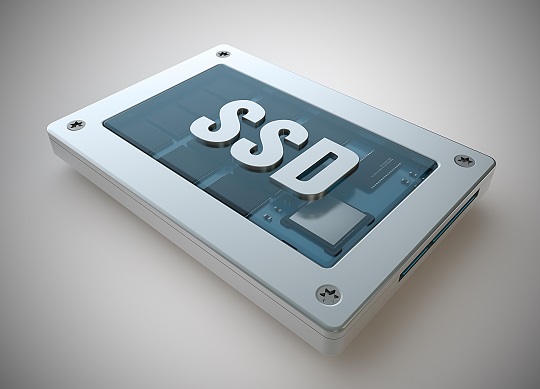
Solid State Drives, commonly known as SSDs, are a vast improvement over regular hard drives. They read and write data at a much faster rate and are much less prone to failure, unlike their Hard Drive counterparts. However, they tend to be far more expensive than regular HDs and generally have less memory space. This makes installing your operating system on the SSD advantageous, as there is less chance of a major system crash due to hard drive failure, and general usage speeds tend to be faster. Non-critical files that are not accessed as often usually go on the regular hard drive in the computer. Therefore, people often wonder how to install their OS on the SSD, but the process is actually simpler than you would think.

How to Install OS on SSD

1. Make sure that no other HDs and storage devices are connected to the computer other than your SSD.

2. Double-check that the SSD is your primary drive and that the OS isn’t installing onto some other partition.

3. Install the OS as per usual, following the instructions on the screen.

4. After finishing the installation, connect any other hard drives you would want to use to store your non-critical files. If you want to install your programs only on the secondary drive, it might be a good idea to set the default program installation directory as well.

Setting the Default Installation Directory

1. Type “regedit” in the Vista Start menu search box or in the Run dialog box (XP, Windows 7) and hit enter to continue.

2. Navigate to the following registry key in the Registry Editor:

HKEY_LOCAL_MACHINE\SOFTWARE\Microsoft\Windows\CurrentVersion

3. Locate the value named “ProgramFilesDir,” and change the default value “C:\Program Files” to your new directory path (address).

4. Reboot your computer for the changes to take place.

Need More Help?

If something went wrong during the installation, or if you would rather have a professional do this for you, use TalkLocal to find a qualified computer technician to solve your SSD issues right now. We will connect you with qualified professionals in your area in just minutes.

How To Remove System Restore Virus

Friday, August 2nd, 2013

How To Remove System Restore Virus - Computer Repair

Don’t be fooled by the malicious System Restore Virus. The infected file that contains this virus is usually a video update, flash update, or video. The intention of its creators is to scare computer users with alerts of false computer issues, convince the user that the fake System Restore program can fix the problem, and make profit by recommending the purchase of the program.

System Restore is completely fake and will not improve any hard drive issues. The virus will hide all of your files, cause your hard drive to spin constantly, remove shortcuts from the start menu, and cause the desktop to go black. Do not worry though; the alerts on your computer are not true, and your files are not permanently gone. The System Restore Virus has simply hidden them.

Follow these steps to learn how to remove System Restore Virus:

1. To begin, reboot the infected computer. If the computer has already been powered down, turn it on.

2. Immediately as the computer begins to boot, press F8 many times. Pressing F8 allows you to access the “Advanced Options Menu.”

3. Once you are in the “Advanced Options Menu,” use the arrow keys to select the “Safe Mode with Networking” option. Press enter when you have selected that option.

4. Windows will now boot into “Safe Mode with Networking,” which will allow you to remove System Restore. This will stop the virus from running.

5. Now that the virus is not running it is time to begin removal. Click and hold Windows key, then press the R key. This will cause the Windows Run Box to open.

6. Type the following into the Run Box and click “OK.”

iexplore http://www.spywarehelpcenter.com/remove

7. After clicking “OK,” the computer will connect to the Spyware Help Center website where you can download their free virus removal program called Spyware Doctor by PC Tools.

8. When the PC Tools download box appears, click the “Run” button. This will cause PC Tools to launch. Click “OK” if your computer asks if you are sure you want to run PC Tools.

9. PC Tools will find the System Restore Virus after the scan is complete. Remove the virus by registering PC Tools. You must register PC Tools while still in Safe Mode to remove System Restore.

10. After registering PC Tools the virus should be completely removed. You can safely reboot into Normal Mode. The virus should be completely gone.

Having Other Computer Troubles?

If you would like professional help with removing the System Restore virus, or you need other help with your computer, just use TalkLocal. We will connect you with up to three computer repair professionals in your area in just minutes. It’s fast, easy, and completely free.

Install OS On Netbook

Thursday, August 1st, 2013

Install OS On Netbook - Computer Repair

Most netbooks do not have CD/DVD drives, which usually is not a big deal. However, this can be a problem if you need to install a new operating system on it. Follow the directions below to install OS on netbook.

Know What Kind of Netbook You Have

Before doing anything to your netbook, you should have a solid understanding of its specs. Most importantly, you’ll need to know how much storage space your netbook has. If your netbook doesn’t have much space, you will want to install a bare version of your operating system, especially with Windows 7.

This means you won’t be able to install anything “optional.” However, if you have lots of space, you can install any feature you want, but make sure to leave 2-4GB of space for other programs.

Make Your Flash Drive Bootable

If you want to install an OS from your flash drive, you will need to make it bootable. Try LiveUSB Helper, a free program used to easily set up your USB stick.

Copy Your OS to the Flash Drive

If you downloaded an ISO file, you will need a tool like DaemonToolsLite, which mounts the image, allowing you to copy all your files onto your USB drive. Copy every file.

Restart your computer

When your netbook starts up, make it boot from your flash drive by pressing F11 or Delright when the BIOS screen flashes. Select your USB drive from the list and you should be finished.

Don’t forget that when you reinstall an OS, you lose all the data on your netbook, so make sure you back up everything important before doing this.

Follow all of the onscreen instructions to install your new OS.

Need Computer Help?

If you are having problems after trying to install an OS on your netbook, then use TalkLocal to get the best help you can get quickly from local IT service professionals. We will connect you directly with up to three professionals who can help.

What to Do When Your DVD Drive Does Not Read

Wednesday, July 31st, 2013

What to Do When Your DVD Drive Does Not Read - Computer Repair

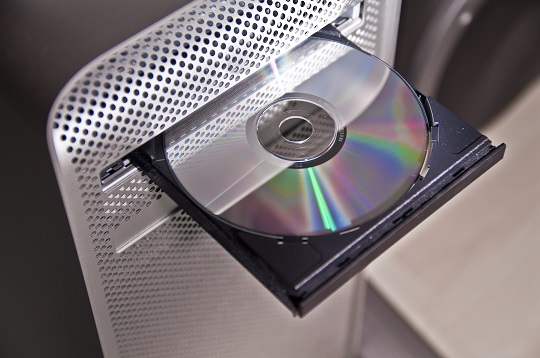
When your DVD drive is not reading discs, it can be frustrating. However, there may be a problem with the actual CD or DVD. Check the disc for any damage such as scratches, cracks, or peeling. If there is no damage, try to thoroughly clean the disc and try it again. If there is actual damage on the disc, you will need to find another disc.

If the disc you are using works in a different device, then you may be wondering what to do when your DVD drive does not read discs.

What To Do When Your DVD Drive Is Not Reading A Disc

1. As with many computer problems, the first thing you should do is restart the computer. In some instances, this simple step fixes the problem.

2. If the problem persists, the next thing you should do is uninstall the driver in the device driver: My Computer > Properties > Hardware > Device manager.

3. After uninstalling, Microsoft may either automatically reinstall the driver, or you can easily reinstall the driver. If you have the driver (either on a CD or preloaded on the computer), re-install the driver. If not, search on Google for the driver and reinstall it. Make sure you install the most up-to-date driver. Try to see if there are updates.

4. Microsoft also has a “fix it” option that you might want to take advantage of. This program runs on your computer and fixes any specific problems you may have. Click here to fix CD/DVD problems. Click “run now”.

5. There also may be several programs you are running on your computer that are blocking the drive from reading the disc. By setting up the drive to run in direct memory access (DMA) mode, you may be able to fix the problem. To run in DMA mode, open Device Manager, right click on the DVD drive that is giving you issues, choose properties, then click the advanced tab. There you can switch to DMA mode.

In Case This Doesn’t Work…

If the problem persists, you may have a broken drive. You can either seek professional help, or you can buy a new CD/DVD drive. They are fairly cheap and easy to install as they tend to come with instructions. Make sure you purchase a drive that is compatible with your computer!

Or you can simply speak with a professional computer repair technician. TalkLocal will connect you with up to three, qualified technicians in your area, so you can get the right help exactly when you need it.

How To Replace A Laptop Screen

Tuesday, July 30th, 2013

How To Replace A Laptop Screen - Computer Repair

One of the biggest and most common hardware problems faced by most laptop users is a dead or misbehaving laptop screen. Laptop screens are incredibly delicate and break easily. However, laptop screens are also fairly easy to repair or replace. Here is a step-by-step guide on how to replace a laptop screen.

Make Sure the Screen is Actually Broken

There are many things that can go wrong inside a laptop which may cause the screen to stop working. First, make sure the inverter is working fine and the video card is in place and is functioning properly before you decide to change your laptop’s screen.

How To Replace a Laptop Screen

Changing a laptop screen can be surprisingly easy. Here is what to do.

1. Find your laptop’s screen type and buy a new one that you’re sure will fit. It must be the same size to fit properly. Check with your laptop’s manufacturer to see if they sell laptops screens.

2. Unplug the charger and remove the battery.

3. Remove the screw covers and unscrew all of the screws on the screen side of the laptop.

4. Once all the screws have been removed, gently remove the screen from the bezel. Once the screen has been successfully detached, pull it out with a little more force. If you cannot pull the screen out, ensure that you have removed all of the screws.

5. Now, slowly tilt the screen forward, exposing the LCD frame’s metal back. The screen should gently pop out of its back shell.

6. Now, you will see two main wires. The video cable will be taped in. Remove the lap and detach the cable.  The other wire should be removed if the inverter needs replacement as well.

7. Now, plug in the new screen and set it in the shell. Put the screws and screw covers back in place and voila ! Brand new laptop screen.

Need Professional Help?

If you would prefer to have a professional computer repair technician replace your laptop screen, just use TalkLocal. We will connect you with up to three computer repair technicians in your area in just minutes. You will be on the phone with a qualified professionals almost instantly!

Does Microsoft 2010 Work on Windows 8?

Monday, July 29th, 2013

Does Microsoft 2010 Work on Windows 8? - Computer Repair

As those who use it already know, Windows 8 is not just an upgrade, but the result of significant changes in design. It makes users change habits and relearn to use Microsoft’s latest OS interface. Some users consider it a step ahead, others don’t hesitate to say it’s a flop, and many look forward to the release of Windows 8.1, which is expected to happen this fall.

One of the greatest concerns of people using previous Windows versions is: Are Microsoft Office packages compatible with Windows 8? Even more to the point:

Does Microsoft 2010 Work on Windows 8?

Before switching to a new OS, it’s best to check software compatibility. Although they are released by the same manufacturer, timing can sometimes be a problem. Here’s how to check the compatibility of Microsoft Office suites with Windows 8.

Go to Windows Compatibility Center to find out what parts of Microsoft 2010 Work on Windows 8

You can answer your compatibility questions quickly if you access Microsoft’s Windows Compatibility Center. To do that, take the steps below:

1. Turn on your computer and log on to your Windows 8 using the administrator account.

2. Check your computer’s connection to the Internet.

3. On the Start screen, click Desktop to reach the desktop window.

4. Now, look on the taskbar, and click the Internet Explorer icon.

5. Use Internet Explorer to go to Windows Compatibility Center webpage.

6. When it opens, type Microsoft 2010 in the product field and hit search.

Compatible versions are accompanied by the Windows logo indicating compatibility, while those that don’t work anymore with Windows 8 are marked with an X. By following the suggested steps, you will see which Microsoft packages are compatible with Windows 8. For instance, you cannot use Microsoft Office 2010 Starter Edition. Also, those who are still using Microsoft Office 2003 should weigh their options, as it is not compatible with Windows 8.

Need Professional Advice?

If you want to find out more about MS’10 on Windows 8, just ask TalkLocal. Here you can get the help you need from IT experts in your area. We’ll connect you with up to three professionals in just minutes.

How to Transfer Contacts between iPhone and Android Using Bluetooth

Sunday, July 21st, 2013

How to Transfer Contacts between iPhone and Android Using Bluetooth - Computer Repair

The iPhone 5 series allows individuals to download various applications for various tasks. The phone has various features, including the ability to transfer contacts from other handheld devices, like Android, using Bluetooth. This feature can be used effectively if users can download and install an application known as Beam It. The software allows individuals to transfer all their contacts from android devices eliminating the need for copying down all contact information. Here is how to transfer contacts between iPhone and Android using Bluetooth.

How To Transfer Contacts Between iPhone and Android

• Go to the app store icon on the iPhone 5 and search for Beam It. This application is available as a free download, and users can just touch the free button on the program description and then click the icon to begin the installation process. Enter the iTunes password if prompted. This mobile software can only work if it is installed on both devices.

• Turn on the Android’s Bluetooth. This is done by clicking the preferences button, followed by the general icon. From the list that will appear, touch the switch that will turn on Bluetooth.

• Open the Beam It application on both handheld devices. The user will be prompted to select the contact information they wish to transfer to the android device. If a user chooses the wrong contact information, they can click on the “i” button at the bottom of the screen and touch on the “my name is” button to change the choice.

• Touch the name of the recipient from the devices listed under “devices nearby.” The iPhone will connect with the recipient device. Once the connection has been made, the contact information will be automatically sent to the other device. The contact information can be saved on the other device by scrolling down the “options” and clicking on the “save” button.

Apple’s iPhone 5 phones can connect to Bluetooth devices within a certain range. The device has an internal chip which makes Bluetooth transfers possible. This allows users to send and receive information from one phone to another without the need for a direct connection.

Need Phone Help?

If the process of transferring data between an iPhone and other devices seems too technical or complicated, just use TalkLocal. We will find the professionals in your area who can help you, in just minutes!

How To Transfer Contacts Between iPhone and Blackberry

Saturday, July 20th, 2013

How To Transfer Contacts Between iPhone and Blackberry - Computer Repair

In this day and age, most people would think that transferring contacts between the iPhone 5 and Blackberry would be an easy task. Unfortunately, it’s not as straightforward as you would think it is. We’re here to make the job easier for you, but the quickest and least difficult way to do this is by finding a professional to do this for you. Refer to the bottom paragraph for more information.

How To Transfer Contacts Between iPhone and Blackberry

1. Start by going to http://www.google.com/sync/index.html via your Blackberry internet browser.

2. Install the application provided, start it up, and log in to your Google Apps or Gmail account. Once that’s done, you’ll be at the usual welcome screen with the option to sync your data.

3. Hit the sync button and give Google Sync a few minutes to transfer all of your data into your Google account. You can verify that all information was sent correctly by going to https://www.google.com/contacts/, which shows you all contacts that were sent from your device.

4. Now it’s time to pick up that iPhone 5 and transfer the contacts. Using Microsoft Exchange, we’re going to sync the data from Google Sync with your iPhone.

5. Browse to the “Mail, Contacts, Calendars” category within the options menu from your iPhone 5.

6. Choose “Add Account” and pick Microsoft Exchange. You’ll then be asked to enter an email address and a password. Use your Google information and hit the “Next” button. Fill out the following details:

Email: (Google Email Address)

Server: m.google.com

Domain: (Leave Blank)

Username: (Google Email Address)

Password: (Google Password)

7. When asked for what you would like to sync, be sure to click Contacts. You can also sync calendars and Google Apps messages, but that’s not what our objective is.

There you have it. Should you decide to continue using both devices, your contacts should now be synced. Otherwise, this is a one time deal and you’ll be all set.

Need More Help?

Transferring contacts between the Blackberry and iPhone can be a difficult task for some and time consuming for others. I so, find a professional computer repair technician who can do it for you. Just use TalkLocal to be connected with at least three professionals in your area within minutes.

Network Cable Unplugged Error

Friday, July 19th, 2013

Network Cable Unplugged Error - Computer Repair

If you are having problems with your network connectivity, you will probably see a network cable unplugged error message. This pop-up may come up on your screen once every few days or once every few minutes depending on how severe the problem is. There are several possible causes for this problem, and it happens most commonly when an Ethernet adapter is trying to make a network connection.

Possible Solutions For Network Cable Unplugged Error Message

Disable the Ethernet network adapter if you are already running a WiFi home network with computers that have built-in Ethernet adapters.  On Windows, double-click the small Network Cable Unplugged error window and click disable.

Check each end of the Ethernet cable and make sure they are plugged in all the way and not loose.

Replace the Ethernet cable with another one.

Update the network adapter driver software from the appropriate manufacturer’s site.

Replace the Ethernet network adapter by removing and reinserting the existing adapter to make sure that the card is connected properly. If the card is damaged in any way, replace it with a different card.

Need Professional Help?

This can be a very annoying error if you don’t know what is causing it, but with just a little troubleshooting you can fix the problem yourself. If the issue persists after trying all of these methods, then just come to TalkLocal. We will connect you with up to three, high-quality computer repair technicians in your area in just minutes. Don’t bother searching for help. We’ll find the right professional for you.