Archive for the ‘Computer Repair’ Category


Microsoft Office On Windows 8

Monday, June 24th, 2013

Microsoft Office On Windows 8 - Computer Repair

Much of the reason users were so pumped about the arrival of Window 8 was because it ushers in a new operating system. While most people would consider this an upgrade, a change in operating systems will never come without its share of casualties.

If you have older programs, it is understandable that you would be concerned whether they would work on Windows 8. One of the most important programs that users go to is Microsoft Office. So, are there any problems with your Microsoft Office on Windows 8?

Read on to see how you can check.

Windows Compatibility Center

You can use the Windows compatibility center to determine if your version of Microsoft Office on Windows 8 will work.

Here, you can check on all the various versions of Microsoft Office — and there are plenty. This is important because some versions will be compatible with Windows 8, while others are partially compatible, and still others are completely incompatible.

While Microsoft Office was released as an app on Windows 8, the individual programs (i.e. Word, PowerPoint, etc.) were not, which has caused significant confusion.

Stay Conscious Of Compatibility Issues When Shopping

Not everyone purchases the brand new version of Microsoft Office. This makes it important to do your homework before you go about purchasing an older version of the software. Check with the compatibility center or search online forums or help websites to determine whether your software will even function on your computer.

Get Computer Help

Microsoft Office on Windows 8 will take some getting used to. Those that have used this software for years will certainly be thrown for a little bit of a loop.

If you need computer help, TalkLocal gives you instant access to those that can help. We find professionals in your area and connect you with them. You’ll never have to suffer more than a couple minutes with a debilitating computer issue.

Computer Won’t Hibernate

Saturday, June 22nd, 2013

Computer Won't Hibernate - Computer Repair

The hibernate setting on your computer is a godsend when you have numerous documents or tabs opened on your computer. Instead of reopening everything, hibernating your computer will save everything until you return to it at a later time. It saves battery and shortens the time it takes for your computer to boot.

Though there are some great benefits to the hibernate setting, some users choose to disable it. If you find that your computer won’t hibernate, a simple fix may be to check the setting.

To Enable Hibernate In Windows 7:​

1. Click the Start Menu.

2. Type “cmd” in the search box.

3. Hold Ctrl + Shift + Enter.

4. Type “powercfg /hibernate on” in the command prompt. This should enable your hibernation on your computer.​​

Now you need to turn on Hibernate on in your power options.​

1. Open Advanced Power Plan Setting.

2. Click the + by Hibernate after to expand it.

3. In the box beside Setting (Minutes), type the number of minutes for your computer to be ​idle      ​before it hibernates.

4. Click OK.

If you are able to hibernate your computer, but it turns on again shortly after, there may be a device or program that is disrupting hibernation.

To Prevent Devices From Disrupting Hibernation:

1. Click the Start button >> Control Panel >> System and Security.

2. Under system, click Device Manager. Type the administrator password or give confirmation if needed.

3. One of the hardware categories listed may be disrupting hibernation — USB flash drives are common culprits. Double-click one of the devices to check.

4. Click Power Management.

5. Clear the check box next to Allow this device to wake the computer.

6. Repeat steps 3 through 5 for all devices.

To Prevent Programs From Disrupting Hibernation:

1. Click the Start button >> Control Panel >> System and Security >> Power Options.

2. Click Change plan settings on the Select a power plan page.

3. Click Change advanced power settings on the Change settings for the plan page.

4. Expand Sleep >> expand Allow wake timers.

5. Click Disable. This should prevent your computer from being disrupted when it is running on battery and when it is plugged in.

6. Click OK.

Need Help? We’ve Got Your Back

If none of the above options have allowed your computer to hibernate, you should consult technical support. TalkLocal can help you find local professionals to help you with all of your computer needs. You will be connected with up to three, high-quality professionals in your area within minutes.

Western Digital Hard Drive Installation

Thursday, June 20th, 2013

Western Digital Hard Drive Installation - Computer Repair

It’s no mystery that as technology continues to evolve, computer users turn to the most updated forms to meet their needs. When it comes to hard drives, Serial ATA drives are now taking over, proving superior to IDE hard drives. Western Digital is one manufacturer that produces SATA drives, making it important for most users to learn Western Digital hard drive installation techniques.

In this article, we offer you a crash course.

Placing And Mounting Your Drive

Just like when you replace or add an IDE hard drive, SATA drives can be mounted on any available bays in your computer. Make sure that the drive is securely mounted and screwed in.

If you are adding a SATA drive, look around your computer for an available bay. If you are replacing your old drive with a SATA drive, just place the SATA drive in the old one’s place.

Using Special Cables To Connect

Western Digital hard drive installation is different from installing an IDE hard drive because SATA drives require a special kind of motherboard cable.

This cable will come with your SATA drive, just make sure you don’t get it mixed in with IDE hard drive cables.

Connect one end of the cable into the end of your SATA drive. Connect the other end of the cable to the motherboard, allowing the two entities to communicate.

Many Computers Will Automatically Recognize Your New SATA Drive

This quick and easy installation should be all you have to worry about. However, some computers or operating systems might not immediately recognize your SATA drive.

In this case, access your system BIOS by pressing the key you are prompted to during the start up process. There, you will find an auto configuration option.

Find Help…NOW!

You don’t have to wait for days to get help with your computer problems. TalkLocal gets you on the phone with help in just minutes. We completely eliminate the tiresome search process. Try it out and see for yourself.

Error When Restoring iPhone

Tuesday, June 18th, 2013

Error When Restoring iPhone - Computer Repair

Sometimes when you are trying to restore your iPhone, the restore process may stop and you may see an error message in iTunes. Here are a few steps to resolve an error when restoring iPhone.

First, make sure you are logged into your computer as an administrator. If you do not have admin access, get the owner of the computer to sign in for you.

Update to the latest version of iTunes

Install any available updates in iTunes. Most updates will require you to connect to the Internet before updating, so make sure that you have an Internet connection.

Make sure your operating system is up to date

For Mac users, click Software Update from the Apple menu and install all available updates. Restart, and then check for updates again after your computer has rebooted.

On a PC, go to the Microsoft Windows Update page. Install all available updates, restart your computer, and check for updates again after restarting.

Disconnect other USB devices

USB devices may interfere with the signal between iTunes and the iOS device.

1. Disconnect all USB devices.

2. Connect only the keyboard and mouse.

3. If using an iOS-device dock, disconnect it and plug the cable directly into the iOS device.

4. Restart the computer.

5. Launch iTunes and attempt to restore again.

Check security settings

Out-of-date or incorrectly-installed security software, firewalls, or router settings can cause an error when restoring iPhone. All security software must be kept up to date and properly configured. After you update and configure your security settings, restart the computer and try to restore again.

Restart the computer

If there are no software updates available, your iTunes is up to date, you have no other USB devices attached, you have no security software installed, and you are directly connected to your ISP, simply restarting your computer may clear up your issues when restoring your iPhone.

If the issue persists after trying all of these things, then you should use TalkLocal to get the best help possible from local IT service professionals.

What Does WiFi Stand For?

Saturday, June 15th, 2013

What Does WiFi Stand For? - Computer Repair

If you are desperately searching for somewhere to use your laptop and check your e-mail, the now-famous WiFi symbol is probably a beautiful sight. You have probably heard the term WiFi many times before, and you probably even know what it means.

But, what does WiFi stand for? Here is your answer and a little bit more information on this now-common area of technology.

What Does WiFi Stand For?

The term WiFi is an abbreviated version of the term “wireless fidelity”. WiFi is the most common term used for a wireless internet network, which is overwhelmingly prevalent among public businesses or establishments.

You will often hear people ask in public “Do you have WiFi?” This simply means they are searching for a place that offers wireless internet that they can utilize on their own computer.

What Do You Need For WiFi?

Wireless internet is so common these days that you are probably utilizing WiFi technology right now. A wireless setup consists of a modem, which generates the connection via a cable system, and a wireless router. The router sends out the internet connection through the air in frequencies.

To use wireless internet, your computer must be equipped with some sort of wireless internet card or device. Unless your computer or laptop is very old, it probably is already equipped with one.

So, I Can Use Any WiFi?

Most individuals and some businesses password protect their WiFi so that you can’t use it without permission. This is especially smart for individuals, who do not want their neighbors using their WiFi and slowing down the connection.

Need Help Installing WiFi?

Many people grapple with setting up WiFi, especially if it is in a commercial setting and the network must accommodate multiple users. For help, do not hesitate to visit TalkLocal, where we can connect you with numerous local tech professionals that can handle the job.

Install A New C Drive

Thursday, June 13th, 2013

Install New C Drive - Computer Repair

Many of you might refer to your computer’s hard drive as the C drive. This stems from the fact that Windows assigned this letter to the primary portion of your hard drive. Learning to install a new C drive is as simple as installing a new hard drive, with one added twist.

Here are the basic steps that can help you install a new C drive.

Back Up Your Drive

Since the C drive contains so much valuable data, you will want to back up your existing drive. This will that ensure your computer retains all important programs and files.

You can back up your information either to an external hard drive, or else many companies offer online storage back-up options. Just make sure the information is correctly stored before going through with your C drive replacement.

Identify Your Existing Hard Drive

Open your computer and find where your hard drive is. Make sure to note all the cables that are running to and from it.

Unhook the cables from the hard drive and replace it with your new one. You will want to hook up the same wires and cables to your new hard drive. There will likely be a place to mount your new hard drive. Make sure it is secure, and use mounting rails if your new hard drive has them.

Add Partitions To The Hard Drive

You can’t install a new C drive unless you partition your hard drive. Each letter indicates a partition of the hard drive. So, the C drive is one partition of your hard drive.

In most versions of Windows, you can partition your new hard drive by taking the following path:

Start > Control Panel > Administrative Tools > Computer Management > Disk Management

You can then run a partition wizard which will partition your hard drive.

Use Seva Call For Computer Help

If you are not confident with fixing computers on your own, find professionals who can help. TalkLocal specializes in tracking down qualified professionals in your local area. Don’t waste time searching — place a TalkLocal!

Static Through Lenovo Speakers

Tuesday, June 11th, 2013

Static Through Lenovo Speakers - Computer Repair

Having speakers emit static or crackling noises is a very annoying issue to deal with, especially when you don’t know what’s causing the static. The problem could be a multitude of issues, including magnetic interference or the cables not being plugged in all the way. Even a laptop brand as reliable as Lenovo can have issues. Here are a few basic things you can do to stop hearing static through Lenovo speakers.

Check the Cables

First, make sure everything is plugged in correctly. This is the most overlooked problem which takes 2 seconds to solve. Unplugged or loose cables can cause static interference if they are not plugged in all the way. Check your speaker cable, which is usually on the back of a desktop or the side of a laptop, and push it in. If you want to, you can take the cable out and wipe it with a soft material before plugging it back in if it is dirty. Check to see if your wires are tangled with any power cables as well, as this can cause electrical interference. Untangle them if that’s the issue.

Shielded vs. Unshielded Speakers

An interesting fact you may not know is that speakers have magnets inside of them. These magnets can interfere with other electronics, so computer speakers are usually shielded to prevent this. However, if your speakers are unshielded you may need to move them a little further away from your monitor to prevent this interference.

Volume Control

Check the volume settings on your computer, and check to see if the levels are maxed out. The Volume Control is located in the Windows Control Panel under Sound. If the volume settings are set too high, this can cause static, because the sound coming out of your computer is too loud for your speakers. Balance the volume control so that the volume is not too loud for your speakers.

Still Need Help?

If all else fails, you should use TalkLocal to get the best help you can get quickly from local IT service professionals. Just tell us what you need, where you are, and when you’re available, and we will connect you with up to three, high-quality professionals in your area, in just minutes. And, our service is free!

Best Laptop Brands 2013

Saturday, June 8th, 2013

Best Laptop Brands 2013 - Computer Repair

If you are in the market to purchase a new laptop this year, you will be overwhelmed by the wide selection. With so many companies and manufacturers throwing their hats in the ring, it might be tough to decipher which are the best laptop brands 2013.

Based on what are projected to be some of the hottest selling laptops of the year, here is a list of brands that might present some products worth your consideration. Of course, each user will be using their laptop for their own specific purpose, so make sure to do your own research to determine which laptop best suits your needs.

Apple

Not only did Apple have a hit on its hands with the MacBook Pro, but this company is at the top of the list for best laptop brands of 2013 because it produces what many consider to be the best laptop bar-none. The MacBook Air 13-inch, at just three pounds heavy and 0.68 inches thick, is incredibly mobile but has some monstrous computing power. Equipped with OS X Mountain Lion, this laptop sports superior design and is easy to use.

The only drawback to this, and other Apple products, is that they do not offer a wide range of laptops and they all come at a pretty hefty price. However, consumers are willing to fork it over because these laptops are held in such high regard.

Dell

This year might be one where Dell makes a push to regain its footing as one of the frontrunners in laptops. Heck, they might shake out to be one of the best laptop brands of 2013 with their Inspiron 15. Using an Ivy Bridge Core i5-3337U processor, the Inspiron 15 is quick and comes with a very manageable price tag.

Dell has always been a favorite among laptop users because their machines are perfect for customizing. That will continue to be a major draw this year.

Lenovo

Unlike Apple, Lenovo’s product line is as extensive as it gets. From multimedia laptops (IdeaPad Y500) to hybrid laptops (IdeaPad Yoga 13), Lenovo covers just about every need. This allows users to trust in this one brand no matter what they are in the market for.

As a bonus, Lenovo comes at a lower price tag.

Looking For Computer Repair Help?

It’s certainly not uncommon for users to encounter issues with their laptops and other computer equipment. If a problem like this stumps you, do not hesitate to visit TalkLocal. We are able to connect you with local computer repair professionals who can help you work through the problem. Our service is completely free.

Removing Inappropriate Pop Ups In Windows 7

Thursday, June 6th, 2013

Removing Inappropriate Pop Ups In Windows 7 - Computer Repair

Pop ups are very annoying, especially the inappropriate pop ups that appear out of nowhere. They can be very disruptive when you are working on a particular task, and little info-bubbles keep appearing, distracting you from the task at hand. Luckily, removing inappropriate pop ups in Windows 7 is easy, and only takes the tweaking of a few settings on your computer.

How to Remove Pop Ups In Windows 7

You can remove inappropriate pop ups in Windows 7 by adjusting the settings. Follow the steps below to eliminate those pesky pop ups in Windows 7.

1)     From the Start menu, open the Control Panel.

2)     In the search bar in the top right-hand corner of the window, type “Change User Account Control Settings,” and press Enter.

3)     The same phrase should appear as a link in the search results. Click on the link which reads: “Change User Account Control Settings.”

4)     You will see a vertical slide bar in your window. This bar gives you control over which pop ups appear in Windows 7. Sliding the bar all the way to the bottom will remove pop ups in Windows 7 altogether.

The following is a way to remove internet pop ups in Windows 7:

1)     From the Start menu, type “Pop Up Blocker Settings” into the search bar and press Enter. This should immediately open a new window.

2)     Go to the Privacy tab. You will see a vertical slide bar similar to the one used above. Slide the bar all the way to the top, to “High”. This will block all pop ups and cookies while you are browsing the internet.

If you are still having issues with pop ups in Windows 7 even after changing both of the above settings, it is likely that your computer has been infected by a virus or spyware.

Speak To A Qualified Professional

If you would like to find a professional computer repair technician for any computer issues, just use TalkLocal. We will connect you with up to three, high-quality computer repair technicians in your area. Our service is fast, easy, and completely free.

Transfer Data From PC To Mac

Tuesday, June 4th, 2013

Transfer Data From PC To Mac - Computer Repair

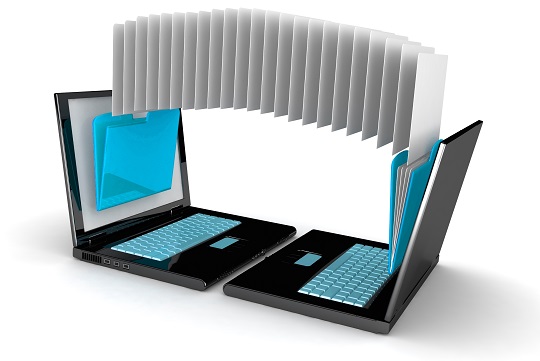
Transferring data between different operating systems is not as easy as transfers between two of the same operating systems, but it can be done. PCs and Macs may be different, but they are not incompatible. We have some advice for you if you want to transfer data from PC to Mac.

All of your Microsoft office documents, such as in Word and Excel, will be easily transferable, as long as you have MS Office installed on your Mac OSX.  Similarly, you can transfer Photoshop and files from other programs as long as you have Adobe installed on your Mac. Audio, image, and movie files can also be moved from your PC.

Transfer Data From PC To Mac

If you need assistance when transferring your files, you can use a Migration Assistant.  Using this program, you can transfer files from between computers, whether it be a Mac, PC, or data backup.  When you log into your transferred user account, you will see everything you need.  Your desktop settings, email accounts, contacts, calendar, Internet settings, applications, and files will all be visible as they were on the first system.

Before you begin the transfer, make sure that both computers are on the same network. Then, you can open the Migration Assistant application and follow its instructions. Every Mac should have this pre-installed, but if you are transferring from a PC, you can download the program from Apple.

Manual Transfer

If you do not want to use the Migration Assistant, you can also try to transfer the files you want by hand.  You can load the files onto a USB drive or external removable storage device and plug it into the computer you want to upload them to.  Further you could try to send the files over the Internet using an online backup system like DropBox, or through email.

Further Assistance

If you cannot figure out what to do or have issues when trying to transfer your files you should try to seek help.  If you are looking for a professional use TalkLocal to be put in contact with a reliable local business within minutes.  Seva Call will do all the work, just put in your problem and availability and your phone will start ringing!