Archive for the ‘Electricians’ Category


Wall Speaker Wiring

Thursday, March 13th, 2014

Wall Speaker Wiring - Electricians

Installing the cables of your audio system speakers in the wall will keep the room tidy, improving its overall appearance. Like with all device installation, if you don’t feel at ease handling various tools and working around electrical wires, it’s best to call a professional electrician who can do the job for you.

Before you start wall speaker wiring, you need to make sure you are aware of all instructions and precautions regarding building construction and fire safety. Prior to drilling or cutting any holes into the walls of your house, you should know exactly how they are made and what’s behind them. You don’t want to hit any electrical cables or drill holes in the wrong place. Also, read and closely follow manufacturer’s instructions for speaker installation.

What Do You Need to Do?

There are several steps to take when installing the speakers of your audio system in the walls of your home. Here are some guidelines.

1. Turn the power off before you start working to avoid being electrocuted.

2. Choose the location of your speakers. Locate wall studs with the help of a stud finder. If your wall does not have a stud frame, you won’t be able to proceed with installation.

It’s important to know what’s behind the wall and how it’s made, to install speakers properly and safely. In case your walls are made of brick or concrete, it is advisable to get a professional to do the job. This will save you the trouble of being stuck at some point during installation, and will allow you to avoid unpleasant surprises.

4. Drill a hole in the spot where you want to place the speakers. Use a wire to check whether there’s plenty of space to install the speakers.

5. Check the sizes specified in the owner’s manual and verify the location of the speakers to make sure they fit.

6.  Install the speakers.

Need an Electrician?

Not sure you can handle this yourself? Seva Call can connect you with a certified electrician in your local area so you can make sure your speakers are installed properly.

Home Theater Wall Wiring

Wednesday, March 5th, 2014

Home Theater Wall Wiring - Electricians

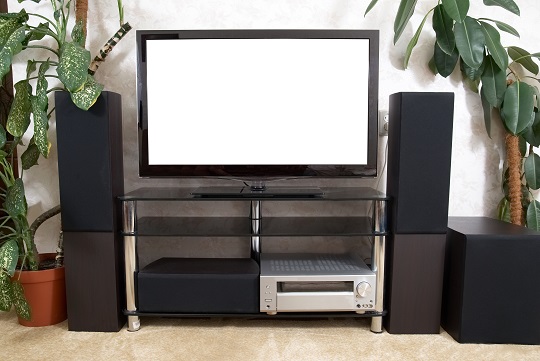
If you’ve decided to install a home theater in your basement or in another room in your house, you’re probably looking forward to the moment when you can sit back and relax, watching your first home cinema movie. But until then, you need to take care of many other details, including the home theater wall wiring.

The messy tangle of video and audio cables can be avoided by hiding the wiring in the walls. This way you don’t have to worry about stumbling on them or about wiping the dust they collect if left on the floor. Moreover, you will significantly improve the appearance of your room.

If you’re a DIY’er, and if the walls of your house are constructed in such a way as to allow you to insert cables behind them, you can embark on this project by yourself. Remember that it is not advisable to try to hide the wires in the wall unless you have drywall. If your walls are made of brick or concrete, it’s highly recommended to entrust this job to an expert.

To ensure the success of your project, read and carefully follow manufacturer’s instructions at all times during installation. Also, make sure you take all the necessary safety precautions.

What Are the Main Steps of Home Theater Wall Wiring?

1. Turn the power off in the part of the house where you are going to drill or cut holes into the walls.

2. Measure the distance between the outlet and your home theater components, and make sure your cables are long enough. Use in-wall cables, which are specially designed for this type of project.

3. Set the location for the jacks by using a stud finder to trace wall stud location.

4. Install wall boxes.

5. Insert the cables.

6. Install your jacks in the wall.

Need Assistance?

Seva Call can put you in touch with an experienced local electrician who can install your home theater on your schedule.

How to Locate Electrical Wiring in Walls

Friday, February 21st, 2014

How to Locate Electrical Wiring in Walls - Electricians

You might want to locate the electrical wiring in the walls of your house for various reasons. These include identifying electrical short circuits, repairing the wiring, planning home improvement projects, and increasing the safety of your home. It also allows you to avoid overloading your electrical system by connecting too many appliances to the same outlet.

To trace the electrical wiring, you need something that doesn’t involve tearing down your walls. Hitting an electrical wire while demolishing a wall can be extremely dangerous, and you want to avoid that. If you have an electrical blueprint of your home, things are simple, but if you don’t, what’s to be done?

What to Do to Locate Electrical Wiring in Walls

First, check the outlets and see where the wire comes from and what it connects to. Do the same for wired appliances. Then, try to understand the link between circuit breakers and the electrical wiring in your house.

Use Special Tools to Locate Wiring in Walls

You can also use several tools to locate the electrical wiring in the walls of your house.

Stud Finder: this tool uses a magnet to trace the nails and the wires in the wall frame.

Voltage Detector: this allows you to locate the wiring in the wall and tells you whether it’s still functional or not. In case you need repairs, this tool is very helpful, as it tells you exactly what’s wrong.

– Wire Tracers: these are specially designed to locate the electrical wiring in walls or even underground.

Professionals Help

However, some of these tools may be expensive, and you may not want to invest in them. If you need help locating electrical wiring in walls because something’s not working, it might be better to get help from a professional. Seva Call can put you in touch with experienced electricians in your area in minutes.

HDPE Conduit Pipe

Friday, February 14th, 2014

HDPE Conduit Pipe - Electricians

Conduit pipes are those pipes, which are used to protect wiring and cables. HDPE conduit pipes are high-density polyethylene pipes that are employed for the same purpose: to insulate electrical wiring.

There are many types of HDPE conduit pipes, but they all share the qualities of the material they’re made of. HDPE is a lightweight, anti-corrosive thermoplastic, which is extremely resistant, and a great insulating material.

Cable Protection

Cables and electrical wiring are exposed to the elements unless they are inserted into conduit pipes. Water exposure can deteriorate the wiring. Conduit pipes protect the wiring, reducing the risk of electrical short circuits. Electrical shorts are dangerous because they can cause fires or damage equipment, among other problems.

Impact Resistant

HDPE conduit pipes can also protect electrical wiring and cables from impacts. Outdoor cables or those installed in traffic areas are exposed to potential impacts. By covering them with HDPE conduit, you ensure better protection.

Weather Resistant

HDPE conduit pipes can withstand both high and low temperatures. They can be installed in harsh weather conditions and can operate under high temperatures.

Last Longer than Power Cables

You may have to replace the power cable much sooner than the HDPE conduit pipe because this thermoplastic is extremely resistant.

Types of HDPE Conduit Pipes

There are flexible HDPE conduit pipes, as well as rigid ones. The latter are stronger, but it’s more difficult to handle them. Flexible HDPE conduit pipes make installation easy, but they are less resistant to impact or harsh weather conditions.

HDPE Conduit Pipe Uses

HDPE conduit pipes are widely used for power lines, in telecommunications, to insulate fiber-optic cables, or for outdoor lighting.

Need Assistance?

Looking for help with HDPE conduit pipe installation or repairs? Seva Call is ready to take your call. We can connect you with professionals in your local area who can get the job done right away.

How to Hide TV Wiring in Walls

Thursday, February 6th, 2014

How to Hide TV Wiring in Walls - Electricians

If you’ve just bought a new TV and want to mount it on the wall, probably your main concern is how to hide the cables. They ruin the entire decor of your living room, and you’ve had enough of them with your old TV.

How Can You Hide the TV Wiring in Walls?

There are kits that make TV mounting easy, allowing you to get rid of all the clutter created by a maze of cables stuck behind a piece of furniture. Here are the main steps you need to take. Before you start, it’s best to turn off your circuit breakers.

1. Choose the location for your new flat screen TV. It’s best to mount your TV on drywall, rather than on a concrete or brick wall.

2. Mark the location of the TV with a pencil or tape.

3. Locate the stud framing of the wall you intend to use with the help of a stud finder. If your wall is not hollow, the job will be more difficult, and it might be best to get professional help to make sure you install the TV safely.

4. Check the distance between the TV and the power outlet, and then buy the necessary cables. Make sure they’re longer than estimated.

5. Follow the instructions on how to install wall mounts.

6. Hide the TV wiring: drill holes near the wall mount, and insert cables.

If you’re not a DIY’er or if you’re not sure you can handle this, don’t hesitate to call a professional. This way you can rest assured your new TV is safely mounted on the wall, and that there are no annoying cables lying around, compromising the appearance of your room.

Need Assistance?

TalkLocal can put you in touch with a local electrician who can get the job done right away. Our service is effective and free.

Wiring Wall Lights

Wednesday, January 22nd, 2014

Wiring Wall Lights - Electricians

A wall light can add the perfect amount of light to a room. Whether you need additional lighting for your work space, or some mood lighting to create a nice ambiance when entertaining guests, wiring a wall light can be done by the average DIY homeowner with basic wiring know-how and techniques.

Thinking of tackling this job this weekend? Here’s what to do:

Arrange the Circuit

1. Choose an area near a wall stud to install your light. Using a jigsaw, proceed to cut out the wall to fit the electrical box so that one side of the opening is against the wall stud.

2. Take the wiring cable and drop an end of it inside the opening you just cut.

3. Then make another opening to accommodate the wall switch and, through this opening, insert the wire and run it to the switch.

4. Then, connect the switch and basement by running another length of wire between the two. If you cannot readily access your basement, you will need to drill through the flooring inside the wall.

Fasten the Boxes

5. Take the bundle of wiring and secure it inside the box. Pull out the wires and separate them out: bare copper, white, and black.

6. Attach the electrical box to the wall stud at an angle, drilling the long screws right through the box’s screw holes. Secure the plastic box the same way.

Wiring Wall Light

7. Attach the mounting bracket of your new wall light to the box using the provided screws. Using a wire cap, connect the fixture’s white and black wires to the matching ones on the wall. Take the copper ground wire and attach it to the mounting bracket’s grounding screw.

8. Follow the product instructions on how to install the wall light fixture. Tuck the wires inside the box.

9. To wire the switch, wire the white wires together and the copper ones together. Use the provided connection screws to attach the black cables to the switch. Position the light switch  over the box and secure with the covering plate.

Connect to the Electrical Supply

10. Shut off the power in your house by turning off the main circuit breaker.

11. Locate the specific circuit breaker that corresponds to the circuit you’re working on. With the breaker pulled out, hook the black wire to it using the connection screw. Locate the brackets where the ground wires will go and attach the copper and white wires into available spots.

12. Turn on the power.

When You Need Expert Help

Working with electricity is always risky, so if you’d rather be on the safe side, rely on a qualified electrician to handle wiring your wall light instead of attempting it yourself. Use Seva Call to locate a quality electrician right now at no cost!

Installing New Electrical Service Panels

Thursday, January 16th, 2014

Installing New Electrical Service Panels - Electricians

Replacing electrical service panels is a complicated job and dangerous with improper installations, presenting risks of fire or electrocution. Precise installation according to code is crucial when putting in a new electrical service panel. Use only the proper components for their intended usage.

While some homeowners bravely take on this task themselves, most cities require that it be handled by a state licensed, bonded, and insured electrician.

Replace Electrical Service Panels If:

– The existing panel is the outdated type of fuse box.

– There are no more available spaces on the old panel to accommodate new electrical circuits you need to add to your home.

– If your circuit breakers trip and fuses blow frequently in your home and it’s difficult to locate parts for replacement.

– The panel is already rusted out and susceptible to moisture, which causes frequent short circuits.

Consult a Qualified Electrician

Is it time to replace your old-fashioned fuse panel? Is the panel so incredibly overloaded that it’s become a hazard? Schedule an appointment with a qualified electrician regarding the installation of a new electrical service panel.

During your consultation, the electrician will let you know what the proper size of your service panel should be so that it can support the energy needs of your home. You will also get an installation service quote.

What to Expect When a Pro Upgrades Your Service Panel

When you work with a reputable electrician, you should expect their assistance right from the start in coordinating the job with the city building inspector and obtaining an electrical permit. It should only take a day to complete this job, so you don’t have to be without power in your home for long.

A reputable electrician will have no hidden fees, meaning the price of the entire upgrade already includes labor and all parts. The panels and breakers to be used should all be high-quality. The electrician will see to it that your electrical service panels will be grounded the proper way and bonded to meet code to ensure your household’s safety.

The panel’s inside wiring would be cleaned up and terminated to the correctly sized circuit breakers. Your wiring will also be tested for ground fault and overloading.

Need New Electrical Service Panels?

If you’ve decided to replace your old panel at home, find a qualified electrician in your area as quickly as possible by using Seva Call. With our free and quick service, there’s no need to waste time searching for the service you need. Let us connect you to local quality professionals in minutes!

Wiring Wall Outlet

Tuesday, December 31st, 2013

Wiring Wall Outlet - Electricians

Knowing how to wire an outlet is a useful skill to have, allowing you to change out damaged or old electrical outlets in your home in just a matter of minutes. Here are the basic steps to wiring a wall outlet.

1. Cut the Cable.

Cut the electrical cable to approximately 11 inches, exposing three wires: black (hot wire), white (neutral wire), and copper (ground wire).

Pull out all three wires from the cable sheathing. Remove the white wire’s paper covering.

2. Strip the Wires.

On the wire strippers, find the right gauge hole and insert a wire into the hole up to the correct length. You’ll want to strip the insulation off ¾-inch of the wire. Close the strippers and carefully pull off the end of the wire.

3. Bend the Wires.

Insert the exposed end of the wire into the stripping pliers, and bend it to make a hook.

4. Connect the Wires.

It’s important that all wires are connected to the right screws to make the outlet work.

First, connect the black wire to the brass screw. Make sure not to screw down right over the insulation, because the connection will become loose after some time.

Next, connect the white wire to the silver screw. You want to ensure that the hook is properly oriented so when the screw is tightened, it allows the hook to close tighter. If the hook is facing the wrong way, it will do the opposite, which is open up as the screw is tightened.

Lastly, connect the copper ground wire to the green screw. Test all wire and screw connections by giving them a bit of a wiggle to ensure they are all tight.

Do You Need Expert Help?

As you can see, it only requires a few steps to wire a residential wall outlet. However, while wiring wall outlets is very doable for many people, hiring expert hands is the best way to make sure the job is completed safely, quickly, and properly the first time. Contact TalkLocal to be matched directly with up to three reliable electricians working in your area. Get the help you need now!

When You Need Emergency Electrical Service

Thursday, December 26th, 2013

When You Need Emergency Electrical Service - Electricians

A good number of calls for emergency electrical service are related to harsh weather, and those that are not caused by it in some way, occasionally signal problems in a home’s wiring. Other potential causes of electrical emergencies include:

– Not enough power to operate multiple appliances at one time

– Electrical parts that are incompatible (either out-of-code or out-of-date) with technologically advanced appliances

– Poorly done do-it-yourself wiring jobs by the homeowner.

Resolving the Problem

Regardless of the reason you find yourself needing emergency electrical service, the critical thing is to have it fixed right away by a well-trained and reliable electrician who is licensed to diagnose and perform electrical repairs.

During an electrical emergency, a qualified electrician will first troubleshoot the situation. Sometimes, all that’s needed to be done is to repair a faulty electrical part or replace it when repair is no longer possible. Another common fix is completely rewiring a room where the emergency situation occurred, or adding new circuits and outlets.

Preventing Electrical Problems

While some electrical emergencies happen beyond anyone’s control, there are many situations that lead to such emergencies that can be avoided. Here are some preventive actions that you can take:

1. Make sure your new appliances are wired properly. Are you buying new appliances that will help improve your home’s energy efficiency? Having a good wiring system is necessary to support your appliances and ensure safety.

2. Let a professional handle the hot tub wiring. Can’t wait to enjoy your new hot tub? The owners’ manual may describe a pretty straightforward wiring installation for your tub, but it’s best to leave this job to an expert for safety’s sake, considering that it involves both water and electricity.

3. Schedule regular inspections. With regular safety inspection of your wiring and overall electrical system, you can ensure that your circuits are not being overloaded and that all appliances are running with the right efficiency.

In addition, the electrician can detect and inform you during the inspection of any electrical problems that may come up in the future. One reason for potential issues is poor wiring installation done by careless technicians for new machines or appliances.

We Can Assist You

When you need emergency electrical service, you cannot afford to waste time. If you don’t know a reliable electrician who can help, call us first at TalkLocal, and we’ll connect you to local, qualified electricians who can respond to you right away. Let us find help for you quickly and at no cost!

Wall Switch Wiring

Monday, December 23rd, 2013

Wall Switch Wiring - Electricians

Electric wall switches are quite durable. Still, at some point, they will wear out and will need to be changed out partly to avoid a fire risk. Sometimes, you simply want to upgrade to a new style of switch. As with anything that has to do with electricity, safety is always a concern, so it’s important to know the safe and secure method of wall switch wiring.

Safety First

Before starting any electrical work, make sure that the electricity is turned off. Locate your home’s circuit breaker box, and turn off the specific circuit breaker that connects to the switch you’re about to wire. Use a voltage detector to double check that there’s really no power supply at the spot you’ll be working on.

Disconnect Wires

Once you’ve verified that it’s safe to proceed, remove the switch carefully from the box by unscrewing it at the top and bottom. Using a screwdriver, remove the wires from the old switch. You’ll notice the wires at the top and bottom terminals are positioned in different ways. Make sure the wires are kept separate.

Begin Wall Switch Wiring

Strip away the insulation on each wire until about 3/8 inch of the wire is exposed. On the new switch, connect the wires to the correct terminal (top or bottom). At the end of each wire, form a loop using needle-nose pliers. Place the loops over the terminals. Screw tight each terminal screw.

Ground the Switch

The switch box normally has a ground post, to which you’ll connect the ground wire. If this is not the case, attach a grounding clip to the box’s bottom edge.

Final Steps

Hold the wire bundle together and carefully place inside the wall box, making sure no connections become undone. You can fold the wires accordion-style so they won’t get cramped.

Screw the switch body at the top and bottom to the corresponding areas of the box. Attach the faceplate. Turn on the circuit breaker to restore power, and test your new light switch.

Need Help with Wall Switch Wiring?

If you feel that this task is too complex for you, let an expert handle it. Take note that it is a must to call a professional electrician if the work involves the silvery-gray type of aluminum wiring. TalkLocal can give you a hand in finding quality electrical service. Call us now, and we’ll put you in touch with the right professionals in no time.