Archive for the ‘Electricians’ Category


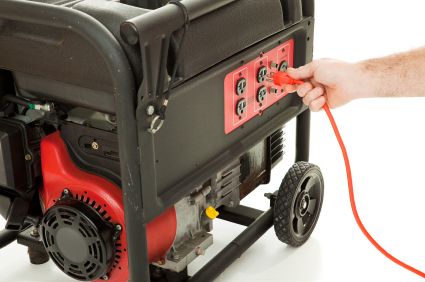
10 Portable Generator Safety Tips

Monday, November 5th, 2012

10 Portable Generator Safety Tips Electricians

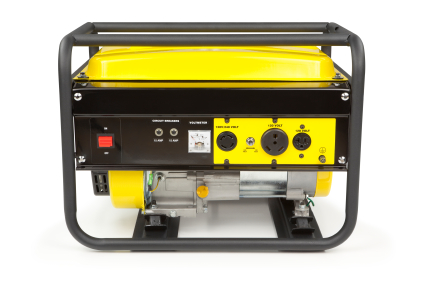
With Hurricane Sandy causing power outages, fallen trees, and damaged properties, some homeowners are considering buying their own portable generators to keep their electricity running. Here are 10 portable generator safety tips:

1. Before purchasing a generator, make sure you have an idea of how much electricity you will need the generator to sustain. Go through your house, and looking at all your fixtures, lights, etc. and add up all the wattage requirements.

2. Carbon monoxide is a critical threat when operating a machine like a generator. It is extremely important to be aware of the risks involved, and know that a generator should never be run inside the house, not even in your garage. Carbon monoxide, also known as the “silent killer”, can become trapped inside your home easily and cause death in minutes. It is recommended to keep the generator at least 10-15 feet from your house, with the exhaust pointing away from your house.

3. If you want to operate your generator directly with your house’s wiring system (i.e. your central A/C), do NOT connect the generator directly to the home’s electrical grid. For this, you will need a transfer switch. These switches are connected to the house’s main circuit breaker. It is recommended to have an electrician install a transfer switch in your home, as it can pose potentially dangerous risks if installed incorrectly.

4. You need to also prevent electrocution when operating a generator. Never plug it directly into one of your home’s wall outlets.

5. Generators run on gas. Therefore, it is important to ensure you have enough oil in the generator and on supply in case it runs out. In most cases, when electricity goes out in your neighborhood, this also means local gas stations are out of power. If gas stations have no power, you can’t fill up.

6. You will need to regularly keep up maintenance. Clean the machine regularly. Don’t use water to clean it, as it can damage the operation of the generator.

7. Test the generator every so often to make sure it operates. Turn it on and let it run for about 10 minutes every month or to ensure proper operation.

8. Keep your excess gas/oil supply in approved containers and make sure they are stored away from your house and the generator itself.

9. If you plan to use the generator at least once a year and keep gas in the engine, you should add engine fuel stabilizer to the engine as well to keep the gasoline from gumming up and causing clogs. Stabilizer can extend the “shelf life” of gasoline for up to a year. After adding some stabilizer, be sure to let the engine run for a couple minutes to fully circulate it.

10. Alert your neighbors that you plan to use a generator, as they usually operate pretty loudly.

If you’d rather contact a certified electrician, try using TalkLocal. Simply a service request and, within minutes, top-quality electricians in your area will call YOU directly, ready to help.

How to Connect Electrical Outlets in a Series

Wednesday, October 31st, 2012

How to Connect Electrical Outlets in Series Electricians

Electrical outlets in a series, as opposed to electrical outlets in a parallel circuit, allow you to access electricity from multiple sources without the individual wiring for each source to the main.  Well-placed outlet series can minimize the strain that your outlets may face by being overloaded with multiple plugs.  Continue reading for more information on how to connect electrical outlets in a series.

Step-by-step

Materials needed: Drill and drill bit(s) corresponding do your outlet settings, screwdriver, wire cutters, electrical cable, electrical outlet kits (depending on how many you want installed), sharpie marker, measuring tape, and rubber gloves.

1.  Go into your place’s circuitry box and power off the specific outlet that you are using.  Make sure that it is the correct one before you start working.  Put your gloves on at this stage.

2.  Using the screwdriver, loosen the two screws on the outlet you want to connect from and pull out the outlet without disconnecting any wires from it.

3.  Measure how far up from the ground the outlet you want to connect from is.

4.  Line up the electrical outlet you want to install with the position and the correct distance from the ground that you measured.

5.  Mark the studs between the desired outlet position from the original outlet, taking into account the correct distance form the ground.

6.  Drill holes at the marked spots.

7.  Weave the cable between the outlets through the holes.

8.  Connect the wiring to the original outlet.  The black wire goes to the brass screw.  The white wire goes to the silver screw.  The green wire goes to the green screw.

9.  Reattach the original outlet back to its original position.

10.  Connect the desired (new) outlet and install it as well.

11.  Test the new outlet.

It’s generally a good idea to consult an electrician regarding how to connect electrical outlets in a series in order to make sure you know what you are doing.  TalkLocal can help you find the correct local experts in this case, saving you time and energy in what may be a stressful situation.

How to Connect an Electrical Outlet to a Light Switch

Tuesday, October 30th, 2012

How to Connect an Electrical Outlet to a Light Switch Electricians

If you have an outlet in a room that does not operate from the room’s light switch, it is possible to re-wire the outlet receptacle so that it is connected to the light switch.  This can be a confusing task, but with careful preparation, it can be done.  Read on for more information on how to connect an electrical outlet to a light switch.

Before starting, it is critical to turn off the power to the circuits you will be working with for safety precaution.  You will need to unscrew the plates from both the outlet and light switch and take a careful look at the wires that are housed inside the boxes.  Be sure to keep all the screws nearby, as you will need them later.

For step-by-step directions, try reading this article with specific directions and helpful pictures.  This video also explains the process with clear directions.

If a task like this is completely new to you, it might be better to contact a professional electrician for help.  Try using TalkLocal, a free service that will connect you with top-quality, reputable electricians within minutes.  All you need to do is enter in your specific problem, location and availability, and TalkLocal will contact multiple companies in your area who will then call you directly, ready to help.  Save time and stress from searching through phone books and directories for the right, most affordable electrician, and let TalkLocal find one for you.

How to Add New Electrical Outlets

Friday, October 26th, 2012

How to Add New Electrical Outlets Electricians

There are many reasons to learn how to add new electrical outlets to your home.  Whether it is to eliminate unsightly extension cords or provide power for a new fixed appliance, new electrical outlets can be essential for getting your home in perfect working condition.  For people with little experience with electrical wiring installation, this can be a daunting task.  If you want to get professional help, you can use TalkLocal to automatically connect you to a professional electrician for free.  For those “do-it-yourselfers” who are feeling a little more adventurous, here are the things you need to think about when approaching this project.

The first thing you need to do is read up on your local electrical codes.  The work you will be doing needs to be up to local code, which can vary from place to place.  Keeping your home wiring up to code is essential not only for avoiding fines but for preventing electrical fires caused by faulty wiring as well.

The next step is to determine where you will be drawing the power for your new outlet.  There are two main options here that will be determined by your home’s layout and your power needs.  The easier option is to piggyback your new outlet on to a nearby existing outlet.  Wiring to an existing outlet is only possible if there is already one nearby in the same room or ideally in the same wall facing towards an adjacent room.  The drawback to this is that it can cause a lot of strain on the individual circuit that will be supporting two outlets.  Avoid this option if either outlet has regular heavy power use or often causes a fuse to trip.  There is a great step-by-step guide on the piggybacking method available here.

Our other available choice is to run a new cable to your home’s main electrical panel.  This method will require additional wiring and expertise, so use it only when piggybacking is not an option.  This may be outside the scope of the ordinary homeowner’s abilities, but it is still doable if you carefully follow this guide.  Just be sure to be very careful when working with live electrical wires, no matter which option you end up going with.

What to Ask when Hiring an Electrician

Tuesday, October 23rd, 2012

What to Ask when Hiring an Electrician Electricians

Finding the right electrician to do work on your house is a matter of both safety and quality.  So before you even consider getting electrical work done, you’ll definitely want to know what to ask when hiring an electrician.  The following questions cover the right questions to ask to ensure you get the right professional for the job.

Are you licensed?

In most states, electricians are required to be licensed, so make sure that you’re only considering hiring one that is properly licensed.  Usually, they will either be a master electrician, who has at least two years of professional experience installing and designing systems, or a journeyman, who has professional experience for installation.

Will you provide references?

Electrical work is often hard to judge since the majority of it is hidden within walls or out of sight.  Talking with people who have worked with the electrician before will tell you a lot about the quality of work and the personality of the electrician you’ll be working with.

Are you insured?

The electrician you hire must have insurance in liability and worker’s compensation, especially due to the potential dangers of electrical work.  Make sure you get a contractor with at least $500,000 covered by insurance.

What kind of expertise or training do you have in the type of work you are doing?

Electricians must be familiar with the specific building codes and contexts they’ll be working in since electrical work can vary drastically.  Electrical work that is acceptable for a residential area often times would be a violation if used in a commercial area.  Additionally, if your job requires specialty work such as home automation work or solar paneling, make sure they have the necessary qualifications and experience with the specialty.

Are they willing to give an estimate and what does it include?

The electrician should be able to give at least an approximate estimate of the work, and make sure that the estimate also includes incidentals, such as repairing drywall or fixing up holes from the electrical work.

Will the work be guaranteed?

The professional you hire should stand behind their work.  In most cases, electricians assume the responsibility for the electrical devices and fixtures they install.  You’ll want to know that if there ends up being a problem with the electrical work, the electrician will do what’s necessary to repair it.

These are the basic questions you’ll want to ask when hiring an electrician.  While these questions covered the major facets that you’ll want to check when hiring an electrician, there are many other questions you may want to ask if you feel they are necessary, such as seeing a work in progress or who specifically will be doing the work (since the person you’re talking may not be actually doing the work).  If you want to be sure you already are talking to a high quality professional, you can always use TalkLocal.  TalkLocal will connect you to a highly rated local electrician in just minutes.

Connecting a Wire Fire Alarm to an Electrical Panel

Thursday, October 18th, 2012

Connecting a Wire Fire Alarm to an Electrical Panel Electricians

Tired of constantly having to replace your smoke alarm batteries?  Can’t get away from the annoying beep that happens when your batteries are low?  Hardwire your smoke alarm batteries into the electrical panel instead. Connecting a wire fire alarm to an electrical panel is fairly simple, even for those of you who are electrically-challenged.

Materials Needed

– Smoke detectors with interconnect capability (when smoke is detected, other smoke detectors go off)

– Screwdriver

– Wire Stripper

– Ladder

– Wire connectors

– Electrical tape

– Ceiling boxes

– NM cable connectors (if using metal boxes)

– MN 12-2 or 14-2 cable connectors

Instructions

1.      Install a new circuit to the electrical panel on the ceiling or the floor.  It should have about 6 inches of 12-2 or 14-2 NM running out of the work box.

2.      Make a cut in the outside sheath of the NM cable with the wire strippers so you have three independent wires.

3.      With the wire strippers, strip ¾ of insulation from the end of the wires

4.      Take the part of the smoke detector with wires coming out. There should be a black, white and yellow wire.

5.      Place a wire connector over the yellow wire if you are only connecting one smoke detector. (Yellow is used to connect multiple smoke detectors.)

6.      Screw the bare or green wire into the wall box.

7.      Connect the white harness wire to the white wire.

8.      Connect the black harness wire to the black wire.

9.      Wrap a stripe of electrical tape around the base of each connector for each pair of wire connectors.

10.    Put the harness through the smoke detector mounting bracket and put the bracket to the wall box.

11.     Put the wiring harness into the jack on the back of the smoke detector and mount the detector on the bracket.

12.     Connect the smoke detector to the electrical panel.

13.     Check the smoke detector. The “ready” light should be on. Push the “test” button to see if the smoke detector is working properly.

Remember, if your home has multiple floors, it is recommend to have interconnected smoke detectors on each floor. If these steps seem a little too complicated, or for some reason your smoke detecter isn’t working after completing these steps, you should consider hiring a professional. Use TalkLocal to connect you to a highly rated electrician in your area within minutes.

Installing a Ceiling Fan Without Existing Wiring

Tuesday, October 16th, 2012

Installing a Ceiling Fan Without Existing Wiring Electricians

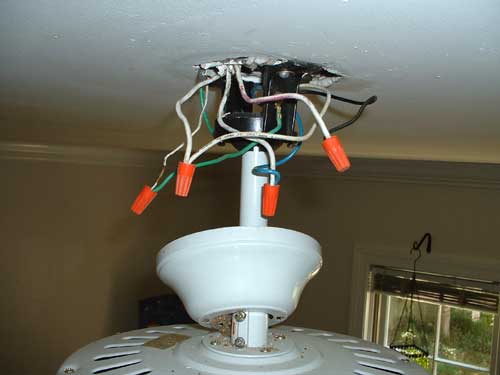
Ceiling fans are a very popular addition to install in bedrooms, patios, and living rooms.  If you have not purchased a ceiling fan yet, there are many options out there. You can find many affordable ceiling fan options on Amazon and have them shipped overnight starting at $71.52. When you want to add a ceiling fan, the most difficult step tends to be getting it wired into your electrical system, especially if you do not have an existing fan or light fixture already in place.  Installing a ceiling fan without existing wiring means you will need to run cables to connect it to a power source.  Electrical wiring can be tricky if you do not know what you are doing; many people will opt to let a professional do the job for them.  If this applies to you, try using TalkLocal to automatically connect you for free with an electrician in your area.  Otherwise, read on for the steps you need to take for a do-it-yourself ceiling fan installation.

The first thing you will need to do is figure out where exactly the fan will be placed.  The electrical junction box that the fan will attach to needs to be in between two joists for support and will be installed from the attic above the room where the fan will be located.  Cut a hole in the ceiling about the size of the box and then bolt it to the two joists so that it is flush with the ceiling.  This junction box needs to be extremely secure as it will be bearing the weight of the fan in addition to the vibrations it generates.

Your next step is deciding where to run the wires from the fan to.  You have a couple different options here; the one that is best for you will depend on your house’s design and your existing wiring.  If you already have an outlet in the same room, or another ceiling fixture in a neighboring room that you have access to from above, these will likely be the best places to connect your fan to.  If there is no nearby existing wiring, you will need to run a new line to your home’s main electrical panel.  Check out this guide for an in-depth guide to fan installation without any existing wiring, and this one for connecting your fan to an existing fixture or outlet.  Be sure to turn off your main circuit breaker before handling any live wires.  Once your wiring is in place all you need to do is mount your fan to the ceiling and it should be ready to use.

The owner of this website is a participant in the Amazon Services LLC Associates Program, an affiliate advertising program designed to provide a means for sites to earn advertising fees by advertising and linking to Amazon properties including, but not limited to, amazon.com, endless.com, myhabit.com, smallparts.com, or amazonwireless.com.

How to Install a Generator

Monday, October 15th, 2012

How to Install a Generator Electricians

Are you in an area where blackouts happen often? Provided that you don’t enjoy blackouts, having a portable generator and knowing how to install it when needed is a great skill. However, there are safety costs to installing and using a generator as well, so read this guide on how to install a generator properly.

How to Install a Generator                      

1. Start by picking a location to install the generator. It is advised that you do not install a generator indoors or near indoor areas because generators emit carbon monoxide, a harmful gas if inhaled. Carbon monoxide (CO) is a byproduct of combustion (burning a gas) that happens if there isn’t enough oxygen around in the air when the natural gas is burned to generate electricity. The combustion was originally intended to make carbon dioxide (CO2), but there wasn’t enough oxygen molecules.

2. Create an even, level surface for your generator by stiffening/compacting the ground on which the generator is going to placed.

3. Move the generator onto the leveled surface carefully.

4. Turn off the natural gas to your home.

5. Test the natural gas line that you are connecting to your generator for leaks.

6. Connect the gas line to the generator tightly using a wrench.

7. Turn the gas back on.

8. Turn the generator on. The generator should be now supplying power to your house.

It’s practically impossible to eliminate all production of carbon monoxide as a by-product, but there are certain ways in you can minimize it. Place your generator in an outdoor area with a good air circulation to ensure a constant flow of oxygen. Clean the fan (flow of air into the internal engine) as well.

Additional Help

If you feel like you need professional help on how to install a generator, TalkLocal can help with finding the correct local experts in this case, saving you time and energy in what may be a stressful situation.

Installing a Cat5 Connector Wall Jack

Thursday, October 11th, 2012

Installing a Cat5 Connector Wall Jack Electricians

If you want to extend the range of your home internet network, a wireless router is usually your best choice.  But when dealing with a room that a wireless signal is unable to penetrate, like a basement or garage, you might need to use an Ethernet cable running from your modem.  The best way to accomplish this is to install a cat5 wall jack panel in the room where you need internet access and connect it with a cable through the walls to your internet source.  For those with little to no wiring experience, installing a cat5 connector wall jack can be a tricky undertaking, but if you follow these steps you should be surfing the web in no time.

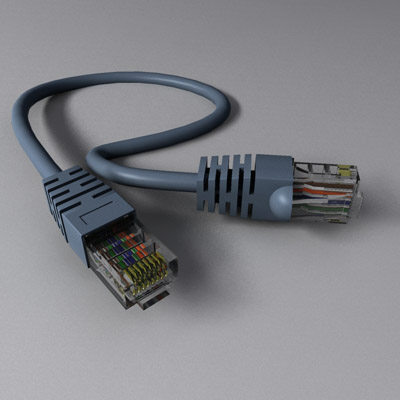
The first step is to actually run the Ethernet cable from the room with your internet modem to the room where you are installing the wall jack.  If you are not familiar with the process of snaking a wire through your walls you should read about it here.  Although simple in theory, this is often the most difficult step for the average do-it-yourselfer.  Those who are unable to accomplish it on their own or uncomfortable making the attempt should probably hire an electrician to take the job on for them.  Getting in contact with a quality local professional is easy if you use TalkLocal, so don’t hesitate to ask for help if you need it.

Now that the cable is in place we will move on to the actual wall jack panel.  Begin by cutting a hole in the wall the size and shape of the panel, wherever you want it to be located.  Then pull the Ethernet cable you ran through the back of the wire box (the part of the wall jack panel that sits inside your wall) and use a screwdriver to screw the box securely to the drywall.  To attach the jack to your cable, you will need to strip the cable end with wire strippers and insert the individually colored smaller wires into the corresponding colored jacks in the back of the wall plate.  Once they are in place you can press the wires into the connections using the punch down tool that should have come with your wall panel when you purchased it. With the cable connected to the jack all that remains is to fit the faceplate of the panel over the wire box and screw it into place.  Congratulations, you should now be able to easily connect to your home network without worrying about all the hassles of wireless connections.

How to Tell if an Electrical Panel is Overloaded

Wednesday, October 3rd, 2012

How to Tell if an Electrical Panel is Overloaded Electricians

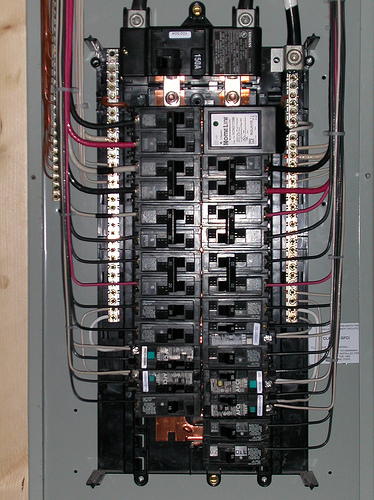
If you are trying to add a circuit to your home’s electrical system, or attempting to figure out the cause of a blown fuse, you will need to establish whether or not your electrical panel is overloaded.  Learning how to tell if an electrical panel is overloaded is fairly simple.  Electrical panels in residential homes are typically either 100 or 200 amps, which means that they can handle up to that amount of amperage before tripping your main circuit breaker and shutting off.  There are amp limits on each of the individual circuits of your main electrical panel as well.  When a circuit receives more amperage than it can handle the individual breaker will trip, cutting off the power to just that circuit.  All of the amperage from each of your circuits together must remain under your panel’s maximum in order to avoid overloading it.

When calculating this panel maximum you cannot simply add up the individual circuit limits.  This is because every circuit has a different amount of power flowing through it, depending on which appliances are plugged in and in use at the moment.  The typical home circuit is usually only carrying about half of its maximum amperage at any one time.  To find out your true total, you will need to perform a load calculation to estimate the average total amount of amperage flowing through your home’s main panel.

Performing a load calculation manually is very tricky and will likely require the service of an electrician. You can use TalkLocal to automatically find a quality local professional in just minutes.  Alternatively, you can use the online calculator available here to generate an estimate of your home’s power load based on all of the appliances and lights that you have.  Keep in mind that this will only be an estimate and is not really a good replacement for having your current measured on-site by an electrician.  Once you know your calculated load, compare it to your panels listed maximum amperage.  Most electricians suggest that you keep your total calculated load below 80% of this maximum number of amps.  If you are under, then you should feel free to add a circuit without worrying about overloading issues.