Archive for the ‘Electricians’ Category


Ceiling Fan is Making a Clicking Noise

Friday, September 28th, 2012

Ceiling Fan is Making Clicking Noise Electricians

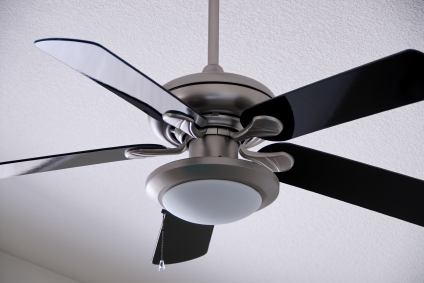
So your ceiling fan makes noises while it is turning? You might be scared that it might fall down on you or your loved ones, potentially hurting someone very badly. It’s actually a legitimate concern. Noise indicates that there is a physical problem with your fan, and parts might break off the fan if the problem goes unresolved. Read on if your ceiling fan is making a clicking noise.

Immediate Action

Noise from the fan installment can be two things: a problem with the rotors or a problem with the mounting of the rotor device itself. Check the components listed in this guide in order to identify and troubleshoot the problem.

A misplaced blade in the ceiling fan will throw off the balance of the rotor device, making it spin out of control and causing some of the internal components to collide with one another.  This makes the clicking noise that you are fearing. Needless to say, collision between the internal components of the rotor is not good. The fan may fall apart if the internal parts wear out.

If the imbalance and the speed at which the blades are turning is big enough, it may even cause the entire ceiling fan to shift as the blades go around. Look for a gap between the ceiling and the base of the fan installment as the fan moves to identify this problem.

Also, check if the center of the blades (the main axle of the rotor) is stationary as the blades in your ceiling fan are turning. If the center stays stationary, then the blades must be balanced. If the base of the fan and the center stays constant, the balance is not a problem at all – there must be some external problem.

Possible external problems can include the wind from the fan constantly hitting something making a noise or the blades of the fan itself hitting something.

Additional Help

If you feel like you need professional help on identifying ceiling fan loud clicking noise, TalkLocal can help with finding the correct local experts in this case, saving you time and energy in what may be a stressful situation.

Porch Light Flickers

Thursday, September 20th, 2012

Porch Light Flickers Electricians

A flickering light may be a fire hazard, but in most cases, you are probably safe. Oftentimes, it is just annoying. If your porch light flickers, check out these helpful tips!

Solution

1. Turn off both the breaker and the switch.

2. Rotate the bulbs between fixtures to see if the problem has to do with the bulb or the light unit itself. If the fixture works with a different bulb, buy a new bulb and you are all set.

3. After replacing the bulb, check out the wires behind the fixture. In order to access the wires, unscrew the screws that hold the fixture up.

4. As you examine the wires, look for loose connections. These loose connections can result from severe storms and winds if the fixture was damaged. Tighten the connection if there appears to be a loose connection. Many times this is the problem and simple tightening can do the trick.

5. If there are no loose connections, replace the socket.

6. Check out the wire nuts and make sure they are secure.

Check the Timer

Still flickering? If you have a programmable timer, the problem may be with your programming. Check the settings to make sure they are correct. In addition, look at your surroundings. Perhaps the porch light is receiving vibrations from a heavy, slammed front door.

If your problem persists, there is still hope. Check out TalkLocal to get connected to a high quality professional right in your neighborhood. Within minutes you will be speaking with professionals that can help you with any electrical issues. Check them out – best of all, the service is free!


Circuit Breaker will not Reset

Tuesday, September 18th, 2012

Circuit Breaker will not Reset Electricians

Circuit breakers are the switches that regulate the flow of electricity to your household.  They’ll protect your home in case of an overload or some other electrical fault, tripping and cutting off power to prevent any further damage to your home.  When there’s an electrical fault, the metal under the circuit breaker will heat up and bend, causing the spring-loaded breaker switch to open the circuit and cut off power.  Breakers are usually very durable and don’t malfunction very often, so make sure that you’ve isolated the problem to the breaker. To check that it is the breaker, reset the it correctly by pushing the handle fully to the off position and then to the on position. If that doesn’t do anything, read on for what to do when your circuit breaker will not reset.

Overloaded Circuit

Every appliance in the home in a circuit will attempt to draw a certain amount of power, but it’s possible that there are too many appliances plugged into a single circuit, effectively overloading it.  Try unplugging everything and shutting off light fixtures; then, attempt to reset the breaker.  If it works, slowly start plugging in appliances and lights one by one until the circuit overloads (it may be a faulty appliance or simply too many appliances in total).

Short Circuit

Overheated wires often times will lead to short circuits, creating the same symptoms of an overloaded circuit.  You’ll once again want to unplug lights and appliances individually and check for loose or torn wires.

Faulty Breaker

This is uncommon, but still very possible. Make sure that when you are attempting to replace the breaker you completely kill all power to the service panel, or you may risk severe injury.  Also, make sure that you replace the breaker with a breaker of the same rating, or you may risk overheating wires or causing a fire.  Disconnect the wires behind the old breaker and reattach them to the new breaker.  

If none of the above solutions helped reset your power, it’s highly recommended that you call a professional electrician.  With TalkLocal, you’ll be talking to a high quality local electrician who can help diagnose and solve your problem in just minutes.  It’s fast, easy, and there’s no reason why you shouldn’t use it to help you as soon as possible.

Installing Lights under Kitchen Cabinets

Friday, September 7th, 2012

Installing Lights under Kitchen Cabinets Electricians

A proper kitchen light can not only improve the ambiance, but it can also enhance the value/appeal of your home to buyers and visitors. Installing lights is easy work, but you should exercise precautions before you start modifying the circuitry of your home by installing lights under kitchen cabinets.

Step Guide

1. Decide on the type of lighting that you want – different bulbs have different brightness and contrast and it is up to you to find the best one for your house. The main ones available on the market are xenon, fluorescent, and halogen. Xenon and halogen bulbs are generally more expensive than the florescent bulbs. Florescent bulbs are the cheapest kind of bulbs that have a yellowish light. Halogen is the brightest bulb, but it can get hot if help on for longer periods of time. Xenon bulbs are somewhat less bright than halogen bulbs but generally last longer.

2. Before proceeding further, wear rubber gloves so that your hands are protected should you encounter any electrical current in your operation.

3. Locate the electrical box near the kitchen cabinet that needs to be replaced for the job. Remove the electrical box – carefully pry it off with something like a crowbar as to not damage the surrounding wall. Connect the remaining cable to the new light fixture (that you bought yourself to place the new light bulbs in).

4. Install the light fixture in place. Install the respective cable connector and the electrical box to account for the wiring. Finally, install the GFCI outlet and the dimmer switch and you are done – just finalize the wall plate of the outlet.

5. Finally test the outlet to make sure it is working. Check the heat of the bulb from time to time after placement in order to make sure that nothing is going wrong (overheating and danger of fire). It is recommended that you use a thermometer placed near the bulb to measure the temperature changes instead of guessing it with hand — halogen bulbs are extremely hot.

Additional Help

If you feel like you need professional help with installing lights under kitchen cabinets, TalkLocal can help with finding the correct local experts in this case, saving you time and energy in what may be a stressful situation.

Wall Switch is Hot

Monday, September 3rd, 2012

Wall Switch is Hot Electricians

Has your wall switch been warm or hot lately? If the wall switch is hot, your home is at risk of a fire, so electrician needs to be called immediately. Here are some of the causes of the wall switch becoming hot.

Overload

If a device that is used by the switch is drawing more current than the switch can handle, the switch become hot. One of the common mistakes a house owner makes is installing switches on a higher amp circuit. A normal switch can handle a 15 amp lighting circuits. Some homeowners don’t know about this and think switches are the same and install low amp switch into a high amp circuit. If you have installed the switch that was hot recently, check the switch amp rating. If the amp rating is too low for the lighting circuit, reinstall a switch with the appropriate amp rating for the specific lighting circuit.

Failing Switch

Switches can wear out after years of use. When worn out, they can turn on and off and cause a small spark. The small spark will cause a burn on the electrical contacts and make the contacts fail. The failing of electrical contacts cause electricity to flow into a smaller area and generate heat. This kind of problem runs the risk of a house fire, so an immediate replacement of the switch is needed.

Faulty Wiring

Wires that are broken or loose but still functioning will cause electricity to take a smaller path through the wire and create excess heat. This problem requires an immediate attention from an electrician.

If a dimmer switch is warm, do not worry; this is normal due to the way a dimmer switch functions. If you think the dimmer switch is abnormally hot, consult the manual.

To find a local electrician, use TalkLocal. TalkLocal can connect you to the best electrician in your area for immediate electrical repairs.

How to Wire a Combination Outlet Switch

Monday, August 27th, 2012

How to Wire a Combination Outlet Switch Electricians

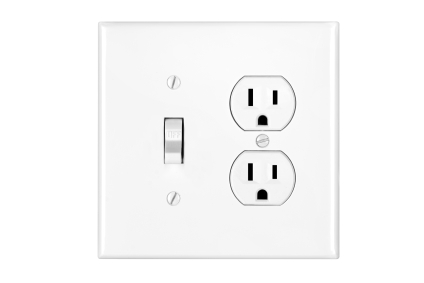
Have you finally decided to make improvements to your place for the sake of convenience in the long term?  Good for you, go-getter.  Follow this guide in order to learn how to wire a combination outlet switch.

Materials needed:

– Screwdrivers that are compatible with the screws

– Screws that are compatible with the wall/outlet

– Voltmeter

– Rubber gloves

– Wiring & wire nuts

– Combination outlet cover plate

Steps:

1.  Go into your place’s circuitry box and power off the specific switch that you are using.  Make sure that it is the correct one before you start working.

2. Lock the box (and leave a notice) that electrical work is being done.  You could be in danger if someone flips the switch while you are working.

3.  Put your gloves on.

4.  Using the screwdriver, loose the (light) switch plate you want to replace.

5.  Use the two ends of the voltmeter to check that the power is off (report of 0V) on the switch’s terminal wires.

6.  Get hold of the wires that were connected to the switch.

7.  There should be four wires in total- two hot wires, one neutral wire, and a green ground wire. Cut them open (around 3 inches.)

8.  Remove the outer wiring to expose the metal cord with the wire clippers.

9.  Connect the hot wires together by twisting them together at the middle of the metal.

10.  Use the wire nut to cover the ends of the wires together.

11.  Connect the twisted ends of the hot wire to the bronze terminals of the combination outlet cover plate.

12.  In a similar way to how you connected the hot wires together, connect the neutral wires together and secure the connection under the terminal.

13.  Connect the ground wires together and secure the connection under a screw.

14.  Place the combination plate in position and screw it in.

If you feel like you need professional help wiring your combination outlet switch, use TalkLocal to find a high quality electrician in your area.

Home Electricity Safety

Tuesday, August 7th, 2012

Home electricity safety is not something that should ever be taken lightly.  While we frequently take our use of electricity for granted, it is important to be aware of potential problems that could arise in a system.  Here you’ll find a quick list of things to watch out for in order to keep your electrical system running safely.

First, it is important to be up-to-date on your electrical inspection.  If it has been more than 40 years since your wiring has been checked out, you should immediately schedule an inspection.  If it has been between 10 and 40 years since your last inspection, an inspection is still a good idea, especially if the home or building has undergone remodeling.  If an inspection has taken place within the past 10 years, another is probably only needed if you witness any of the following warning signs.

While some serious electrical problems are easy to spot, there are a couple less obvious things to watch out for.  Loose plugs or small shocks in electrical sockets are not safe for your home.  You may think these are just side effects of having electricity, but this is not normal.  Loose plugs should be fixed immediately. Prongs not inserted completely into the wall are dangerous as well.  When it comes to shocks, you may have a more serious issue on your hands.  The wiring to one or more areas in your home may be faulty.  Again, these may seem like minor problems at first, but it is best to contact a professional electrician to take a look.

Some more obvious signs of electrical problems may come in the form of sparks or buzzing noises from electrical equipment, overheating smells throughout the home, or temporary to complete power outages.  Simply use common sense with these indicators – they seem dangerous because they are!  These warning signs can signify any number of problems in an electrical system, and an electrician should be consulted immediately.

Perhaps the most important thing to remember with electricity is these are generally not do-it-yourself fixes.  Electrical systems are extremely expansive, and one wrong move could put you and your home in severe danger.  There are plenty of available professionals who can quickly and safely put you back on the right track, so don’t put yourself at risk!  Your job is to simply to be aware of these warning signs to keep the electrical system in your home functioning properly.  If you feel like your home electrical system is not functioning properly, use TalkLocal to find an quality electrician to fix any problems you might be having.

How to Replace a Circuit Breaker Fuse

Thursday, August 2nd, 2012

How to Replace a Circuit Breaker Fuse Electricians

Circuit breakers are used to protect your home from overloaded circuits.  If you have too many electrical devices plugged into too little circuitry, your circuit breaker will automatically trip and turn that entire section of circuit off.  Otherwise, the wiring in your walls has a high possibility of overheating and setting fire to your entire house.  Usually, you can just turn the circuit breaker back on, but make sure you unplug all your electrical appliances from the outlet before you do so, as overloading circuits are extremely dangerous.  Circuit breakers usually trip when the wires are dangerously hot, but if it’s turning off too often, or even worse, not turning on when it’s supposed to, you’ll need to replace it.  When you replace your circuit breaker, make sure your replacement circuit breaker is of the exact same model as the original, as replacing it with a different model could be have dangerous results.  Read on for more information on how to replace a circuit breaker fuse.

1.   Turn off the main circuit breaker and also all the branch circuit breakers.  Check for voltage on the circuit breakers to make sure that they’re definitely turned off, never assume.

2.   Take off the panel cover to get access to the branch breaker.  Do not attempt to take the cover off the main breaker or try to replace it.

3.   Disconnect the wire from the breaker you want to replace and carefully take out the broken breaker.  Note how it’s attached.

4.   Put in the new circuit breaker and attach the wire.

5.   Check that none of the other breakers and wires are loose.

6.   Turn the main circuit breaker back on, and then test the other breakers one by one.

Messing with electricity can be very dangerous, and if you’re having problems, it’s highly recommended to find a professional to fix your circuit breaker problems rather than put yourself in extreme danger.  Use TalkLocal to find a reliable electrician right now at no additional charge!

Is it Safe to Connect an Extension Cord to a Power Strip

Wednesday, July 25th, 2012

Is it Safe to Connect an Extension Cord to a Power Strip Electricians

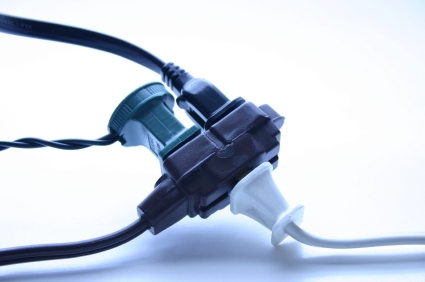
Is it safe to connect an extension cord to a power strip?  Power strips and extension cords are commonly used to increase the number of outlets in your home and to shorten the distance between an outlet and an appliance you want to plug in, respectively. One option to consider is purchasing a surge protector with a longer cord. You can find the highest rated surge protectors with long cords on Amazon and have them shipped overnight starting at $14.98. However, the incorrect use of power strips and extension cords can provide high risks in causing overheating and fires in your home. This article will explain the basics about where, when, and for how long these items should be used.

If you have several appliances that need to be plugged into an electrical outlet (such as having a desk with a computer, lamp, printer, etc), but find that there is no wall outlet nearby, you may have thought of plugging an extension cord into the nearest wall outlet, and then using a power strip to connect to the extension cord, making several new outlets available.

This is an option you can choose, but be aware that in general, the use of extension cords and power strips should usually be for short-term situations as opposed to permanent solutions. In the case above, it might be a better solution to move the desk and any appliances closer to a rooted wall outlet. In addition, when not in use, it is recommended to unplug any cords and turn off any power strips to save electricity and to reduce the risk of sparks and fires. You can find the highest rated extension cords and have them shipped overnight starting at $6.48.

If you are unsure of whether connecting a power strip to an extension cord is a plausible solution in your particular situation, or if you have experienced any sparking or blowing of fuses, you should contact a professional electrician for help. To locate one near you, try using TalkLocal, a FREE service that will connect you with top-quality, reputable electric contractors in your neighborhood, within minutes. Simply enter in your specific problem, location and availability and TalkLocal will contact multiple specialists who will then call YOU directly, ready to help. 

The owner of this website is a participant in the Amazon Services LLC Associates Program, an affiliate advertising program designed to provide a means for sites to earn advertising fees by advertising and linking to Amazon properties including, but not limited to, amazon.com, endless.com, myhabit.com, smallparts.com, or amazonwireless.com.

How to Troubleshoot Electrical Outlet Problems

Monday, July 23rd, 2012

How to Troubleshoot Electrical Outlet Problems Electricians

Troubleshooting electrical outlets may be an irritating and dangerous process. Usually, an outlet problem is a simple one and does not need any electrical expertise to be fixed. So before going to an electrician, try these steps that explain how to troubleshoot electrical outlet problems you might be having.

– Plug in the appliance to another wall outlet. If it does not work then the appliance may be faulty; if the appliance does work then the electrical outlet is faulty.

– Look for any wall switches and turn them on. If the appliance works in the dead outlet, then it’s ok.

– Check other outlets by switching the lights on or by plugging in an appliance. If dead, mark them with tape.

– Unplug all appliances from outlets. This eliminates the possibility of a short or overload.

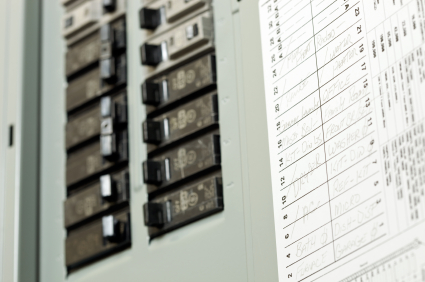
– Check the breaker box for a tripped circuit breaker. Usually the breaker box is in the kitchen or basement. Open the box; the two main breakers should be on the top while the circuit breakers are on the bottom. Look at the circuit breaker where the outlet is and check if it’s in an “off” position or in between the “on” and “off” position. If it is, make sure the appliance is turned off; then switch the circuit breaker off and on. If this does not work, turn off the breaker.

– Check for blown fuses. Turn off the main switch and turn on a flashing light. Look at the top left corner of the fuse box. Look at the fuse if it is are burnt or blackened.

– Check for a GFCI (Ground Fault Circuit Interrupter). These GFCI shut off power to all outlets if they find a leak in the electrical current. If you find any GFCI outlets, test and reset them. If they trip after reset then there could be a dangerous leak in electric current and an electrician should be called.

– Go back to the outlet(s) and remove the faceplate. Look at the terminal connections and see they don’t have a screw. If not, use screw in a terminal screw to the head of the wires.

– Check outlet for charring on the sides or the back.

If the problem was found, there are many how-to guides to fix the problem. If there are problems that can’t be fixed on your own, use TalkLocal to find professional help. TalkLocal can connect you with a high quality electrician in minutes.