Archive for the ‘Handyman’ Category


Pros and Cons of Teak Tiles Shower Floors

Tuesday, February 18th, 2014

Pros and Cons of Teak Tile Shower Floors - Handyman

People who want to boost the appeal of their bathroom and improve their levels of comfort at the same time often choose to purchase and install premium flooring materials. Teak shower tiles are highly durable, water-resistant, and aesthetically pleasing. Are teak tiles shower floor an alternative worth considering? Keep reading to find out.

Why Teak Tiles for Shower Flooring May Be Suitable for Your Bathroom

Numerous people are tempted by the idea of investing in a first-class, wooden shower floor, simply because it addresses their specific aesthetic requirements, matches the main interior design idea, and goes very well with the wood bathroom cabinets.

Teak tiles shower flooring is very practical for a number of reasons:

1)      They are water-resistant and preserve their beauty in moist environments.

2)      They are incredibly durable.

3)      Due to their natural oils, they deter wood-eating pests.

Discover the Main Disadvantages of Teak Tiles for Shower Flooring

On the other hand, tiles made of teak that are designed to go in your bathroom also have more than a few disadvantages that you should always factor in.

1)      The natural oils contained by teak tiles ensure effective moisture protection and prevent mold contamination. However, this doesn’t mean that the teak surface is not impacted by colored chemical compounds (such as hair dye, bath salts, or shower gel) that stain your teak tiles shower.

2)      If you don’t have time to look after your shower flooring material, then teak tiles might not be the best option for you. To keep the grain looking smooth, you have to scrub the surface with soapy water and a quality bristle brush. The cleaning routine itself could lead to the formation of stains that have to be eliminated with bleach.

3)      While you take a shower, you use abrasive components (like bath salts, for instance) that could easily scratch the teak surface and compromise its appeal.

4)      Yes, teak responds well to moisture. However, in moist environments it tends to age faster and change its color to a shade of silvery grey sooner than expected.

Ask an Expert

Can’t decide whether or not teak tiles shower would be a great alternative for you? Simplify the decision-making process by consulting a handyman. Find the best ones in your area with Seva Call, a free service designed to connect you with the best professionals in your area.


How to Fix Leaning Mailbox Posts

Thursday, February 13th, 2014

How to Fix Leaning Mailbox Posts - Handyman

If your mailbox is leaning for various reasons, such as severe weather or improper installation, sooner or later you’ll have to fix it. That’s a must-do, especially if you consider selling your house. Here’s what you should know about how to fix leaning mailbox posts.

1. Remove the Leaning Mailbox Post from the Ground

If your mailbox is installed on a wooden or metal post and it’s leaning, the best way to fix it is to dig it out of the ground. This may be an easy job if the post was simply stuck into the ground without having a foundation. If the initial hole was not deep enough, the cause of the leaning is obvious. If the ground around the post is packed very hard, is stony, or has a thin layer of concrete, you might need to use a mattock to break up the surface.

2. Prepare the Hole for the Mailbox Post

To make sure your mailbox will withstand the test of time, you need to dig a hole which is about two feet deep and about half of that in diameter. After digging the hole, insert a layer of gravel into it to minimize the effect of water infiltration. If you use a metal mailbox pole, the gravel on the bottom of the hole will help prevent rusting.

3. Insert the Mailbox Post into the Ground

Insert the post into the hole and add soil to keep it in place. Level the mailbox post and fill the hole with dirt. Make sure the mailbox post stands up straight, and tread on the dirt to pack it down. Don’t forget that the ideal length of a mailbox pole is 41-45 inches above ground level.

How Can You Fix Leaning Mailbox Posts with Cement Bases?

If your leaning mailbox is set in cement, it will be more difficult to fix it, but you can do so by enlarging the base. Repeat the first step by removing the mailbox, make the hole wider, reinsert the mailbox post, and add cement to make the post stand upright.

Get Professional Help

If you don’t want to repair your mailbox yourself, Seva Call can get you professional help by putting you in touch with local handymen who can get the job done in no time. Our service is fast and free of charge.

Make Over Your Porch with Front Porch Repairs

Tuesday, February 11th, 2014

Make Over Your Porch with Front Porch Repairs - Handyman

One of the nicest places to just hang around in is your very own porch. However, porch maintenance is not always a breeze. Unless yours have a closed-in design, the porch gets a lot of beating from the elements. Also, most porches are not attached to the main foundation of the house and are only supported by a landing place of bricks or blocks that settles over time and eventually causes the porch to collapse.

Here are the steps to perform basic front porch repairs:

1. Take out all the floorboards, making sure not to cause damage to the supporting joists below.

2. On one side of the foundation, remove one foundation block by cutting out the mortar around it. Take a new block. Spread cement mortar and sand mix over its edges and tap it into the foundation evenly. Clean out the extra mortar around the block and make new lines of mortar so that the block matches the existing foundation.

3. To this new block, add a front cover made of stainless steel mesh to let air circulate well underneath the porch. Cut the screen so it fits the block tightly. Attach to the mortar line by tapping it in with a trowel.

4. With a nail gun, attach new lumber beams to the existing joists. The new joist should be a quarter of an inch elevated at the house end.

5. Install the subfloor, positioning the joist and cross joist at right angles to each other. Start laying the floor from the outside, allowing 16 inches of space in between cross joists.

6. Install the tongue-and-groove boards perpendicular to the cross joists. Put some construction adhesive to reinforce bonding.

7. When the floor is complete, place a temporary wooden edge to the porch to guide you and protect the porch as you saw off the uneven floor ends. Paint your finished porch.

Replacement Ideas

Sometimes, quick front porch repairs are not enough and replacement of components become called necessary. For the frame, consider replacing rotten or insect-damaged wood frames with pressure-treated lumber, which can ward off termites and wood decay. This new system will last you for many years.

When it comes to wooden floorboards, these could suffer from wood rot during the damp cold months. When summer comes, they easily crack when exposed to the sun. Replace the boards with composite deck material, which doesn’t crack and decay and is virtually maintenance-free.

You can also upgrade wood railings, columns, and other parts of your porch with high-density urethane components, which are reinforced with steel for durability. Plus, they never need repainting.

Need Help with Front Porch Repairs?

Restore the beauty and function of your front porch with the help of a professional handyman. Let Seva Call find up to three professionals in your area so you can choose the right one for your job. We work fast and won’t charge you a dollar. Contact us now!

Advantages of Knock Down Cabinet Hardware

Wednesday, February 5th, 2014

Advantages of Knock Down Cabinet Hardware - Handyman

Knock down cabinet hardware are fasteners and connectors used in assembling flat pack cabinets. Knock down or KD is a very popular type of furniture these days due to its affordable price and ease of installation. Besides cabinets, other common KD furniture pieces include bookcases, wall units, or storage units.

What Are the Advantages of Knock Down Cabinet Hardware?

1. KD Cabinet Hardware Makes Installation Easy

If you choose to install knock down cabinets in your kitchen, you will be able to do it yourself without asking for professional help. Knock down hardware is designed to join cabinet components, which come with pre-cut and pre-drilled holes, so you don’t have to worry about measuring sizes and fitting parts. KD fasteners can be assembled and disassembled whenever needed, which is why they are called ‘knock down.’

2. You Don’t Need Special Skills

One of the reasons that explain the popularity of knock down cabinets, besides cost, is convenience. Both the cabinet parts and hardware are designed to be put together by almost anybody. You don’t need a handyman to install KD hardware on your cabinets, unless you’re not much of DIY’er, or can’t find the time to do it yourself.

3. Knock Down Cabinet Hardware Can Be Replaced

With traditional cabinets and furniture, it may be difficult to find the right fasteners if you need to replace them. The sizes and types of connectors you need may no longer be available or harder to find. On the other hand, knock down hardware is standardized, and there are plenty of suppliers offering replacement components.

If you disassemble cabinets, and plan to reinstall them in a different space, for example, you might want to replace the hardware to make sure it lasts longer. Or maybe you lose some fasteners or they get damaged during reinstallation. In these cases, you can find new hardware right away to complete your project.

Need Assistance?

If you’re not the DIY type, or if your home improvement project is more labor intensive, Seva Call can give you a hand. We can connect you with a reliable handyman in your area to get things done quickly and effectively.

Hot Tub Skirting Materials

Thursday, January 30th, 2014

Hot Tub Skirting Materials - Handyman

Hot tub skirting, or the cabinet that surrounds your hot tub, is typically made of durable wood, such as cedar, which is widely used in outdoor applications for its endurance to decay and insect infestation. However, nowadays composite or synthetic materials are widely used for hot tub skirting.

If you are considering installing spa skirting or replacing your old one, here are some options for hot tub skirting materials to help you decide what’s best for your needs.

Wood

Many people prefer wood for hot tub skirting because of its appealing look. It integrates naturally in outdoor spaces, enhancing the appearance of your hot tub. The most common types of wood used in hot tub skirting are cedar and teak. They are extremely resistant and can withstand severe weather conditions. More affordable options include lumber or plywood.

Composite Materials

Synthetic wood kits are another option. The panels, or siding, used to make the skirting for your hot tub is made of a material, which combines wood and plastic. They are easy to install and require less maintenance than traditional wood skirting. A lot of homeowners choose composite materials because they simulate wood, but aren’t as demanding as wood when it comes to maintaining them.

Faux Stone

If you want to give your hot tub a more rustic look, you can choose faux stone interlocking panels. Unlike wood, they don’t require staining or sanding to preserve their appearance.

Plastic Hot Tub Skirting Materials

Plastic hot hub skirting is increasingly popular because of its advantages. Skirting panels are available in several color,s and you can install them yourself if you’re a DIY’er, as many of them come in easy-to-follow instruction kits. Also, it’s easier to maintain polymer or foam hot tub skirting than wood.

Expert Help

Looking for hot tub skirting materials? Seva Call can locate a professional in your area who can give you a hand. We’ll do that in minutes. For free!

Patio Columns Ideas

Monday, January 27th, 2014

Patio Columns Ideas - Handyman

The patio provides relaxation in an intimate and quiet setting. This living space has several types, ranging from the classic, colonial European courtyards to today’s chic, paved havens found in many urban yards. In whatever form or design, the patio functions as a place for family dining, entertaining, or peaceful alone time.

Whether the patio is entirely covered, partially shaded, or wide open, it can be dramatically improved with trendy patio columns ideas. The right type of column doesn’t just offer support to structures, but it can also easily turn a patio into an elegant space or simply add a touch of stylish detail to an area. Here are some patio columns ideas you might want to try in your home:

Fiberglass Patio Columns

These columns combine classic beauty and cutting-edge manufacturing technology. Made with fiberglass-reinforced polymer, these columns offer exceptional durability even stronger than stone or marble. They come in either round or square columns, which are stately and architecturally precise. They are perfect for homes with a traditional Colonial style.

PVC Patio Columns

Made in very durable cellular PVC, these columns are designed to appear like traditional painted wooden patio columns, but the great thing is they free homeowners from the chore of maintenance and are economical.

There are tapered and non-tapered PVC columns with the tapered ones offering a stylish form to the usual column. The surfaces of the columns can be plain and smooth or paneled with some traditional details. These columns can be square or round. Square columns outline spaces and are popular choices in traditional homes.

Wood Patio Columns

No matter how advanced building materials get, many still go back to natural wood because of its unparalleled beauty, texture, and warmth.

Some of the classic column designs include the festive Corinthian style with leaves and scrolls, which is great if you’re looking for an elegant and detailed column, and the simple fluted Greek Doric column, which is very versatile and suits most modern patios and porches. A more detailed version of Greek Doric but still minimalist in style is the Roman Doric column, which is an excellent choice when you want to add height and simple elegance to a living space.

Thinking of a Patio Makeover?

Anytime you need help with your home improvement projects, you can quickly get all the expert help you need by using Seva Call. We’re a free service that connects customers to local qualified service professionals. Try us now and save time finding the right professional for your job. Best of all, our service is free!

Proper Way to Tip Handyman – Tipping Etiquette

Monday, January 20th, 2014

Proper Way to Tip Handyman - Tipping Etiquette - Handyman

If you cannot consider yourself handy with work tools and capable to tackle small jobs around the house, you probably have found yourself needing the services of a handyman on more than one occasion during the year.

Sometimes, even do-it-yourself enthusiasts prefer to hire a handyman for certain tasks once in a while. When dealing with a handyman, tipping may or may not be the right thing to do depending on certain situations.

The Basic Idea of Tipping

Obviously, there are no policies whatsoever about tipping, which is why opinions vary greatly on the subject. Some say certain service professionals should not get a tip – handyman or what have you – while others continue the practice of tipping to reward a good service given.

Tipping is an act of thanks, so a lot of it depends on personal values, opinion, and character. As with a verbal “thank you,” tipping is given voluntarily, so never feel obligated to tip even when the service is far from worth it.

When Not to Tip the Handyman

There is a general agreement that you can tip the workers but never the business owner. So, if the handyman you hired is an independent contractor with his own business, don’t tip. Tipping is reserved for the employees of the handyman services firm.

If you wish to tip a handyman — which you may want to do when you’ve called one to your own home — the standard rate is around 18 to 20 percent of the total bill. On the other hand, if you live in an apartment or condominium where you pay monthly fees for building maintenance, then it’s fine not to tip the handyman.

Find a Handyman Fast and Easy!

Whatever help you need around your house, if you need it done by a professional handyman quickly, just let Seva Call find the right person for your job. We will connect you with reputable local service professionals within minutes, allowing you to get the right help right now.

How to Repair Column Base

Thursday, January 16th, 2014

How to Repair Column Base - Handyman

Older houses with wood porches often share a common problem – rotting porch columns or column base. The degree of rot or dry rot may vary from column to column but it is often found around the base, within a foot up the ground. Dampness around the base of porch columns, which leads to rotting, typically occurs due to the following:

– Clogged downspouts in the gutter, which causes rainwater to flow over the gutter and straight onto your porch instead

– Lush vegetation around the perimeter of the porch, which transports rainwater and excessive moisture onto your porch

– The deck is not sloped properly and water is not draining away from the columns adequately

Before you attempt any repair column base rot should be inspected first to identify what is causing it. Get rid of or resolve the source of water damage (i.e. clear out clogged downspout) to permanently stop moisture from saturating the base of the porch columns. This will ensure that after repair, column base moisture problems will not start again.

Repair Steps

1. Identify the extent of damage.

Locate the areas of the porch columns and/or base that are rotted by gently prodding them with a sharp tool. If the tool is able to penetrate the wooden surface with almost no effort, that surface is already rotted. Mark the surface a few inches higher than the rotted section.

2. Put up temporary support.                     

During repair, prop up the porch roof or any load being carried by the columns by installing temporary shores.

3. Remove damaged structures.

Saw off the rotted post following the mark you made earlier. Measure the length of the column splice from the point of the saw cut to the deck.

4. Build the splice.

Use treated lumber, nails, and screws to construct the column splice. Fasteners should be countersunk to allow patching up later once the splice has been installed.

5. Install new decking as necessary.

Replace old and rotted wood decking to ensure a strong foundation for the columns. Consider installing durable composite decking.

6. Put in the column splice.

Insert the splice into the hollow area of the column with a generous application of waterproof glue to its interior piece and then slide in the outer piece. When the splice is already in position, let go of the interior piece so that it falls into place.

Fasten the splice and the existing column to the interior piece with screws. Fasten the underside of the splice to the decking also with screws.

7. Perform final touch-ups.

Take down the shoring once the glue has fully cured. Sand the splice and fill in gaps and screw holes with a wood putty filler. Re-sand, prime, and paint the column  anew.

Rely on Expert Skills

Expert construction skills are necessary to repair a porch column base. Fortunately, Seva Call knows how to find qualified service professionals whenever they are needed. Let us help you now!

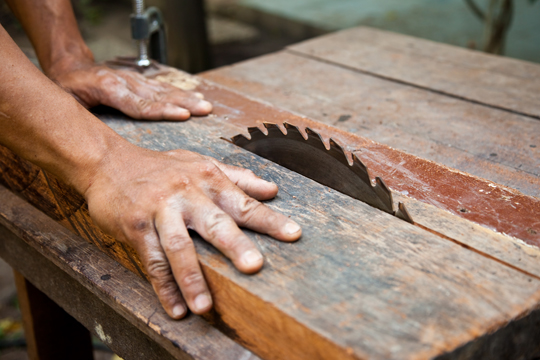
What Is a Table Saw?

Tuesday, January 14th, 2014

What Is a Table Saw? - Handyman

People who display remarkable handcrafting skills and love to invest their time and energy in different home improvement projects usually choose to purchase a basic set of tools that they can use regularly.

What is a table saw and what purpose does it serve? Keep reading to find out everything there is to know about different types of table saws launched on the market by well-known manufacturers.

What Is a Table Saw?

Table saws are highly practical woodworking machines that are very easy to use. They are utilized by numerous homeowners who need to cut hundreds of pieces of seasoned wood into various sizes and shapes. Most woodworking shops own at least one device of this kind, and countless homeowners choose to invest in a table saw to conduct different DIY projects in their own households.

Table saws all have a similar structure and include a base, a motor, an arbor assembly, trunnions, a table, extension wings, and an arbor.

Table saws can be easily divided into 3 main categories:

– Portable ones that are small, lightweight, and highly accessible

– Contractors’ saws, usually purchased by people who own woodworking shops

– And cabinet saws, famous for their enhanced motor power and their large, ideal work surface.

Unfortunately, these important advantages make cabinet saws quite expensive, with a price tag ranging from $3,000 to $4,000 for newer models.

Can You Customize Your Table Saw?

Of course, if you can’t afford to pay the right price for a new type of cabinet saw, you can always purchase a basic model and customize it to meet your needs and project requirements. Adding a few much-needed features, like extension tables, which allows users to profit from an expanded work surface, or crosscut sleds, required by most precision cutting jobs.

Ask an Expert

What is a table saw? In a few words, it is an essential tool allowing you to create wood-based masterpieces. If you want to invest in a durable, fully functional, inexpensive table saw, it is advisable to rely on expert advice provided by a skilled handyman. Identify the most competent one with help from Seva Call, a free service designed to help you find respectable professionals who live and work in your area.

Considerations and Cost to Replace Porch Columns

Monday, January 13th, 2014

Considerations and Cost to Replace Porch Columns - Handyman

When thinking about upgrading your porch, as with any home improvement project, one of the major considerations is cost.  Checking your porch columns for structural damage is a sound way to evaluate whether they can still be repaired or you need to have them replaced.

Replace porch columns if there are structural problems that will be impractical or very costly to repair. Consider the following points when deciding between repair and replacement.

What kind of columns are they?

Are the columns supportive or just decorative? If the porch connects with a second level area such as a balcony or a terrace, it’s critical to safety that the porch columns are strong enough to support the weight above. Therefore, it’s recommended to replace weak porch columns with a type that is stronger and more durable and to make sure columns are always in mint condition.

The cost to replace porch columns may be expensive, but it’s the safest option whenever there’s a need for extra stability. Relying on repairs is a suitable option if the columns are decorative or they support a lighter load like a small roof.

What kind of damage do they have?

Wood rot, insects, and drastic temperature changes can cause damage to porch columns. Find out the extent of the damage, if any, to determine whether the problem can be fixed by repair work or if replacement is in order.

If there is damage only in one particular area, then resolving the localized issue is the best course of action. However, it would be safer to remove the whole thing and replace it with a new one if its integrity has already been compromised.

Counting the Cost

Obviously, the cost to replace porch columns would be greater than making a local repair or touch-up. However, you must weigh the consequences of trying to save on the cost of upgrading your porch columns when you know they are no longer structurally sound.

Porch columns in such a condition would only worsen in time, not only costing you more in repair, but also putting you and your family’s safety at risk. If you’re on a tight budget and cannot afford a complete porch column replacement at the moment, then consider repairing and reinforcing the existing columns.

However, regardless of the cost, replace porch columns that already have large cracks.

Get Professional Help

Still not sure what to do with your porch columns? Get a professional opinion. Use Seva Call to connect with a qualified handyman in your area who can evaluate whether the columns need repair or replacement. Try our free service now and get in touch with local pros in minutes!