Archive for the ‘Handyman’ Category


The Advantages and Disadvantages of Non-Chemical Adhesive Removers

Friday, October 18th, 2013

The Advantages and Disadvantages of Non-Chemical Adhesive Removers - Handyman

People use adhesives and glues to bind all sorts of things. From common maintenance tasks around the house to industrial application, you can find chemical adhesives everywhere. The trouble is that most adhesive removers contain toxic chemicals, such as solvents or epoxies. When using them, you can inhale harmful vapors or the chemicals might come in contact with your skin, which is bad for your health.

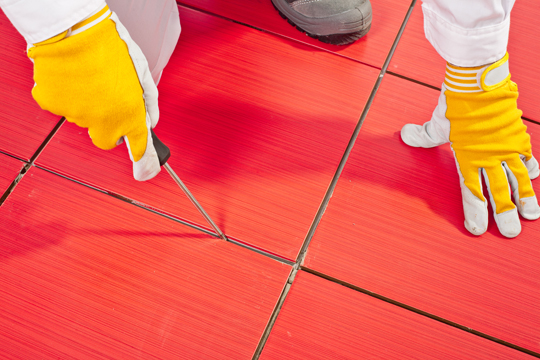
If you are trying to adopt a greener, more eco-friendly lifestyle, you could try to replace your usual adhesive remover, which is most likely one based on chemicals, with a non-chemical adhesive remover. For instance, in home improvement jobs, such as tile or paint removal, you need to remove the adhesive or sealant that keeps the tiles or the paint fixed. To do that, people generally use strong, but harmful chemical adhesives. Instead, you could try using a non-chemical adhesive remover.

What are non-chemical adhesive removers used for?

You can use them to remove chemical adhesives from surfaces, such as:

– walls

– tiles

– flooring

Besides construction work, non-chemical adhesive removers can be used in product disassembly. Instead of employing dangerous chemicals to separate the parts of an item, you could use an effective non-chemical remover to achieve the same purpose.

What are the advantages and disadvantages of non-chemical adhesive removers?

Let’s look at the bright side first.

Advantages

Non-chemical adhesive removers:

– Don’t put your health in danger.

– Aren’t toxic and don’t have an unpleasant smell.

– Protect the environment.

– Are safer to use around children.

– Are easy to apply.

Now, let’s see the other side of the coin.

Disadvantages

Non-chemical adhesive removers:

– Are less effective for some materials, such as metal, for instance.

– Are not as strong as regular glue and sealant removers.

– Are less versatile than their chemical counterparts.

Need a Helping Hand for Your Projects?

A handyman can considerably ease your task in maintenance and home improvement projects. TalkLocal is here to assist you in finding the right professional to get the job done.

Types of Wood for Cabinets

Wednesday, October 16th, 2013

Types of Wood for Cabinets - Handyman

Modern, tasteful, durable wood cabinets can beautify even the dullest indoor spaces, adding value to your house and reflecting your unique sense of style. These days, one could easily find various types of wood for cabinets, displaying different features and different price tags. Which type is best for you? Decide based on your aesthetic requirements, real necessities, demands, and financial possibilities.

Identifying the Most Appealing Types of Wood for Cabinets

With so many appealing alternatives, how could you possibly make an inspired choice? Discuss your option with a handyman and analyze different color and grain variations. Red oak, red birch, maple, walnut, alder, and cherry are only a few options worth considering if you want to take pride in durable, high-quality, rustic, or sophisticated cabinets giving a personal touch to your room.

Designing the Perfect Cabinets for Your Home

If you want to design your very own cabinets, make sure you opt for those particular types of wood that are inexpensive, widely accessible, extremely strong, and durable. If you love golden tones, don’t hesitate to go in favor of a cabinet made from white oak.

Conversely, red oak could be the best kind of wood for your project, due to its affordability and remarkable versatility. It is available in different finishes and styles.

Cherry is ideal for elegant, traditional cabinets. This wood is well liked for its beautiful reddish-brown color, and it is usually stained to obtain a uniform color.

Pine cabinets are the perfect option for you if you adore the discreet shades of pale yellow of this type of wood and its numerous knots, making it perfect for rustic decors.

Count on an Expert Opinion

Undoubtedly, finding the most amazing types of wood for cabinets can be confusing and time-consuming. Narrow your search by counting on expert advice from an experienced local handyman. Find the best ones by relying on TalkLocal, a free service launched to make finding the right professional quick and easy.

Post Hole Digger Rental

Monday, October 14th, 2013

Post Hole Digger Rental - Handyman

Most homeowners choose to invest hundreds of dollars in tools and materials that they never actually use, hoping that they will have the opportunity to conduct a cost-efficient DIY project at some point in time. This is how expensive tools end up gathering dust in attics and garages for a long period of time.

Those who prefer to handle repairs and home improvement assignments on their own, rather than opting for professional services ensured by a handyman, could rent these tools instead of buying them. A post hole digger rental can save you a considerable amount of money in the long term. Think about it: It won’t occupy space in your garage, as you’ll use it only when you really need it.

Rent a Post Hole Digger

Why would you choose to rent a post hole digger in the first place? First of all, it’s the most convenient method, allowing you to profit from great equipment and excellent services while also preserving your resources. Experienced providers will also offer you cost-free guidance, enabling you to rent the perfect equipment for your assignment. Some of them also provide 5-star emergency services, designed to address all of your needs, concerns and potential problems.

How to Identify the Perfect Post Hole Digger for Your Task

Not all post hole diggers are the same; thus, not all models are suitable for your particular assignment. For instance, the one-person mini post hole digger is ideal for planting trees and adequate for areas with soft soil. If you need to drill bigger holes with a diameter of approximately 14 inches or less, consider renting a hydraulic one-person post-hole digger. When it comes to finding the perfect post hole digger rental for your project, keep in mind that you could also rent a mini-loader equipped with a post hole digger.

Bottom line: There are various types of devices currently available on the market; all you have to do is to find the best one for your project, based on your real necessities, demands, and site conditions.

If you want to rent the post hole digger, choose to collaborate with a company making you an all-inclusive offer comprising 2 augurs of different sizes, a damage waiver, one tank of fuel, one ramped trailer, and all essential equipment you will need, in order to get the job done.

Contact an expert

Are you looking for the very best post hole digger rental for your project? If this is your first assignment of this kind, you might feel the need to profit from expert advice. Save time and money by discussing your options with a skilled handyman. Find the best one by consulting TalkLocal, your trusted source of information, connecting you with the most competent professionals living and working in your area.

How to Build a Picnic Table

Thursday, October 10th, 2013

How to Build a Picnic Table - Handyman

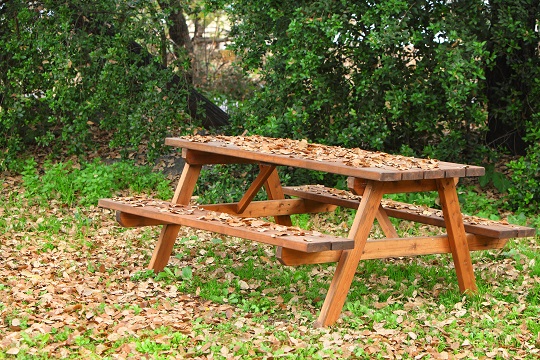
The traditional picnic table provides excellent seating to your backyard with its attached benches, allowing people to sit elbow to elbow to maximize space. It works on any terrain, so you can put it on grass or on your attached deck. While there are ready-made kits available to build a picnic table quite easily, you may find it more fun, as would any do-it-yourselfer, to assemble the table from scratch. Here’s how:

Cut the Wood Pieces

1. Cut four table legs from 2 x 8 wood boards. Each leg should be mitered 22 degrees at the top and bottom.

2. Make the horizontal crosspieces that will support the top and the bench: two 2 x 4 pieces for the top and two 2 x 8 pieces for the benches.

3. The end of each bench crosspiece should have one corner cut off.

4. For the braces that will run along the table’s underside from the sides, cut two pieces of wood measuring 2 x 4 with ends mitered 45 degrees.

5. Cut middle braces measuring 2 x 4 for the benches and the table top.

Assemble the Table Frame

With the frame parts ready, build a picnic table frame by doing the following steps on both ends of the frame:

1. Use 2 ½-inch decking screws to attach the top crosspiece to the table legs.

2. For the bench crosspiece, position it 15 inches from the bottom of the table legs and attach to the legs using carriage bolts with a length of 3 ½ inches.

Finish Building the Table

1. Cut seven 2 x 6 pieces of wood, two to be used for the benches and five for the table top. Include an overhang 2 inches on both sides. Cut the corners of the bench planks.

2. With the table A-frames up, attach the bench pieces to the top edge of the bench crosspiece using 2 ½-inch decking screws.

3. Use the same type of screws to attach the table top pieces to the top crosspiece.

4. Position all the middle planks with ¼ inch spacing in between them.

5. Use a deck stain to paint the table.

Need Professional Help?

With your picnic table built, you can start enjoying it by having a classic backyard BBQ with family and friends. If you’re not able to build a picnic table on your own, why not hire someone else who can? Use TalkLocal, and we’ll connect you with qualified professionals within minutes to fit your request. Try us now!

Small Bathroom Makeovers: Storage and Design

Monday, October 7th, 2013

Small Bathroom Makeovers: Storage and Design - Handyman

New Flooring and Tiling

Small bathroom makeovers need not be expensive. You can install your own bathroom tiles for the fraction of the cost that bathroom experts will charge you.

1. First, you need to purchase enough tiles for your bathroom floor, accounting for any corners and spaces.

2. Then, you need to mix thin-set mortar to the appropriate consistency or use adhesives that are recommended by the manufacturer.

3. Spread the adhesive or thin-set mortar on the bathroom floor, beginning with the center, and lay the tiles, again, beginning with the center.

4. Make any cuts that you need with the tiles using a wet-cut tile saw.

5. Allow the tiles to dry overnight or as recommended by the adhesive manufacturer.

Cabinets and Storage Space

These tips will show you how to select the proper bathroom cabinets that are right for you.

1. The first step is to know how to use your space. For example, if you have a hot tub and you like taking long baths, you might like to have a cabinet with lots of space for towels and a television set.

2. Next, you have to do your homework. Flip through design books or magazines and get inspiration from what you see. There are lots of design options out there, and you can get ideas from practically any bathroom design book.

3. The last thing to remember is, you don’t need to break the bank. Cabinets don’t need to be that expensive. You can look for cheaper alternatives by sourcing for materials that are not that expensive.

Shelves

Small bathroom makeovers that require new shelves are not something that will cost you a lot. Shelves give you additional storage space and won’t cost you a bundle.

Shelves are ideally placed beside cabinets where they can easily be reached. They are ideally made of wood or metal, whichever best complements your bathroom décor. Shop around for the best shelving materials and you can install them yourselves.

Need Professional Help?

Contact TalkLocal today and let us help you find the professional help that you need for a fantastic bathroom makeover!

Building a Cement Sidewalk

Wednesday, October 2nd, 2013

Building a Cement Sidewalk - Handyman

If you want to enhance the curb appeal of your home and replace that ugly, old, cracked path, building a cement sidewalk might be an excellent idea. You could either complete this relatively simple project on your own, or you could try to find a competent landscaper living and working in your area, who would gladly lend a helping hand, allowing you to finish this task on time and on a budget while taking pride in spectacular results.

What type of materials should I buy for my project?

You should know that the most recommended material for your new sidewalk is by far a concrete mix, based on aggregates like gravel, crushed stone and sand, and paste, obtained after mixing water and cement. Concrete is a cost-efficient, maintenance-free, durable material giving you more bang for your buck, so this particular material might be indeed the ideal option at hand when it comes to building a cement sidewalk.

Prepare the tools and do your homework

1. While in most regions you don’t need a special approval to build a cement sidewalk on your property, in some areas you have to obtain a building permit before implementing any changes. To avoid embarrassing situations and a fine, make sure you contact your local building inspector first, and ask them whether you need a permit or not.

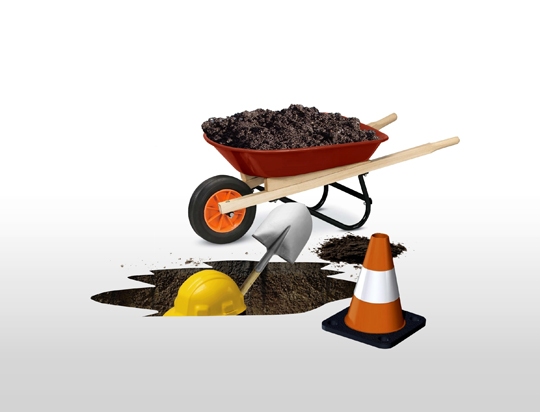
2. Next, gather all of the necessary tools, including rakes, shovels, wheelbarrows, and professional concrete finishing utensils.

Getting down to business

3. Define the layout, using hardboard siding, a spacer block and marking paint.

4. Establish grades by using a laser. If you’d rather opt for a simpler, cheaper method, rely on a line level and on a string line to come up with a flawless sidewalk design.

5. Afterward, start digging. Use a shovel and a premium sod cutter to remove the excess soil. If you’re usually dealing with drainage problems, it is recommended to elevate the sidewalk a bit.

6. Once you’ve finished excavating the area, start forming the sidewalk by using rigid, yet extremely flexible pieces of plywood.

7. Use a string line and form pins buried in the ground to guide your next steps in the right direction.

8. Pour the necessary amount of concrete and roll it properly by utilizing your concrete roller.

9. Cut the edges with a stick edger and eliminate all imperfections by using a magnesium float.

Ask for help

Building a cement sidewalk requires lots of time, more than a few tools, and special skills. If you don’t have what it takes to complete this project on your own, simplify your mission by contracting a local handyman. Find the best ones in your area by consulting TalkLocal, your trusted source of information designed to help you meet reputable specialists who live and work in your area.

Use Post Hole Digger

Tuesday, October 1st, 2013

Use Post Hole Digger - Handyman

Post hole diggers are excellent tools that can be used in a wide range of applications. For instance, you can utilize this tool when you want to plant a tree or build a solid, durable fence.

Because a post-hole digger is not one of the most common tools frequently utilized by homeowners, it is advisable to rent one, rather than spending a small fortune on equipment that will end up gathering dust in your garage. Keep reading to find out how to use post hole digger, and make sure to contact a skilled handyman if you have additional questions.

Types of Post Hole Diggers

Now you can easily find various types of post hole diggers on the market. The manual type is equipped with handles and a pair of blades. It is inserted into the ground to extract a chunk of soil and dig a hole. Users should repeat this simple action until they finally obtain a hole that is deep enough to serve its purpose.

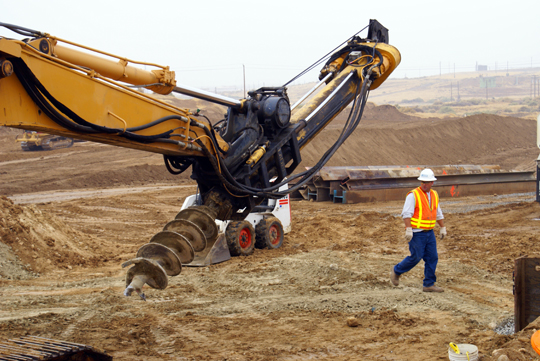
However, if you want to finalize a project in record time and with minimal effort, the auger type is by far the best alternative at hand, as it is much easier to use. The auger post hole diggers can create bigger, deeper holes with maximum precision. However, this device displays one limitation that every user should take into consideration: The neater holes dug by the auger models will all have the same size, coinciding with the diameter of the drilling device’s screw.

How to Utilize a Post Hole Digger

Want to learn how to use post hole digger?

1. Start by asking for a soil analysis to establish what type of post hole digger you might need to get the job done. It is recommended to start digging holes after rainfall, or after damping the soil using a garden hose.

2. Penetrate the soil by dropping the post hole digger with its metallic jaws left in an open position. Repeat this action several times to come up with a well-defined hole.

3. Form dirt clumps at least 10 to 20 inches far from the cavity; then start deepening the hole.

4. When you are finally pleased with the depth of your excavation, use the level bottom post to flatten the surface located at the bottom of the recently dug hole.

5. If you’re dealing with rock-hard soil that is virtually impossible to excavate, rely on a heavy-duty post-hole digger for 1 or 2 persons, running on gas.

Ask an expert

Undoubtedly, digging perfect holes in rock-hard soils can be quite a challenge. Instead of trying to use post hole digger on your own, let a skilled handyman address all of your home improvement needs in a timely manner. Use TalkLocal, your free service, to find the best specialists in your area who can complete any project, regardless of its size and its complexity, on time and on a budget.

Tips for Buying a New Home: Renovations and Repairs

Friday, September 20th, 2013

Tips for Buying a New Home: Renovations and Repairs - Handyman

Possible Repairs

When encountering tips for buying a new home, it is always a surprise how little is covered about possible repairs. There should always be a clause in the contract about repair contingency. This clause states that if a repair is discovered by the buyer during inspection, then the seller is held liable for the repair. It’s very important to understand this, because once this document is signed and sealed, it’s legally binding.

Simply put, if the buyer discovers that some repairs need to be made, the seller can opt to repair them or not. If the seller repairs them, then all is clear. However, if the seller refuses to repair them, then the buyer can terminate the contract. Repairs, if not discovered early, can cost a lot. Chimney repairs, for example, may lead to some serious expenses. This is why it is important to always inspect the house you are buying thoroughly, and to always read the fine print.

Possible Renovations

A simple way to find out if the house you are buying would need possible renovations is to simply see when it was built. If it was built as far back as 20 years ago, then it may even contain asbestos, and you’ll need to have that removed as quickly as possible.

You also have to look at the building plans of the house and check the plumbing system to see if everything is in order. There may be rust that needs to be removed before it damages your property. You also need to check the walls, the roof, and the floors. Is everything sturdy? Is everything as it should be?

Do You Need Help?

Here at TalkLocal, we are dedicated to helping you. Call us or fill out an online request, and we will have you on the phone with up to three professionals in just minutes. Use Seva Call today!

How to Use Wall Anchors

Monday, September 16th, 2013

How to Use Wall Anchors - Handyman

With so many helpful tutorials available online and so many tool kits that could be easily found in any hardware store, more and more homeowners feel encouraged to start numerous DIY home improvement projects. At some point in time, some of them might want to install a new shelf on their wall, using resistant wall anchors. These tiny products come in various types and sizes; therefore identifying and purchasing the best ones can be quite challenging. Keep reading to find out how to use wall anchors on your own, without any help from the handyman whom you usually call to solve your daily problems.

Finding and buying the ideal fasteners for your DIY project

First of all, make sure to purchase wall anchors that are resistant enough to support the weight of the object you plan to fasten on the wall. Also, go in favor of premium fasteners that are suitable for your particular wall construction. In other words, despite the fact that they serve the same purpose, wall anchors can be divided in 3 main categories: lightweight objects, products designed to support a medium or a heavy weight, and fasteners for solid walls.

If you only need a wall anchor to secure your favorite picture on the wall, in this case the best alternative at hand would be a picture hook displaying a long nail that can be easily pushed inside the wall by striking it a few times with a hammer. Heavyweight picture hooks can be similarly installed; the main difference is that they can be used to fasten heavier objects, up to 75 pounds.

Furthermore, one can also choose to install self-tapping screw anchors by using a screwdriver, but sometimes these items require huge holes in the walls. Last, but definitely not least, one should also analyze the pros and cons of inexpensive, resistant nylon toggle anchors before making a final decision. Nylon toggle wall anchors can be installed with a hammer and a screw, even by inexperienced homeowners. These can support a weight ranging from 50 pounds to 75 pounds, and are durable and cost-effective.

Ask an expert

So now you know how to use wall anchors. Usually, all types of fasteners come with a set of instructions that makes the installation fast and hassle-free. However, if you lack the tools, the time, or the patience to complete this household improvement project on your own, it is recommended to opt for first-class services ensured by professional handymen operating in your area. Find the best ones today by consulting TalkLocal, a free service allowing you to get in touch with real specialists providing the best answers to your daily questions and challenges.

What Is the Firebox?

Monday, September 9th, 2013

What Is the Firebox? - Handyman

The firebox is the space in the core of the chimney where the fire burns. It’s that part of the fireplace which makes it what it is: a source of heating and an element that warms up the atmosphere in your house, enhancing both comfort and the ambience. Fireboxes are built in such a way as to allow you to use various fuels, depending on your preferences. Some are made for firewood, others for coal or natural gas. There are even electric fireboxes, which create the illusion of a burning fire without actually having one.

What Is the Firebox Good for?

As already anticipated, the firebox is that part of a fireplace which contains the fire. Without it, you wouldn’t have a functional fireplace. The size and style of a firebox determines the appearance of your fireplace, making it look a particular way.

Does the Firebox Need to Be Repaired?

Just like any other thing around the house, the firebox needs to be inspected regularly to see whether it works properly or not. It’s important to check the condition of the firebox, because the safety of your fireplace depends on it. If you’re not familiar with chimney and fireplace repairs, it is advisable to call an expert to do the job for you. A firebox inspection or repair is a chance to refresh the appearance of your fireplace should you consider it necessary.

What Is the Firebox Supposed to Look Like When it Requires Attention?

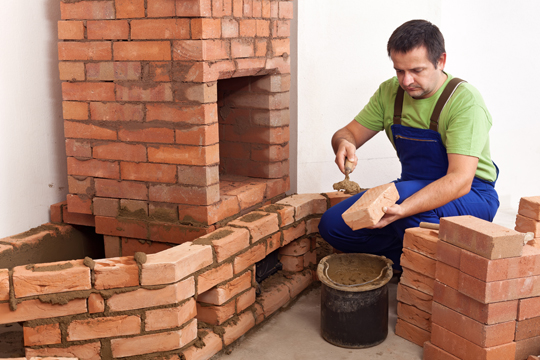
If, when you sweep your chimney, you notice that the bricks and mortar have cracks or even worse, start to fall apart, it’s time to rebuild it before using the fireplace again, otherwise you’re exposing yourself and your family to a fire hazard. For this repair, you need a special type of bricks and mortar, which can resist the high temperatures produced by a burning fire.

Need Assistance?

If you want to find out more about fireboxes or need some repairs done to your fireplace, TalkLocal can save you time by introducing you to qualified professionals in your area. Free of charge.